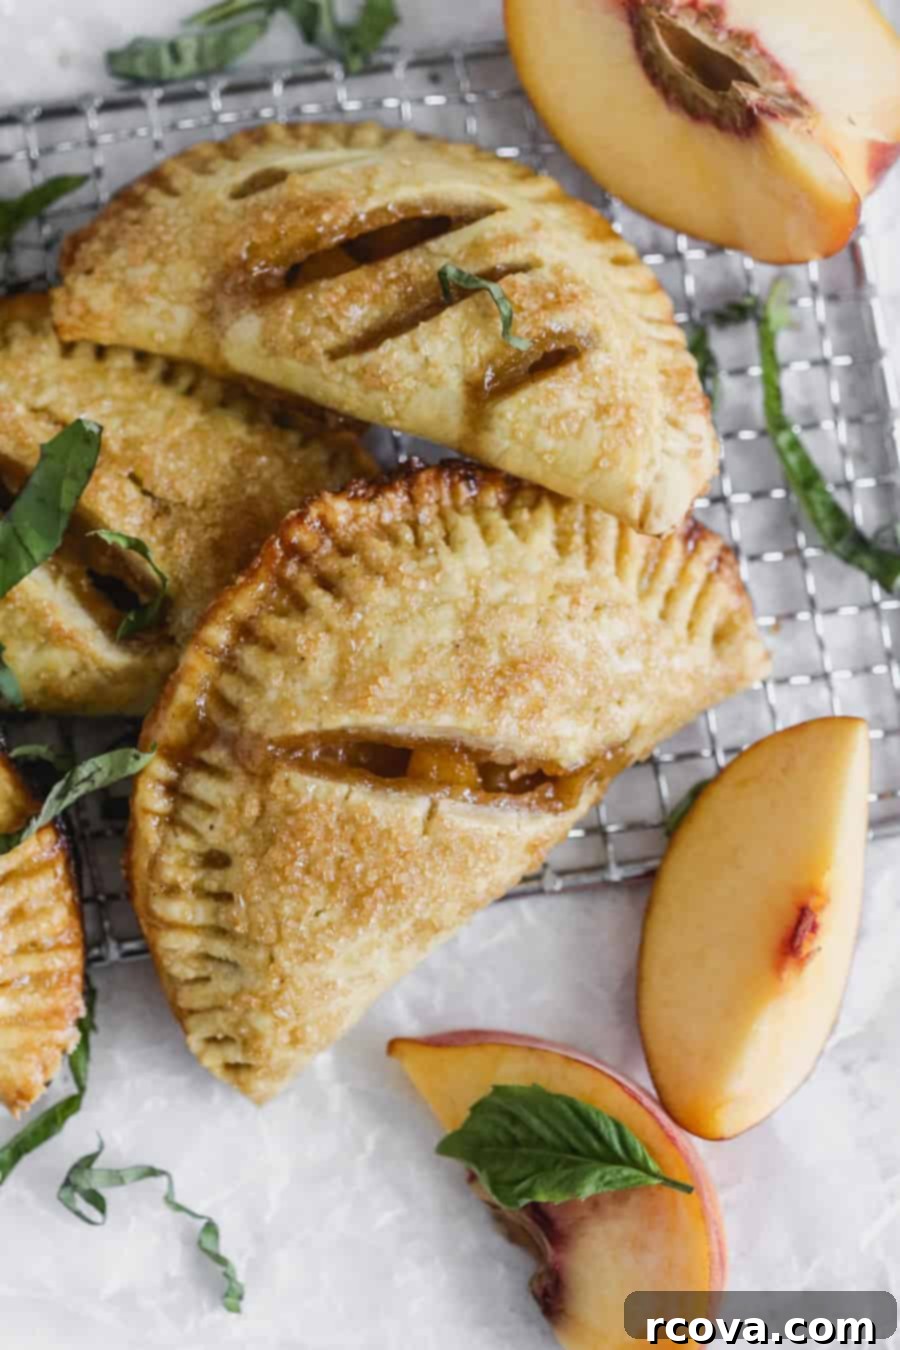
Flaky Basil Bourbon Peach Hand Pies: Your Ultimate Summer Dessert Recipe
Basil + Bourbon Peach Hand Pies are a delightful culinary creation, featuring a harmonious blend of sweet peaches, aromatic basil, and a hint of rich bourbon, all encased in a tender, buttery, and incredibly flaky einkorn pie crust. These individual-sized treats are perfectly portable for a snack on the go or exquisitely paired with your favorite scoop of vanilla bean ice cream for a truly unforgettable dessert experience.
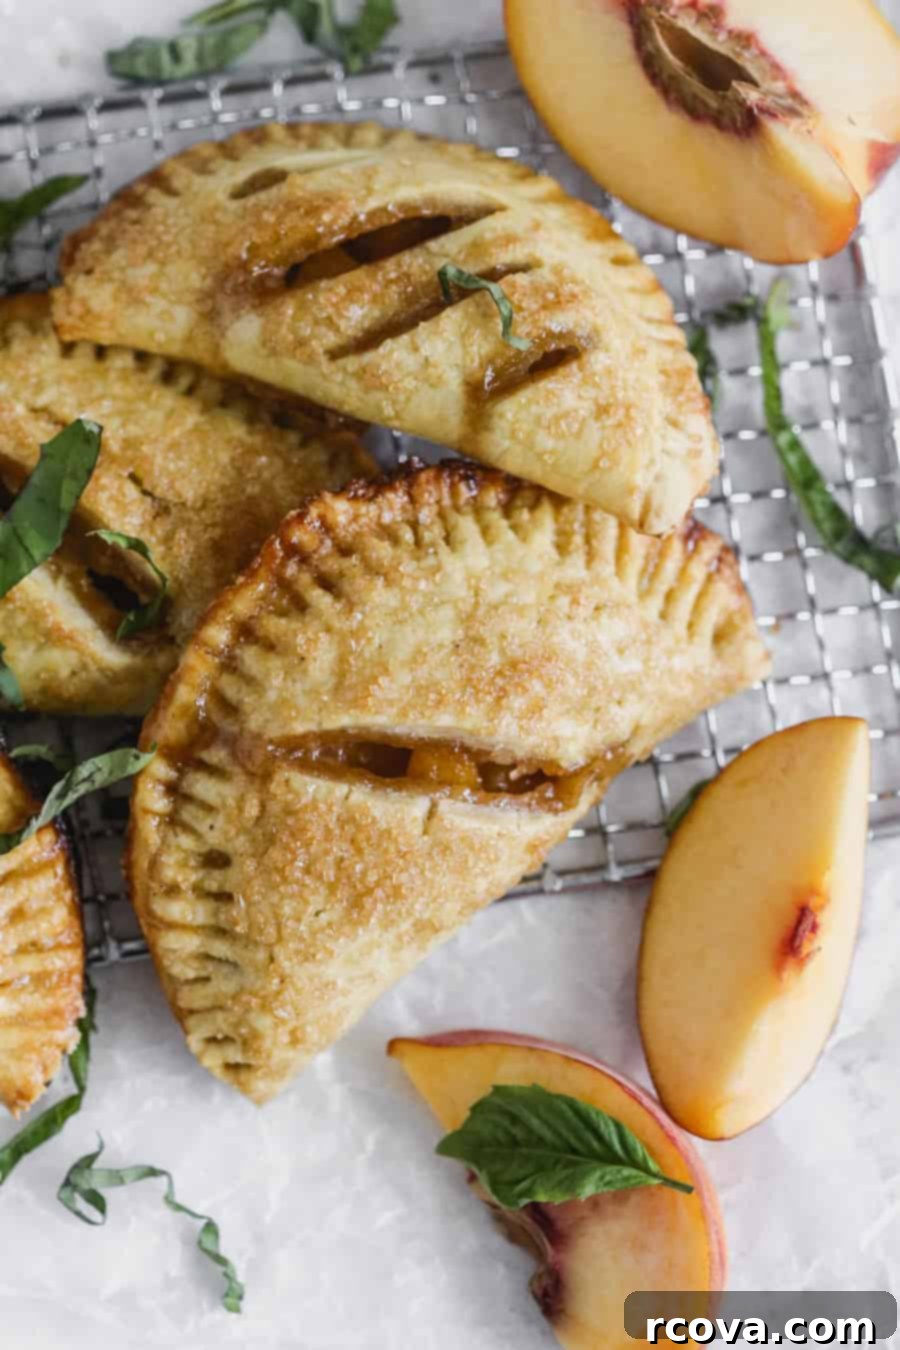
As summer’s vibrant produce season gracefully draws to a close, there’s no better way to bid farewell to its bounty than by celebrating with these exquisite Basil + Bourbon Peach Hand Pies. While I cherish other pie recipes, like my healthier peanut butter pie, which holds nostalgic value, and our no-bake s’mores pie, a quintessential summer indulgence, a fruit pie truly speaks to my soul. The juicy sweetness of peaches combined with an unexpected twist makes this particular recipe a standout favorite.
These hand pies encapsulate the essence of late summer, offering a unique flavor profile that balances the natural sweetness of ripe peaches with the fresh, herbaceous notes of basil and the subtle depth of bourbon. Each bite delivers a burst of comforting, earthy flavors wrapped in a golden, crispy crust. They are not just a dessert; they are a celebration of seasonal ingredients, thoughtfully combined to create a truly memorable treat for any occasion.
Crafting the Perfect Einkorn Pie Crust
For these gourmet peach hand pies, I wholeheartedly recommend making your own homemade pie dough using einkorn flour. The choice of einkorn isn’t merely a preference; it’s a culinary decision rooted in both health and superior texture. Why choose einkorn for your pie crust?
- An Ancient Grain with Modern Benefits: Einkorn is revered as an ancient grain, tracing its origins back thousands of years. Unlike modern commercially produced wheat flour, einkorn remains largely unmodified from its original genetic structure, offering a more wholesome and nutritious alternative. These inherent health and nutritional benefits come directly from nature, untouched by modern agricultural practices.
- Easier Digestion for Gluten Sensitivity: Many individuals who experience sensitivity to modern wheat gluten find einkorn much easier to digest. This is attributed to its distinct gluten structure, which differs significantly from that found in common wheat varieties. While it still contains gluten, its simpler molecular composition can be gentler on the digestive system for some, making these hand pies a more enjoyable option.
- Enhanced Flavor and Texture: Beyond its health advantages, einkorn flour imparts a distinct, slightly nutty flavor and a remarkably tender texture to baked goods. When used in a pie crust, it contributes to an exceptionally buttery and flaky result that complements fruit fillings beautifully. My specific pie crust recipe, based on this excellent foundation, has been carefully adapted by doubling the quantities and adding a touch more butter to enhance both richness and flakiness, ensuring a truly sublime crust for your peach hand pies.
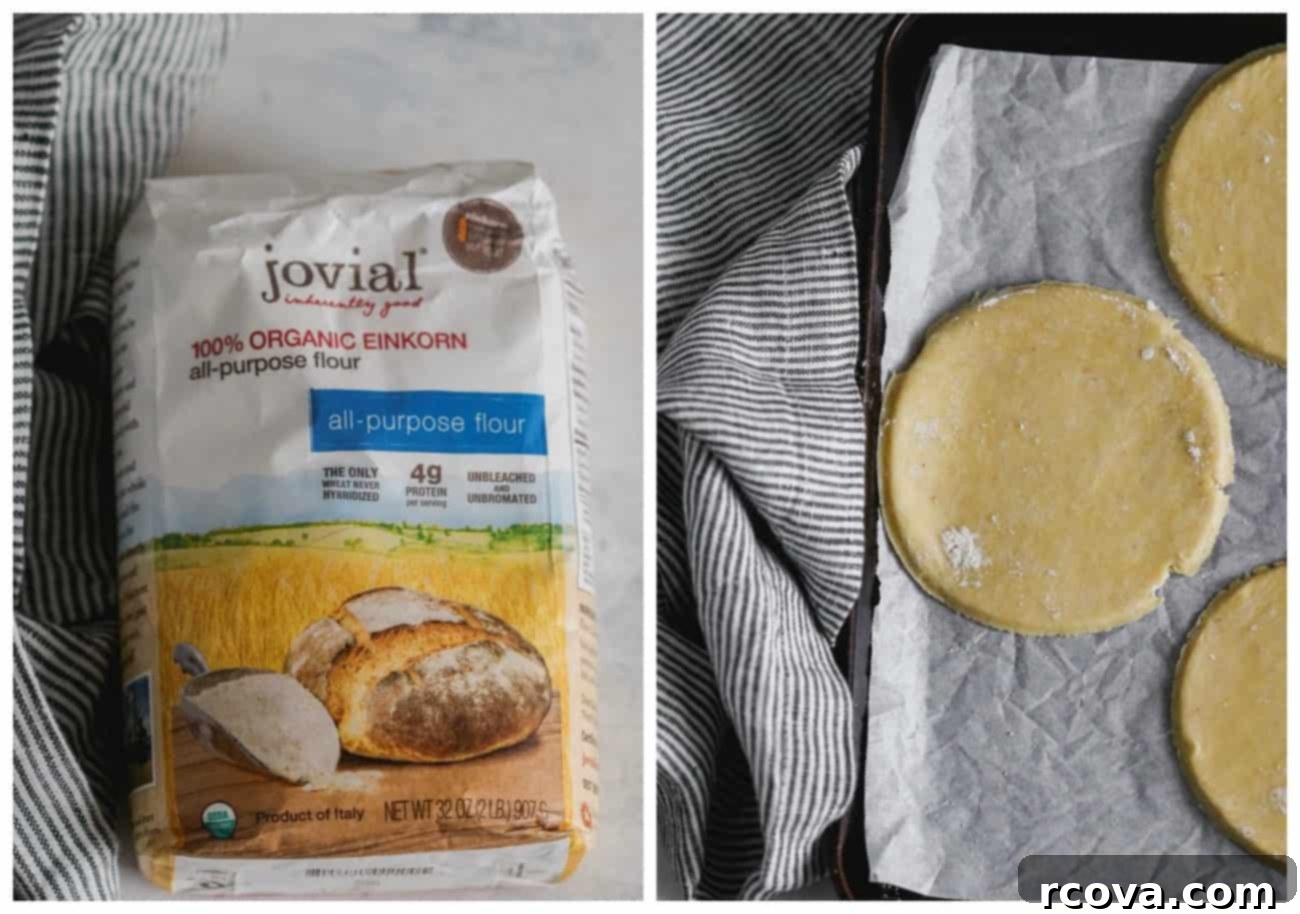
While I strongly advocate for the homemade einkorn pie dough, if you have a preferred go-to pie crust recipe or opt for the convenience of store-bought pie dough, that is perfectly acceptable. The key is to ensure you have enough dough for what would typically make two 9-inch pies, providing ample material to create approximately ten 4.5-inch hand pies.
The Irresistible Basil + Bourbon Peach Pie Filling
This peach filling is, without a doubt, my absolute favorite. It strikes a perfect balance between sweet and tangy, with the fresh peaches providing a juicy base and the basil introducing an unexpected, earthy, and profoundly comforting aroma. This unique combination elevates a simple hand pie into a gourmet delight, living up to every bit of the hype.
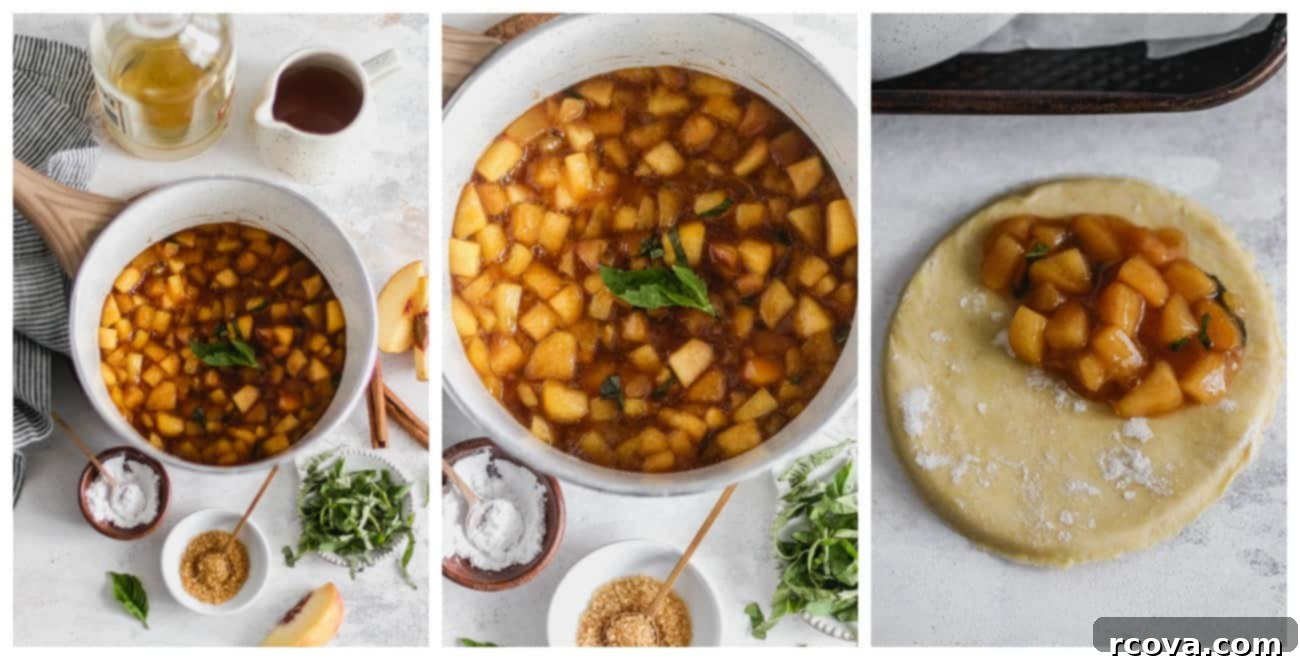
- Perfect Peaches are Key: For the best results, I highly suggest using three fresh peaches and peeling them. If you’re new to peeling peaches, rest assured, it’s incredibly simple! You can easily blanch them in boiling water for 30 seconds, then immediately transfer to an ice bath, and the skins will slip right off. Here’s a detailed step-by-step guide if you need visual assistance. Alternatively, if fresh peaches aren’t available or in season, you can absolutely use frozen or canned peaches (ensure the only ingredient listed is peach). Just make sure to dice them into small, bite-sized pieces before simmering. You are the chef, after all!
- Dice for Deliciousness: It’s crucial to dice your peaches into small, uniform, bite-sized pieces. This careful dicing ensures that you can maximize the amount of delicious filling within each small round of dough, preventing large chunks from breaking the crust and allowing for even cooking and distribution of flavor.
- Fresh Basil Makes the Difference: While dried herbs often serve as convenient substitutes for fresh ones in many recipes, this is emphatically not one of those times. The vibrant, aromatic essence of fresh basil is indispensable for this pie recipe. Plan to have around 2 tablespoons of fresh basil, finely torn or chopped into a chiffonade, to infuse the filling with its distinct and delightful flavor.
- The Secret Ingredient: Bourbon: I love to add 1 to 2 tablespoons of bourbon to the peach pie filling. As the filling cooks, the alcohol in the bourbon will evaporate, leaving behind only its rich, complex flavor. It contributes a natural depth and subtle sweetness that you simply won’t achieve with sugar alone, enhancing the overall profile of the peaches. If you prefer to omit bourbon, you certainly can, and the pies will still be delicious.
- Sweetness and Sparkle: This pie is primarily sweetened with maple syrup, complemented by a pinch of vanilla extract and the natural sweetness contributed by the optional bourbon. For an appealing golden finish and an extra touch of sweetness, I recommend using turbinado sugar (often labeled “sugar in the raw”) for dusting your hand pies before they go into the oven.
Creative Hand Pie Shapes
One of the joys of making hand pies is the flexibility in shaping them. You can truly let your creativity shine! For this particular recipe, I found that using a 4.5-inch round cookie cutter works exceptionally well. This size allows for an ideal amount of filling and makes it easy to fold the dough in half to create classic semi-circle or “moon” shapes, which are then effortlessly sealed. I strongly advise against using cutters smaller than 3 inches in diameter, as you’ll struggle to fit a sufficient amount of that delectable filling into such a tiny pie, compromising the flavor experience. Beyond circles and semi-circles, you can also opt for elegant rectangular shapes, using a knife or pastry wheel to cut the dough, offering another charming presentation for your Basil + Bourbon Peach Hand Pies.
Expert Tips: How to Create Perfect Hand Pies Every Time
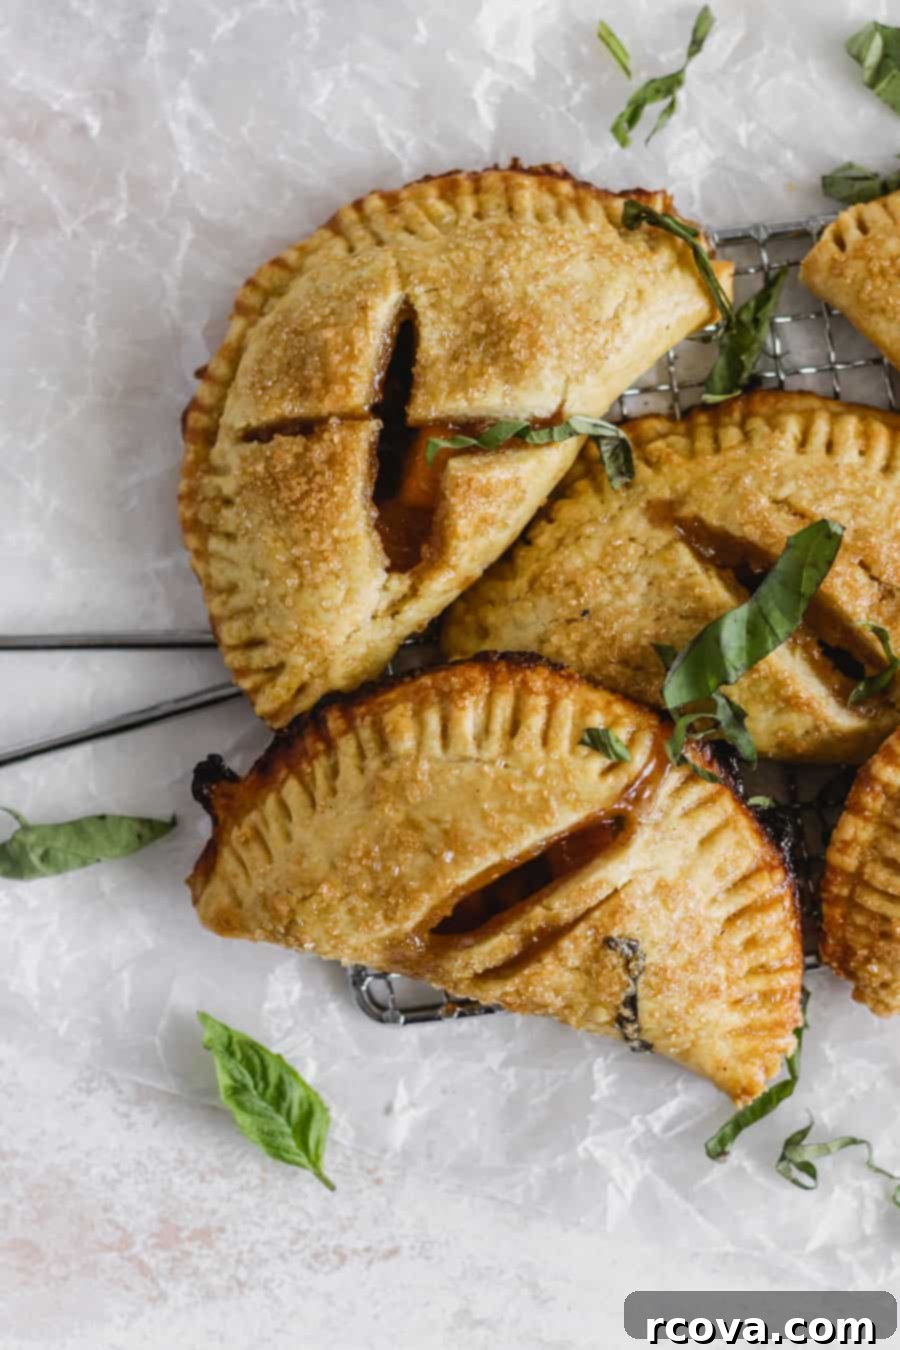
Achieving bakery-quality hand pies at home is entirely within reach with a few simple, yet crucial, techniques. These tips will help you ensure your hand pies are not only delicious but also visually stunning and perfectly structured:
The Golden Rule: Chill Your Dough
For an exquisitely crisp, buttery, and flaky crust, maintaining a cold dough temperature is paramount. The goal is to keep your dough as cold as possible without making it unworkable. When you handle the dough, it should still feel cool to the touch, yet be pliable enough to stretch easily without tearing. This principle applies universally, regardless of the flour type you choose. Whether you opt for the einkorn flour suggested in the recipe card below, a conventional all-purpose flour, or even a gluten-free blend, always prioritize chilling your dough for at least 45 minutes (and up to 3 days) in the refrigerator. This allows the gluten to relax, preventing shrinkage, and keeps the butter solid, which creates steam during baking, resulting in those coveted flaky layers.
The Pitfall: Don’t Overfill!
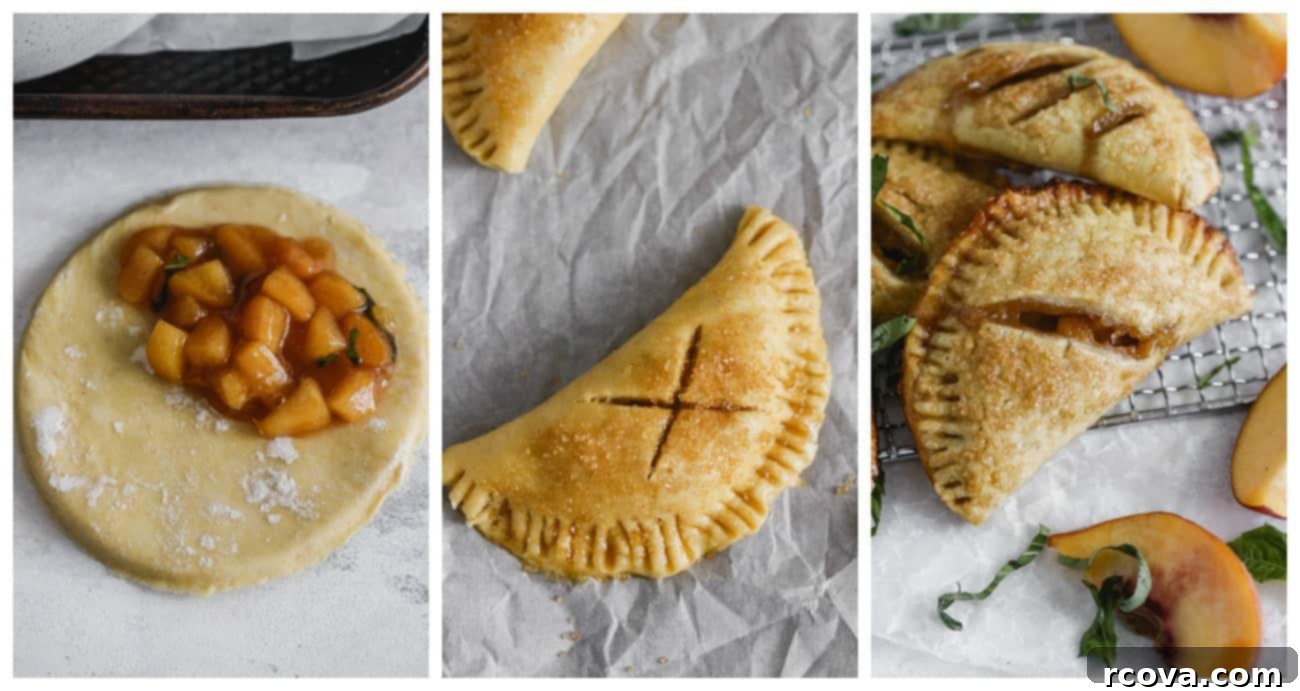
It’s tempting to pack your hand pies with as much delicious filling as possible, but overstuffing the dough is a common mistake that will lead to disappointment. Too much filling will cause your hand pies to burst open during baking, creating a messy situation and compromising their structural integrity. To avoid this, carefully measure out the filling for each pie. A small cookie scoop or a large spoon works perfectly for this task. For a moon-shaped hand pie made with a 4.5-inch round guide, approximately 1.5 to 2 tablespoons of filling is usually the sweet spot, ensuring a well-filled but securely sealed pastry.
The Finishing Touch: Brush Before Baking
Dreaming of a hand pie with a beautifully golden-brown, shiny, and extra-crispy crust? The secret lies in a simple egg wash. Whisk together one large egg yolk with one teaspoon of water until thoroughly combined. This mixture, when carefully brushed over the unbaked pie crust, will give it that desirable professional sheen and contribute to a rich, caramelized color during baking. For an added layer of sweetness and a sparkling texture, generously sprinkle your hand pies with turbinado sugar (or “sugar in the raw”) immediately after applying the egg wash. This not only enhances the visual appeal but also adds a delightful crunch to the crust.
Leftover Storage and Reheating Best Practices
Should you find yourself with any of these delectable Basil + Bourbon Peach Hand Pies leftover – a rare occurrence, I assure you – proper storage and reheating are key to preserving their freshness and deliciousness. For short-term storage, tightly wrap the cooled hand pies individually in plastic wrap or eco-friendly beeswax paper. They can then be stored at room temperature for up to 3 days, perfect for quick snacks or a delightful breakfast treat. If you’re looking to extend their shelf life significantly, these pies freeze beautifully. Wrap each pie tightly, then place them in a freezer-safe bag or airtight container. Frozen hand pies will maintain their quality for up to 3 months, allowing you to enjoy a taste of summer long after the season has passed.
When you’re ready to savor a frozen hand pie, first thaw it at room temperature for approximately an hour. Once thawed, preheat your oven to 375 degrees F (190 degrees C). Arrange the hand pies on a parchment-lined baking sheet and reheat for about 20 minutes, or until they are warmed through and the crust regains its crispness. This method ensures your reheated pies are nearly as good as freshly baked ones, offering that comforting warmth and flaky texture you crave.
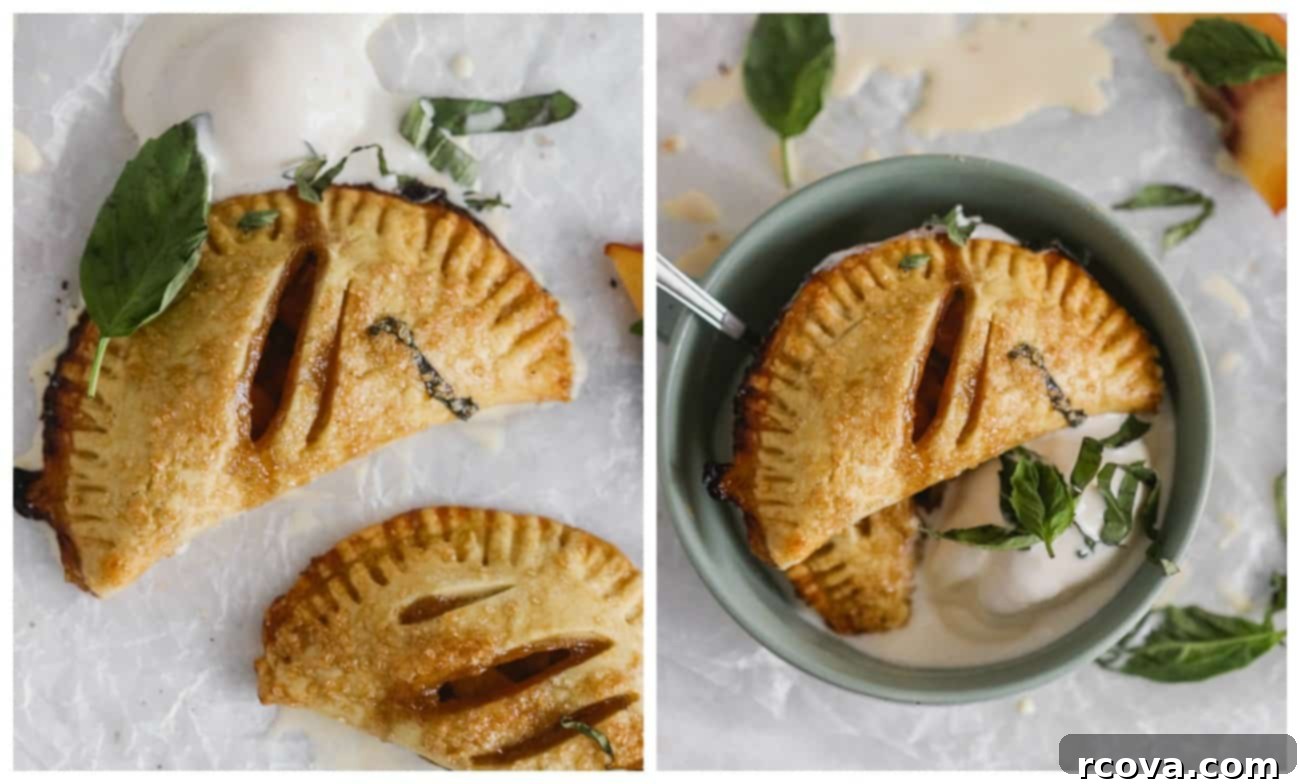
A single batch of this recipe will yield approximately 10 delightful hand pies (when using a 4.5-inch round cookie cutter or ramekin). This generous quantity is perfect for sharing with a crowd at gatherings, delivering to cherished friends and family during busy times, or simply stashing away for future cravings. Imagine pulling a taste of summer from your freezer on a crisp autumn day! However you choose to enjoy them, these Basil + Bourbon Peach Hand Pies promise pure delight. Enjoy every flaky, fruity, bourbon-infused bite!
More Delicious Peach Recipes to Explore
If you’ve fallen in love with the vibrant flavor of peaches in these hand pies, you’re in luck! There’s a world of other incredible peach recipes waiting to be discovered. Peaches are incredibly versatile, lending their sweet and juicy essence to both sweet and savory dishes. Here are a few more fantastic peach-centric recipes to inspire your culinary adventures:
- Refreshing Peach Panzanella Salad: A delightful blend of sweet peaches, crusty bread, and fresh herbs, perfect for a light summer meal.
- Whole30 Blackened Salmon with Peach Salsa: A healthy and flavorful dish featuring perfectly seasoned salmon topped with a bright and zesty peach and avocado salsa.
- Balsamic Steak and Grilled Peach Salad: A gourmet salad combining tender steak, smoky grilled peaches, and a tangy balsamic dressing for an unforgettable meal.
- Sparkling Peach + Strawberry Sangria: A light, bubbly, and fruity beverage ideal for entertaining or relaxing on a warm evening.

Basil + Bourbon Peach Hand Pies
Print
Pin
Rate
Ingredients
Einkorn Pie Crust
- 2 2/3 cups (340g) all-purpose einkorn flour
- 1 teaspoon salt
- 10 tablespoons (138g) unsalted butter, extra-cold, cut into small cubes – I like KerryGold but use what you prefer for best flavor and flakiness
- 1/2 cup water – ice cold
Peach Filling
- 3 peaches peeled and cubed, about 2 1/2 cups – alternatively you can use frozen or canned peaches (ensure only peach is the ingredient)
- 1/3 cup maple syrup
- 2 tablespoons fresh basil torn or finely chopped – – chiffonade for best results
- 2 tablespoons bourbon – optional, but highly recommended for depth of flavor
- pinch of salt
- pinch of cinnamon
- 1 tablespoon tapioca starch – or cornstarch for thickening
- 1 tablespoon water
- 1/4 teaspoon vanilla extract
- egg wash: 1 large egg beaten with 1 teaspoon water
Instructions
Einkorn Pie Crust
-
Cut the extra-cold unsalted butter into small, pea-sized cubes and place them in the freezer for 8-10 minutes to ensure they are thoroughly chilled. In the bowl of a food processor, combine the einkorn flour, salt, and the cold butter cubes. Pulse several times until the butter pieces are roughly the size of small peas. Add ½ cup of ice-cold water, then pulse 3–4 more times, just until the mixture begins to come together. Be careful not to overmix.
-
Transfer the crumbly mixture to a large mixing bowl. Gently gather and form the dough into a cohesive ball using your hands, ensuring it is moist but not sticky. If the dough seems too dry and isn’t coming together, you may add 1-2 more drops of ice-cold water at a time, kneading minimally, until it reaches the desired consistency. Cover the bowl with a clean kitchen towel and let the dough rest at room temperature for 30 minutes.
-
After the 30-minute resting period, divide the dough into two equal portions. Form each portion into a ball. Wrap each ball tightly with plastic wrap, then gently flatten each half into a 1-inch thick disc using your hands. This disc shape will make rolling out the dough much easier later.
-
Wrap each disc tightly in its plastic wrap, ensuring no air can get to the dough. Refrigerate for at least 45 minutes, or up to 3 days. This chilling period is crucial for developing a flaky crust and preventing the dough from shrinking during baking.
Peach Filling & Assembly
-
While your pie crust chills in the refrigerator, prepare the delicious peach filling. In a saucepan, combine the diced peeled peaches, maple syrup, fresh basil, 1-2 tablespoons of bourbon (if using), a pinch of salt, and a pinch of cinnamon. Heat this mixture over medium-low heat, stirring frequently, until the peaches have softened and the mixture has become syrupy, which should take approximately 7-10 minutes. In a separate small bowl, whisk together the tapioca starch (or cornstarch) and 1 tablespoon of water to create a smooth slurry. Add this slurry to the saucepan and whisk constantly for about 2 minutes, until the filling thickens considerably. Remove the saucepan from the heat and stir in the vanilla extract. Allow the peach filling mixture to cool completely before proceeding with assembly. This is vital to prevent the warm filling from melting the cold pie dough.
-
Once the filling is cool and you’re ready to bake, preheat your oven to 375 degrees F (190 degrees C). Line a large baking sheet with parchment paper to prevent sticking and for easy cleanup.
-
On a lightly floured surface, roll out one of the chilled dough discs until it is about 1/4 inch in thickness. Use a 4.5-inch biscuit or cookie cutter (or any round object of similar size, such as a ramekin) to cut out as many rounds as possible from the dough. Gather the scraps, gently re-roll, and cut additional rounds until all dough is used. Repeat with the second dough disc.
-
Carefully spoon approximately 1.5 to 2 tablespoons of the cooled peach filling onto one half of each dough circle, leaving a small border around the edge. In a small bowl, whisk together the egg and 1 teaspoon of water to create an egg wash. Lightly brush this egg wash around the outer edge of the dough circle where there is no filling. Gently fold the empty half of the dough over the filling, creating a perfect semi-circle (or “moon” shape). To seal each hand pie, use the tines of a fork to firmly press the edges of the dough together. This crimping not only seals the pie securely but also adds a decorative touch. Finally, make 2-3 small slits on the top of each hand pie with a sharp knife to allow steam to escape during baking. Brush the tops with the remaining egg wash and sprinkle generously with turbinado sugar for a beautiful golden crust and extra sweetness.
-
Place the prepared hand pies back into the refrigerator for about 20 minutes to firm up. This brief chill helps the pies hold their shape and prevents the butter from melting too quickly in the oven, ensuring a flakier crust. Once firm, transfer them to your preheated oven and bake for approximately 25 minutes, or until they are puffed and gorgeously golden brown. Remove from the oven and let them cool slightly on the baking sheet before transferring to a wire rack. These hand pies are absolutely divine served warm, especially with a dollop of vanilla ice cream!
Notes
LEFTOVER STORAGE AND REHEATING INSTRUCTIONS:
Any leftover baked hand pies should be tightly wrapped in plastic wrap or eco-friendly beeswax paper to maintain freshness. Store them at room temperature for up to 3 days. For longer preservation, tightly wrap each hand pie individually and place them in a freezer-safe bag or airtight container. Frozen hand pies will keep well for up to 3 months.
To reheat frozen hand pies, first allow them to thaw at room temperature for about an hour. Once thawed (or if reheating refrigerated pies), preheat your oven to 375 degrees F (190 degrees C). Place the hand pies on a parchment-lined baking sheet and reheat for approximately 20 minutes, or until they are thoroughly warmed through and the crust has crispified.
This post may contain affiliate links. Purchasing through them helps support this website, allowing us to continue creating and sharing delicious recipes. Please see our full disclaimer here for more information.
