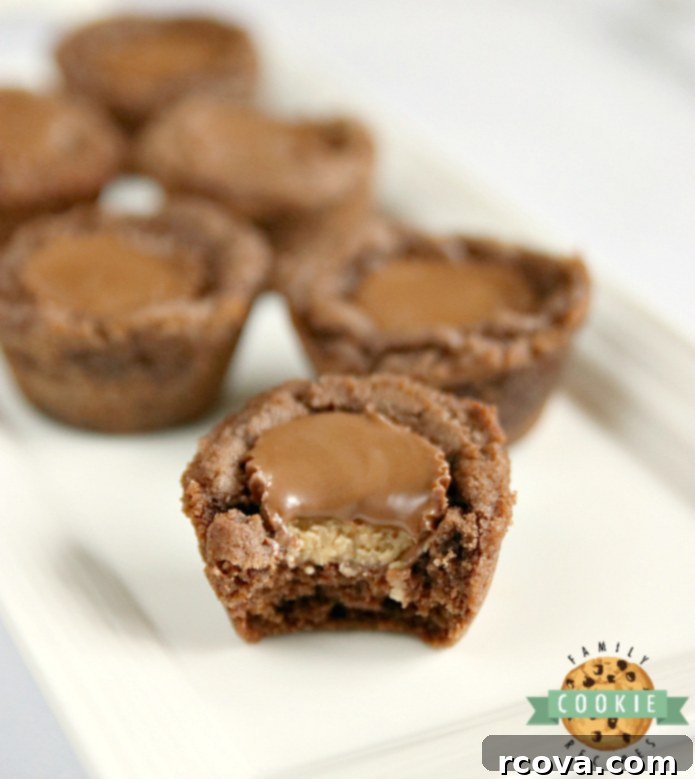
Irresistible Reese’s Chocolate Cookie Cups: The Ultimate Chocolate & Peanut Butter Treat Recipe
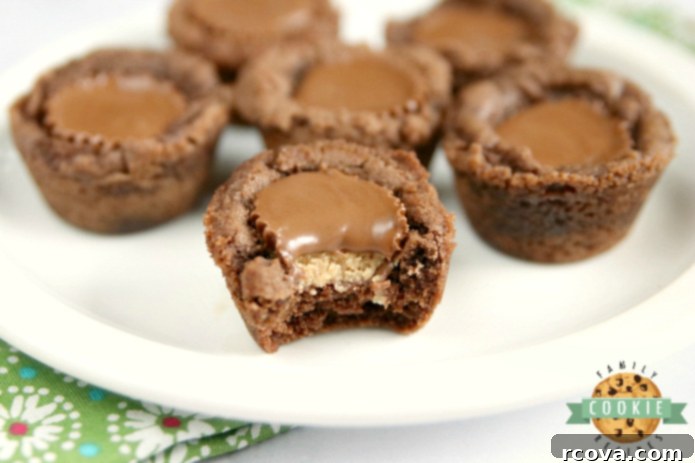
Prepare for an explosion of flavor with these incredible Reese’s Chocolate Cookie Cups! These delightful, bite-sized treats feature a rich, fudgy chocolate cookie base, perfectly baked in a mini muffin tin, and crowned with a miniature Reese’s Peanut Butter Cup. It’s the quintessential combination of creamy peanut butter and decadent chocolate, creating a dessert that’s utterly irresistible and perfect for any occasion. Whether you’re a long-time fan of the classic chocolate and peanut butter pairing or simply looking for an easy-to-make, crowd-pleasing dessert, these cookie cups are guaranteed to be a hit.
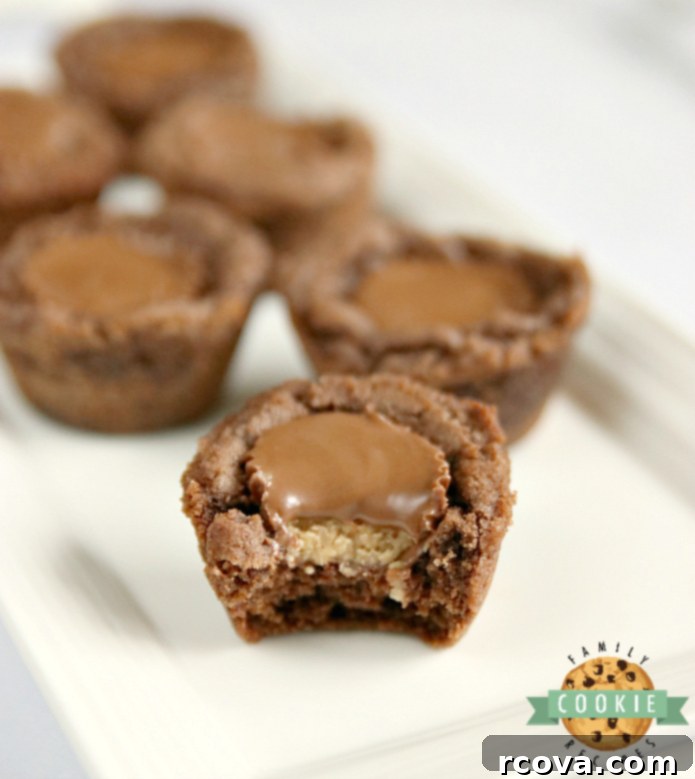
Around my home, Reese’s Peanut Butter Cups are more than just candy; they’re an institution. I’m constantly on the lookout for innovative and delicious ways to incorporate them into baked goods, and cookie cups have become one of my favorite vessels. They offer a unique twist on traditional cookies, presenting a charming, individual portion that can be filled with endless possibilities. While I’ve certainly enjoyed crafting peanut butter cookie cups with a Reese’s filling in the past, there’s something truly magical about the deep, rich flavor of a chocolate cookie base complementing that iconic peanut butter center. This recipe takes that beloved combination to a whole new level, making each bite a symphony of sweet and salty, rich and creamy flavors.
Why You’ll Love These Chocolate Peanut Butter Cookie Cups
These Reese’s Chocolate Cookie Cups aren’t just a dessert; they’re an experience. Here’s why they’re sure to become a staple in your baking repertoire:
- Perfect Flavor Fusion: The classic pairing of rich chocolate and creamy peanut butter is elevated in these bite-sized treats. Each cup delivers that satisfying balance of sweet and salty.
- Portion Control Perfection: Their individual size makes them ideal for parties, potlucks, or simply enjoying a controlled sweet treat without overindulging.
- Easy to Make: With straightforward ingredients and a simple baking process, even novice bakers can achieve impressive results.
- Kid-Friendly & Crowd-Pleasing: Who doesn’t love Reese’s? These cookie cups are a guaranteed hit with children and adults alike, making them perfect for family gatherings or school events.
- Visually Appealing: Their charming cup shape and the visible Reese’s Peanut Butter Cup on top make them an attractive addition to any dessert spread.
- Versatile for Any Occasion: From casual after-dinner treats to festive holiday spreads, these cookie cups fit right in.
Ingredients for Decadent Reese’s Chocolate Cookie Cups
Crafting these delectable cookie cups requires a few simple, common baking ingredients, most of which you likely already have in your pantry. The quality of your ingredients, especially your cocoa and butter, will significantly impact the final flavor and texture of your cookie cups. Ensure your butter is at a true room temperature for optimal creaming.
- 1/2 cup butter, softened to room temperature
- 1 cup granulated sugar
- 1/2 cup light brown sugar, packed
- 2 large eggs
- 1 tsp. pure vanilla extract
- 2 cups all-purpose flour
- 1/3 cup unsweetened cocoa powder (Dutch-processed for a darker, richer flavor is recommended)
- 1 tsp. baking soda
- 1/2 tsp. fine sea salt
- 36 miniature Reese’s Peanut Butter cups, unwrapped
Step-by-Step Guide to Making Reese’s Chocolate Cookie Cups
Creating these heavenly chocolate peanut butter cookie cups is a straightforward process, but a few key steps will ensure they turn out perfectly every time. Follow these instructions carefully for the best results:
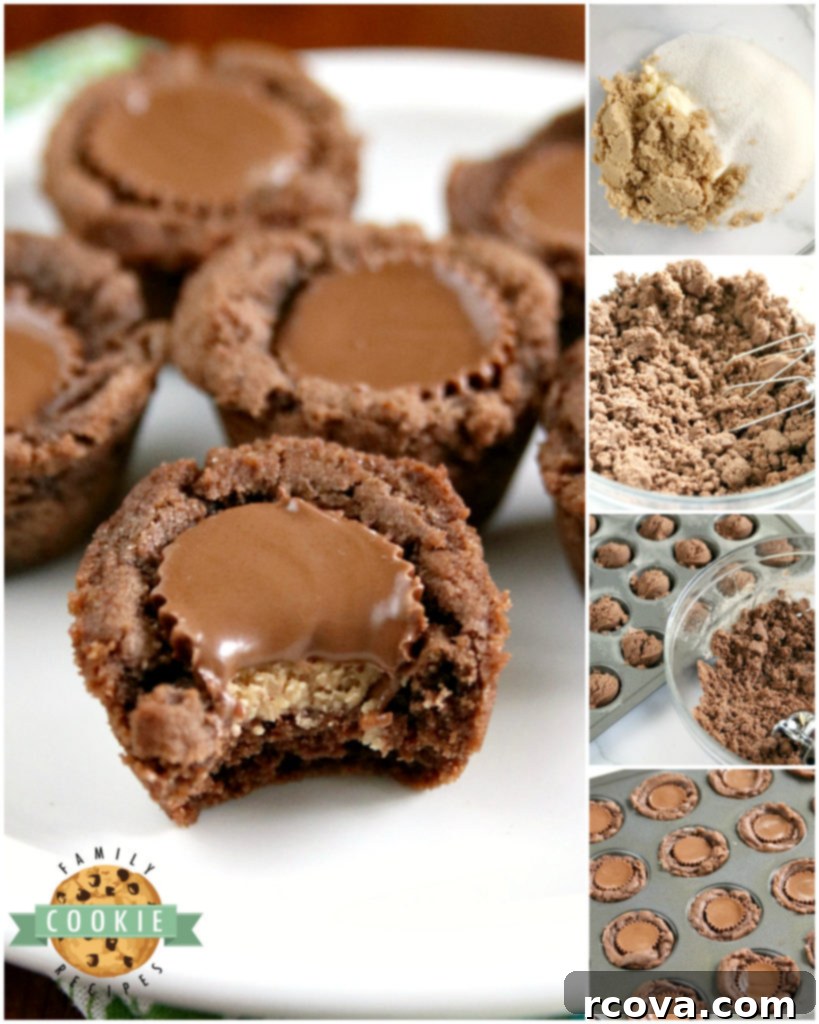
- **Prepare Your Wet Ingredients:** In a large mixing bowl, using an electric mixer, cream together the softened butter, granulated sugar, and brown sugar for approximately 2-3 minutes. This step is crucial for incorporating air into the mixture, which results in a lighter, softer cookie. The mixture should become pale and fluffy.
- **Incorporate Eggs and Vanilla:** Add the eggs one at a time, mixing well after each addition. Then, stir in the vanilla extract. Continue to mix for another 2-3 minutes until the mixture is fully combined and smooth.
- **Combine Dry Ingredients:** In a separate medium bowl, whisk together the all-purpose flour, unsweetened cocoa powder, baking soda, and salt. Ensure these ingredients are thoroughly combined to guarantee even distribution in your cookie dough.
- **Combine Wet and Dry Mixtures:** Gradually add the dry ingredients to the wet ingredients, mixing on low speed just until combined. Be careful not to overmix the dough, as this can lead to tough cookies. Stop mixing as soon as no streaks of flour remain. The dough will be thick.
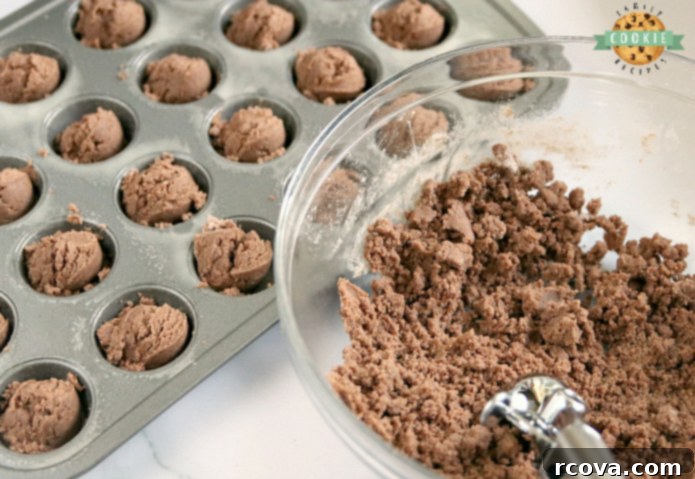
- **Prepare for Baking:** Preheat your oven to 350°F (175°C). Lightly grease a mini muffin pan. Using a cookie scoop (a 1-tablespoon size works perfectly for mini muffin tins), scoop the cookie dough into each cavity. There’s no need to meticulously shape the dough; simply drop it in.
- **First Bake & Reese’s Addition:** Bake the cookie cups in the preheated oven for 6 minutes. After 6 minutes, carefully remove the pan from the oven. Immediately, press one miniature Reese’s Peanut Butter cup into the center of each partially baked cookie cup. Gently press down until the top of the peanut butter cup is flush with the top of the cookie dough.
- **Second Bake:** Return the muffin pan to the oven and bake for an additional 2 minutes. This brief second bake allows the cookie dough to finish cooking around the Reese’s cup and helps the chocolate soften slightly without fully melting out.
- **Cooling Process:** Once baked, remove the pan from the oven. Let the cookie cups cool in the mini muffin pan for a few minutes. This initial cooling helps them firm up and prevents them from breaking when removed. After a few minutes, carefully transfer the cookie cups to a wire rack to cool completely.
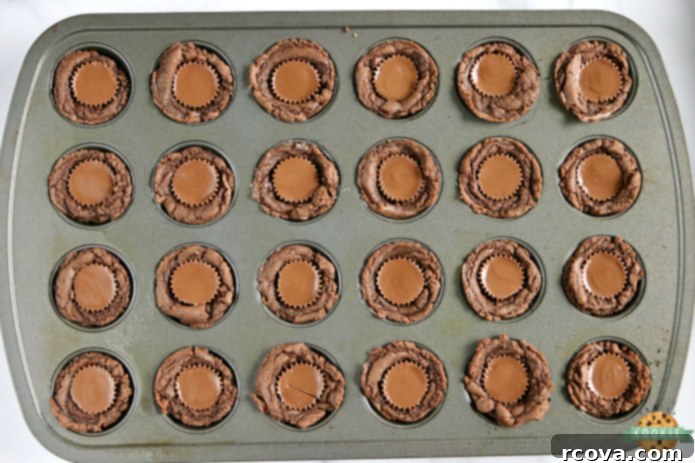
Allowing them to cool completely on a wire rack is essential for achieving the perfect texture and for the Reese’s cup to fully set.
Expert Tips for Making the Best Cookie Cups Every Time
Even though this recipe is relatively simple, these professional tips will help you achieve consistently perfect Reese’s Chocolate Cookie Cups that are moist, flavorful, and beautifully shaped:
- **Achieve the Right Dough Consistency:** The amount of flour can sometimes vary slightly based on humidity and how it’s measured. If your dough feels overly sticky and difficult to scoop, incorporate an additional tablespoon or two of flour until it reaches a manageable, yet still soft, consistency. A dough that’s too wet can spread too much, losing its cup shape.
- **Creaming Butter and Sugars is Key:** Don’t rush this step! Spending 2-3 minutes creaming the butter and sugars together with an electric mixer is vital. This process incorporates air into the mixture, which is what gives your cookies a light, tender, and chewy texture. When properly creamed, the mixture will be noticeably lighter in color and fluffy.
- **Always Preheat Your Oven:** A consistently preheated oven is crucial for even baking. Placing cookie dough into a cold or partially heated oven can lead to cookies that spread unevenly, bake too slowly, or have an inconsistent texture. Always give your oven at least 15-20 minutes to reach and stabilize at the target temperature.
- **Invest in a Cookie Scoop for Uniformity:** For perfectly uniform cookie cups that bake evenly and look professional, a cookie scoop is your best friend. It ensures each cup has the same amount of dough, leading to consistent size and baking time across the batch.
- **Avoid Overbaking for Ultimate Softness:** This is perhaps the most critical tip for chocolate cookies! Chocolate cookie dough is inherently darker, making it challenging to determine doneness by color alone. When I remove my cookie cups from the oven, they still appear slightly underbaked in the center. This is intentional and perfect! They will continue to bake and set in the residual heat of the hot muffin pan for a few more minutes. The specified baking times (6 minutes before adding the PB cup, 2 minutes after) have been perfected over multiple batches and different ovens, yielding perfectly moist and tender results. Trust the timing, even if they look a little soft.
- **Don’t Forget to Unwrap the Reese’s:** This might sound obvious, but in the rush of baking, it’s easy to forget to unwrap all 36 miniature Reese’s Peanut Butter Cups beforehand. Have them ready to go when the first baking cycle is complete!
Storage and Make-Ahead Tips
These Reese’s Chocolate Cookie Cups are delightful for days after baking:
- **Storing:** Store leftover cookie cups in an airtight container at room temperature for up to 3-4 days. For longer freshness, you can store them in the refrigerator for up to a week.
- **Freezing Dough:** You can prepare the cookie dough ahead of time and freeze it. Scoop the dough balls into the mini muffin tin cavities and freeze until solid. Then transfer the frozen dough balls to a freezer-safe bag. When ready to bake, place frozen dough in a greased muffin tin and add a couple of minutes to the initial bake time before adding the Reese’s.
- **Freezing Baked Cookie Cups:** Once completely cooled, store baked cookie cups in a single layer in an airtight freezer-safe container or bag for up to 2-3 months. Thaw at room temperature before serving.
REESE’S CHOCOLATE COOKIE CUPS
Print
Pin
Rate
Ingredients
- 1/2 cup unsalted butter softened to room temperature
- 1 cup granulated sugar
- 1/2 cup light brown sugar packed
- 2 large eggs
- 1 tsp. vanilla extract
- 2 cups all-purpose flour
- 1/3 cup unsweetened cocoa powder
- 1 tsp. baking soda
- 1/2 tsp. fine sea salt
- 36 miniature Reese’s Peanut Butter cups unwrapped
Instructions
-
In a large bowl, cream the softened butter, granulated sugar, and brown sugar together with an electric mixer for about 2-3 minutes until light and fluffy.
-
Add the eggs one at a time, mixing well after each, then stir in the vanilla extract. Continue to mix for 2-3 more minutes.
-
In a separate bowl, combine the flour, cocoa powder, baking soda, and salt and whisk well.
-
Gradually add the dry ingredients to the wet ones and mix on low speed just until combined. Be careful not to overmix.
-
Preheat oven to 350°F (175°C). Use a cookie scoop to portion the dough into a lightly greased mini muffin pan. No need to shape, just scoop it in!
-
Bake for 6 minutes. Remove the pan from the oven and immediately press one miniature Reese’s Peanut Butter cup into the center of each cookie cup until the top of it is flush with the top of the cookie. Place back in the oven for two more minutes.
-
Let the cookie cups cool in the pan for a few minutes before carefully removing them. Transfer them to a wire rack to cool completely.

More Decadent Chocolate & Peanut Butter Cookie Recipes and Creative Cookie Cup Ideas:
If you love the chocolate and peanut butter combination, or simply enjoy the fun format of cookie cups, explore these other fantastic recipes to expand your baking horizons:
- Best Monster Cookies: A classic loaded with all your favorite mix-ins.
- Peanut Butter Oatmeal Chocolate Chip Cookies: A chewy and satisfying twist on a classic.
- Reese’s Peanut Butter Cookies: The pure peanut butter cookie, often with a Reese’s surprise.
- Peanut Butter Chip Chocolate Cookies: Double the chocolate, with a burst of peanut butter chips.
- Snickers Peanut Butter Cookies: For those who love the caramel, nougat, and peanut crunch.
- Best Chocolate Chip Peanut Butter Cookies: The ultimate chewy combination of two beloved cookie types.
- Fudge Peanut Butter Cookie Cups: A rich, fudgy spin on the peanut butter cup idea.
- Snickerdoodle Apple Pie Cookie Cups: A warm and comforting dessert in a cup.
- Banana Cream Pie Cookie Cups: A delightful fruity and creamy sensation.
- Cherry Pie Cookies: Sweet and tangy cherry filling encased in a buttery cookie.
- Hot Chocolate Cookie Cups: Perfect for winter, complete with marshmallow topping.
- Frosted Strawberry Cookie Cups: A burst of fresh fruit flavor with a sweet frosting.
No matter the occasion, these Reese’s Chocolate Cookie Cups are a fantastic way to bring joy and deliciousness to your table. Happy baking!



This traditional Easter family picture captures a moment of joy and togetherness that truly defines “family fun.” I almost let it slip by this year, but we managed to snap this quick one right after church! It’s always a bit of an effort to gather everyone for a family photo, but these memories are invaluable and always worth the small hustle. It’s truly bittersweet to see how much everyone grows from year to year; my kids are getting so big, and time seems to accelerate as they get older. Moments like these, shared over delicious homemade treats like these cookie cups, are what truly make life special and memorable.
