Easy No-Chill Snowman Sugar Cookies: Your Ultimate Guide to Festive Holiday Baking
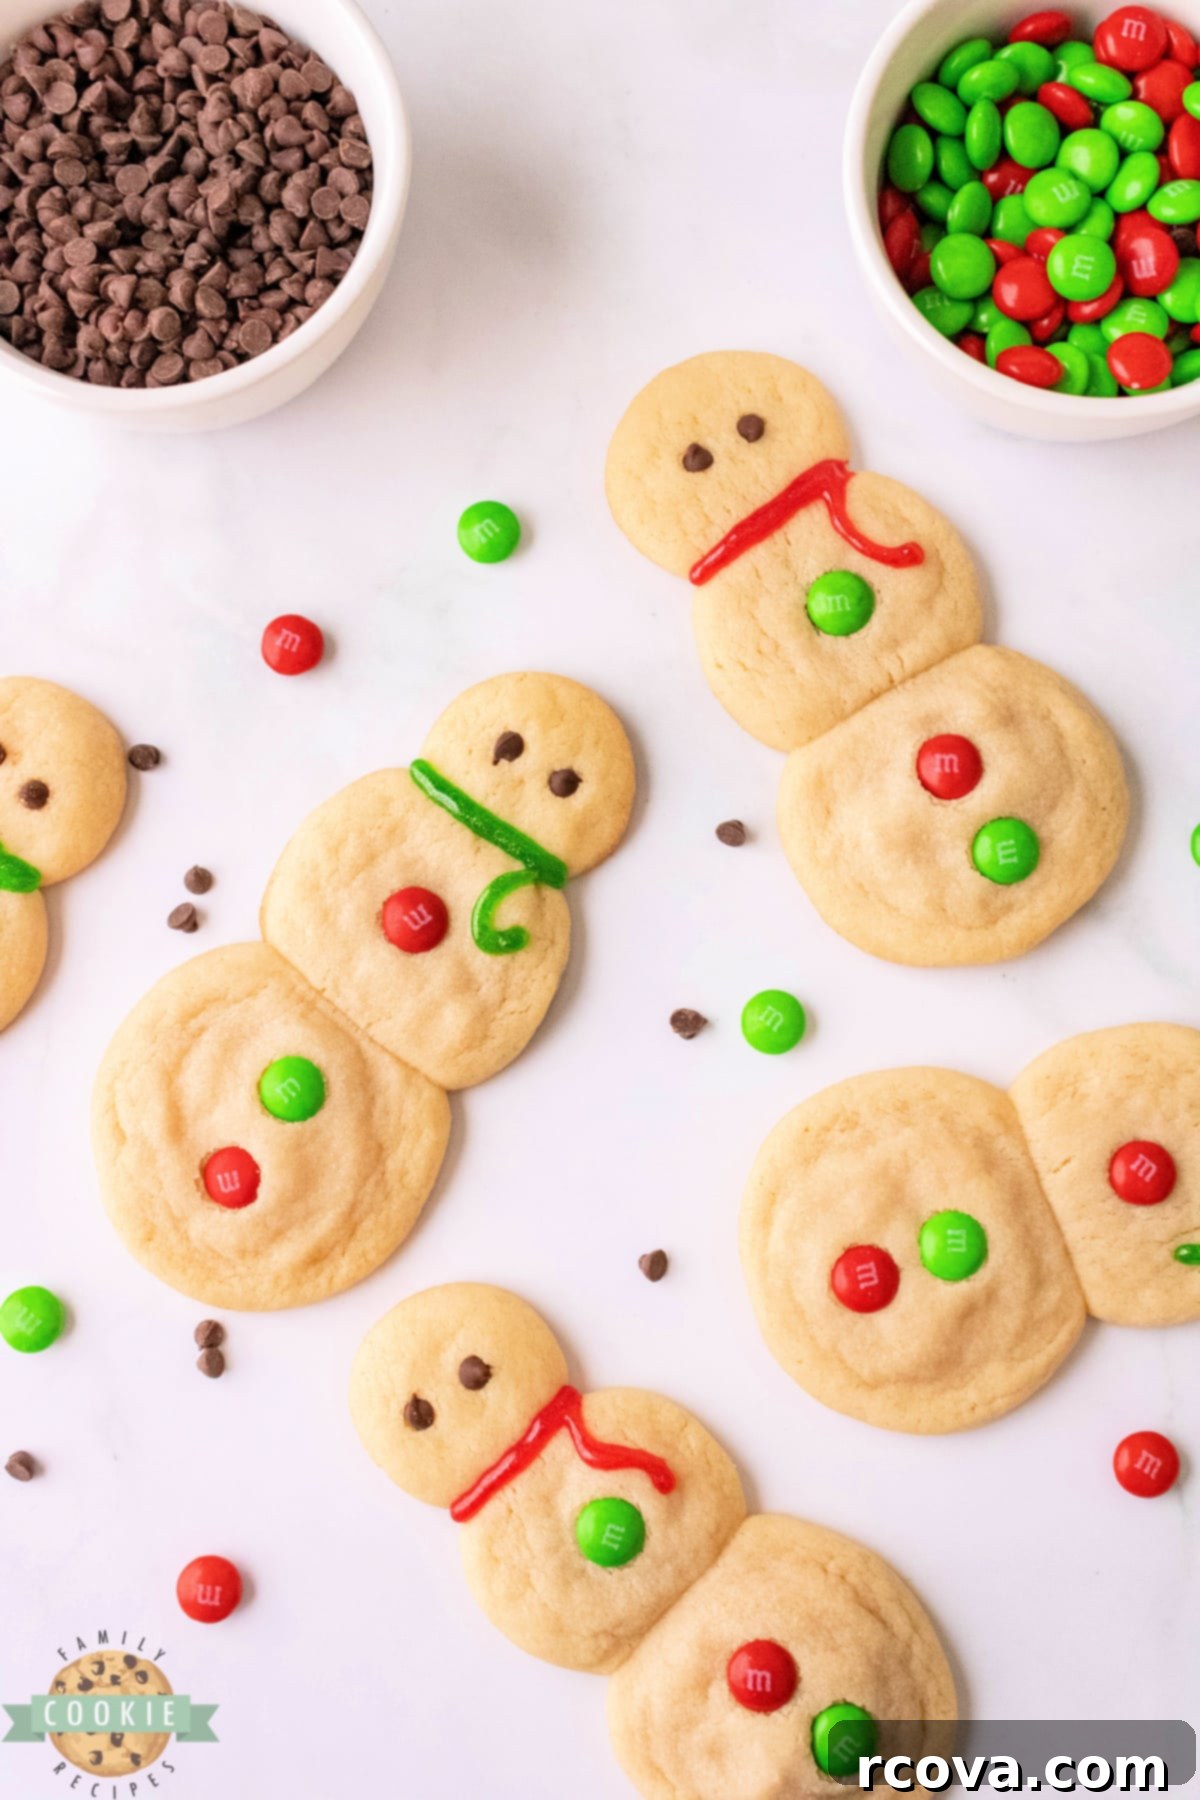
These Snowman Sugar Cookies are the epitome of festive holiday baking, offering a delightful treat that’s as charming to look at as it is delicious to eat. Imagine biting into a cookie that’s perfectly soft and wonderfully chewy, bursting with rich vanilla flavor – all without the hassle of chilling dough, wrestling with cookie cutters, or even needing complicated frosting techniques. This truly is a stress-free sugar cookie recipe designed for pure enjoyment, making it ideal for busy holiday seasons.
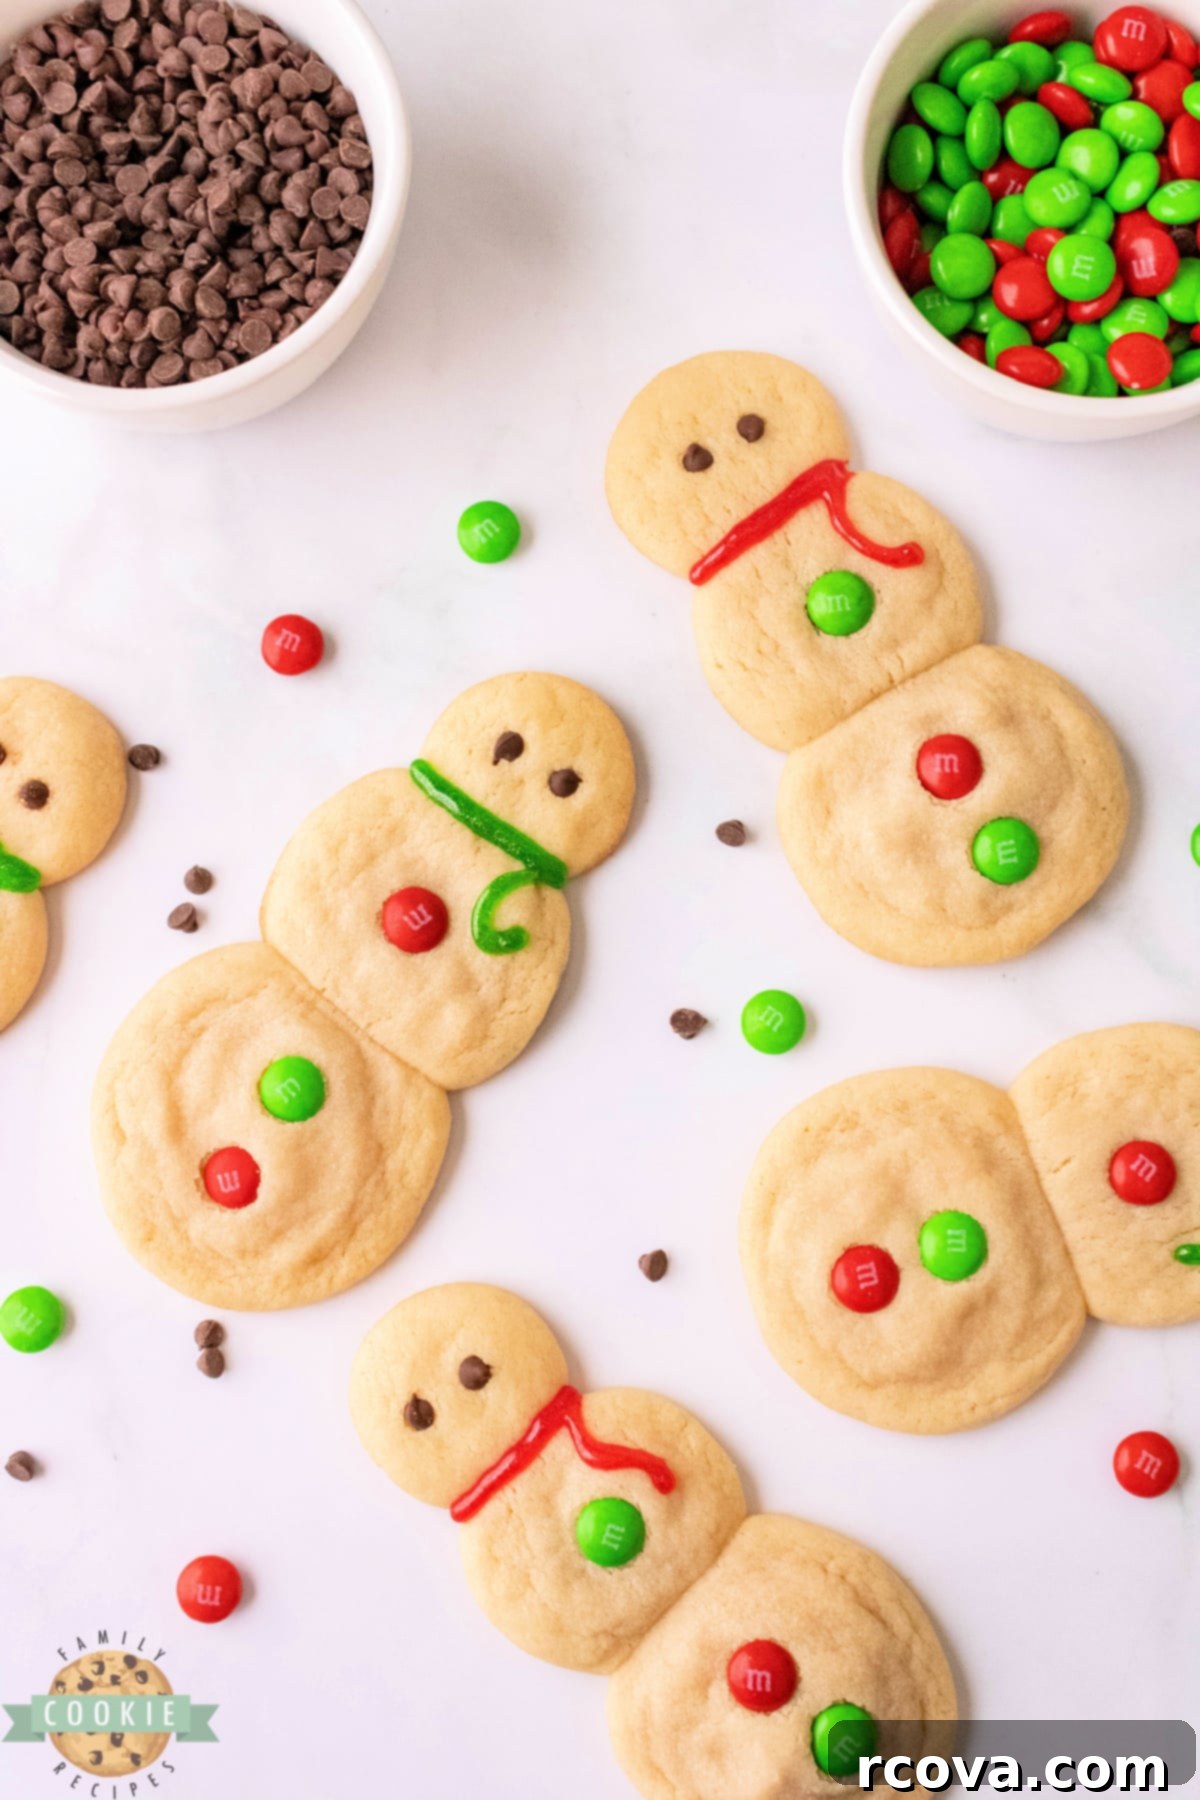
We have a deep affection for sugar cookies and an extensive collection of our cherished sugar cookie recipes. This particular recipe stands out as a true gem, yielding cookies that boast a consistently soft and tender texture. What makes it truly fantastic is that the dough requires absolutely no chilling, saving you precious time during your holiday preparations. Furthermore, it relies on readily available, common pantry ingredients, so there’s no need for a special grocery run. The adorable snowman shapes are effortlessly formed using simple balls of dough, eliminating the need for rolling out sheets or cutting intricate shapes. While you could certainly choose to frost these festive snowmen for an extra layer of sweetness and visual appeal, a significant advantage of this recipe is that the cookies are incredibly flavorful on their own. Their inherent vanilla richness means they’re absolutely delicious even without a drop of frosting, offering a delightful simplicity that many appreciate. They’re a fantastic choice for families looking for a fun, engaging, and easy baking project this winter.

Discover the Magic of Our Easy Snowman Sugar Cookies
Our Snowman Sugar Cookies are a holiday baking marvel, designed to bring joy and ease to your kitchen. Crafted from fundamental cookie ingredients like flour, sugar, eggs, and vanilla, these cookies embody classic sugar cookie goodness. The secret to their perfect consistency and ability to hold their whimsical snowman shape without excessive spreading during baking lies in a balanced blend of butter and shortening. This combination ensures a tender, melt-in-your-mouth texture that everyone will adore.
The beauty of this recipe is its simplicity in shaping. Forget about flour-dusted countertops and tedious cookie cutters; these snowmen come to life by assembling three varying sizes of cookie dough balls. This method not only makes the process incredibly fun and family-friendly but also guarantees charmingly rustic, unique snowmen every time. Once baked to golden perfection and allowed to cool, the real artistry begins with simple decorations. Transform them into cheerful snowmen by adding mini chocolate chips for sparkling eyes, colorful M&Ms for cheerful buttons, and a touch of decorating gel or icing to create a cozy scarf. These elements are not just for looks; they add delightful pops of flavor and texture to an already delicious base. Perfect for parties, gift-giving, or simply enjoying by the fireplace, these cookies capture the spirit of the season with minimal effort and maximum delight, proving that holiday baking doesn’t have to be complicated to be spectacular.
Essential Ingredients for Your Perfect Snowman Sugar Cookies
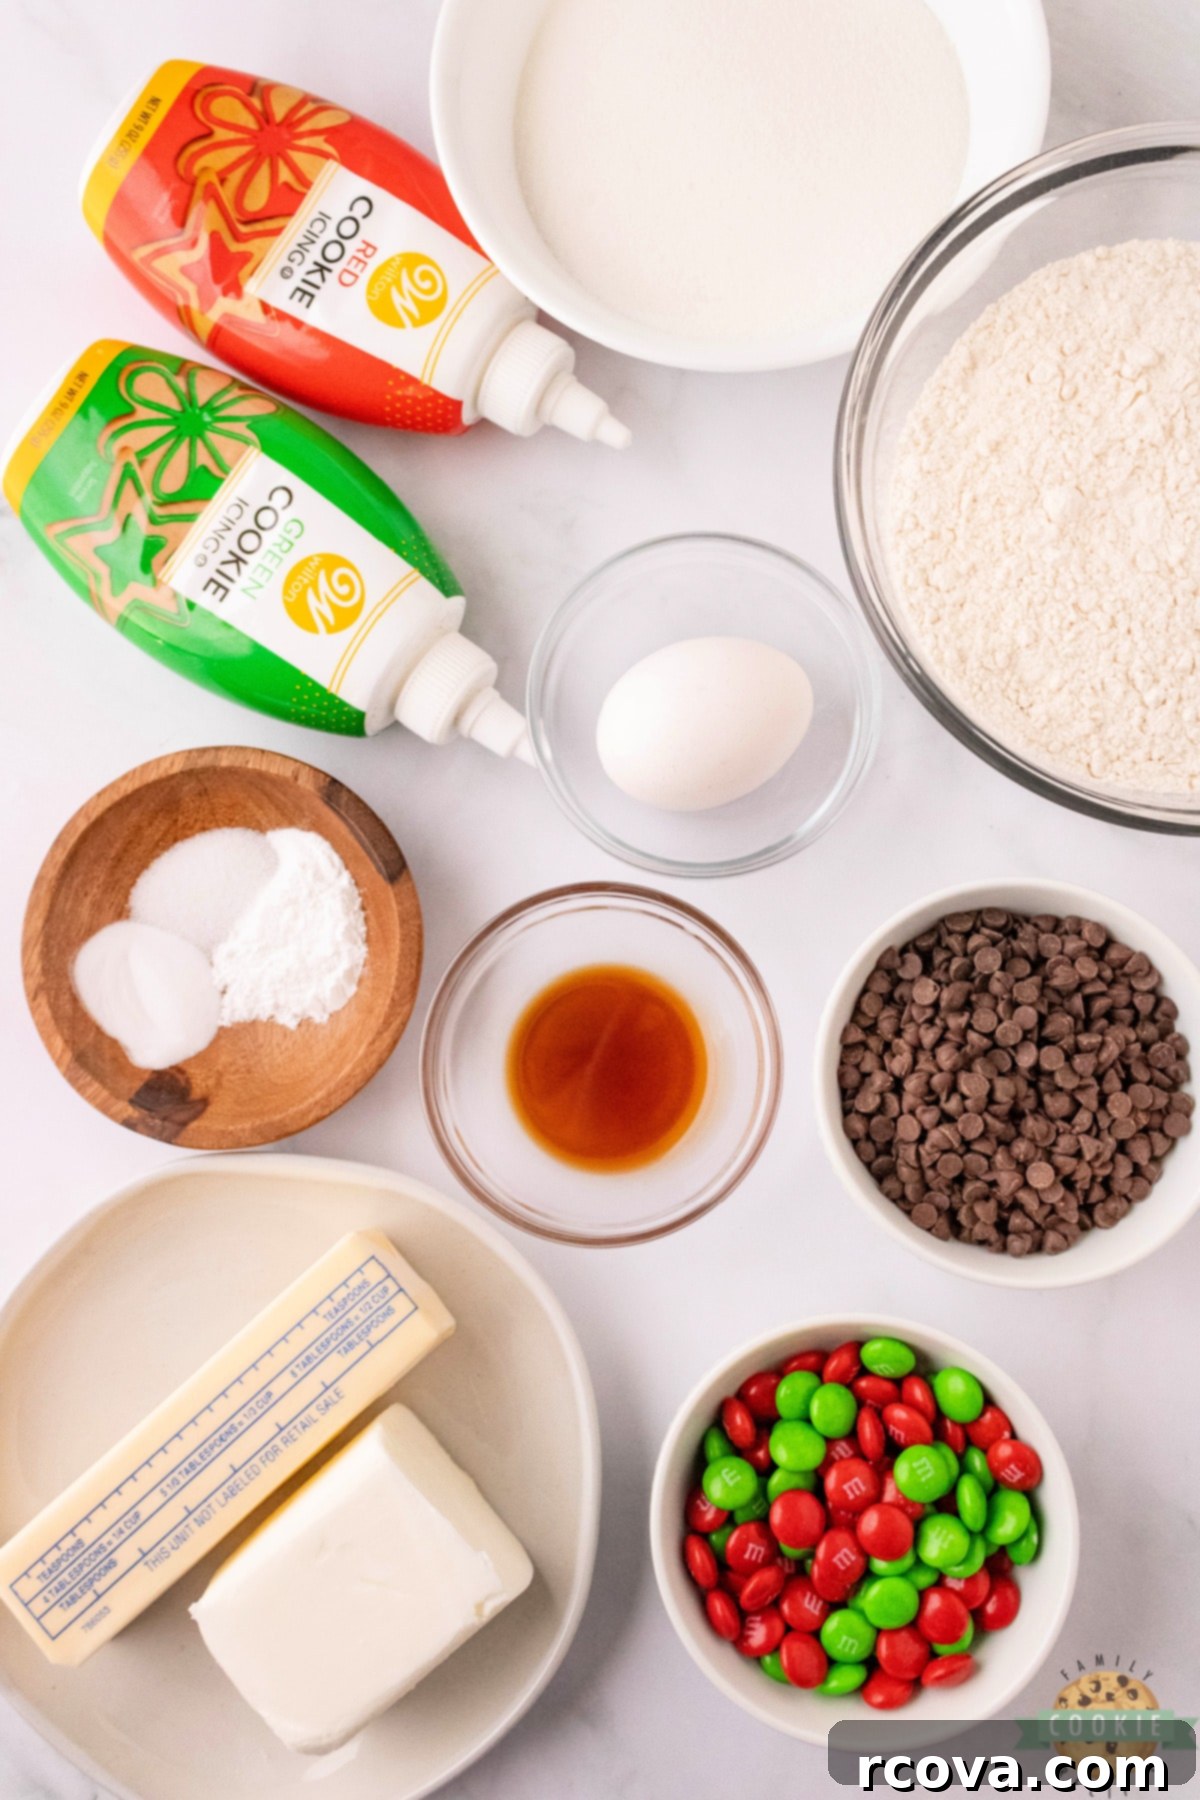
Creating these delightful Snowman Sugar Cookies starts with a careful selection of quality ingredients. Each component plays a vital role in achieving their characteristic soft, chewy texture and rich vanilla flavor. Here’s a detailed look at what you’ll need and why:
- All-Purpose Flour: The foundation of our cookies. While all-purpose flour works beautifully, you have flexibility. Bread flour can yield a slightly chewier cookie, and pastry flour can make them even more tender. For those with dietary restrictions, a reliable gluten-free substitute can also be used successfully, just be sure to follow the manufacturer’s recommendations for baking. The key is to measure your flour correctly – spoon it into your measuring cup and level it off, rather than scooping directly from the bag, which can compact the flour and lead to dry cookies.
- Baking Powder & Baking Soda: These are your key leavening agents, crucial for giving the cookies their lift and signature soft texture. For optimal results, always ensure both are fresh and not expired. Old leavening agents can lead to flat, dense cookies, so check their expiry dates to guarantee your snowmen rise beautifully.
- Salt: A small amount of salt is a culinary superpower, not just for seasoning but for enhancing and balancing all the other sweet flavors in the cookie. It truly makes the vanilla and sugar sing, providing a necessary counterpoint that elevates the overall taste profile.
- Shortening: This unsung hero contributes significantly to the cookies’ structure, helping them maintain their festive snowman shape without spreading too much during baking. It also adds to their tender, slightly crumbly texture, giving them a delightful bite. You can opt for regular shortening or, for an extra layer of buttery flavor, use butter-flavored shortening.
- Butter (Softened): We recommend using high-quality salted butter for a richer flavor profile. If unsalted butter is your preference, feel free to use it, but you might want to slightly increase the added salt. The crucial point is that your butter must be softened to room temperature, not melted. Softened butter creams beautifully with sugar, incorporating air for a light texture, whereas melted butter will result in greasy, dense cookies. Avoid margarine, as its different fat content will alter the cookie’s texture and flavor significantly.
- Granulated Sugar: The star of any sugar cookie! Sugar provides sweetness, contributes to beautiful golden-brown edges, and helps create that desirable crisp-chewy texture that makes these cookies so addictive. There’s no substitute here – it’s fundamental to the recipe’s success and signature taste.
- Egg: Just one egg acts as a vital binding agent, holding the dough together and ensuring the cookies have the proper structure as they bake. It also adds a touch of richness and moisture, preventing them from becoming crumbly and contributing to their overall chewiness.
- Vanilla Extract: For that irresistible, warm vanilla aroma and taste, a good quality pure vanilla extract is indispensable. This is not the time to skimp on flavor! Alternatively, using a Vanilla Bean Paste can elevate the flavor even further with visible specks of vanilla bean, adding a gourmet touch.
And for the delightful snowman decorations that bring these characters to life:
- Mini Chocolate Chips: You’ll need precisely 24 mini chocolate chips to give each of your 12 snowmen two adorable, sparkling eyes. Their petite size is perfect for a whimsical and proportionate touch on the snowman’s face.
- M&Ms: Add a burst of vibrant color and a satisfying crunch with 3 M&Ms per snowman, serving as their festive buttons. Any color combination works beautifully, allowing for creative personalization and ensuring each snowman has its own unique character.
- Decorating Gel or Icing: A small tube of decorating gel or a piping bag with icing will be your artistic tool. Not only does it act as the adhesive to secure the chocolate chip eyes and M&Ms buttons firmly in place, but it’s also perfect for drawing on colorful, cozy scarves, bringing your snowmen to life with personality and a touch of edible artistry.
Step-by-Step Guide: Crafting Your Festive Snowman Sugar Cookies
Baking these charming Snowman Sugar Cookies is a straightforward and enjoyable process that even novice bakers will find rewarding. Follow these detailed steps to ensure perfectly formed and incredibly delicious holiday treats.
- Prepare Your Workspace: Begin by preheating your oven to 350° F (175° C). This ensures the oven is at the correct temperature for even baking from the moment your cookies go in, which is crucial for consistent results.
- Line Baking Sheets: Line two large baking sheets with parchment paper. This simple step is crucial for preventing sticking and allowing for easy removal of your delicate snowmen after baking, eliminating the need for extra grease and ensuring they maintain their perfect shape.
-
Make the Sugar Cookie Dough
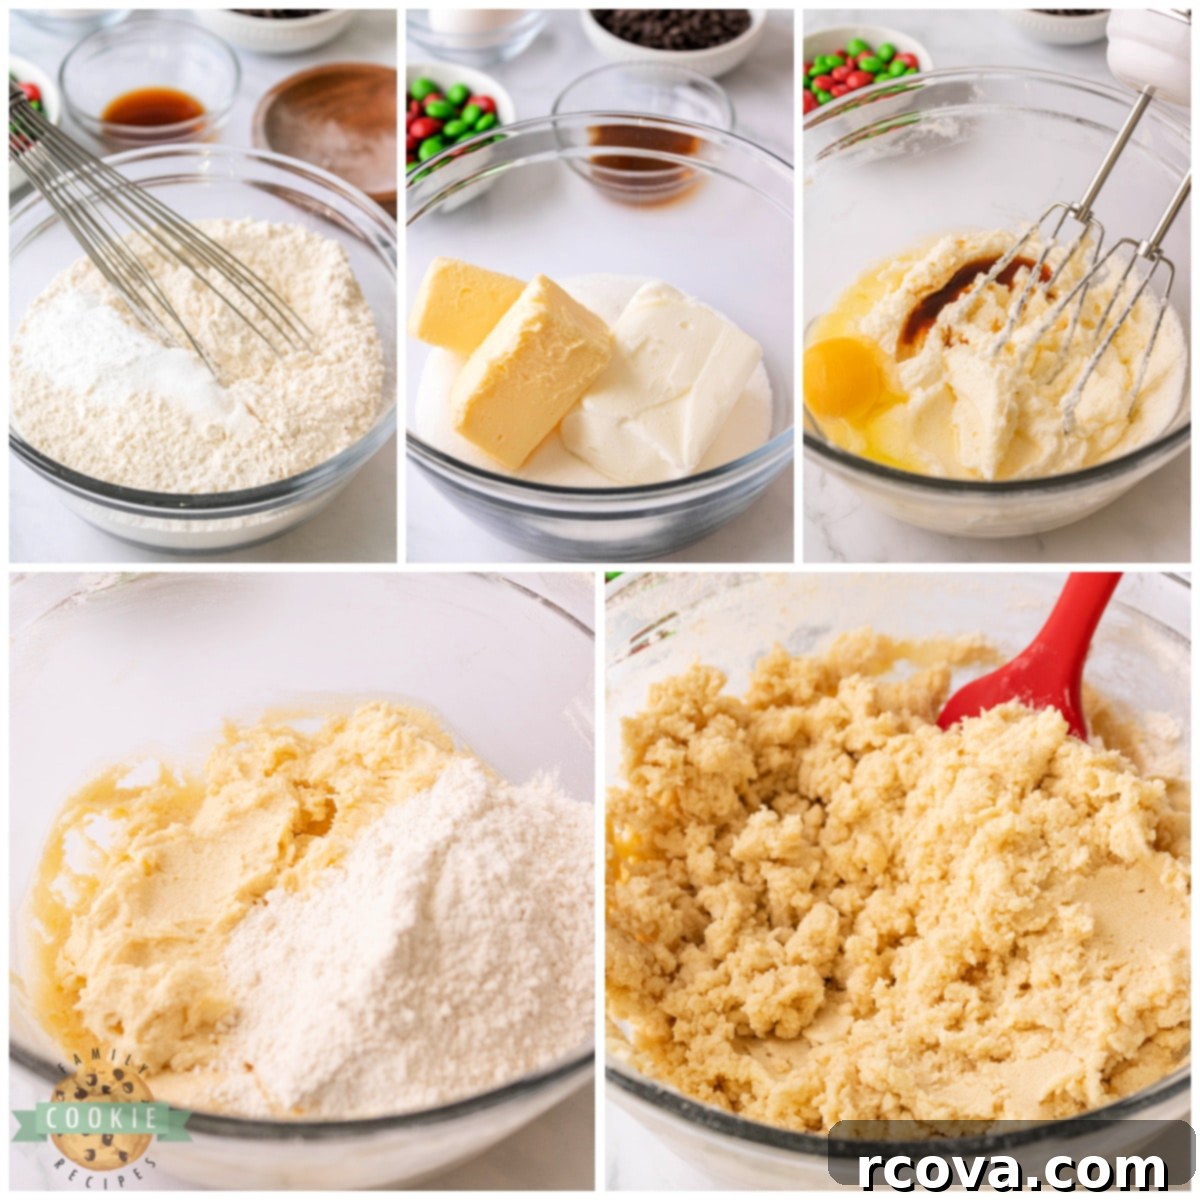
- Combine Dry Ingredients: In a medium mixing bowl, thoroughly whisk together the all-purpose flour, baking powder, baking soda, and salt. Whisking ensures these ingredients are well-distributed, which is vital for even rising and consistent flavor throughout the cookies. Set this bowl aside for later use.
- Cream Wet Ingredients: In a larger mixing bowl, using an electric mixer, cream together the softened shortening, softened butter, and granulated sugar. Beat on medium-high speed for a good 2-3 minutes. This creaming process is essential; it incorporates air into the mixture, resulting in light, fluffy, and tender cookies. The mixture should become noticeably lighter in color and creamy in texture, resembling whipped frosting.
- Add Egg and Vanilla: Scrape down the sides of the bowl with a spatula to ensure everything is evenly incorporated, then add the single egg and vanilla extract. Continue to mix for another 2-3 minutes until everything is well combined and aerated. This ensures the egg is fully incorporated as a binding agent and the vanilla flavor is evenly distributed for maximum taste.
- Incorporate Dry into Wet: Gradually add the whisked dry ingredients into the wet mixture. Mix on low speed until just combined. Be careful not to overmix the dough once the flour is added, as this can develop the gluten too much, leading to tough and chewy (not in a good way!) cookies. Stop mixing as soon as no dry streaks of flour remain, even if a few small lumps are present.
-
Shape Your Adorable Snowman Cookies
- Divide the Dough: This recipe yields 12 delightful snowmen. To create these, first divide the entire cookie dough into 12 equal portions, with each portion measuring approximately 3 tablespoons. Using a cookie scoop can help ensure consistent sizes.
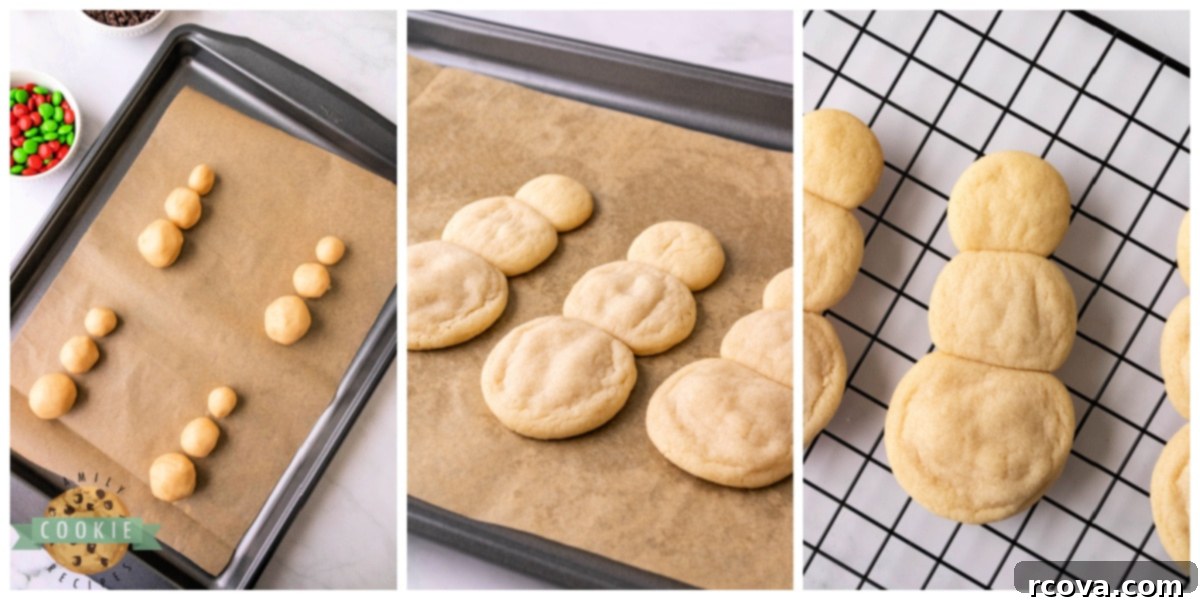
- Form Snowman Segments: Take each 3-tablespoon portion and divide it into three distinct parts to form the snowman’s head, body, and base:
- Head: Use ½ tablespoon of dough. Roll it gently between your palms to form a smooth ball.
- Body: Use 1 tablespoon of dough. Roll it into a smooth ball, slightly larger than the head.
- Bottom: Use 1 ½ tablespoons of dough. Roll it into the largest smooth ball for the snowman’s base.
- Assemble Snowmen on Baking Sheet: Carefully arrange these three rolled dough balls on your prepared baking sheet, placing them almost touching each other in a vertical line (smallest on top, largest at the bottom). As they bake, the edges will gently meld together, forming a single, cohesive snowman shape. Repeat this process with the remaining dough, ensuring each snowman is spaced about 2 inches apart from its neighbors to allow for expansion without touching.
-
Bake to Perfection
- Bake in Batches: Place your baking sheets into the preheated oven. Bake one sheet at a time, if necessary, to ensure even heating and optimal airflow around the cookies. Bake for 8-10 minutes. The cookies are done when their tops appear set, and the edges are just lightly golden brown. It’s important not to overbake, as they will continue to firm up as they cool and overbaking can lead to dry, crumbly cookies.
- Cooling Process: Once out of the oven, allow the cookies to cool on the baking sheet for about 5 minutes. This brief resting period helps them set and become firm enough to handle without breaking. The residual heat on the baking sheet also contributes to their final texture.
- Transfer and Fully Cool: Gently transfer the partially cooled snowmen to a wire rack to finish cooling completely. It is absolutely crucial to let the cookies cool entirely before attempting to move them further or decorate them. If you rush this step, the delicate snowman sections, which have just melded together, could easily break apart. Patience here will be rewarded with perfectly intact, ready-to-decorate snowmen!
-
Decorate Your Festive Snowmen
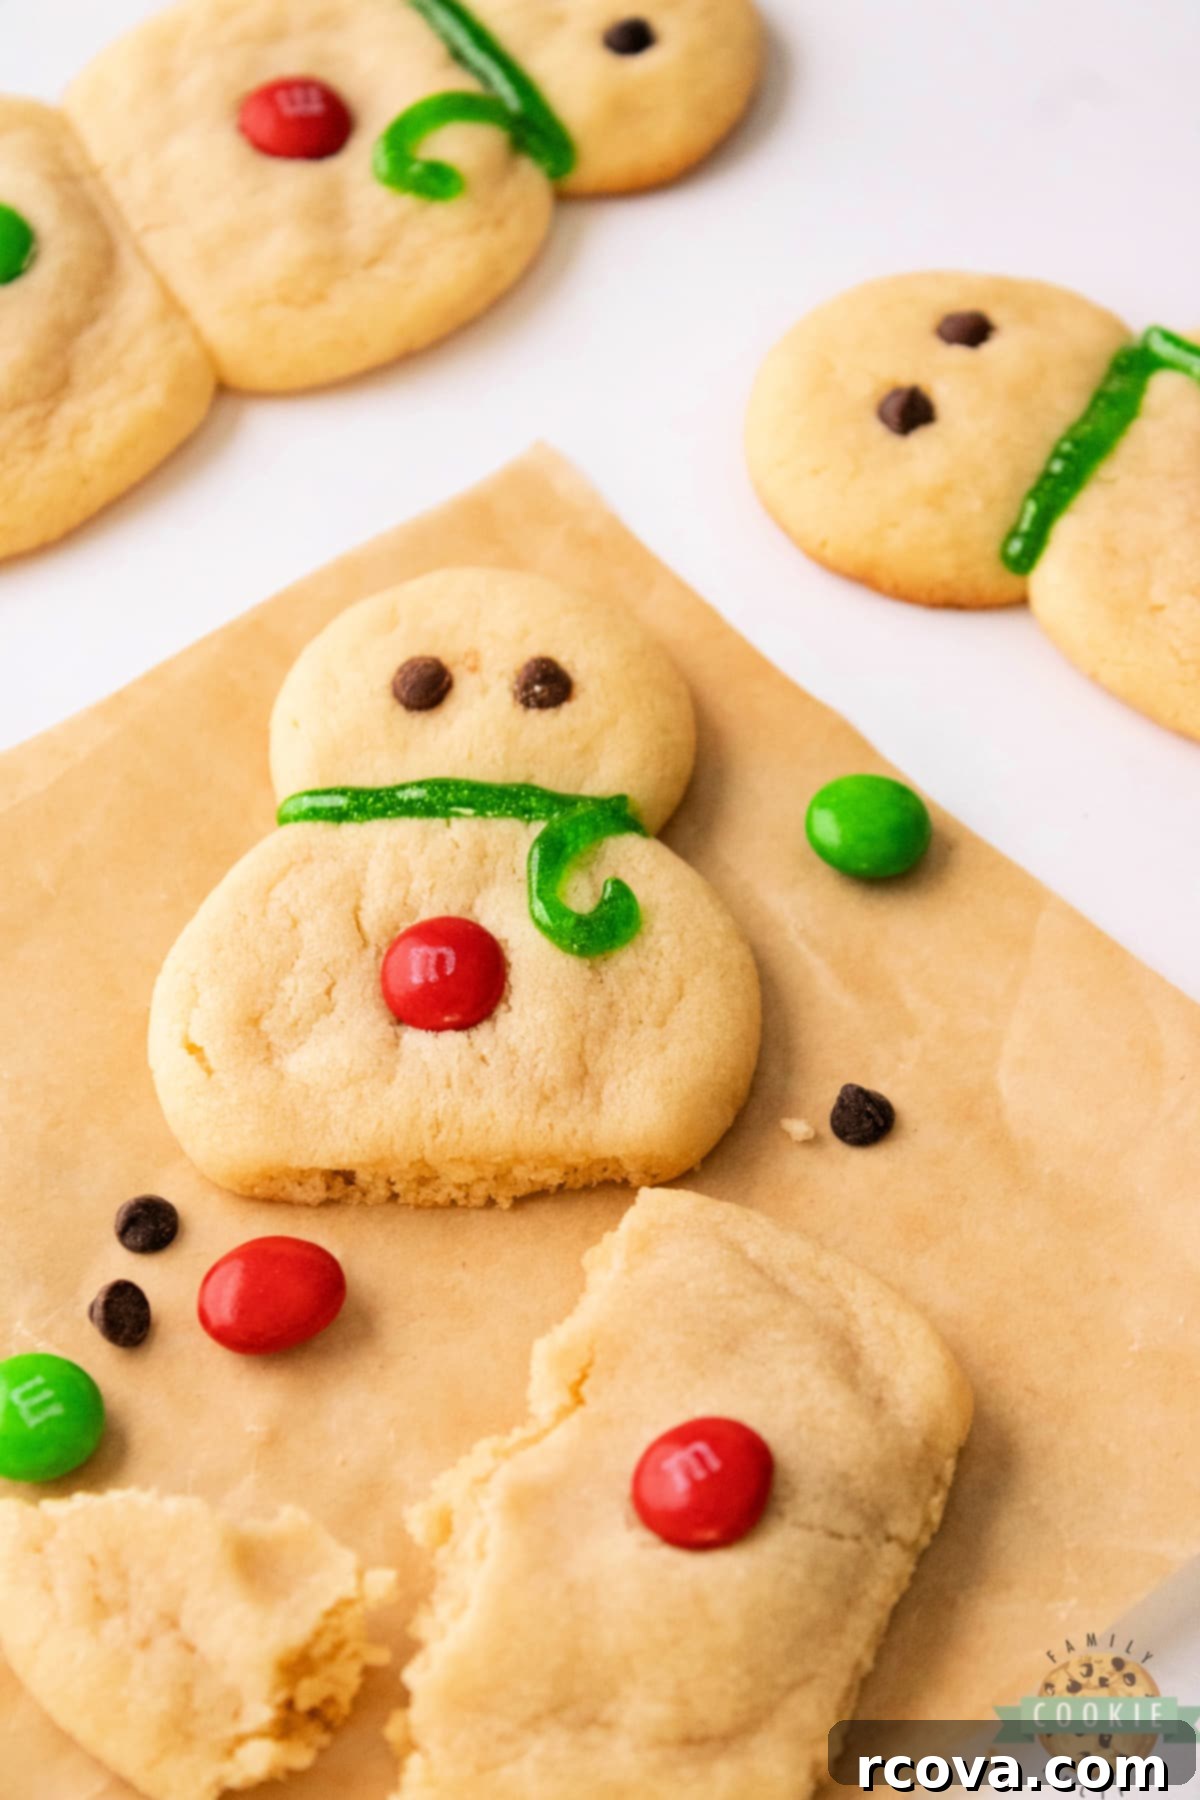
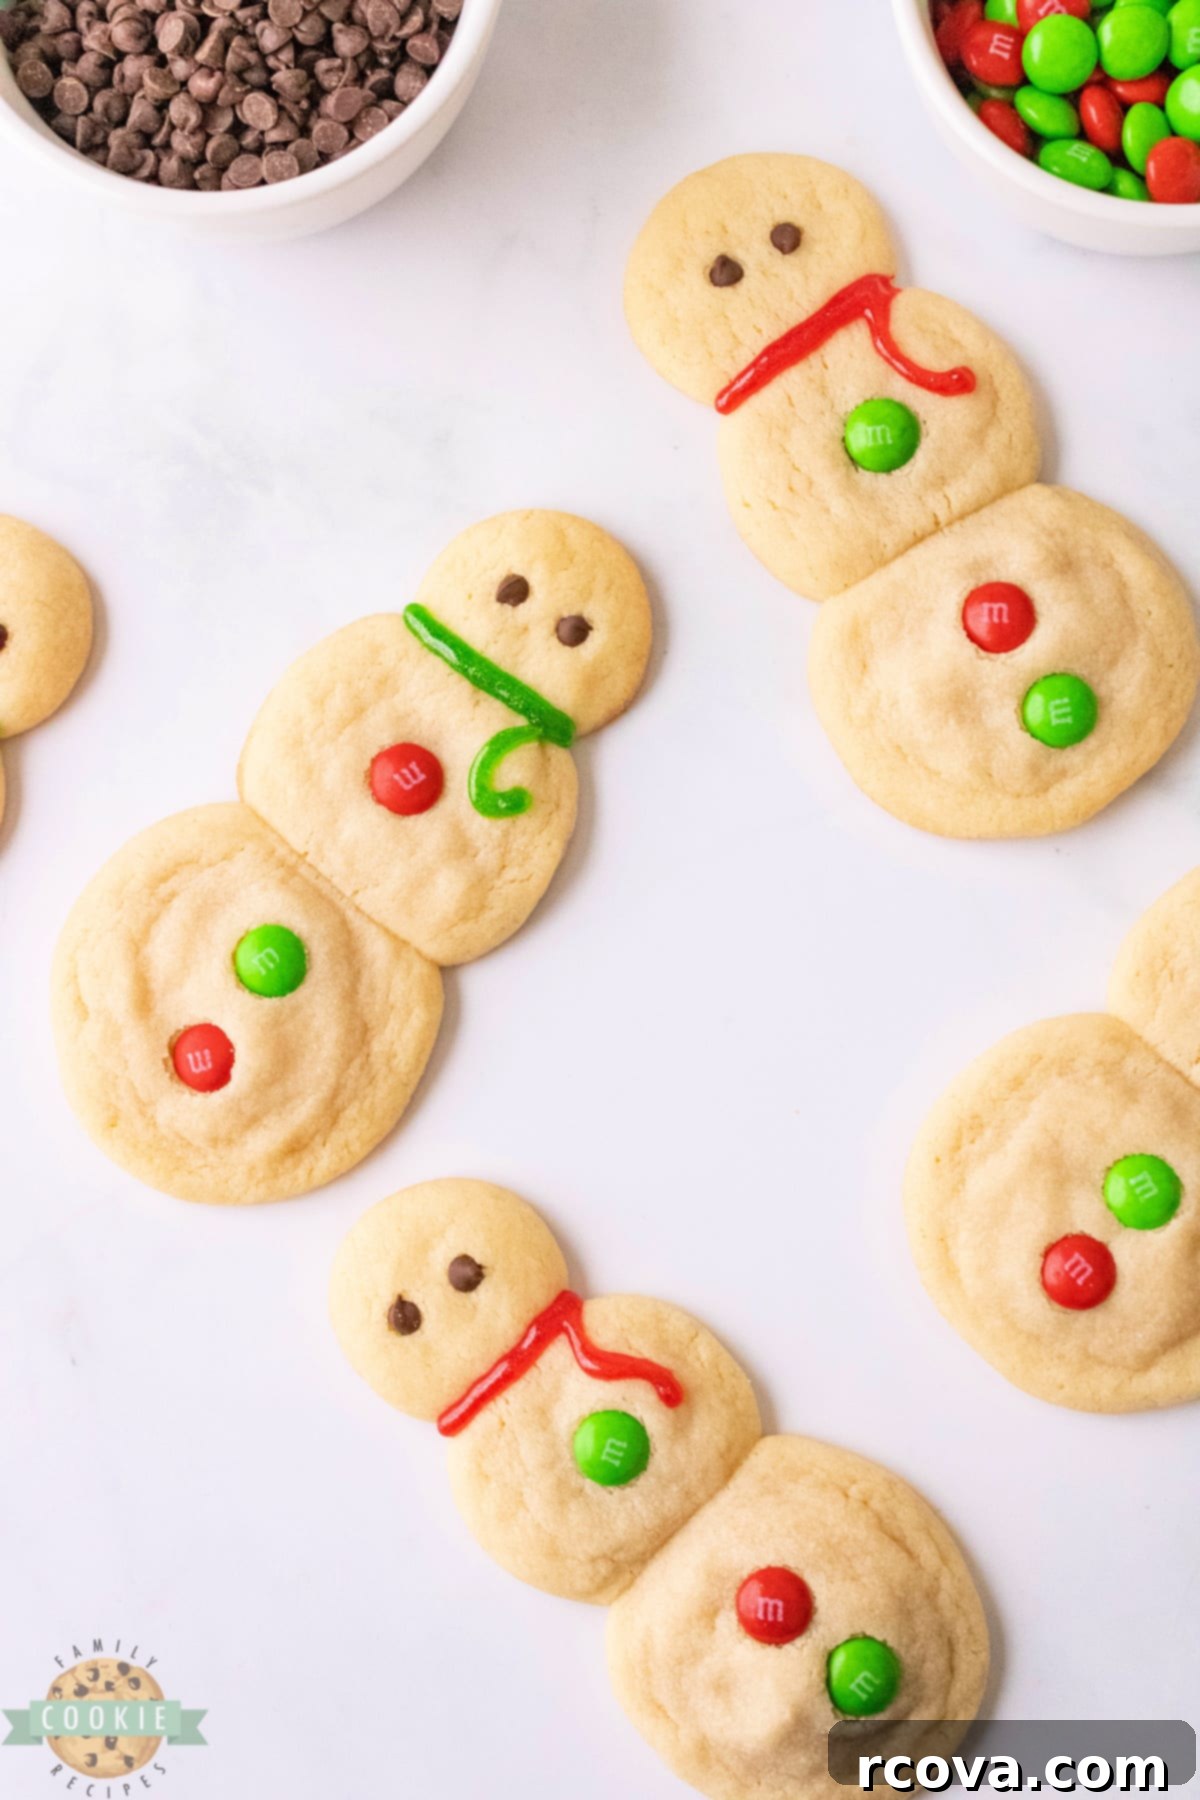
- Add Eyes: Once the cookies are fully cooled and firm, take two mini chocolate chips for each snowman and gently press them into the top (head) portion to create adorable, sparkling eyes. The melted chocolate will help them adhere.
- Attach Buttons: Apply a small dot of decorating gel or icing to the back of three M&Ms for each snowman, then carefully press them onto the middle (body) and bottom portions of the cookie to form colorful buttons. The gel acts as a perfect edible adhesive.
- Draw Scarves: Using your decorating gel or icing, get creative and draw unique, festive scarves around the neck of each snowman. This is where their individual personalities truly shine! You can use different colors and patterns to make each one special.


SNOWMAN SUGAR COOKIES
Print
Pin
Rate
Cookies
American
Snowman Sugar Cookies
15 minutes
10 minutes
12 cookies
335kcal
Jessica & Nellie
Ingredients
- 2 ½ cups all-purpose flour
- 1 teaspoon baking powder
- ½ teaspoon baking soda
- ½ teaspoon salt
- ½ cup shortening
- ½ cup butter softened
- 1 cup sugar
- 1 egg
- 2 teaspoons vanilla extract
- 24 mini chocolate chips
- 36 M&Ms
- Decorating gel or icing
Instructions
-
Preheat oven to 350° F.
-
Line two baking sheets with parchment paper.
-
MAKE THE SUGAR COOKIE DOUGH: In a mixing bowl, whisk flour, baking powder, baking soda, and salt. Set aside.
-
In a larger bowl, cream shortening, butter, and sugar for about 2-3 minutes, or until light and creamy.
-
Mix in the egg and vanilla and mix for another 2-3 minutes.
-
Slowly add the dry ingredients to the wet ingredients and mix until just combined.
-
SHAPE THE COOKIES: Divide the dough into 12 balls that are 3 tablespoons each. Divide each of those balls into 3 parts – ½ tablespoon for the head, 1 tablespoon for the body, and 1 ½ tablespoons for the bottom. Roll into balls.
-
Place the 3 pieces on a baking sheet so that they are almost touching. Continue with the rest of the dough, keeping each snowman about 2 inches apart.
-
BAKE THE COOKIES: Bake in batches for 8-10 minutes until the tops of cookies are set and the edges are lightly browned.
-
Cool on a baking sheet for 5 minutes then transfer to a wire rack for cooling. Allow the cookies to fully cool before removing from the cooling rack. It is important to allow the snowman to fully cool before removing from the cooling rack, otherwise they could break apart.
-
DECORATE THE SNOWMEN: Once cool, push 2 mini chocolate chips into the snowman for eyes. Add a dot of decorating gel to 3 M&Ms and push them into the snowman for buttons. Use decorating gel to draw a scarf on the snowmen.
Nutrition

Expert Tips for Baking the Best Snowman Sugar Cookies Every Time
Achieving perfectly soft, chewy, and flavorful sugar cookies is simple when you know a few key tricks. Here are our top tips to ensure your Snowman Sugar Cookies turn out beautifully every single time, making your holiday baking truly magical:
- Mind the Butter Temperature: This is perhaps the most critical tip. Your butter *must* be softened to room temperature, not melted. Softened butter creams beautifully with sugar, incorporating tiny air pockets that create a light and tender crumb. Melted butter, on the other hand, will result in a greasy dough and dense, flat cookies. Plan ahead and take your butter out of the refrigerator at least 30-60 minutes before you start baking, or carefully microwave for a few seconds if you’re in a hurry (but don’t melt it!).
- Proper Creaming is Key: Don’t rush the creaming process of the butter, shortening, and sugar. Spending an extra minute or two (aim for a full 2-3 minutes as specified) beating them together until the mixture is light, fluffy, and pale in color will significantly improve the consistency and texture of your finished cookies. This aeration is what makes them wonderfully soft and gives them their signature melt-in-your-mouth quality.
- Always Preheat Your Oven: A properly preheated oven is essential for consistent baking. Placing cookies into a cold or partially heated oven can lead to uneven baking, excessive spreading, and an undesirable texture. Ensure your oven has reached the target temperature of 350°F (175°C) before you put your cookies in, and consider using an oven thermometer for accuracy.
- Use Parchment Paper or a Silicone Baking Mat: This isn’t just for easy cleanup; it’s a game-changer for cookie texture and removal. Parchment paper or a silicone baking mat provides a non-stick surface, ensuring your delicate snowman cookies slide off the pan effortlessly without breaking or scraping. It also helps with more even heat distribution across the bottom of the cookie, preventing scorched bottoms.
- Do Not Overbake: This is a common mistake that can turn soft, chewy cookies into dry, crumbly ones. Sugar cookies, especially, can look slightly underdone on top when they are actually perfectly baked. Watch for the edges to be just lightly golden brown and the tops to look set, even if they seem a little soft in the center. They will continue to cook slightly on the hot baking sheet and firm up as they cool. When in doubt, err on the side of slightly underbaked for a chewier result.
- Measure Flour Correctly: For consistent results, always spoon your flour into the measuring cup and then level it off with a straight edge (like the back of a knife). Scooping flour directly from the bag can compact it, leading to too much flour and a dry, tough cookie. This technique, often called “spoon and level,” makes a significant difference.
- Avoid Overcrowding the Baking Sheets: Give your snowman cookies ample space to spread slightly and bake evenly. Overcrowding can lead to uneven baking and cookies sticking together, compromising their perfect shape and texture. Bake in batches if necessary.
- Quality Vanilla Makes a Difference: Since vanilla is a prominent flavor in these sugar cookies, investing in a high-quality pure vanilla extract or vanilla bean paste will truly elevate the taste of these cookies, making them even more irresistible.

How to Store Your Delightful Snowman Sugar Cookies
Once your Snowman Sugar Cookies are baked and beautifully decorated, proper storage is key to keeping them fresh and delicious for as long as possible. Here’s how to ensure they maintain their festive charm and delightful texture, whether you plan to enjoy them now or later:
For short-term storage, place the cooled cookies in an airtight container at room temperature. They will remain wonderfully fresh, soft, and chewy for 3-5 days. To prevent the decorations from smudging or sticking, especially if they are freshly decorated, you might want to place a sheet of wax paper or parchment paper between layers of cookies if stacking them. This creates a barrier that protects their delicate features. Keep them away from direct sunlight or excessive heat, which can affect their texture and cause frosting or decorating gel to melt.
If you’re planning to bake ahead for a holiday party or simply want to enjoy these festive treats later, these cookies freeze exceptionally well. Arrange the fully cooled snowmen in a single layer on a baking sheet and flash freeze them for about 30 minutes to an hour. This crucial step prevents them from sticking together when transferred to a larger container. Once firm, transfer the frozen cookies to an airtight freezer-safe container or a heavy-duty freezer bag. For added protection and to prevent any sticking, place a piece of wax paper between each snowman layer. When stored correctly, they can maintain their quality and flavor in the freezer for up to 2-3 months. To enjoy, simply remove them from the freezer and let them thaw at room temperature for an hour or two before serving. They’ll be just as delicious as when they were freshly baked, making holiday meal prep a breeze!
Creative Variations to Personalize Your Snowman Sugar Cookies
While our Snowman Sugar Cookies recipe is fantastic as is, there are plenty of ways to customize them and add your own creative flair. Don’t be afraid to experiment and make these cookies uniquely yours, adding personal touches for every occasion!
- Adjust Cookie Size: If you’re looking for mini snowmen for a bite-sized treat or larger, more substantial cookies, you can easily adjust the amount of dough used for each snowman segment. Just remember that if you make them significantly smaller, you’ll need to reduce the baking time accordingly (check at 6-7 minutes). For larger cookies, a slight increase in baking time might be necessary (up to 12 minutes). Always keep an eye on the edges for that light golden hue, as this is your best indicator of doneness.
- Alternative Buttons and Features: Instead of M&Ms, you can use regular chocolate chips (mini or standard size) for buttons, or even small round candies like Skittles, gumdrops, or sprinkles for different textures and colors. For the nose, a tiny piece of orange decorating icing, a sliver of dried apricot, or a small orange sprinkle can create a classic carrot look. Edible food markers can also be used to draw on rosy cheeks, eyebrows, or intricate scarf patterns, offering limitless creative possibilities.
- Embrace the Frosting: If you love a classic frosted sugar cookie, these snowmen are an excellent canvas! Before decorating with chocolate chips and M&Ms, you can certainly frost them. A simple and delicious buttercream frosting can be made by creaming together 4 cups of powdered sugar, ½ cup (one stick) of softened butter, 1 teaspoon of vanilla extract, and about 2-4 tablespoons of milk. Adjust the milk amount until you reach your desired consistency – a thicker frosting is great for spreading with a knife, while a thinner one works well for drizzling or piping. Spread this over the fully cooled cookies before adding your snowman features for an extra layer of sweetness.
- Flavor Enhancements: While vanilla is a timeless classic, consider adding a ¼ teaspoon of almond extract along with the vanilla for a richer, more complex flavor profile that hints at marzipan. Peppermint extract (use sparingly, about ½ teaspoon) could also be a delightful addition for a festive holiday twist, especially if you plan to decorate with red and green M&Ms, creating a minty fresh treat.
- Sparkle and Shine: For an extra magical touch, before the decorating gel dries, sprinkle a little edible glitter or sanding sugar over the scarves, buttons, or even the entire snowman for an enchanting shimmer. This adds visual appeal and a fun texture.
- Colored Dough: For a playful and unique touch, you could divide a portion of the dough and add a few drops of food coloring to create colored snowman hats, mittens, or other features by shaping smaller dough balls. Imagine a snowman with a blue hat or green mittens!
These variations allow you to tailor your Snowman Sugar Cookies to any preference or occasion, making them even more special and memorable for your holiday celebrations.

More Festive Holiday Cookie Recipes to Explore:
- CHRISTMAS TREE TWIX COOKIES
- NO BAKE GINGERBREAD COOKIES
- CHOCOLATE RITZ CRACKER COOKIES
- PEPPERMINT CUT OUT COOKIES
- PEPPERMINT SNOWMAN COOKIES
- RED VELVET CHRISTMAS COOKIES
- PEPPERMINT BARK COOKIES
- FROSTED EGGNOG COOKIES
- BEST GINGERBREAD CUT OUT COOKIES
- FROSTED ROSE SUGAR COOKIES
- PEPPERMINT SHORTBREAD COOKIES
- MINT CHRISTMAS COOKIES
- HOT COCOA COOKIES
- FROSTED GINGERBREAD SUGAR COOKIES
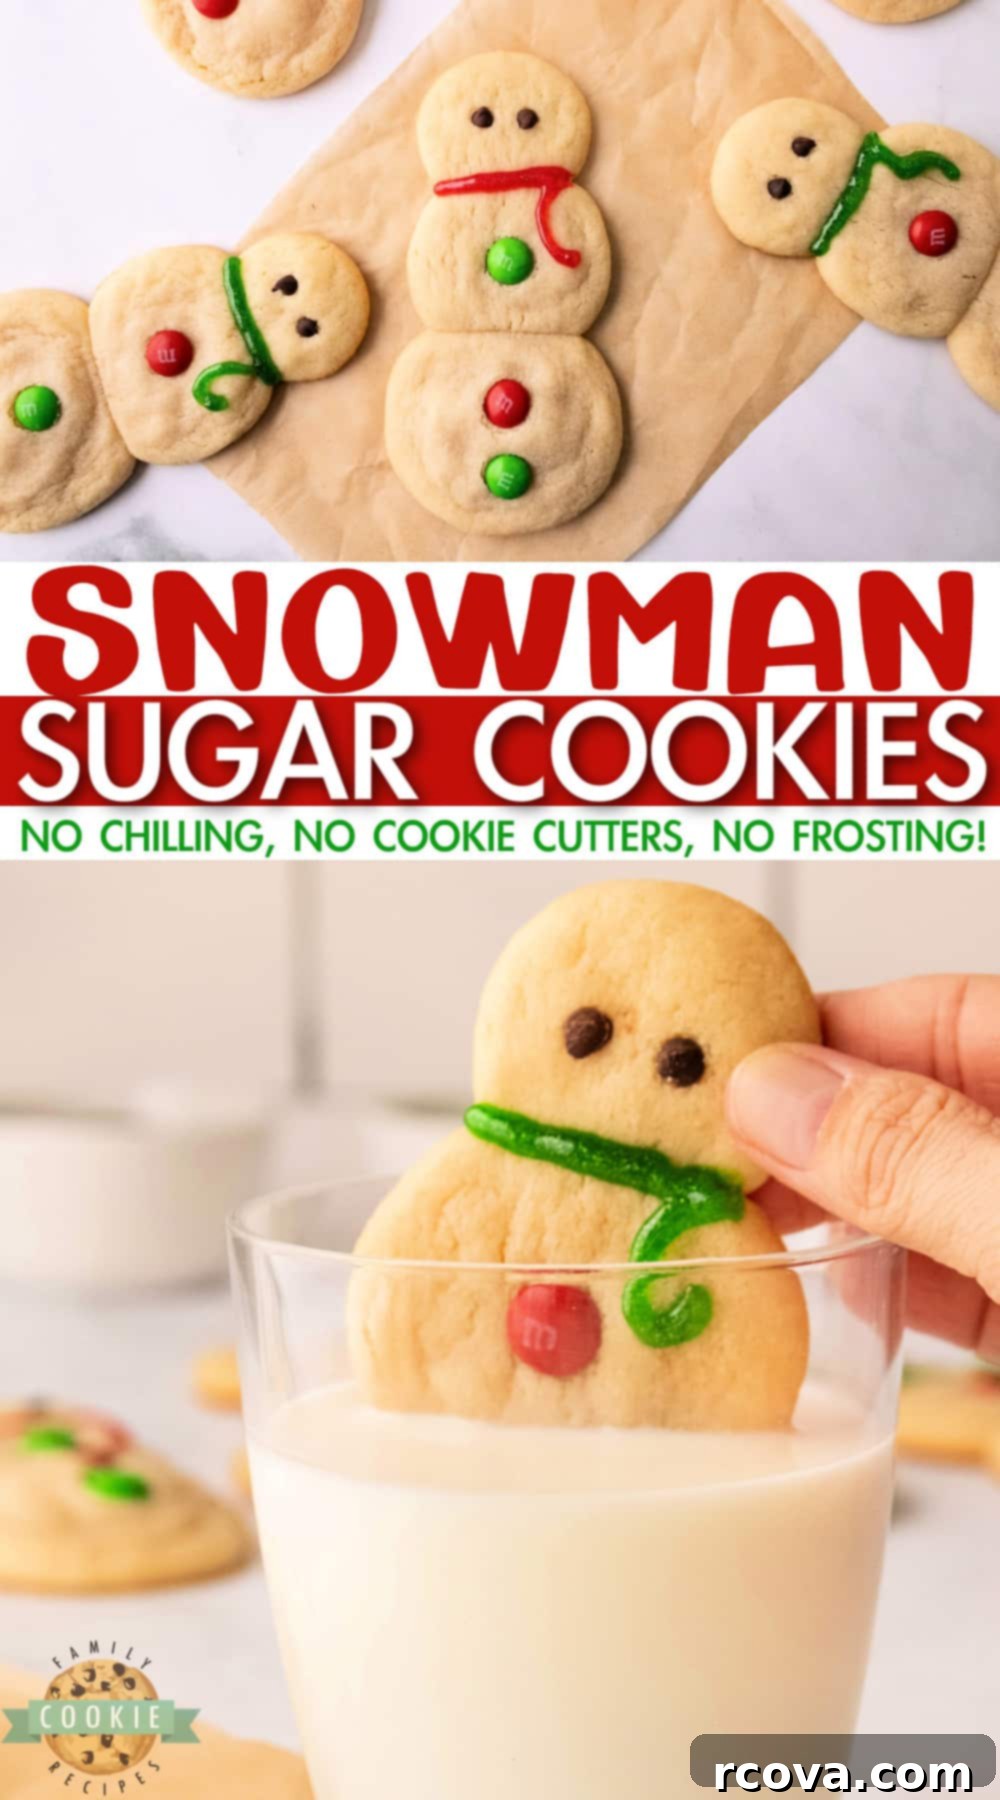
In conclusion, these Snowman Sugar Cookies are truly a celebration of holiday baking made simple. Their irresistible soft, chewy texture and rich vanilla flavor make them a standout treat that everyone will adore. The ingenious no-chill dough and ball-forming method mean you can skip the cookie cutters and complicated frosting, making them perfect for bakers of all skill levels, from beginners to seasoned pros. Whether you’re baking for family, friends, a festive gathering, or simply to enjoy a sweet moment with a warm cup of cocoa, these charming snowmen are guaranteed to bring smiles and holiday cheer. Enjoy the magic of creating these delicious, fuss-free cookies this season and make them a cherished part of your holiday traditions!
