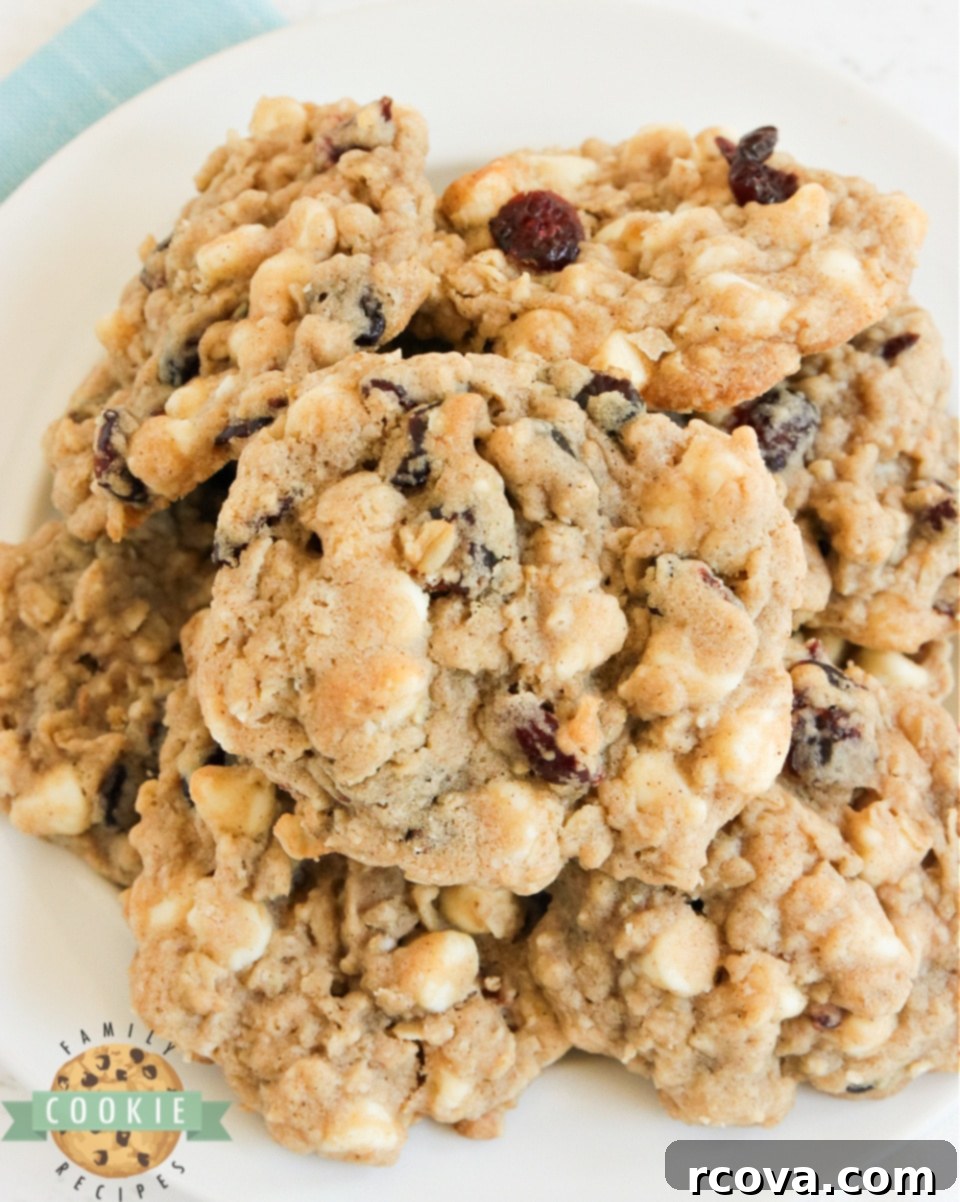
Irresistibly Chewy White Chocolate Cranberry Oatmeal Cookies: Your New Favorite Recipe!
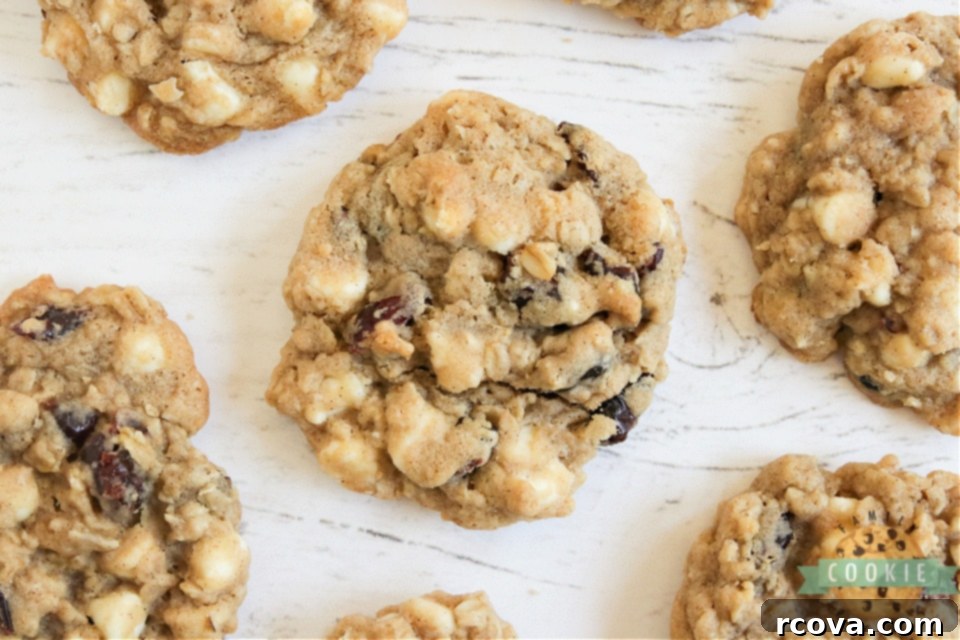
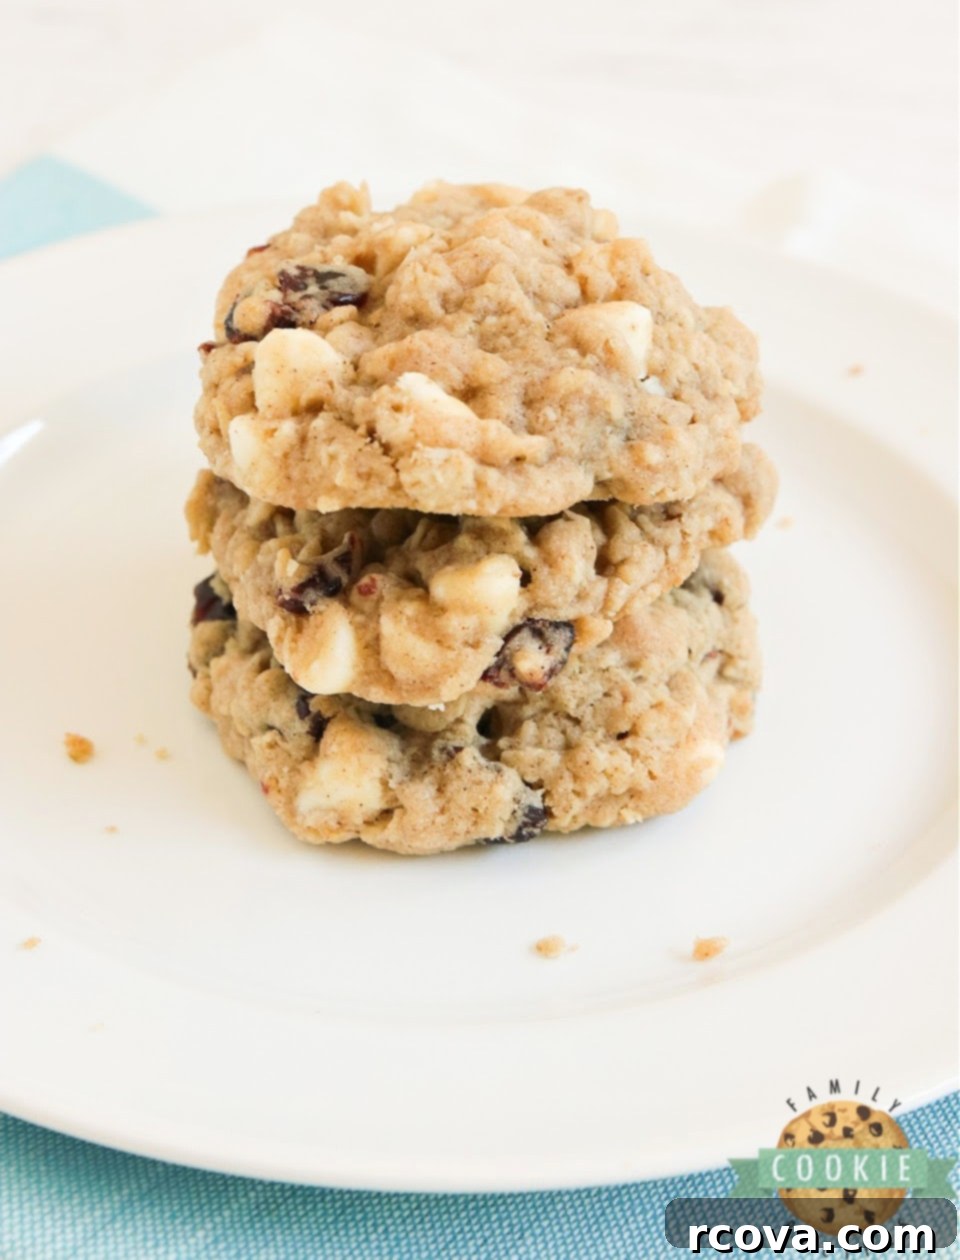
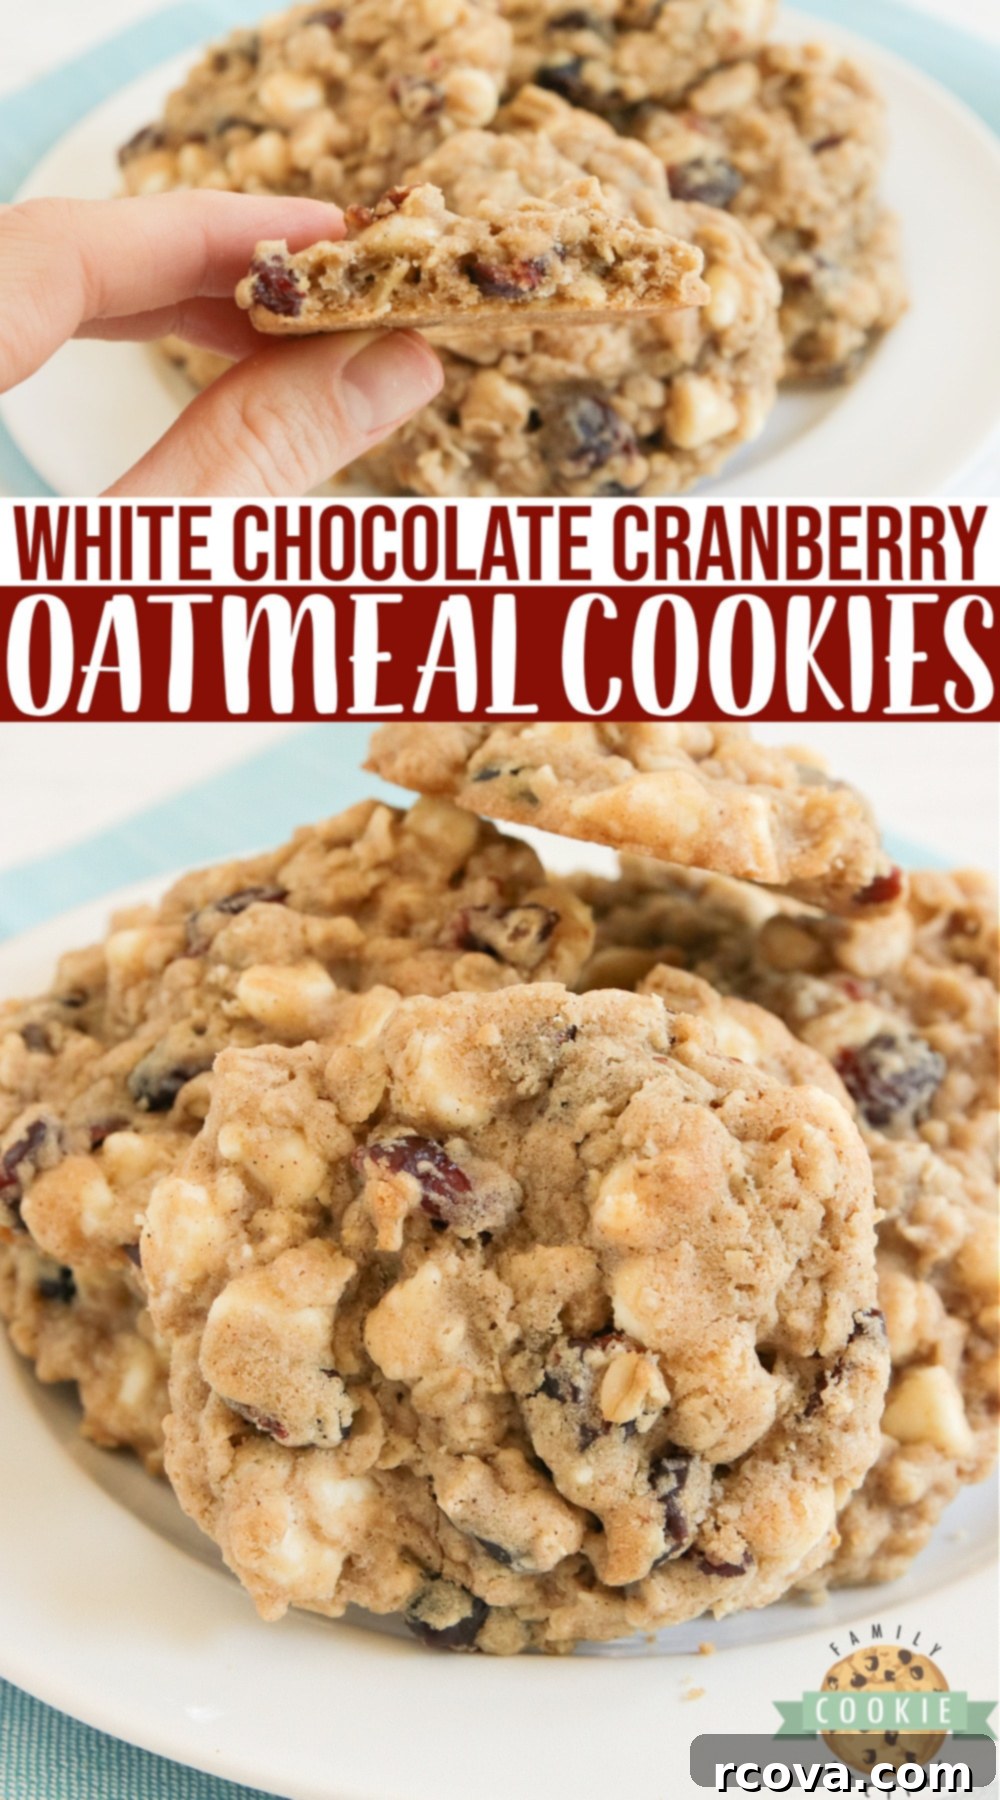
There’s something truly comforting and utterly delicious about a freshly baked batch of oatmeal cookies. But when you elevate them with the delightful tartness of dried cranberries and the sweet creaminess of white chocolate chips, you create a cookie masterpiece that’s hard to resist. These White Chocolate Cranberry Oatmeal Cookies are a classic for a reason – they’re wonderfully soft, perfectly chewy, and bursting with incredible flavor. Whether you’re a seasoned baker or just starting out, this recipe promises a batch of homemade cookies that will disappear faster than you can say “more, please!”
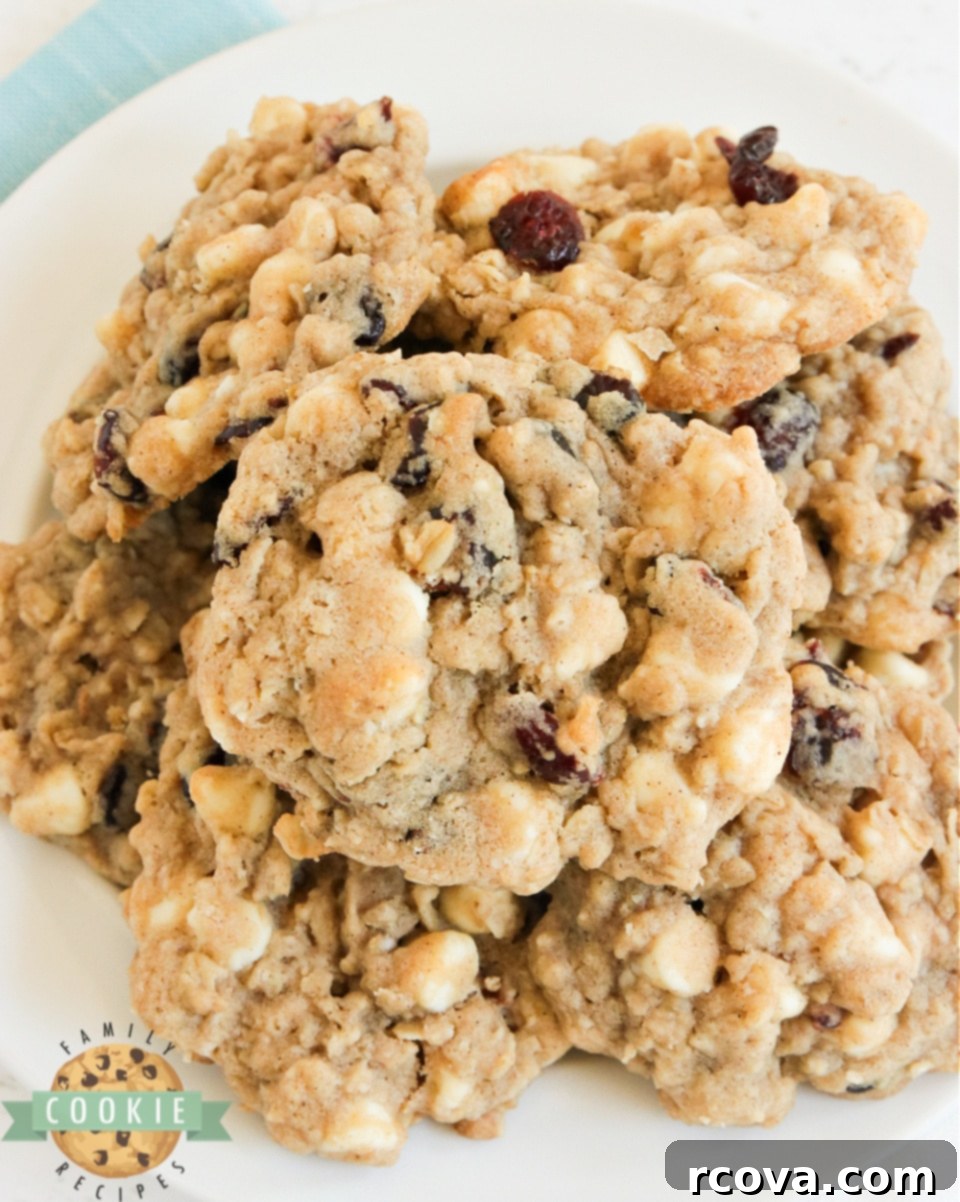
While classic oatmeal cookies are fantastic on their own, or with traditional additions like raisins or chocolate chips, the combination of white chocolate chips and dried cranberries is truly exceptional. The vibrant red cranberries provide a beautiful contrast and a tangy counterpoint to the rich white chocolate, creating a balanced and addictive flavor profile. Beyond the delightful mix-ins, what truly sets these cookies apart is the generous splash of vanilla extract and a full tablespoon of cinnamon. These warm spices don’t just add a hint of flavor; they infuse the entire cookie with an irresistible aroma and depth that makes every bite a pure joy. This recipe isn’t just about baking cookies; it’s about crafting an experience for your taste buds.
Unlocking the Secrets to the Best Oatmeal Cookies
Through years of experimenting with countless recipes, I’ve gathered invaluable tips that transform good oatmeal cookies into absolutely outstanding ones. Following these simple yet crucial steps will ensure your cookies are perfectly textured and flavored every single time.
- Achieve the Right Dough Consistency: One of the most common pitfalls in cookie baking is dough that’s either too dry or too sticky. If your dough feels excessively sticky after mixing, it might need a slight adjustment. Gradually add a little extra all-purpose flour, one tablespoon at a time, until the dough is manageable and no longer adheres too much to your hands or the mixing bowl. This ensures your cookies hold their shape and bake evenly without spreading too thin.
- Master the Art of Creaming Butter and Sugars: Don’t rush this vital step! Creaming butter and sugars together for a solid 2-3 minutes, until the mixture is visibly light and fluffy, is foundational to a superior cookie texture. This process incorporates air into the butter, which creates pockets that expand in the oven, leading to light, tender, and chewy cookies. Skipping or shortening this step can result in dense, flat cookies.
- Always Preheat Your Oven: This might seem obvious, but it’s often overlooked. A properly preheated oven ensures that your cookies start baking immediately at the correct temperature. This initial burst of heat helps the cookies set quickly, preventing excessive spreading and ensuring a consistent rise and even bake throughout the batch. An unheated or underheated oven can lead to unpredictable results.
- Invest in a Quality Cookie Scoop: For professional-looking cookies that bake uniformly, a cookie scoop is a game-changer. Using a scoop ensures that every portion of dough is precisely the same size. This consistency is key for even baking – all your cookies will be perfectly done at the same time, preventing some from being overbaked while others are still raw in the middle. Plus, it makes portioning dough incredibly quick and mess-free. Find a reliable cookie scoop here.
- Utilize Parchment Paper or Silicone Baking Mats: Say goodbye to scraped-off, misshapen cookies! Lining your baking sheets with either parchment paper or a silicone baking mat is a simple trick that makes a huge difference. Not only do these liners prevent sticking, making it incredibly easy to remove your cookies, but they also contribute to more even browning on the bottom. Your cookies will simply slide right off, perfectly intact.
- Avoid Overbaking at All Costs: This is perhaps the most critical tip for achieving perfectly soft and chewy oatmeal cookies. When I remove my cookies from the oven, they often look slightly underbaked in the center, with edges just barely beginning to turn golden. Resist the urge to bake them longer! Cookies continue to cook from residual heat on the hot baking sheet for a few minutes after being removed from the oven. Overbaking will lead to dry, crumbly cookies instead of the desirable soft and chewy texture.
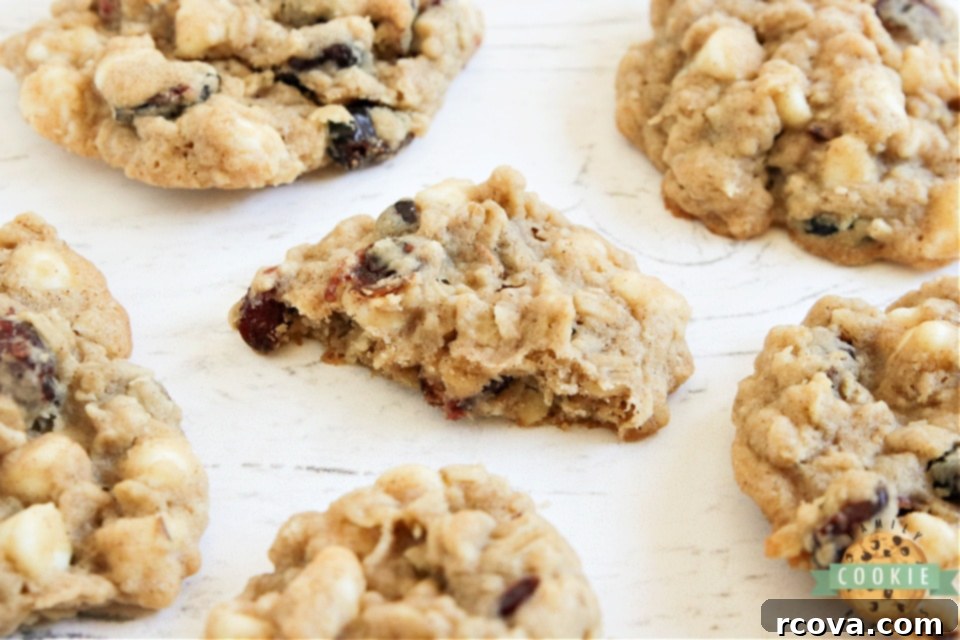
Quick Oats vs. Old-Fashioned Oats: Which is Best for Oatmeal Cookies?
When it comes to selecting oats for your oatmeal cookies, you have two primary choices: quick oats or old-fashioned rolled oats. The “best” option often boils down to personal preference and the texture you’re aiming for. Both types can yield delicious results, but they interact with the dough differently.
I personally gravitate towards using old-fashioned rolled oats in this White Chocolate Cranberry Oatmeal Cookies recipe. Their larger, flatter flakes provide a more substantial and satisfying chew to the cookies, enhancing that quintessential oatmeal texture. When you bite into a cookie made with old-fashioned oats, you get a delightful sense of “eating real oatmeal,” which, let’s be honest, makes it a little easier to justify enjoying a few for breakfast! The hearty texture they impart truly elevates the cookie experience, making them incredibly satisfying and wonderfully chewy.
On the other hand, if you opt for quick oats, your cookies will typically be a bit denser and have a slightly puffier appearance. Quick oats are pre-cooked, dried, and then rolled and cut into smaller, thinner pieces, allowing them to absorb liquid more rapidly. This faster absorption means they blend more seamlessly into the dough, resulting in a less distinct oat texture. While still tasty, the chewiness factor is often reduced. If you have only quick oats on hand, don’t hesitate to use them! The cookies will still be delicious. For those who enjoy a nuanced texture, a combination of both quick oats and old-fashioned oats can also be a fantastic compromise, offering a balance of chewiness and a slightly softer crumb. Experiment to find your perfect oat ratio!
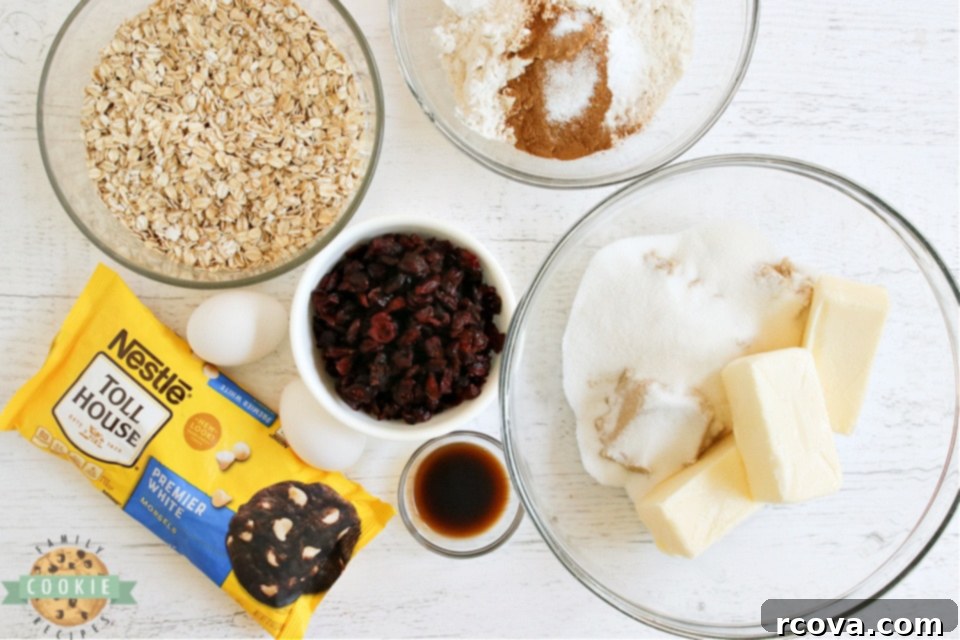
Essential Ingredients for Perfect White Chocolate Cranberry Oatmeal Cookies
Crafting these delectable cookies relies on a precise combination of quality ingredients. Here’s a closer look at what you’ll need and why each component is crucial:
- All-Purpose Flour: This is the backbone of most cookie recipes. All-purpose flour provides the necessary structure without making the cookies too dense. While it’s my go-to, you can experiment with cake flour for a slightly more tender crumb, or even swap a portion of it with whole wheat flour for a nuttier flavor and added fiber. Keep in mind that altering the flour type will subtly change the final taste and consistency.
- Ground Cinnamon: A non-negotiable ingredient for these oatmeal cookies! This recipe calls for an entire tablespoon of ground cinnamon, which might seem like a lot, but trust me, it’s essential. The warm, inviting spice of cinnamon pairs exquisitely with the wholesome oats and tangy cranberries, infusing the cookies with an incredible depth of flavor and an irresistible aroma that truly makes them special. Do not omit or reduce it!
- Baking Soda and Salt: These two work in tandem to ensure your cookies have the right texture and balanced flavor. Baking soda acts as a leavening agent, helping the cookies rise and achieve a tender chewiness. Ensure your baking soda is fresh and not expired for optimal results. Salt, on the other hand, enhances all the other flavors, balancing the sweetness and making the cranberries and white chocolate truly shine.
- Unsalted Butter: You’ll need 1½ cups (which is equivalent to three standard sticks) of unsalted butter for this recipe. The key here is to ensure your butter is softened to room temperature. This is critical for the creaming process with the sugars, allowing air to be incorporated efficiently for light and airy cookies. Using cold butter will result in a dense, crumbly dough, while melted butter can lead to greasy, flat cookies.
- Brown Sugar and Granulated Sugar: The combination of both sugars is what gives these cookies their signature chewiness, moistness, and slight crispness at the edges. I typically use light brown sugar, which contributes molasses notes and moisture, but dark brown sugar can be used for a deeper, more pronounced caramel flavor. For the best texture, ensure your brown sugar is soft and fresh, without hard clumps. Granulated sugar adds to the overall sweetness and helps with spreading and crisping.
- Large Eggs: Two large eggs are essential binders, bringing all the ingredients together and adding moisture to the dough. They also contribute to the cookie’s structure and richness, ensuring a perfectly cohesive and tender result.
- Vanilla Extract: Just like the cinnamon, a full tablespoon of vanilla extract is crucial here! While you can certainly use less, I promise that this generous amount amplifies the overall flavor profile, adding warmth and sweetness that complements the other ingredients beautifully. For the most profound taste, opt for a high-quality pure vanilla extract.
- Old-Fashioned Rolled Oats: As discussed, I prefer old-fashioned oats for their superior chewiness and hearty texture, which gives these cookies a delightful substance. However, if quick oats are what you have, they will still work, resulting in a slightly denser and puffier cookie.
- White Chocolate Chips: A 12-ounce bag of white chocolate chips provides the perfect amount of creamy sweetness. These melt beautifully into the cookies, creating pockets of rich, sweet flavor that are simply divine. If you’re a true white chocolate enthusiast, feel free to add a bit extra!
- Dried Cranberries (Craisins): Often known by the popular brand name “Craisins,” these dried cranberries are the star partner to the white chocolate. Their tart and chewy nature cuts through the sweetness of the white chocolate, creating a dynamic flavor combination that keeps you coming back for more. They also add a lovely pop of color to the cookies.
How to Make White Chocolate Cranberry Oatmeal Cookies
Get ready to bake a batch of these amazing cookies by following these straightforward steps:
-
Preheat your oven to 350°F (175°C).
-
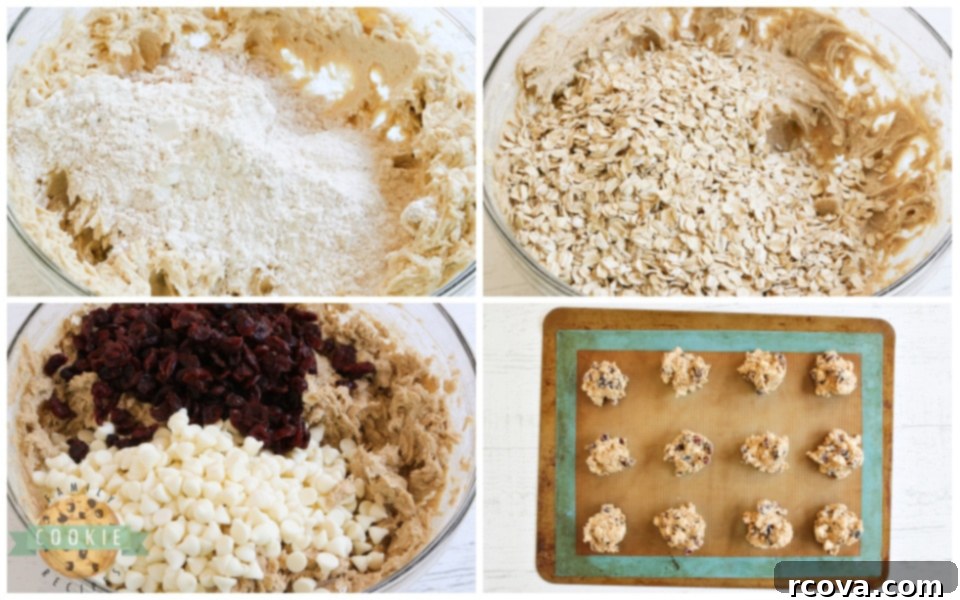
In a small bowl, whisk together the all-purpose flour, ground cinnamon, baking soda, and salt. Set this dry mixture aside.
-
In a separate, larger mixing bowl, using an electric mixer, cream together the softened butter, light brown sugar, and granulated sugar for at least 2-3 minutes. Continue mixing until the mixture is light in color and has a creamy, fluffy consistency.
-
Beat in the eggs one at a time, then add the vanilla extract. Mix for another 2-3 minutes until well combined and fluffy.
-
Gradually add the reserved dry flour mixture to the wet ingredients. Mix on low speed just until everything is combined and no streaks of flour remain. Be careful not to overmix at this stage.
-
Stir in the old-fashioned rolled oats. Mix gently until they are fully incorporated into the cookie dough.
-
Finally, gently fold in the dried cranberries and white chocolate chips. Mix just until they are barely combined throughout the dough. Remember, overmixing after adding the flour and mix-ins can lead to tough cookies.
-
Using a cookie scoop (approximately 1.5-2 tablespoons per cookie), drop rounded spoonfuls of dough onto prepared cookie sheets. I highly recommend using silicone baking mats for easy release and even baking, but parchment paper or lightly greased cookie sheets also work well.
-
Bake the cookies for approximately 10-12 minutes. Look for the edges to be just barely starting to turn golden brown, while the centers still look slightly soft and underbaked. This is crucial for chewy cookies! Allow the cookies to cool on the baking sheets for a few minutes (about 5-7 minutes) before carefully transferring them to a wire rack to cool completely.
WHITE CHOCOLATE CRANBERRY OATMEAL COOKIES
Print
Pin
Rate
Ingredients
- 2 cups all-purpose flour
- 1 Tbsp ground cinnamon
- 1 tsp baking soda
- ½ tsp salt
- 1 ½ cups butter softened to room temperature
- 1 cup light brown sugar
- ½ cup sugar
- 2 eggs
- 1 Tbsp vanilla extract
- 3 cups old-fashioned rolled oats
- 1 bag 12 oz white chocolate chips
- 2 cups dried cranberries Craisins
Instructions
-
Preheat the oven to 350°.
-
Mix the flour, cinnamon, baking soda and salt together in a small bowl and set aside.
-
In a larger bowl, cream the butter and sugars together for at least 2-3 minutes, until light and creamy.
-
Add the eggs and vanilla and mix for another 2-3 minutes.
-
Add the dry mixture and mix just until combined.
-
Stir in the oats, mixing just until they are fully incorporated in the dough.
-
Fold in the dried cranberries and the white chocolate chips, mixing just until barely combined. Do not overmix the dough after you have added the flour mixture!
-
Use a cookie scoop to scoop the dough onto prepared cookie sheets. I prefer to use silicone baking mats, but parchment paper or lightly greased cookie sheets work fine as well.
-
Bake the cookies for about 10-12 minutes, or until the edges just barely start to brown. Let the cookies cool for a few minutes on the baking sheets before transferring to a wire rack to cool completely.
Nutrition
Effortless Ways to Soften Butter to Room Temperature
Achieving perfectly softened butter is a fundamental step for many baking recipes, especially cookies, as it directly impacts the texture of your final product. Butter at room temperature creams beautifully with sugar, creating that light and airy foundation for chewy cookies. Ideally, you’d plan ahead and let your butter sit on the counter for a few hours. However, life happens, and we’re not always that prepared! Here are a few reliable tricks to get your butter to the perfect consistency in minutes:
- The Microwave Method (with caution): This is undeniably the quickest method, but it requires careful attention to avoid melting the butter entirely, which can negatively affect your cookie texture. Place a whole stick of butter (unwrapped, unless it’s in a microwave-safe paper wrapper) in your microwave. Microwave it on a low power setting (like 30% or 50% power) for short bursts of 6-7 seconds. After each interval, gently press the butter with your finger. You’re looking for it to be pliable and easily indented, but not oily or shiny (which indicates melting). If it’s still quite firm, give it another 5-7 seconds. As it starts to soften, reduce subsequent intervals to just 2-3 seconds to prevent accidental melting.
- The Defrost Setting Trick: My personal preference for microwaving butter is to use the defrost setting. While it takes a little longer—typically closer to 30 seconds for a full stick—it seems to provide a gentler, more even softening without the risk of accidentally creating liquid butter pools. It’s a fantastic alternative if your microwave has this feature and you want to minimize risk.
- The Grating Method: For a no-microwave approach, you can grate cold butter using the large holes of a box grater. The small shreds will come to room temperature much faster, usually within 10-15 minutes, allowing you to proceed with your recipe without significant delay.
- The Water Bath Method: Cut your cold butter into smaller pieces and place them in a small, heat-proof bowl. Fill a larger bowl with warm (not hot) water and set the smaller bowl inside, ensuring no water gets into the butter. The gentle warmth will soften the butter evenly in about 10-15 minutes.
Remember, the goal is “room temperature softened,” not melted. Properly softened butter will blend smoothly with sugar, creating a creamy base that results in wonderfully textured cookies.
Troubleshooting: Why Do My Oatmeal Cookies Burn on the Bottom But Remain Undercooked in the Middle?
There’s nothing more frustrating than pulling a batch of cookies from the oven, only to find their bottoms scorched while their centers are still disappointingly raw. If this sounds like a recurring problem in your kitchen, the culprit is most likely your baking equipment or baking practices. Let’s break down the common reasons and how to fix them for perfectly baked oatmeal cookies:
- Dark-Colored Baking Sheets: The most frequent offender is often the color of your cookie sheets. Dark-colored pans absorb and retain heat much more efficiently than lighter ones. This intense heat transfer means the bottom of your cookies cooks and browns (or even burns) at a much faster rate than the rest of the cookie can bake through. If you’re consistently experiencing burnt bottoms, consider switching to lighter-colored, reflective aluminum baking sheets. These distribute heat more gently and evenly, allowing the cookies to bake through before the bottoms overcook.
- Excessive Cooking Spray: While cooking spray seems like a good way to prevent sticking, using too much can actually contribute to burnt bottoms. The oils in cooking spray can heat up rapidly, essentially frying the bottom of your cookies. It’s best to use it sparingly, or ideally, replace it with more reliable non-stick alternatives.
- The Solution: Silicone Baking Mats and Parchment Paper: As mentioned in our tips for the best oatmeal cookies, I’ve become a huge proponent of silicone baking mats over the past few years. They are truly revolutionary! These mats provide an excellent non-stick surface, eliminating the need for cooking spray or grease. More importantly, they create a gentle barrier between the hot metal of the baking sheet and the cookie dough, promoting incredibly even baking and preventing burnt bottoms. Parchment paper serves a similar function and is also a fantastic choice. Both options ensure your cookies release effortlessly from the tray, keeping them in perfect shape every time.
By making a simple swap from dark, greased pans to lighter ones lined with parchment paper or silicone mats, you’ll notice a dramatic improvement in how your white chocolate cranberry oatmeal cookies bake, ensuring tender, evenly cooked centers and perfectly golden bottoms.
Other Irresistible Oatmeal Cookie Recipes We Adore!
If you’ve fallen in love with these white chocolate cranberry oatmeal cookies, you’ll be thrilled to discover the versatility of oatmeal in baking. Here are some more of our favorite oatmeal cookie recipes that are sure to become staples in your kitchen:
- Fudgy Oatmeal Cookie Bars
- Homemade Oatmeal Cream Pies
- White Chocolate Cherry Oatmeal Cookies
- Oatmeal Chocolate Chip Cookie Bars
- Classic Chocolate Chip Oatmeal Cookies
- Microwave Oatmeal Chocolate Chip Cookies
- Chewy Toffee Oatmeal Cookies
- Sweet Blackberry Oatmeal Cookies
- Our Best Oatmeal Raisin Cookies
- Peanut Butter Oatmeal Chocolate Chip Cookies
- The Best Monster Cookies
- Healthy Banana Oatmeal Cookies
- Delicious Caramel Apple Oatmeal Cookies


A few weeks ago, our family had the most wonderful opportunity to escape to the beautiful beaches of Panama City, Florida. It was truly an amazing trip, filled with sunshine, laughter, and precious family moments. My siblings were also there with their families, and it was so much fun watching all the cousins play together, building sandcastles and splashing in the warm ocean water. The weather was absolutely perfect, and the clear, warm water was incredibly inviting. It was exactly what we needed – a few days to truly relax, unwind, and create lasting memories together.
Traveling with a two-year-old always comes with its unique set of challenges, and I admit I was a little apprehensive about the long flights. However, my little one surprised us all! She absolutely adored the flights, but not for the reasons you might expect. These days, she’s utterly fascinated by buckles, and her new obsession became the airplane seatbelt. I had packed an arsenal of snacks, toys, and activities to keep her occupied, but she spent about 90% of our flying time simply opening and closing that seatbelt. It was an unexpected source of entertainment, and honestly, if it kept her happy and occupied for the entire journey, I have zero complaints! It just goes to show that sometimes, the simplest things can bring the most joy, especially when you’re a curious toddler. It was a delightful and memorable family vacation, made even sweeter by those perfectly happy flights.

