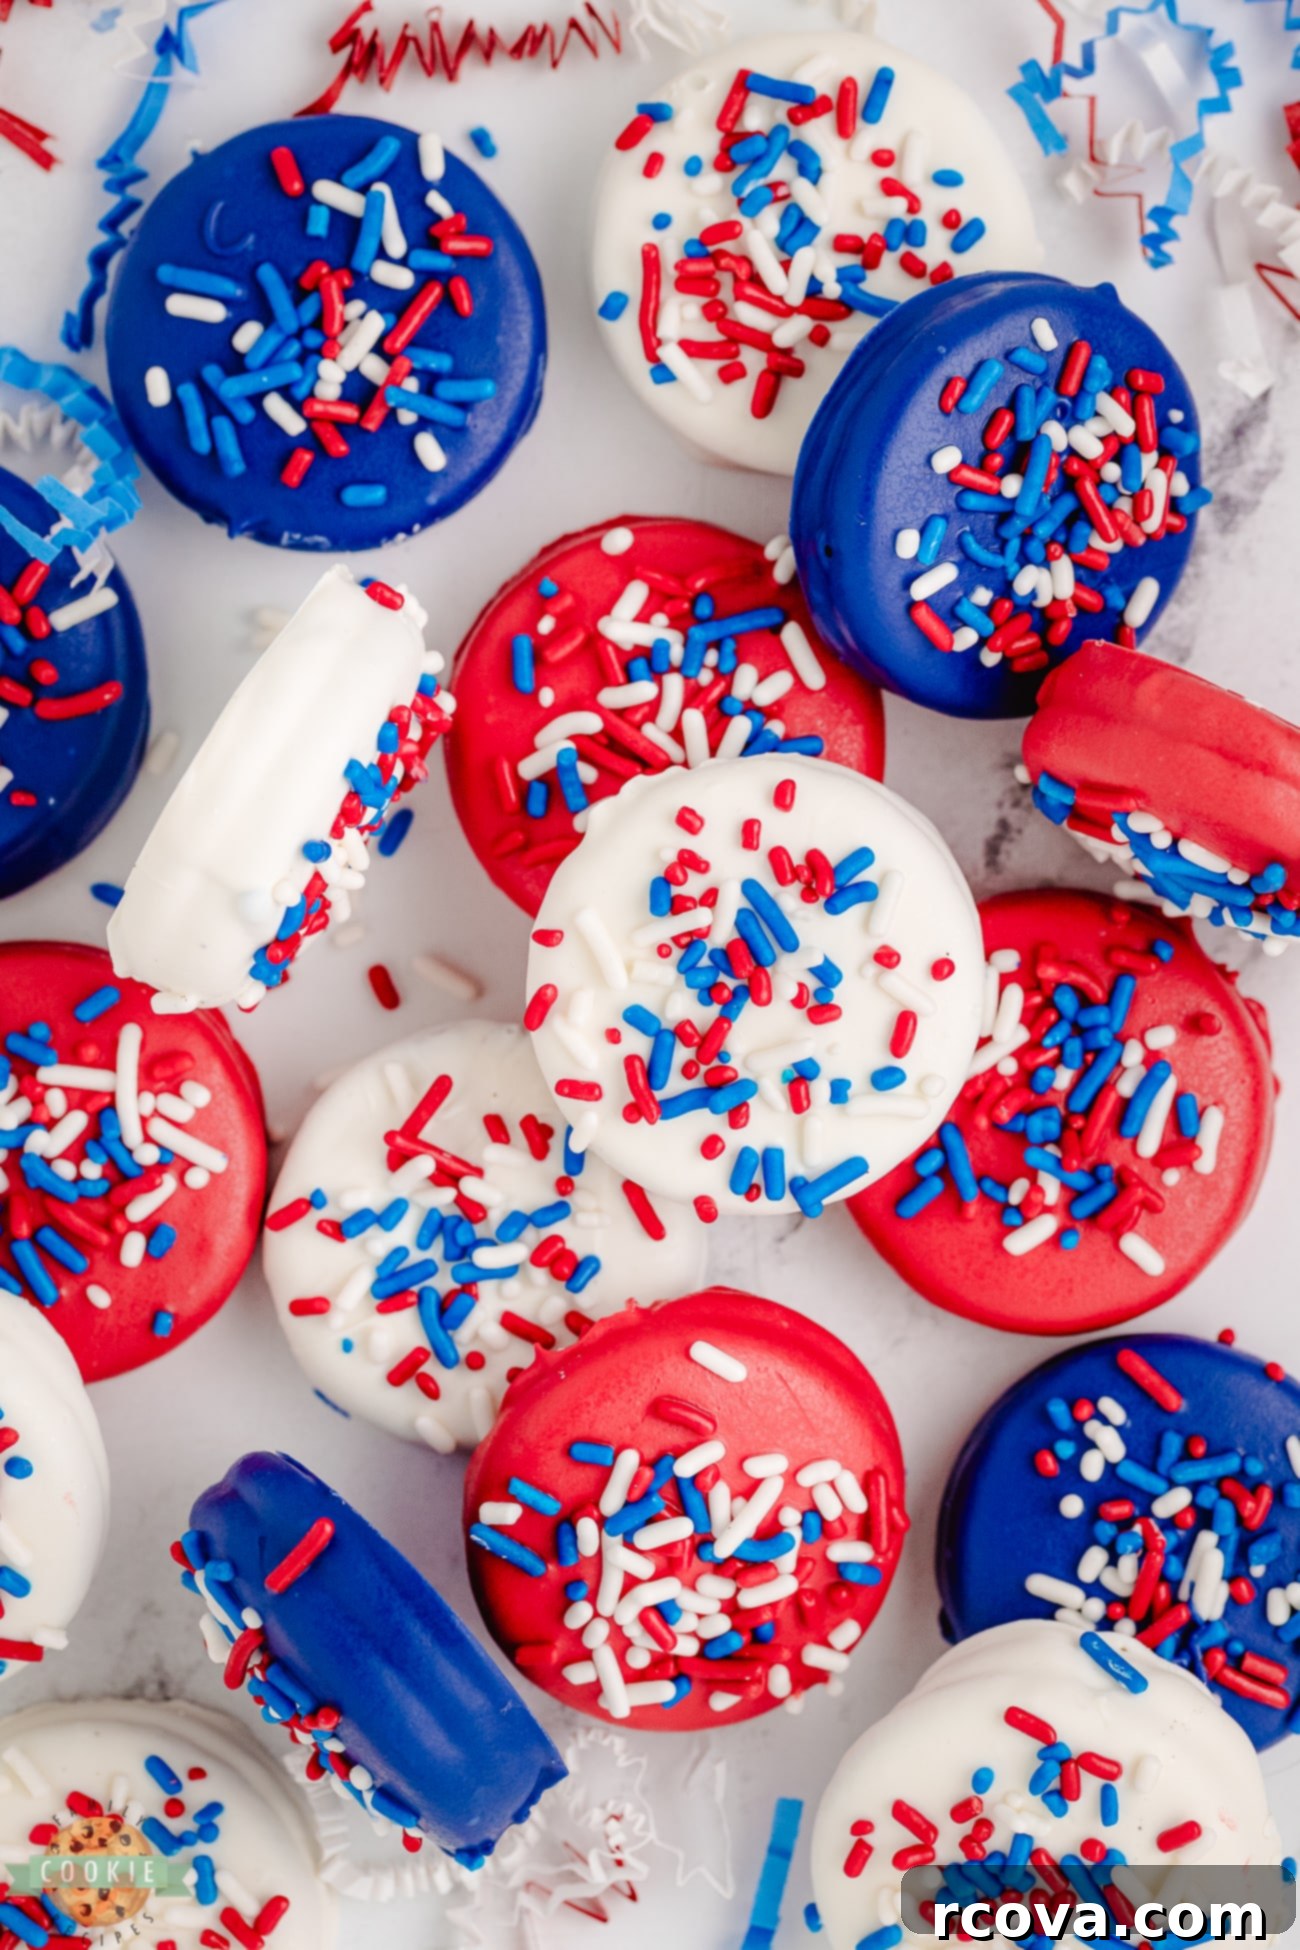
Delicious Red, White, & Blue Chocolate Covered Oreos: The Ultimate Patriotic Treat!
Prepare to delight your taste buds and impress your guests with these incredibly easy and undeniably festive Red, White, & Blue Chocolate Covered Oreos! Perfect for the 4th of July, Memorial Day, Labor Day, or any patriotic celebration, these chocolate dipped Oreo cookies are adorned with vibrant holiday sprinkles, making them an instant hit. This no-bake dessert combines the classic crunch of an Oreo with a smooth, sweet chocolate coating, creating a treat that’s as delicious as it is visually stunning. Whether you’re hosting a backyard barbecue, attending a potluck, or simply looking for a fun activity with the kids, these patriotic Oreos are a guaranteed crowd-pleaser that brings a burst of national pride to your dessert table.
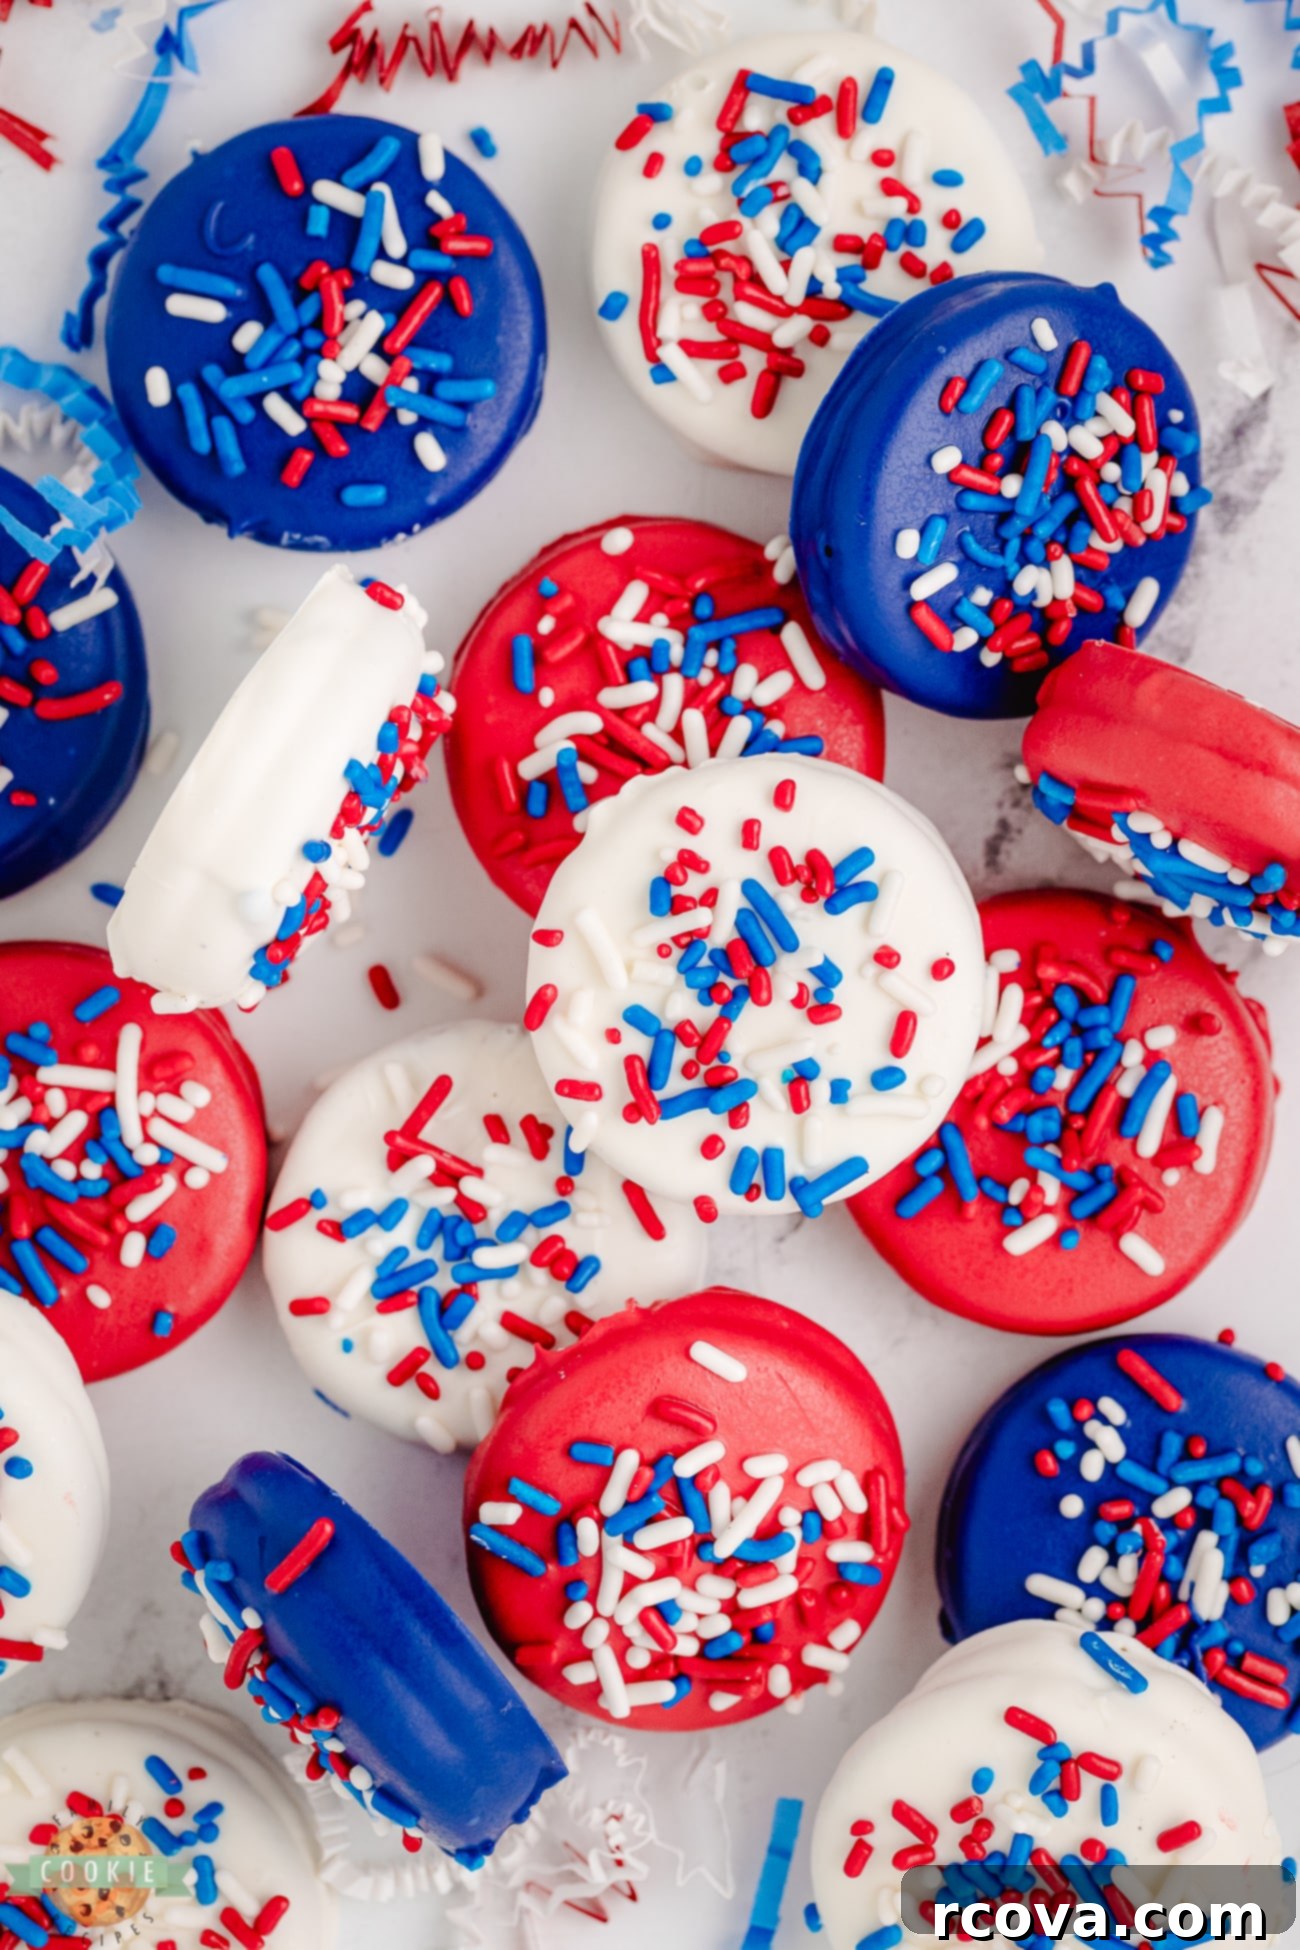
Crafting these delectable chocolate covered Oreos requires minimal effort and only a handful of readily available ingredients, positioning them as an ideal candidate for a quick and easy 4th of July dessert. The vibrant red, white, and blue sprinkles are not merely decorative; they add a delightful textural contrast and infuse each bite with a fun, celebratory spirit. By opting for high-quality white chocolate melting wafers, you ensure a perfectly smooth and glossy finish, transforming ordinary Oreo cookies into extraordinary, eye-catching confections that will have everyone reaching for more.
Why These Patriotic Chocolate Dipped Oreos Are a Must-Try
Searching for a dessert that’s not only a feast for the eyes but also incredibly simple to prepare for your next patriotic gathering? Your quest ends here with these charming chocolate covered Oreos! These delightful treats are a testament to how effortlessly you can elevate a classic snack into a show-stopping dessert. Their ease of preparation means you can focus more on enjoying the festivities and less on complex baking.
Beyond their patriotic allure, these cookies deliver on taste. The beloved combination of the rich, crunchy chocolate cookie and the creamy, sweet white chocolate coating creates a symphony of flavors and textures that is universally adored. The addition of colorful sprinkles enhances the experience, offering a playful crunch and a captivating visual appeal. Serve them at your next celebration – be it the 4th of July, Memorial Day picnic, or a Labor Day cookout – and get ready for rave reviews. These fun and festive chocolate treats are destined to become a staple at all your patriotic events!
Reasons You’ll Adore This Red, White, & Blue Oreo Recipe
- Effortlessly Simple to Follow: This recipe stands out for its incredible simplicity. With just a few staple ingredients and basic kitchen tools, you can effortlessly whip up a batch of these impressive chocolate covered Oreos in no time. It’s perfect for beginner bakers or those looking for a quick yet impactful dessert. The straightforward dipping process ensures success every time.
- Remarkably Customizable for Any Occasion: One of the greatest advantages of this recipe is its versatility. While designed for patriotic holidays with red, white, and blue, feel free to unleash your creativity! Easily swap out the sprinkle colors to match any theme – pastels for Easter, orange and black for Halloween, or specific team colors for a game day. You can even experiment with different types of chocolate, such as milk or dark chocolate, for a varied flavor profile.
- Irresistible Taste & Delightful Texture: The ultimate reason to love this recipe is the delicious outcome. The iconic crunch of the Oreo cookie perfectly complements the smooth, melt-in-your-mouth white chocolate shell. Each bite offers a satisfying contrast, while the festive sprinkles add an extra layer of texture and a burst of color. It’s a sweet indulgence that appeals to all ages, making it a guaranteed crowd-pleaser at any gathering.
- A Perfect No-Bake Solution: Forget turning on the oven! This recipe is entirely no-bake, which is fantastic for hot summer days when you want to avoid heating up your kitchen. It’s a convenient option that delivers gourmet results without the fuss of baking.
- Visually Stunning & Photo-Ready: These cookies aren’t just tasty; they’re truly beautiful. The vibrant colors and polished chocolate coating make them an attractive addition to any dessert spread. They’re perfect for party platters, gift bags, or even for capturing those Instagram-worthy food photos.
Essential Ingredients for Your Patriotic Chocolate Oreos
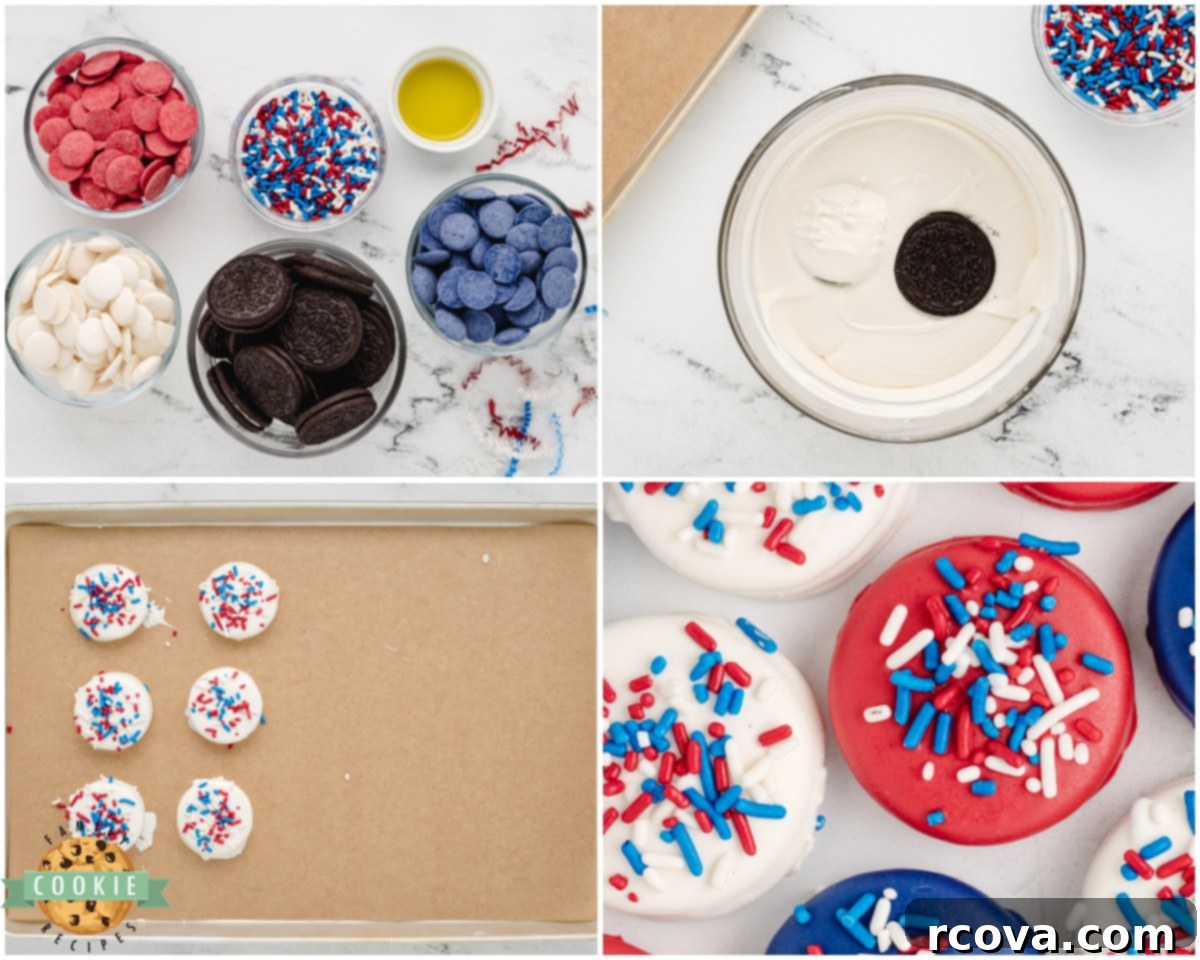
Gathering your ingredients for these delightful chocolate dipped Oreos is incredibly simple. Here’s what you’ll need to create a batch of 20 festive treats:
- Oreo Cookies: You’ll need one standard package of Oreo cookies, approximately 20 individual cookies, to achieve this simple and festive dessert. Classic Oreos work best for their iconic flavor and sturdy structure.
- White Chocolate Melting Wafers: For the smoothest, most professional-looking coating, use 2 cups of high-quality white chocolate melting wafers. These are specifically designed to melt evenly and set quickly, creating a beautiful, hard shell without seizing. Avoid regular white chocolate chips, as they contain stabilizers that can make them difficult to melt smoothly for dipping.
- Shortening: A small amount, 1 teaspoon of shortening, is crucial. It helps to thin the melted chocolate slightly, ensuring a silky-smooth consistency that makes dipping effortless and results in a perfectly uniform coating. This also prevents the chocolate from becoming too thick or gloppy.
- Patriotic Sprinkles: To achieve that perfect celebratory look, generously use red, white, and blue sprinkles. You can opt for a mix of jimmies, nonpareils, or even star-shaped sprinkles to enhance the festive appeal of your patriotic Oreos. These are added while the chocolate is still wet, ensuring they adhere beautifully.
Crafting Your Festive Red, White, & Blue Chocolate Covered Oreos: A Step-by-Step Guide
Follow these easy instructions to create perfect chocolate covered Oreos that are sure to impress:
Step 1: Preparation is Key
Before you begin melting chocolate, it’s essential to set up your workspace. Line a baking sheet with a sheet of parchment paper or wax paper. This non-stick surface will prevent your chocolate-dipped Oreos from sticking as they cool and set, making cleanup a breeze. Set this prepared baking sheet aside, ready for your beautifully coated cookies.
Step 2: Mastering the Melted Chocolate
In a microwave-safe bowl, combine your 2 cups of white chocolate melting wafers with 1 teaspoon of shortening. Place the bowl in the microwave and heat for 1 minute and 30 seconds. Do not stir immediately. Instead, allow the bowl to sit in the microwave for an additional 2 minutes after heating. This residual heat helps the wafers to melt more evenly. Carefully remove the bowl and stir the mixture gently with a spoon or spatula. You’ll notice the chocolate beginning to smooth out.
If the chocolate is not yet fully smooth, return it to the microwave. Heat in 30-second increments, allowing the chocolate to rest for a moment after each heating interval, then stir gently. Repeat this process until your chocolate mixture is entirely smooth, glossy, and free of any lumps. Achieving the right consistency here is key for easy dipping and a flawless finish.
Step 3: The Art of Dipping and Decorating
Once your chocolate is perfectly melted, it’s time for the fun part: dipping the Oreos! Carefully submerge each Oreo cookie into the melted white chocolate. Use a fork, or even better, a specialized Wilton dipping tool, to fully coat the cookie. Ensure the entire surface of the cookie is covered in chocolate.
Gently tap the fork against the side of the bowl to remove any excess chocolate. This prevents pooling and ensures a clean, even coating. Carefully transfer the dipped Oreo onto your prepared baking sheet.
Immediately after placing the dipped Oreo on the parchment paper, generously add your red, white, and blue sprinkles to the top while the chocolate is still wet. This ensures the sprinkles adhere firmly. For an extra touch of patriotic flair, consider melting an additional 2 tablespoons of red or blue chocolate wafers in a small piping bag or a corner of a ziplock bag. Snip a tiny corner and drizzle festive lines or patterns over the still-wet white chocolate for a truly professional look.
Step 4: Cooling and Enjoyment
Once all your chocolate covered Oreos are dipped and beautifully decorated, allow them to cool on the countertop. The chocolate will naturally set at room temperature, which typically takes about 1 hour. For faster setting, you can place the baking sheet in the refrigerator for about 15-20 minutes. Once the chocolate is completely firm, your festive treats are ready to be served and enjoyed!
Creative Serving Suggestions for Your Patriotic Oreo Cookies
Chocolate covered Oreos are inherently delightful, but with a little creativity, you can elevate their presentation and enjoyment even further. These versatile treats are perfect for any occasion, especially patriotic celebrations. Here are some inspired serving suggestions to make your red, white, and blue Oreos even more memorable:
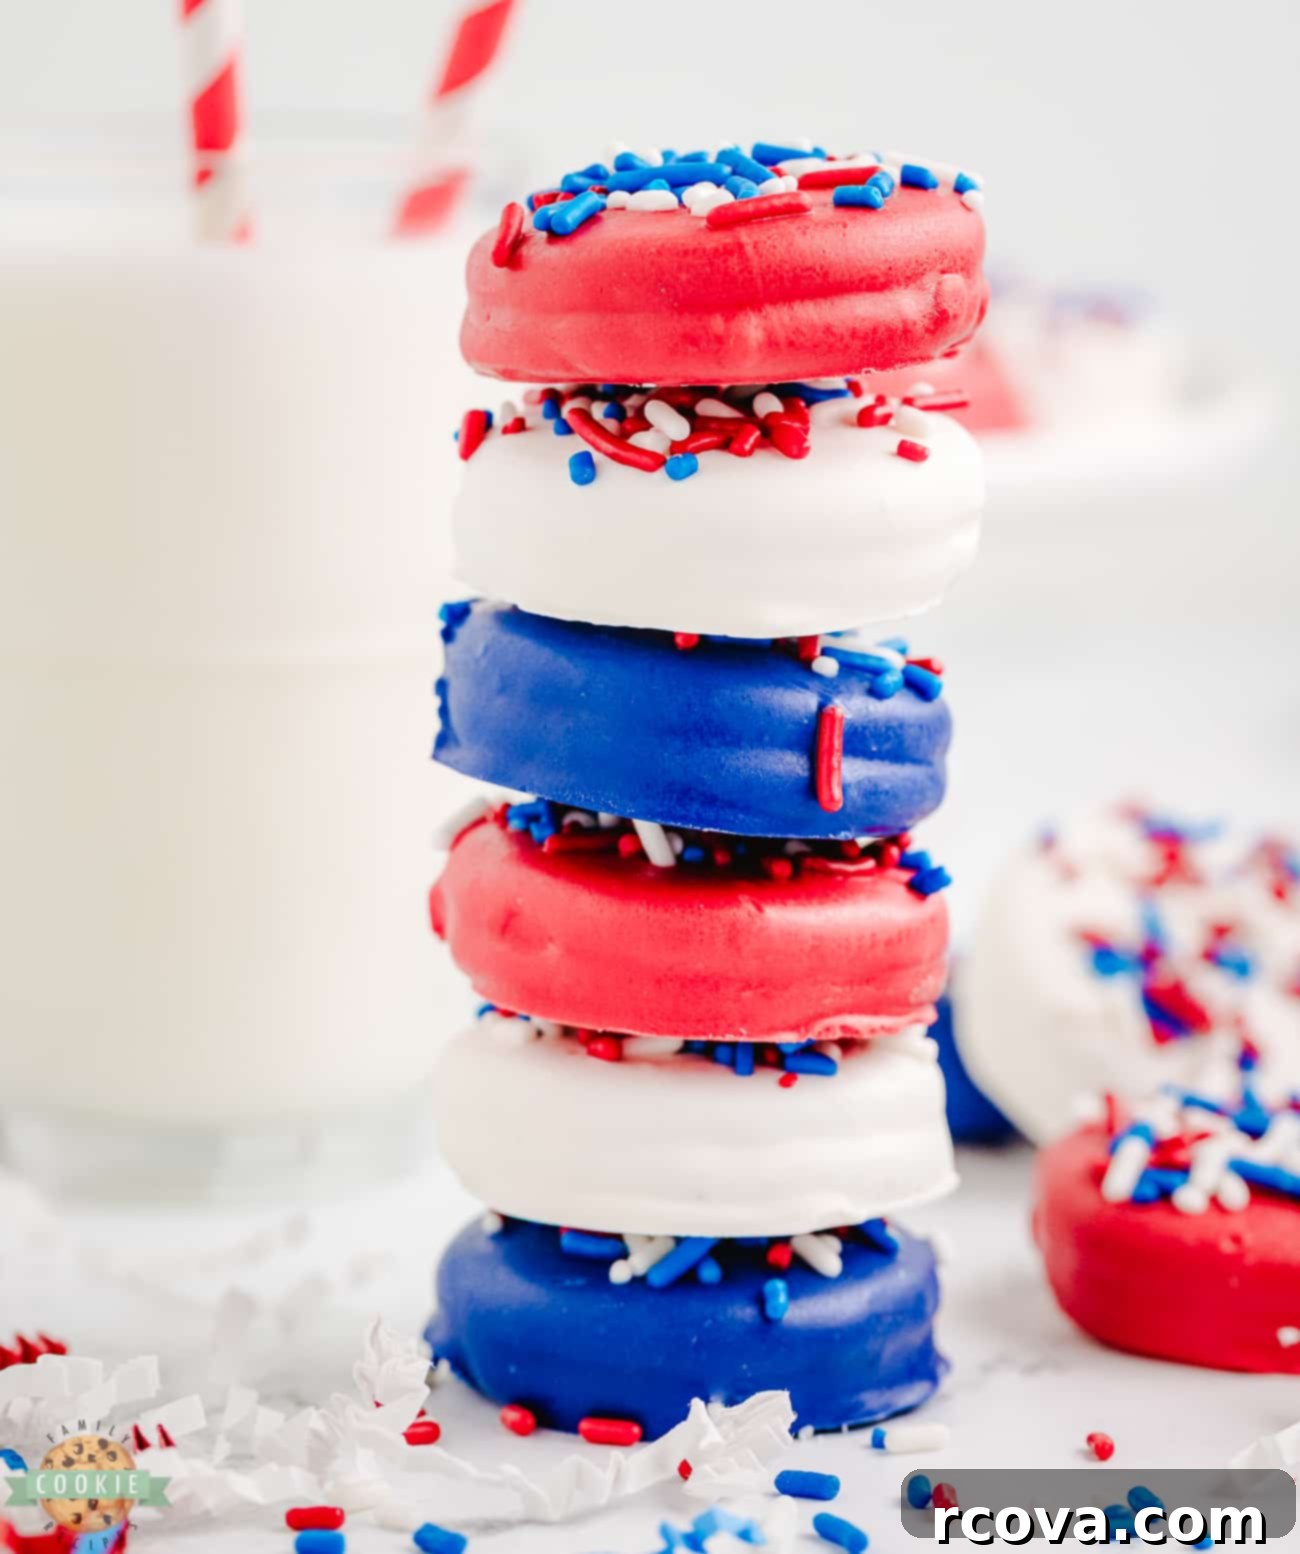
- Classic Pairing with Cold Milk: The ultimate companion for any Oreo cookie, a tall, cold glass of milk perfectly complements the creamy filling and sweet chocolate coating. It’s a timeless pairing that appeals to both children and adults.
- Elegant Display on a Festive Platter: Presentation matters! Arrange your vibrant patriotic Oreos on a beautiful platter to enhance their visual appeal. For a cohesive theme, choose red, white, and blue serving dishes or a classic silver platter for a touch of elegance. Consider arranging them in a pattern or alternating colors for an even more striking display.
- Enhance with Additional Toppings: While the sprinkles add a fantastic touch, don’t stop there! Explore other delicious toppings to add extra flavor and texture. A drizzle of contrasting melted chocolate (like dark or milk chocolate), crushed nuts (peanuts, pecans, or almonds), mini chocolate chips, or even a delicate swirl of caramel sauce or melted peanut butter can transform these cookies. Edible glitter or pearl dust can add a touch of sparkle for a truly special event.
- Thoughtful Gift Packaging: These homemade chocolate covered Oreos make wonderful gifts for hosts, teachers, or as party favors. Package them individually in clear cellophane bags, tied with a festive red, white, or blue ribbon. A small personalized tag can add an extra thoughtful touch, making them an ideal treat to share.
- Dessert Bar Centerpiece: Incorporate these colorful Oreos into a larger dessert bar spread. They pair beautifully with other patriotic treats like fruit tarts, mini cupcakes, or berry parfaits. Their vibrant colors will draw attention and add a celebratory focal point.
- Crumble as a Topping: Crush a few of your finished chocolate-covered Oreos and use them as a topping for ice cream sundaes, milkshakes, or even a cheesecake crust for an extra layer of flavor and crunch.
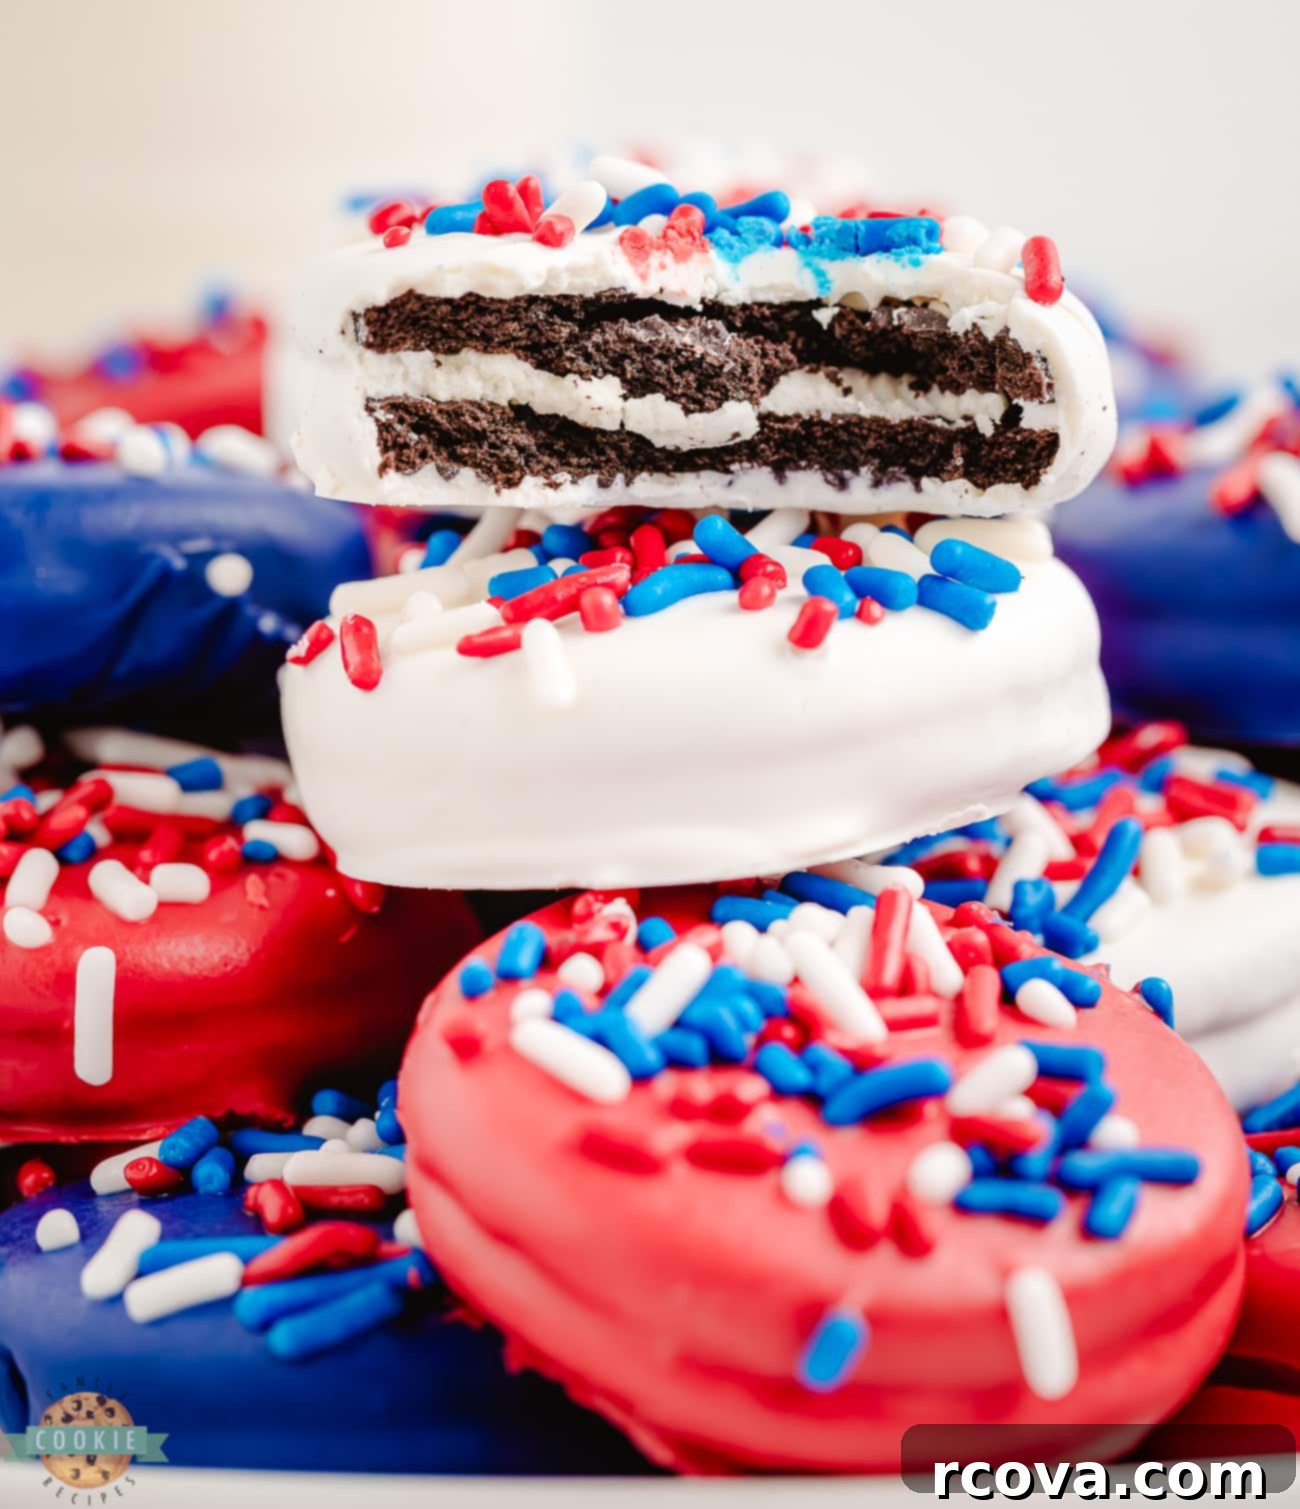
Red, White, & Blue Chocolate Covered Oreos
Print
Pin
Rate
Ingredients
- 20 Oreo cookies
- 2 cups white chocolate melting wafers
- 1 tsp shortening
- Patriotic Sprinkles (red, white, & blue)
Instructions
-
Prep: Line a baking sheet with parchment paper or wax paper and set it aside. This prepares a non-stick surface for your dipped cookies.
-
Melt Chocolate: In a microwave-safe bowl, combine white chocolate melting wafers and shortening. Microwave for 1 minute and 30 seconds. Do not stir immediately; let the bowl sit in the microwave for an additional 2 minutes, allowing residual heat to melt the chocolate further. Then, remove and stir gently until smooth.
-
If needed, return the chocolate to the microwave and heat in 30-second increments, stirring gently after each session, until the mixture is completely smooth and fully melted. This ensures a perfect dipping consistency.
-
Dip Cookies: Dip each Oreo cookie into the melted chocolate, using a fork or a dipping tool to ensure it’s fully coated. Tap off any excess chocolate gently and place the dipped Oreo onto the prepared baking sheet.
-
Decorate: While the chocolate is still wet, immediately add your red, white, & blue sprinkles to the top of the chocolate-dipped Oreo. For extra decoration, you can melt 2 tablespoons of red or blue chocolate wafers in a small piping bag, snip the corner, and drizzle patterns onto the cookies.
-
Set & Serve: Let all the decorated Oreos cool on the countertop at room temperature until the chocolate has completely set (about 1 hour), or refrigerate for 15-20 minutes for faster setting. Once firm, serve and enjoy your festive treats!
Notes
Nutrition
Storage and Preservation Tips for Chocolate Covered Oreos
Once your beautiful chocolate covered Oreos are complete, proper storage is essential to maintain their quality, crispness, and delicious flavor. Follow these guidelines to keep your treats fresh for as long as possible:
- Room Temperature Storage: For immediate enjoyment or short-term storage, place the cooled and set chocolate-covered Oreos in an airtight container. Store this container at room temperature, away from direct sunlight or any heat sources, as this can cause the chocolate to melt or become sticky. When stored correctly, these cookies will remain fresh and delicious for up to 1 week. Ensure the container is truly airtight to prevent moisture absorption, which can make the Oreos stale.
- Refrigeration (Optional, for quicker setting or warmer climates): While not strictly necessary for storage, if you live in a particularly warm climate or want the chocolate to set faster, you can place the baking sheet of dipped Oreos in the refrigerator for 15-20 minutes until firm. For longer refrigeration (beyond a few hours), transfer them to an airtight container to prevent them from absorbing odors or moisture. However, sometimes refrigerating can cause a slight condensation bloom on the chocolate, so room temperature is generally preferred for optimal appearance if possible.
- Freezing for Extended Preservation: If you’re looking to prepare these treats well in advance or have leftovers you want to save, freezing is an excellent option. Arrange the fully set chocolate covered Oreos in a single layer in a freezer-safe container or a heavy-duty freezer bag. If stacking, place parchment paper between layers to prevent sticking. Store them in the freezer for up to two months. When you’re ready to enjoy them, simply thaw the cookies at room temperature for a few hours before serving. This method helps preserve their texture and flavor beautifully.
Frequently Asked Questions About Chocolate Covered Oreos
Can I use regular chocolate chips for dipping Oreos?
While it is technically possible to use regular chocolate chips for dipping Oreos, it is generally not recommended for optimal results. Regular chocolate chips contain ingredients like stabilizers that are designed to help them hold their shape during baking, not melt smoothly for coating. This means they can be more challenging to melt into a thin, pourable consistency, often resulting in a thicker, gloppy coating that can seize or become difficult to work with. For the best, smoothest, and most professional-looking finish, we highly recommend using high-quality chocolate melting wafers or candy melts. These products are specifically formulated to melt effortlessly and set with a firm, glossy finish, giving you superior results for your chocolate dipped Oreos.
What are the steps to make chocolate covered Oreos using a mold?
Using a mold is a fantastic way to create perfectly shaped and uniform chocolate covered Oreos, especially if you’re aiming for a polished, professional look. Here’s how you do it:
- Melt Chocolate: Start by melting your chocolate wafers and a teaspoon of shortening in a double boiler or using the microwave method described in the main recipe, ensuring it’s smooth and fluid.
- Fill Molds: Pour a small amount of the melted chocolate into each cavity of your Oreo mold. Use a small brush or the back of a spoon to spread the chocolate up the sides of the mold, creating a thin, even layer. This forms the outer shell.
- Insert Oreos: Carefully place an Oreo cookie into each mold cavity, gently pressing it down so it sits snugly into the chocolate.
- Top with Chocolate: Cover the Oreo cookies with more melted chocolate, filling the cavity completely.
- Remove Air Bubbles: Gently tap the mold on your countertop a few times. This helps to release any trapped air bubbles, ensuring a smooth surface and preventing imperfections.
- Chill to Set: Place the filled mold into the refrigerator for about 15-20 minutes, or until the chocolate is completely set and firm.
- Demold and Enjoy: Once thoroughly chilled and set, carefully invert the mold and gently push the chocolate covered Oreos out. They should pop out easily, revealing beautifully formed treats.
Is it possible to create chocolate covered Oreos on a stick?
Absolutely! Making chocolate covered Oreos on a stick is a popular and fun variation, perfect for parties as they are easy to hold and eat. To achieve this, simply take a lollipop stick and carefully insert it into the cream filling of an Oreo cookie. Twist it gently to secure it without breaking the cookie. Once the stick is in place, proceed with dipping the Oreo in melted chocolate as described in the main recipe. Ensure the stick is also coated at the base for extra stability. This transformation turns your delicious cookies into delightful cake pop-style treats, making them even more appealing, especially for kids!

What are some creative ways to decorate chocolate covered Oreos?
Decorating chocolate covered Oreos is where you can truly let your creativity shine! Beyond the classic patriotic sprinkles, there are endless possibilities to make each cookie unique and perfectly suited for any event:
- Vary Chocolate Colors: Instead of just white chocolate, try dipping some Oreos in melted milk or dark chocolate. You can also purchase candy melts in various colors to create a rainbow assortment for birthdays or specific holiday themes.
- Drizzle Patterns: After the main chocolate coating has set, melt a contrasting color of chocolate (or candy melts) and drizzle it over the cookies in zigzags, spirals, or abstract patterns.
- Edible Glitters and Dusts: For a touch of elegance or sparkle, brush on edible glitter, pearl dust, or shimmery food paint once the chocolate has set.
- Crushed Candies or Nuts: While the chocolate is still wet, press finely crushed candies (like peppermints, M&M’s, or toffee bits) or chopped nuts (pecans, almonds) onto the surface for added texture and flavor.
- Miniature Candies: Affix small candies like mini chocolate chips, Reese’s Pieces, gummy bears, or even small sugar flowers onto the wet chocolate.
- Royal Icing Details: For advanced decorators, use royal icing to pipe intricate designs, names, or small festive images onto the set chocolate.
- Swirled Designs: Immediately after dipping an Oreo in one color of melted chocolate, drizzle a small amount of a contrasting color over it. Then, use a toothpick to swirl the two colors together to create beautiful marbled patterns.
Can I make these chocolate covered Oreos ahead of time?
Yes, absolutely! These chocolate covered Oreos are an excellent make-ahead dessert. You can prepare them up to a week in advance and store them in an airtight container at room temperature. This makes them a perfect stress-free option for busy party planning. For even longer storage, refer to the freezing instructions mentioned in the “Storage and Preservation” section.
What is the best way to prevent the chocolate from seizing?
Preventing chocolate from seizing (becoming thick, clumpy, and unusable) is crucial for smooth dipping. Here are key tips:
- Use Melting Wafers: As recommended, melting wafers or candy melts are less prone to seizing than regular chocolate chips.
- Avoid Water: Water is the enemy of melting chocolate. Ensure your bowl and any utensils are completely dry. Even a tiny drop of water can cause the chocolate to seize.
- Low Heat & Gradual Melting: Melt chocolate slowly, whether in the microwave or a double boiler. High heat can cause the chocolate to burn or seize. In the microwave, use short bursts and stir frequently. For a double boiler, ensure the water in the bottom pot never touches the bottom of the top bowl, and keep the heat at a gentle simmer, not a rolling boil.
- Add Shortening (or Oil): Adding a small amount of shortening (as in this recipe) or a neutral oil like coconut oil (about 1 tsp per cup of chocolate) helps to thin the chocolate and makes it more stable and resistant to seizing.
Discover More Festive & Patriotic Recipes!
If you’ve enjoyed these patriotic chocolate-covered Oreos, you’re in for a treat! We have a delightful collection of other festive and easy-to-make recipes that are perfect for celebrating American holidays. Explore these favorites to add more red, white, and blue deliciousness to your table:
- Patriotic Swirled Sugar Cookies: Beautifully marbled cookies that are as fun to make as they are to eat.
- Patriotic Cookie Cake: A giant, shareable cookie that’s perfect for a crowd.
- Easy 4th of July Cookies: A quick and simple assortment of cookies ideal for summer celebrations.
- Patriotic Cookie Bars: Effortless to bake and easy to serve, these bars are packed with festive colors.
- Krispy M&M 4th of July Cookies: A delightful crunch with every patriotic bite.
- Red Velvet Cake Mix Cookies: Soft, rich, and perfectly colored for any patriotic occasion.
Explore Our Other Amazing Cookie Recipes!
Beyond patriotic themes, our kitchen is always bustling with new and classic cookie creations. Dive into our wider collection of tried-and-true cookie recipes that are perfect for any craving or gathering:
- Frosted Lemon Sugar Cookies: Bright, zesty, and incredibly soft cookies with a sweet frosting.
- Strawberry Cake Mix Sandwich Cookies: Two soft strawberry cookies hugging a creamy filling – pure delight!
- Soft Sugar Cookies: The quintessential soft and chewy sugar cookie, perfect for decorating.
- Cake Mix Rolo Cookies: Easy, chewy cookies with a hidden caramel surprise.
- Watermelon Sugar Cookies: Fun, fruity, and visually appealing cookies that taste like summer.
- Cream Cheese Sugar Cookies: The addition of cream cheese makes these sugar cookies extra tender and flavorful.
- Strawberry Lemonade Cake Mix Cookies: A sweet and tangy treat combining two beloved flavors.
- Caramel Banana Cookies: A unique and utterly delicious combination for banana lovers.
These Red, White, & Blue Chocolate Covered Oreos are truly a testament to how simple ingredients and a few easy steps can create something spectacularly festive and incredibly delicious. Whether you’re preparing for a grand celebration or a small family get-together, these white chocolate covered Oreos, adorned with their patriotic sprinkles, promise to be a fun, eye-catching, and utterly satisfying addition to any party table. Get ready to dip, decorate, and delight!
