Grandma’s Classic Frosted Italian Cookies: An Authentic Family Recipe
Step into a world of sweet nostalgia with these incredible Frosted Italian Cookies. This isn’t just any Italian cookie recipe; it’s a cherished legacy, a timeless tradition, and a taste of home passed down through generations. My grandmother, a true master of Italian baking, perfected this recipe, and to me, these will always be “her cookies.” Each tender bite, enhanced by a simple yet divine vanilla glaze and adorned with colorful sprinkles, promises a moment of pure bliss. These cookies are more than just a dessert; they are a symbol of family gatherings, festive holidays, and the warmth of shared memories.

One of the most remarkable things about this particular Italian cookie recipe is the generous batch size it yields. You’ll find it nearly impossible to stop at just one, but thankfully, this recipe ensures there are plenty to go around! Whether you’re hosting a grand holiday celebration, a casual family get-together, or simply looking for a delightful treat to share with friends and neighbors, these cookies are the perfect solution. Their charming appearance and irresistible flavor make them a standout on any dessert table, inviting everyone to partake in a taste of authentic Italian tradition and creating lasting sweet memories.
For decades, these Italian cookies have graced our family tables during every significant occasion. From Christmas and Easter to birthdays and anniversaries, their presence was a delicious guarantee. My grandmother was renowned for her ability to craft these cookies into various intricate shapes, a skill I admired immensely. While I often opt for the simpler route of rolling them into perfect little balls, the essence and flavor remain wonderfully consistent with her original creation. Now, I have the joy of continuing this beautiful tradition, teaching my own children the art of making these beloved cookies, and sharing this priceless recipe with you, so you can create your own cherished family memories. It’s truly a classic Italian cookie that embodies love and tradition.
 Mastering the Authentic Italian Cookie Recipe

How Many Delicious Cookies Does This Recipe Yield?
How Long Do Frosted Italian Cookies Stay Fresh?

Essential Ingredients for Your Italian Cookie Recipe
- 4 large eggs (ensure they are at room temperature for better mixing)
- 3/4 cup canola oil (or another neutral-flavored vegetable oil, like grapeseed or sunflower oil, to let other flavors shine)
- 1 teaspoon pure vanilla extract (for that classic, comforting flavor)
- 1 teaspoon almond extract (this is key for the distinct, traditional Italian cookie flavor, don’t skip it!)
- 3/4 cup milk (whole milk often yields the best richness and tender crumb)
- 1 cup granulated sugar (for perfect sweetness in the cookie base)
- 5-6 cups all-purpose flour (start with 5 cups, then add more incrementally until the dough is firm and non-sticky)
- 4 teaspoons baking powder (the leavening agent for that soft, slightly puffed texture)
- **For the Vanilla Glaze:**
- 1 cup powdered sugar (confectioners’ sugar)
- 1 teaspoon pure vanilla extract
- A small amount of milk (start with 1-2 tablespoons, adjust for desired consistency)
- Food coloring (optional, for festive colorful glazes)
- Colorful sprinkles (optional, for decoration)

Step-by-Step Guide: How to Make Frosted Italian Cookies
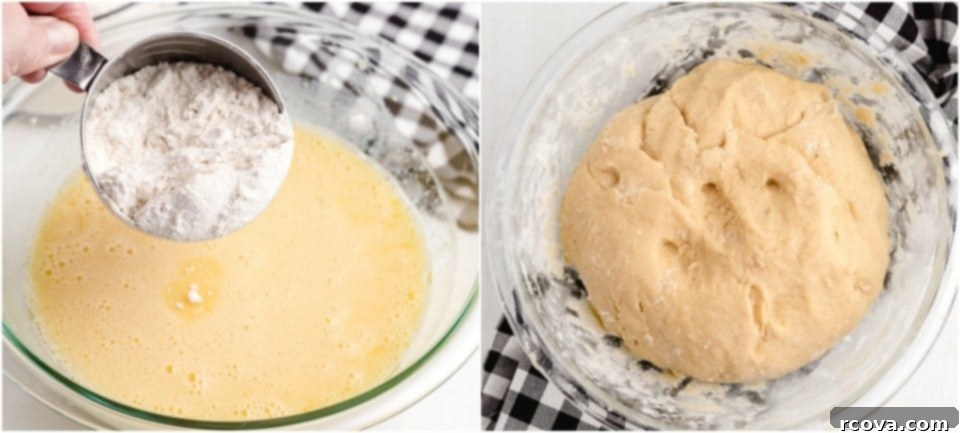
- **Prepare the Wet Ingredients:** In a generously sized mixing bowl, combine the 4 eggs, 3/4 cup canola oil, 1 teaspoon vanilla extract, 1 teaspoon almond extract, 3/4 cup milk, and 1 cup granulated sugar. Whisk them together thoroughly until the mixture is smooth, uniformly blended, and the sugar has dissolved. This creates the flavorful liquid base for your cookie dough.
- **Form the Dough:** Gradually add 5 cups of the all-purpose flour along with the 4 teaspoons of baking powder to the wet mixture. Mix until a cohesive dough begins to form. At this stage, the dough should be relatively firm and manageable, not excessively sticky. If you find the dough is still quite sticky to work with, slowly incorporate additional flour, one tablespoon at a time, until it reaches a consistency that is firm enough to handle comfortably without sticking to your hands.
- **Chill the Dough:** Once your dough has reached the desired consistency, place the entire bowl (covered tightly with plastic wrap) in the refrigerator to chill for at least 30 minutes. This crucial chilling step allows the gluten in the flour to relax, making the dough much easier to shape and preventing the cookies from spreading too much during baking, ensuring they retain their beautiful form.

- **Shape the Cookies:** Lightly flour your hands and turn the chilled dough out onto a lightly floured work surface. Take portions of the dough and roll them into small, uniform balls, approximately 1 to 1.5 inches in diameter. You can also get creative with traditional Italian cookie shapes if you prefer. Place the shaped cookies onto a baking sheet prepared with parchment paper or a silicone baking mat, ensuring a little space (about 1 inch) between each cookie to allow for slight spreading.
- **Bake to Perfection:** Preheat your oven to 350 degrees Fahrenheit (175 degrees Celsius). Bake the cookies for 10-14 minutes, or until the bottoms are lightly golden brown. The tops of the cookies should remain pale and soft, indicating their tender texture. Avoid overbaking, as this can lead to dry cookies.
- **Cool Completely:** Once baked, remove the cookies from the oven and transfer them to a wire rack to cool completely. This step is absolutely essential; glazing warm cookies will cause the glaze to melt, run off, and create a soggy mess.
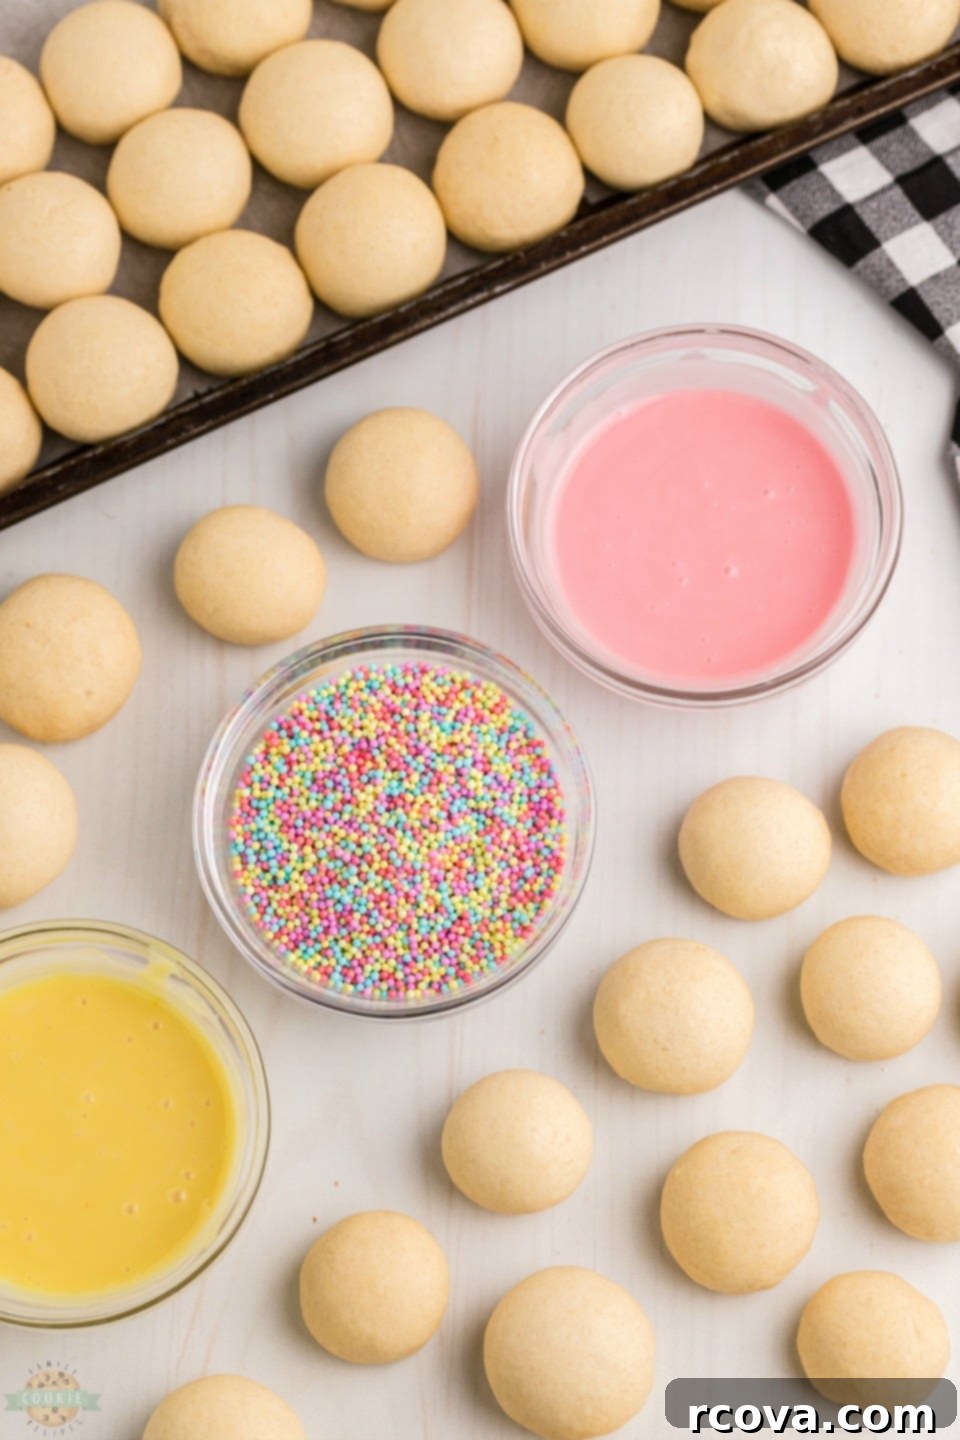
- **Prepare the Vanilla Glaze:** While the cookies are cooling, prepare your vanilla glaze. In a small bowl, combine 1 cup of powdered sugar with 1 teaspoon of vanilla extract. Begin by adding just 1 tablespoon of milk and stirring vigorously until smooth. Gradually add more milk, a tiny bit at a time (half a teaspoon increments), until you achieve a smooth, pourable consistency that is thick enough to coat the back of a spoon and adhere to the cookie, but still flows easily. It should coat the cookies adequately without being too thin. If desired, add a few drops of food coloring to create festive colorful glazes for different occasions.
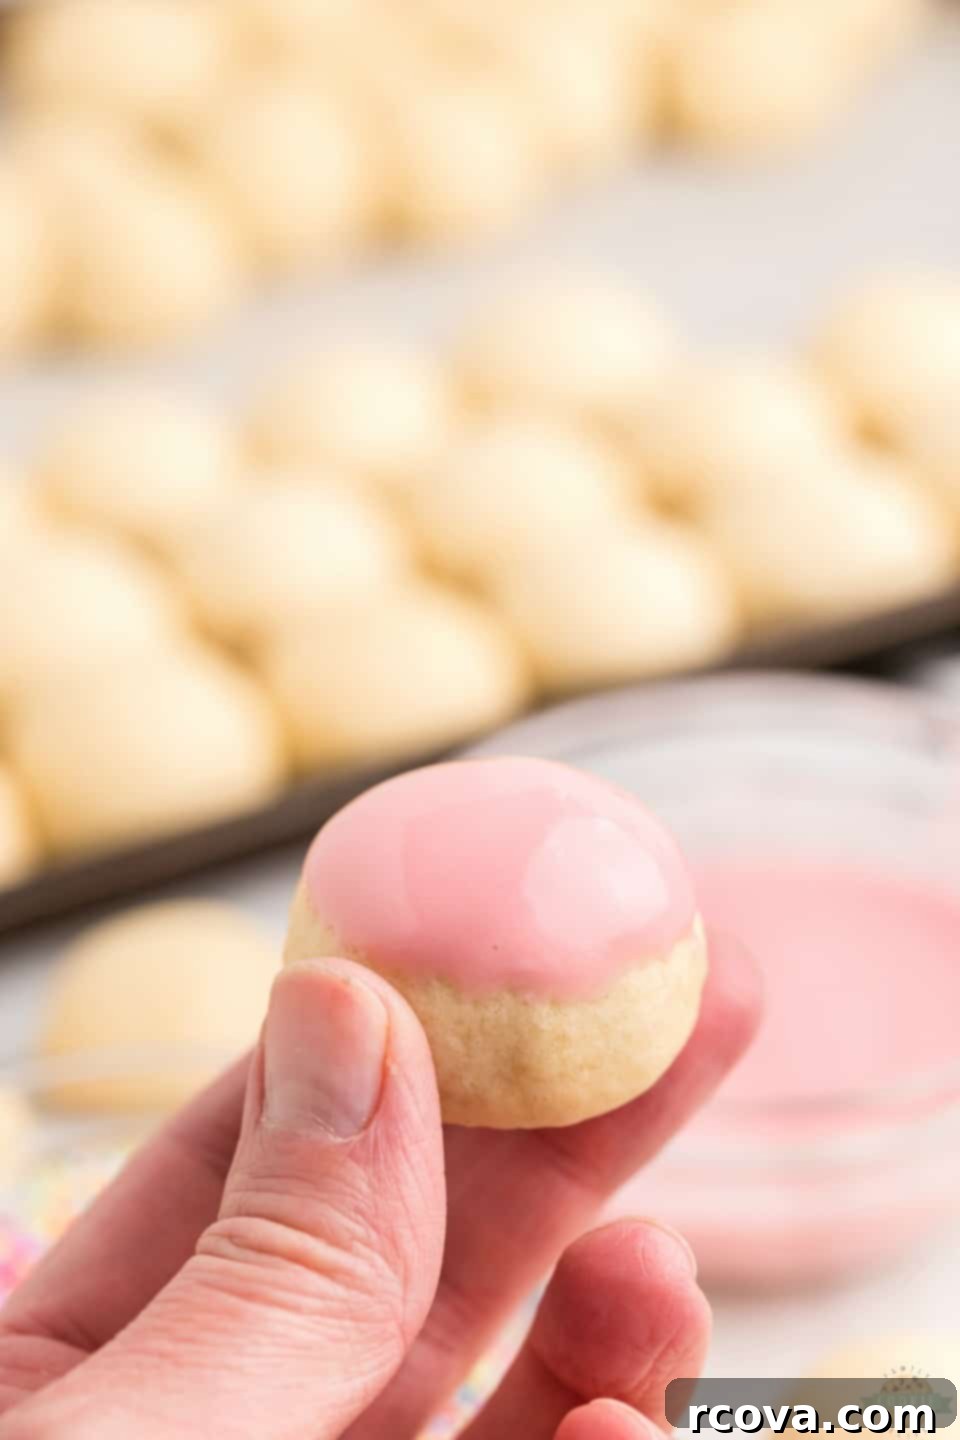
- **Glaze and Decorate:** Dip the top of each completely cooled cookie into the prepared glaze, twisting gently to ensure even coverage. Lift the cookie, allowing any excess glaze to drip off. Carefully place the glazed cookies back onto the baking sheet (or a fresh piece of parchment paper). Immediately, while the glaze is still wet, generously sprinkle them with your favorite colorful sprinkles. Allow the glaze to set completely (this can take several hours, depending on humidity) before stacking or storing the cookies.


Frosted Italian Cookies
Print
Pin
Rate
Ingredients
- 4 large eggs
- 3/4 cup canola oil
- 1 tsp vanilla extract
- 1 tsp almond extract
- 3/4 cup milk
- 1 cup granulated sugar
- 5-6 cups all-purpose flour
- 4 tsp baking powder
For the Vanilla Glaze
- 1 cup powdered sugar
- 1 tsp vanilla extract
- small amount of milk (start with 1-2 tablespoons)
- food coloring if desired, for festive touches
- colorful sprinkles for decoration
Instructions
Part 1: Making the Cookies
-
In a large mixing bowl, combine the 4 eggs, 3/4 cup canola oil, 1 teaspoon vanilla extract, 1 teaspoon almond extract, 3/4 cup milk, and 1 cup granulated sugar. Whisk thoroughly until the mixture is smooth and well combined.
-
Gradually add 5 cups of all-purpose flour and 4 teaspoons of baking powder to the wet ingredients. Mix until a cohesive dough forms. The dough should be firm and relatively non-sticky. If it feels too sticky to handle, add the remaining flour (up to 1 cup more), one tablespoon at a time, until it reaches the desired firm consistency.
-
Cover the bowl with plastic wrap and chill the dough in the refrigerator for 30 minutes. This chilling period is crucial for firming up the dough, making it easier to shape, and preventing the cookies from spreading too much during baking.
-
Once chilled, lightly flour your hands and a clean work surface. Take portions of the dough and roll them into small, uniform balls, or get creative with traditional Italian cookie shapes. Place the shaped dough onto a baking sheet lined with parchment paper, leaving about an inch between each cookie.
-
Preheat your oven to 350°F (175°C). Bake the cookies for 10-14 minutes, or until the edges are very lightly golden brown. The tops of the cookies should remain pale. Remove from oven and transfer to a wire rack to cool completely. Ensure they are fully cooled before glazing.
Part 2: Preparing the Glaze & Finishing
-
In a small bowl, combine 1 cup of powdered sugar with 1 teaspoon of vanilla extract. Begin by adding 1 tablespoon of milk and stirring vigorously until smooth. Gradually add more milk, half a teaspoon at a time, until the glaze reaches a desired consistency: thick enough to coat the back of a spoon and adhere to the cookie, but still runny enough to drip gently down the sides. If you want colored glaze, now is the time to add a few drops of food coloring and mix well.
-
Dip the top of each completely cooled cookie into the vanilla glaze, twisting gently to ensure even coverage. Lift the cookie, allowing any excess glaze to drip off. Place the glazed cookies back onto the parchment-lined baking sheet. While the glaze is still wet, immediately add your chosen colorful sprinkles. Let the cookies sit undisturbed for several hours, or until the glaze has fully set and hardened. Store the finished Frosted Italian Cookies in an airtight container at room temperature.
Nutrition

Expert Tips: How Do You Keep Italian Cookies Fresh?
To truly savor the delicate flavor and tender texture of your Frosted Italian Cookies, proper storage is paramount. Once your cookies have completely cooled and the beautiful vanilla glaze has fully set and hardened (this is crucial to prevent sticking and maintain appearance), transfer them to an airtight container. This barrier prevents air exposure, which is the primary culprit behind stale cookies and flavor loss. For an extra layer of freshness and to protect the delicate glaze, you can arrange the cookies in layers within the container, placing a piece of parchment paper or wax paper between each layer. This not only keeps them from sticking together but also helps retain their moisture, ensuring each cookie looks and tastes perfect when you reach for it. Stored this way at room temperature, they will remain wonderfully fresh for up to three days.
Can You Leave Italian Cookies Out Overnight?
While leaving your Italian cookies out overnight might seem convenient, it’s generally not recommended for optimal freshness and texture. Exposure to air, especially in a typical kitchen environment, will cause them to dry out significantly faster. The tender crumb will harden, and the glaze might become sticky or less appealing due to humidity changes. While they won’t necessarily spoil, their quality will certainly diminish. To truly preserve their soft, delicious appeal, always store them in an airtight container or individually wrap them in plastic wrap once they’ve completely cooled and the glaze has set. This small effort goes a long way in ensuring your homemade Italian cookies remain a delightful treat for days to come, tasting as fresh as the day they were baked.
 Can You Freeze Frosted Italian Cookies for Long-Term Storage?
Absolutely! Freezing is an excellent option if you’ve made a large batch of these incredible Frosted Italian Cookies and want to enjoy them over an extended period, or if you’re preparing for an event far in advance. Proper freezing techniques ensure they retain their delicious flavor and tender texture. To freeze them effectively, follow these steps:
- **Pre-Freeze (Optional but Highly Recommended):** After the glaze has completely set and hardened (this is crucial to prevent the cookies from sticking together), arrange the cookies in a single layer on a baking sheet. Place the baking sheet in the freezer for about 1-2 hours, or until the cookies are firm to the touch. This step is often called “flash freezing” and helps prevent the cookies from clumping together when transferred to a larger storage container or bag.
- **Packaging for Freezing:** Once flash-frozen, transfer the cookies to a heavy-duty freezer-safe Ziploc bag or an airtight freezer container. For added protection and to prevent the glaze from sticking or getting damaged during storage, it’s wise to place sheets of parchment paper or wax paper between layers of cookies. This extra step ensures they come out looking as good as they went in. Label the container with the date for easy tracking.
- **Freezing Without Glaze:** Alternatively, you can bake the cookies, let them cool completely, and freeze them *before* glazing. This offers flexibility: you can thaw and glaze them fresh before serving, which can sometimes yield a slightly better-looking and fresher-tasting glaze, especially if you plan to use colorful glazes for a specific event.
- **Thawing:** When you’re ready to enjoy them, simply remove the desired number of cookies from the freezer and let them thaw at room temperature for a few hours. If they were frozen unglazed, you can then prepare and apply the glaze as per the recipe instructions before serving.
Properly frozen, these Italian cookies can maintain their quality for up to 2-3 months, making them a fantastic make-ahead treat for future gatherings, holiday baking, or simply satisfying an unexpected craving for these delightful traditional cookies.
Explore More Delicious Sugar Cookie Recipes:
- Frosted Strawberry Cookies
- Strawberry Cake Mix Cookies
- The Best Sugar Cookies
- Lemon Sugar Cookie Bars
- Soft Sugar Cookies
- Frosted Rose Sugar Cookies
- Strawberry Cookie Cups
- Cherry Cheesecake Cookies
- Frosted Lemon Sugar Cookies
- Blueberry Cream Cookies


Food, especially baked goods, has an incredible power to connect us to our heritage and to the people we love. Years ago, shortly after my husband and I exchanged vows, I embarked on a significant project: creating a comprehensive family cookbook. It was a labor of love that spanned many months, and I’ll confess, it wasn’t always a walk in the park. Yet, the effort was profoundly rewarding. To this day, that cookbook is a treasured possession, frequently pulled from the shelf, filled with recipes like these Grandma’s Italian Cookies that tell stories and evoke powerful memories. I am immensely fortunate to live not only near my husband’s parents but also his grandparents, which allowed for countless shared meals and traditions. I fondly recall a birthday celebration for Grandpa Bill several years back. He has since passed, but the memories of his warmth, his infectious laugh, and our time together remain vividly alive in our hearts. He always had a special appreciation when I arrived with freshly baked goods, and I often imagine him savoring one of these very cookies, perhaps with a cup of coffee and a contented smile. This recipe, and the act of baking it, keeps those precious family memories alive and allows new ones to be created with each delightful batch.


I genuinely hope you cherish my grandma’s authentic Italian cookie recipe as much as my family and I do. May these perfectly sweet and tender cookies, crowned with their simple vanilla glaze and vibrant sprinkles, add a touch of warmth, joy, and countless new memories to your family table and holiday celebrations. Each batch of these classic Italian treats is an opportunity to create and share joy, keeping a delicious tradition alive for generations to come. Happy baking!

 Mastering the Authentic Italian Cookie Recipe
 Can You Freeze Frosted Italian Cookies for Long-Term Storage?