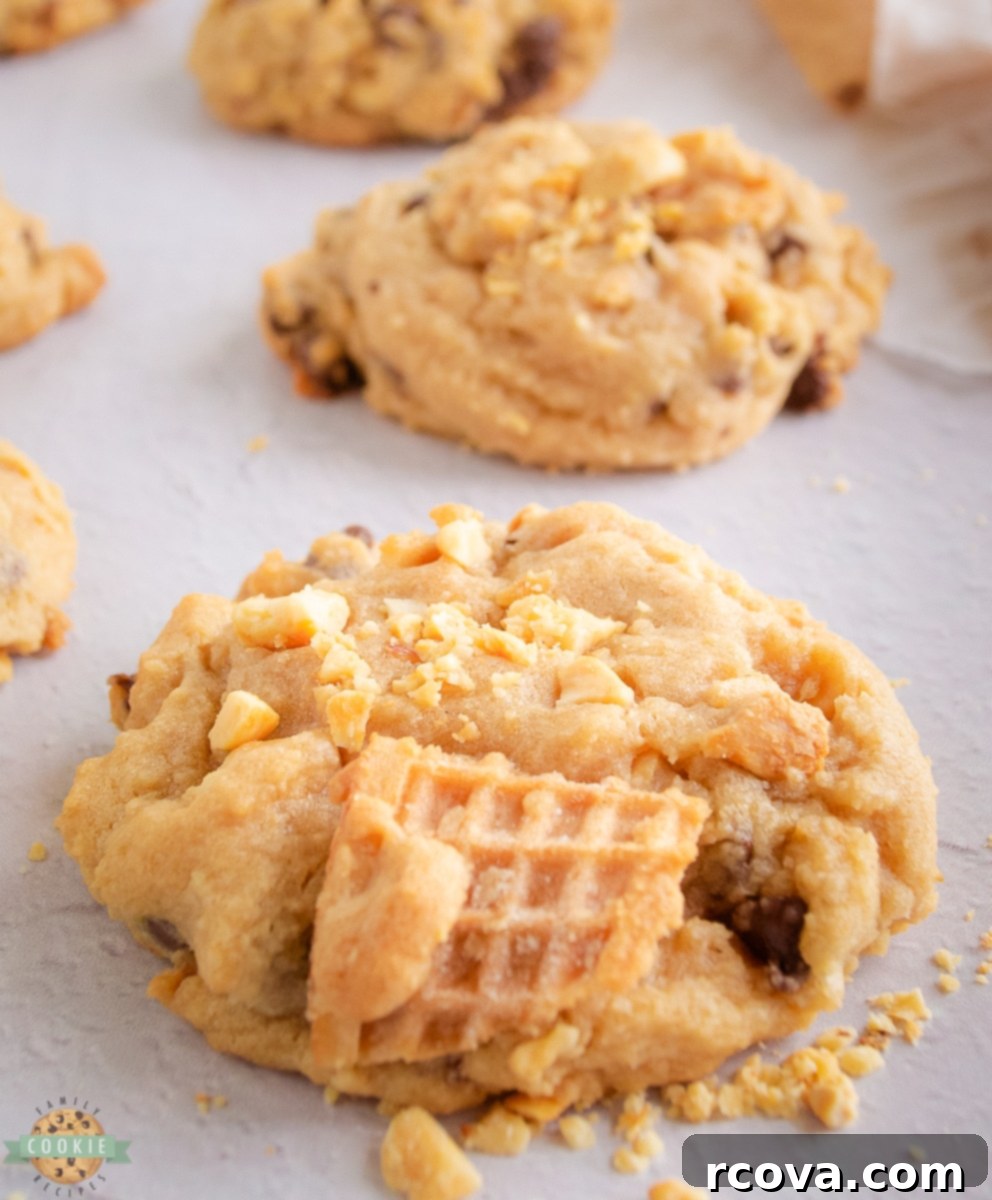
Irresistible Ice Cream Cone Cookies: Your New Favorite Drumstick-Inspired Chocolate Chip Treat
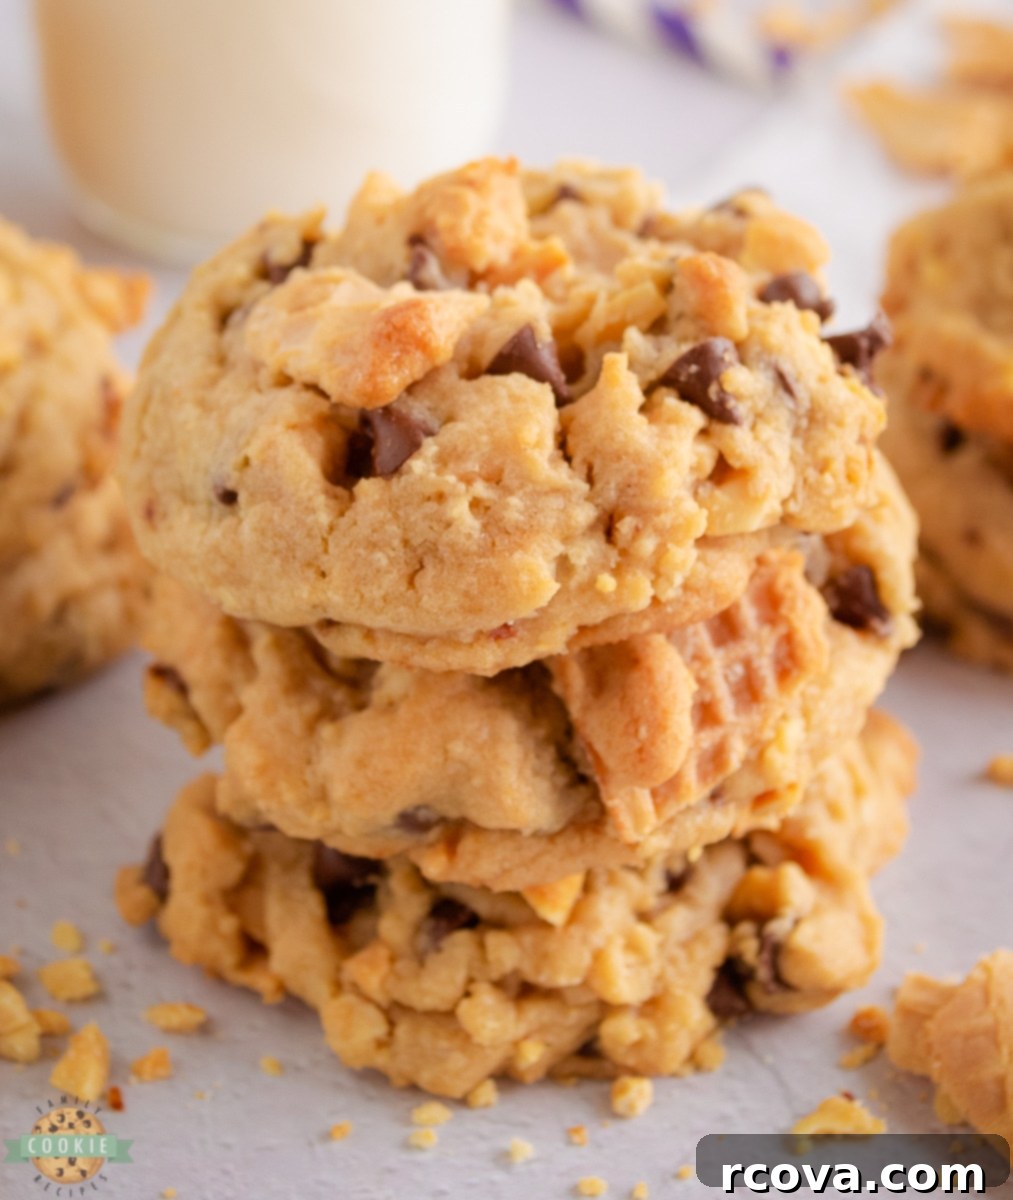
Welcome to a delightful twist on a beloved classic: Ice Cream Cone Cookies! These aren’t just any homemade cookies; they’re a creative celebration of the iconic Drumstick ice cream cone, transformed into a convenient, bite-sized baked good. Imagine the perfect harmony of crispy waffle cones, rich chocolate chips, and savory peanuts, all baked into a chewy, tender chocolate chip cookie. Every single bite promises an explosion of incredible flavor and texture, making these cookies an instant favorite for any occasion.
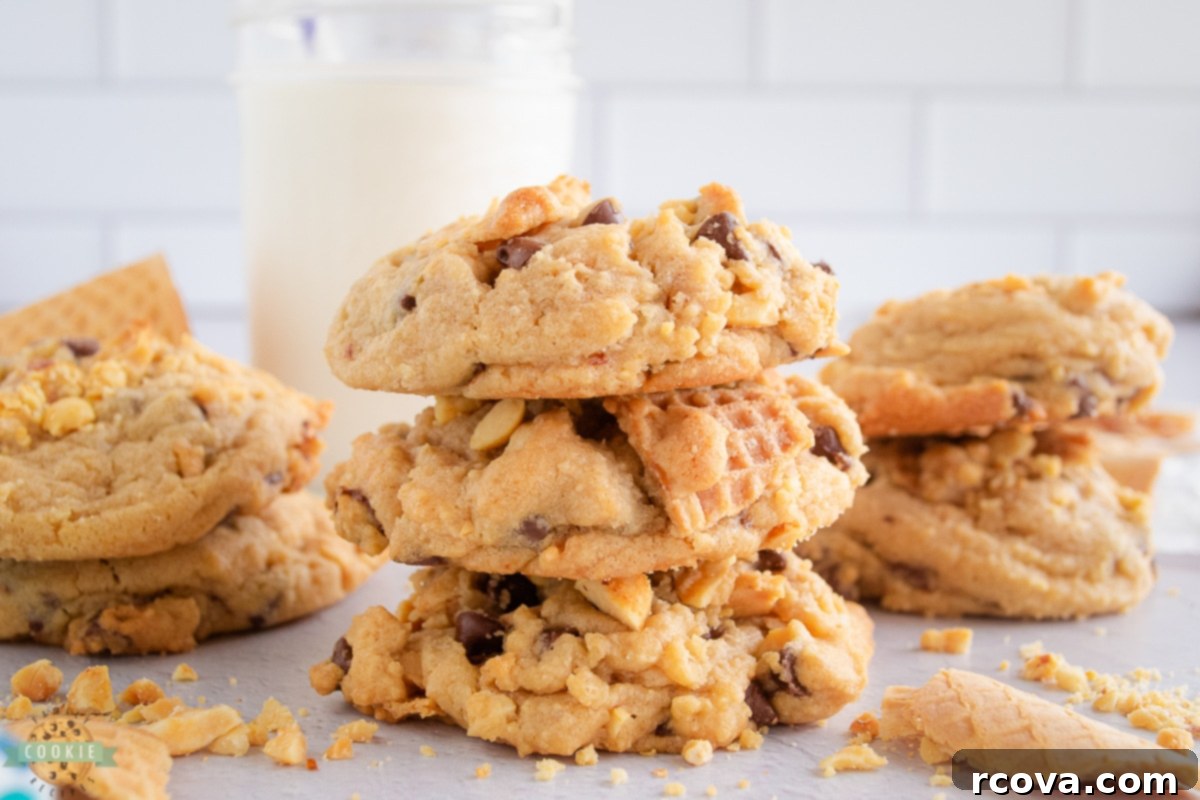
Our unique ice cream cone cookie recipe captures the essence of the classic Drumstick, allowing you to enjoy those cherished flavors any time of year, without the melting mess. It’s a harmonious blend of sweet chocolate, crunchy nuts, and the distinctive crispness of an ice cream cone, expertly folded into a perfectly baked cookie. Get ready to impress your friends and family with this innovative dessert that perfectly marries tradition with a touch of playful creativity.
The Inspiration Behind These Drumstick-Style Cookies
The creation of our Drumstick Chocolate Chip Cookies stems from a deep love for the timeless Drumstick ice cream cone. For generations, this delightful frozen treat has been a staple, cherished for its unique combination of textures and flavors. We wanted to bottle that magic and bring it into the world of baked goods, offering a new and exciting way to experience those nostalgic tastes. The core idea was to craft a cookie that embodied the crunchy waffle cone, the rich chocolate coating, and the satisfying sprinkle of peanuts, all within a soft, chewy chocolate chip cookie base. After extensive experimentation and perfecting the balance of ingredients, we are thrilled to share this recipe, allowing you to savor your favorite Drumstick-inspired flavors throughout the year, completely ice cream-free!
For those familiar with our culinary journey, you know our passion for reinventing the classic chocolate chip cookie. Our collection boasts many beloved variations, each as fabulous and exciting as the last. From our enticing BISCOFF CHOCOLATE CHIP COOKIES, which infuse a delightful spiced biscuit flavor, to our indulgent CHOCOLATE CHIP S’MORES COOKIES, reminiscent of cozy campfire treats, we constantly strive for innovative cookie experiences. These Ice Cream Cone Cookies are a proud addition to our unbeatable repertoire, promising a memorable dessert experience that stands out from the crowd.

Why You’ll Be Obsessed with This Unique Cookie Recipe
- Simple, Accessible Ingredients: We believe a truly great cookie should start with familiar, easy-to-find ingredients. While these cookies offer a unique twist, their foundation is built upon classic pantry staples. Our special additions, like the waffle cone pieces and chopped peanuts, seamlessly integrate to elevate the flavor without making the recipe overly complicated or requiring hard-to-find items.
- The Perfect Use for Broken Ice Cream Cones: Have you ever opened a box of ice cream cones only to find some are already broken, rendering them “unusable” for actual ice cream? Don’t let those fractured cones go to waste! This recipe is an ingenious and delicious solution. Instead of disappointment, grab those broken waffle cones and transform them into a batch of fresh, exciting cookies. It’s a fantastic way to minimize food waste and unlock new culinary possibilities.
- No Chilling Required – Instant Gratification! We understand that sometimes, when a cookie craving hits, patience is in short supply. That’s why you’ll love that this recipe requires absolutely no chilling time for the dough. These cookies come together quickly, bake in a mere matter of minutes, and deliver warm, delightful results without the hours of waiting often associated with cookie recipes. The faster you begin, the sooner you can enjoy a comforting, flavorful treat straight from the oven!

Essential Ingredients for Your Ice Cream Cone Cookies
To create these wonderfully inventive Ice Cream Cone Cookies, you’ll need a collection of simple yet powerful ingredients that come together to form a symphony of flavor and texture:
Flour: You will need 1 ½ cups of all-purpose flour. This forms the essential structural base of our cookies, providing the perfect canvas for all the exciting additions.
Baking Soda: A crucial leavening agent, 1 teaspoon of baking soda helps the cookies spread beautifully and achieve that desirable soft, chewy interior.
Salt: Just ½ teaspoon of salt works wonders in balancing the sweetness of the cookie dough and truly enhancing all the individual flavors, making them pop.
Butter: ½ cup of softened unsalted butter (one stick) is key for a rich, tender, and luxurious cookie. Softened butter creams beautifully with sugar, creating a light, airy base.
Brown Sugar: For that classic chewy texture and a deep, moist flavor, 1 cup of packed brown sugar is indispensable. Its molasses content adds a lovely caramel note.
Egg: One large egg acts as the primary binder for the dough, providing structure, richness, and helping to emulsify the ingredients for a cohesive texture.
Vanilla Extract: A teaspoon of vanilla extract is a must-have flavor enhancer, bringing warmth and depth to the cookie base that complements all other ingredients.
Ice Cream Cones: The star of the show! You’ll need ⅓ cup of broken waffle cone pieces. These bring an irresistible crunch and the authentic “ice cream cone” flavor. If waffle cones are unavailable, sugar cones or crushed waffle bowls make excellent substitutes.
Chocolate Chips: Indulgent ½ cup of chocolate chips (feel free to choose semi-sweet or milk chocolate based on your preference) ensures gooey pockets of melty chocolate in every bite.
Peanuts: Inspired by the crunchy topping of a Drumstick, ½ cup of chopped salted peanuts adds a fantastic salty crunch and nutty depth, perfectly mimicking the classic frozen treat.

Step-by-Step: Crafting Your Drumstick Chocolate Chip Cookies
Creating these delightful Drumstick Chocolate Chip Cookies is a straightforward process, ensuring a rewarding baking experience from start to finish. Follow these simple steps for perfectly baked treats:
Preparation is Key
Begin by preheating your oven to 350 degrees F (175 degrees C). This ensures your oven is at the optimal temperature for even baking. Next, prepare two baking sheets by lining them with parchment paper. Parchment paper not only prevents sticking but also aids in easy cleanup and promotes consistent baking. Set these prepared sheets aside while you mix the dough.
Mixing the Perfect Dough
In a medium-sized mixing bowl, combine your dry ingredients: thoroughly whisk together the all-purpose flour, baking soda, and salt. Whisking ensures these ingredients are evenly distributed, which is crucial for the cookie’s texture and rise. Once combined, set this dry mixture aside.
In a separate, larger bowl, it’s time to work on your wet ingredients. Using an electric mixer, cream together the softened butter, brown sugar, egg, and vanilla extract. Beat these ingredients until they are light, fluffy, and well-combined. This creaming process incorporates air into the mixture, contributing to the cookies’ tender texture.

Now, gradually add the whisked dry ingredients to the wet ingredients. Mix on low speed until a cohesive dough begins to form. Be careful not to overmix; just combine until no streaks of flour remain. At this point, gently fold in the broken waffle cone pieces, chocolate chips, and chopped peanuts. Distribute them evenly throughout the dough using a spatula.
Using a cookie scoop (a 1-inch scoop works perfectly for uniform cookies), portion the dough into balls and place them onto your prepared baking sheets. Ensure you leave 1-2 inches of space between each cookie dough ball to allow for spreading during baking.
Baking for Golden Perfection
Carefully place the baking sheets into your preheated oven. Bake for approximately 10-12 minutes, or until the edges of the cookies appear lightly golden brown and set. The centers might still look slightly soft, but they will firm up as they cool.
Once baked, remove the cookies from the oven and let them cool on the baking sheet for 2-3 minutes. This crucial resting period allows them to set further and prevents them from breaking when moved. After this initial cooling, gently transfer the cookies to a wire rack to cool completely. Serving them warm is highly recommended for the ultimate delightful experience!
Customize Your Ice Cream Cone Cookies: Endless Possibilities
One of the joys of baking is the opportunity to personalize your creations, and these Ice Cream Cone Cookies are no exception! Their versatile base allows for a myriad of delightful customizations, ensuring there’s a perfect version for every palate.
Flavorful Mix-Ins & Toppings: Don’t limit yourself to just chocolate chips and peanuts. The possibilities for alternative mix-ins are truly endless! Consider swapping out or adding to the chocolate chips with your favorite candies, such as colorful mini-M&Ms for a playful touch, or Reese’s Pieces for an extra burst of peanut butter flavor. For an enhanced crunch, try incorporating other chopped nuts like walnuts, pecans, or even roasted almonds. Dried fruits like chopped cranberries or golden raisins can add a pleasant chewiness and a hint of tartness. If you’re feeling extra decadent, swirl some creamy peanut butter or rich Nutella directly into a portion of the cookie dough before baking for pockets of gooey, flavorful goodness. After the cookies are baked and cooled, a drizzle of caramel sauce, white chocolate, or an extra layer of melted dark chocolate can elevate them to an even more indulgent treat, perfect for special occasions or when you simply want to spoil yourself.
Dietary Adaptations & Healthier Options: We believe everyone should be able to enjoy delicious cookies, regardless of dietary needs. These Ice Cream Cone Cookies can be easily adapted to suit various restrictions. For a gluten-free version, simply substitute the all-purpose flour with a high-quality gluten-free flour blend (ensure it’s a 1:1 baking blend for best results). If dairy is a concern, use dairy-free chocolate chips or carob chips, and substitute regular butter with a good quality vegan butter alternative to make these cookies entirely vegan-friendly.
For those looking for a slightly healthier option, several swaps can be made without sacrificing flavor. Replace granulated sugar with natural sweeteners like coconut sugar or honey (adjust liquid content slightly if using honey). Coconut oil can be used in place of butter for a different fat profile and a subtle tropical note. Boost the fiber and nutrient content by incorporating a portion of rolled oats or flaxseed meal into the dry ingredients. You could also experiment with using a blend of whole wheat flour and all-purpose flour to add more whole grains.
Ice Cream Cone Cookies
Print
Pin
Rate
Ingredients
- 1 ½ cups all-purpose flour
- 1 tsp baking soda
- ½ tsp salt
- ½ cup butter softened
- 1 cup brown sugar packed
- 1 egg
- 1 tsp vanilla extract
- ⅓ cup broken waffle cone pieces
- ½ cup chocolate chips
- ½ cup salted peanuts chopped
Instructions
-
Prep: Preheat your oven to 350 degrees F. Line two baking sheets with parchment paper and then set them aside.
-
Dough: In a medium sized mixing bowl, whisk the flour, baking soda, and salt. Set this mixture aside.
-
In a separate bowl, using an electric mixer, cream the butter, brown sugar, egg, and vanilla extract until well mixed.
-
Add the dry ingredients to the wet ones and mix until the dough is formed. After that fold in the broken waffle cone pieces, chocolate chips, and peanuts. Use a cookie scoop to scoop up the dough into 1-inch sized cookie dough balls and place them onto the prepared baking sheets 1-2 inches apart.
-
Bake: Place the cookies in the preheated oven and bake for 10-12 minutes, until the edges look set.
-
Let the cookies cool on the baking sheet for 2-3 minutes, before transferring them to a wire rack to cool completely. Serve the cookies warm & enjoy!
Notes
Place them in an airtight container or freezer bag and freeze for up to 3 months. Thaw at room temperature before serving.
Nutrition
Frequently Asked Questions About Ice Cream Cone Cookies
Can I use actual ice cream in ice cream cone cookies?
While the name “Ice Cream Cone Cookies” might suggest incorporating real ice cream, it is absolutely not recommended to use actual ice cream in this recipe. The high moisture content and dairy fat in ice cream would lead to a disastrous result, causing the cookies to become excessively soft, soggy, and likely prevent them from baking properly. Instead, this recipe ingeniously uses broken waffle cone pieces, rich chocolate chips, and chopped peanuts to meticulously mimic the iconic flavors and textures of a Drumstick ice cream cone, achieving that delightful essence without the added moisture challenges of actual ice cream.
What’s the best way to chop peanuts without a food processor?
For these Drumstick Chocolate Chip Cookies, we aim for lightly chopped peanuts that provide a satisfying crunch, not a fine, powdery dust. This is why using a food processor or blender is generally discouraged, as it can easily over-process the nuts. The easiest and most convenient method is to simply purchase pre-chopped salted peanuts from your local grocery store. However, if pre-chopped isn’t an option, you can easily DIY the chopped peanuts. Place your whole salted peanuts into a sturdy freezer bag (a Ziploc bag works well). Seal the bag, ensuring some air is left inside to cushion the nuts, then gently crush them using a rolling pin or a meat mallet. This method gives you excellent control over the texture, allowing you to achieve perfectly coarse, crunchy pieces without turning them into peanut butter or dust.
How long do these chocolate chip ice cream cone cookies stay fresh?
These delightful chocolate chip ice cream cone cookies are surprisingly durable and can be stored in a couple of ways to maintain their freshness. When stored in an airtight container at room temperature, they will remain wonderfully fresh and delicious for up to 5 days. For longer-term storage, you can easily freeze them. Place the cooled cookies in a single layer in an airtight freezer-safe container or a heavy-duty freezer bag, and they will keep well for up to 3 months. To enjoy them after freezing, simply let the cookies thaw at room temperature for about 20-30 minutes before serving. For an extra treat, you can even warm them slightly in the microwave for a few seconds to restore that freshly-baked warmth and gooey chocolate!
How do you prevent waffle cone pieces from getting soggy in cookies?
Preventing the waffle cone pieces from becoming soggy is key to maintaining the wonderful crunchy texture that makes these cookies so special. Here are a few tips:
- Choose Sturdy Waffle Cones: Opt for high-quality, sturdy waffle cones that are less prone to absorbing moisture quickly. Thicker cones tend to hold up better during baking.
- Break into Small, Even Pieces: Ensure your waffle cones are broken into relatively small, uniform pieces (roughly pea-sized). Smaller pieces integrate better into the dough and are less likely to create large pockets where moisture can accumulate.
- Timing is Everything: The most crucial step is to mix the broken waffle cone pieces into the cookie dough just before baking. Avoid letting the dough sit for extended periods after the cones have been added, as this gives them more time to absorb moisture from the dough and soften.
- Don’t Overmix: When folding in the cone pieces, do so gently and briefly. Excessive mixing can break the cones down further and release more starch, which can contribute to sogginess.
- Bake Promptly: Once the waffle cone pieces are incorporated, scoop and bake the cookies immediately. This ensures the cones retain their crispness before the heat of the oven sets them in their crunchy state.

Can you freeze these cookies (baked or unbaked)?
Absolutely! Freezing cookies is a fantastic way to prepare ahead or ensure you always have a delightful treat on hand. There are two primary methods we recommend for freezing these Ice Cream Cone Cookies:
1. Freezing Unbaked Cookie Dough Balls: This is my favorite method for ultimate convenience.
- Scoop and Shape: Use a cookie scoop to form uniform dough balls, rolling them gently with your hands to make them perfectly round.
- Flash Freeze: Arrange the dough balls in a single layer on a parchment-lined cookie sheet. You can place them relatively close together as long as they aren’t touching. Flash freeze them for about 1-2 hours, or until they are completely solid.
- Store: Once solid, transfer the frozen dough balls to a heavy-duty ziplock freezer bag or an airtight container. They can be stored in the freezer for up to 3 months.
- Bake from Frozen: When a craving strikes, simply pull out as many dough balls as you desire! You can either let them thaw on a cookie sheet while your oven preheats (this usually takes about 20-30 minutes), or you can bake them directly from frozen. If baking from frozen, you may need to add an extra 2-4 minutes to the original bake time to ensure they cook through evenly.
2. Freezing Baked Cookies: This method is also very effective, and one my mother-in-law uses all the time!
- Cool Completely: Ensure your baked Ice Cream Cone Cookies are entirely cooled before freezing. Warm cookies will create condensation, leading to soggy results.
- Package Properly: Arrange the cooled cookies in an airtight freezer-safe container, separating layers with parchment paper to prevent sticking. A heavy-duty freezer bag is also suitable.
- Store: They will keep well in the freezer for up to 3 months.
- Thaw and Enjoy: While they turn out quite well, baked frozen cookies can sometimes be a tiny bit drier and more crumbly once thawed compared to freshly baked ones or those baked from frozen dough. It’s crucial to thaw them completely before eating, as frozen cookies are quite hard! Thankfully, they typically only take about 20-30 minutes to thaw at room temperature. For an extra treat, a quick zap in the microwave can warm them up and bring back some of that delicious chewiness.

Explore More Chocolate Chip Cookie Creations
If you’ve enjoyed the unique flavors and textures of our Ice Cream Cone Cookies, you’ll love diving into our broader collection of irresistible chocolate chip cookie recipes. Each one offers a distinct twist, ensuring there’s always something new and exciting to bake!
- PEPPERMINT CHOCOLATE CHIP COOKIES
- S’MORES OATMEAL COOKIES
- OATMEAL CHOCOLATE CHIP COOKIES
- BANANA CHOCOLATE CHIP OATMEAL COOKIES
- PEANUT BUTTER OATMEAL CHOCOLATE CHIP COOKIES
- EDIBLE CHOCOLATE CHIP COOKIE DOUGH
- BIG CHOCOLATE CHIP COOKIES
- OATMEAL WALNUT CHOCOLATE CHIP COOKIES
- CADBURY MINI EGG COOKIES
- REESE’S PEANUT BUTTER BANANA COOKIES
- REESE’S PEANUT BUTTER PUDDING COOKIES
- MINT CHOCOLATE CHIP COOKIES
- HONEY MAPLE CHOCOLATE CHIP COOKIES
- FIVE CHIP PEANUT BUTTER OATMEAL COOKIES
- CHOCOLATE CHIP COCONUT OATMEAL COOKIES
- CREAM CHEESE CHOCOLATE CHIP COOKIES
In conclusion, these Ice Cream Cone Cookies are more than just a dessert; they are a truly fun and unique culinary adventure, offering a fresh way to enjoy your favorite ice cream-inspired flavors. These homemade chocolate chip cookies are incredibly easy to bring together, resulting in a wonderfully flavor-packed treat that is guaranteed to delight everyone who tries them. Whether you’re making them for a party, a family gathering, or simply to satisfy a sweet craving, these cookies are sure to become a cherished addition to your recipe collection!

