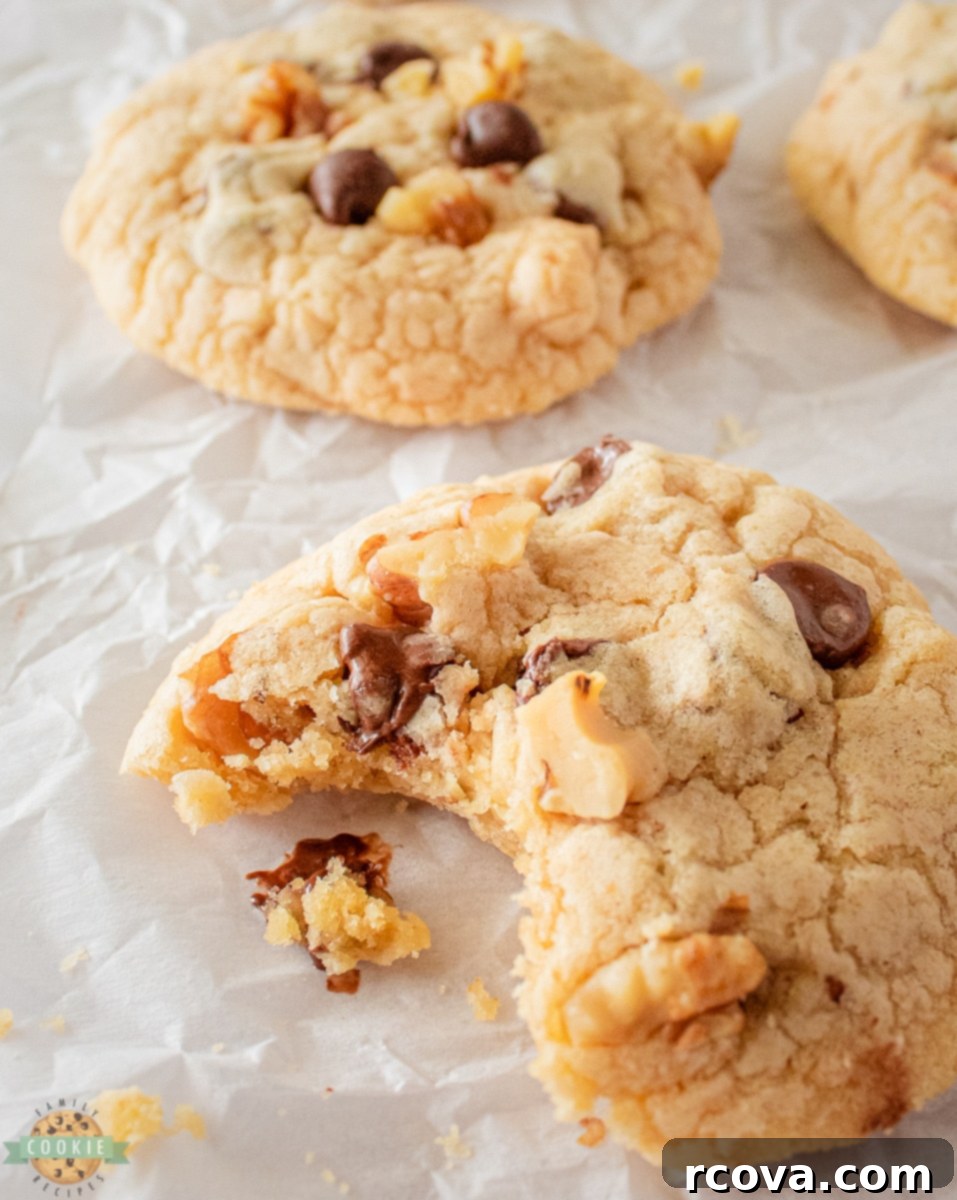
Irresistible Brown Butter Walnut Chocolate Chip Cookies: The Ultimate Guide
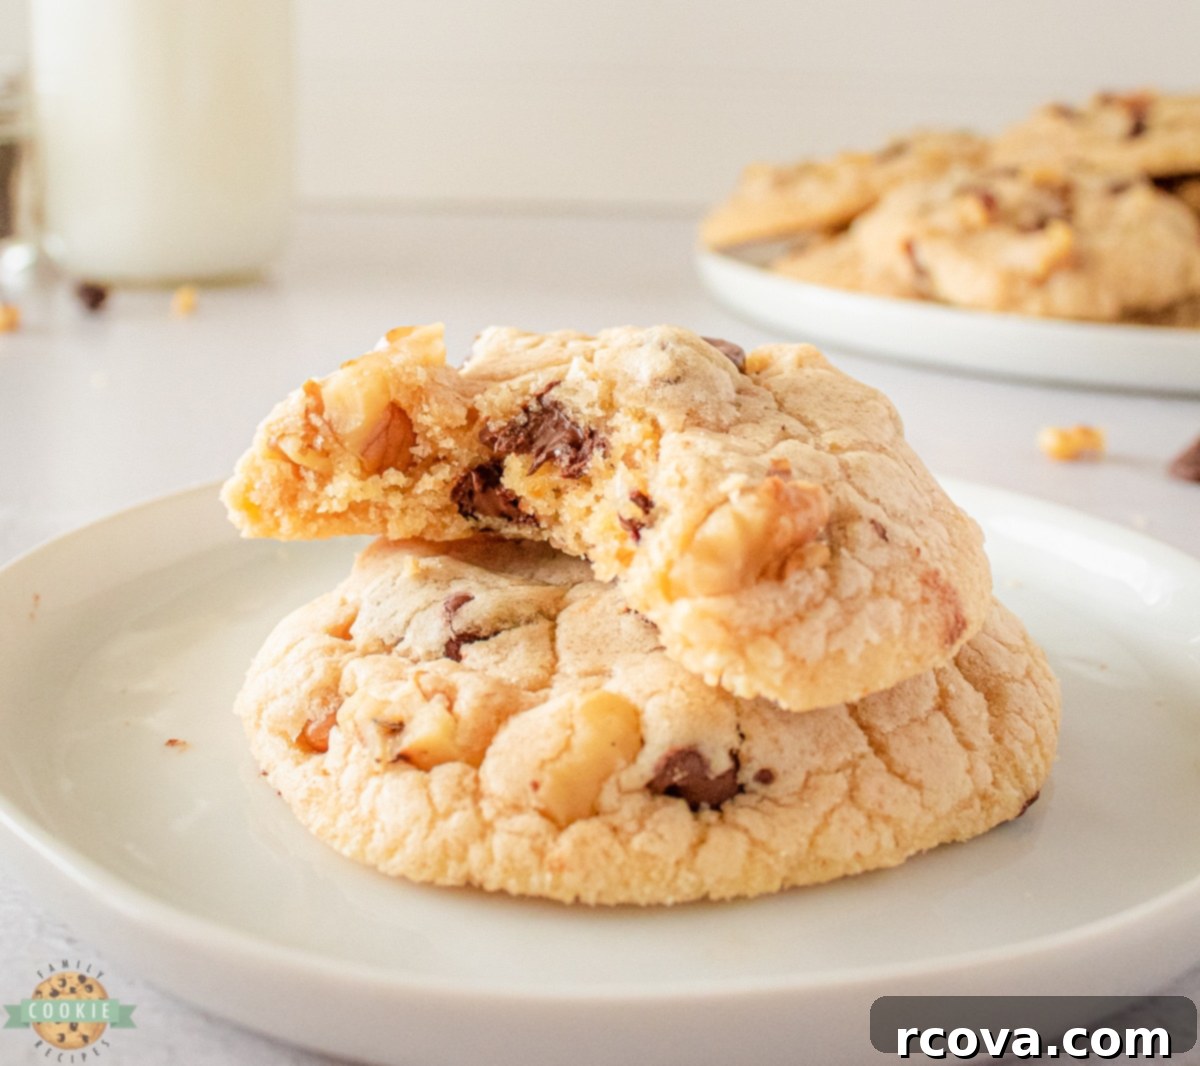
Prepare to elevate your cookie game with these incredible Brown Butter Walnut Chocolate Chip Cookies. This recipe takes the beloved classic chocolate chip cookie and transforms it into an extraordinary treat. Imagine soft, chewy cookies with a rich, complex buttery flavor that melts in your mouth, perfectly balanced with the delightful crunch of walnuts and sweet chocolate chips. These aren’t just cookies; they’re an experience that will leave everyone asking for the recipe.
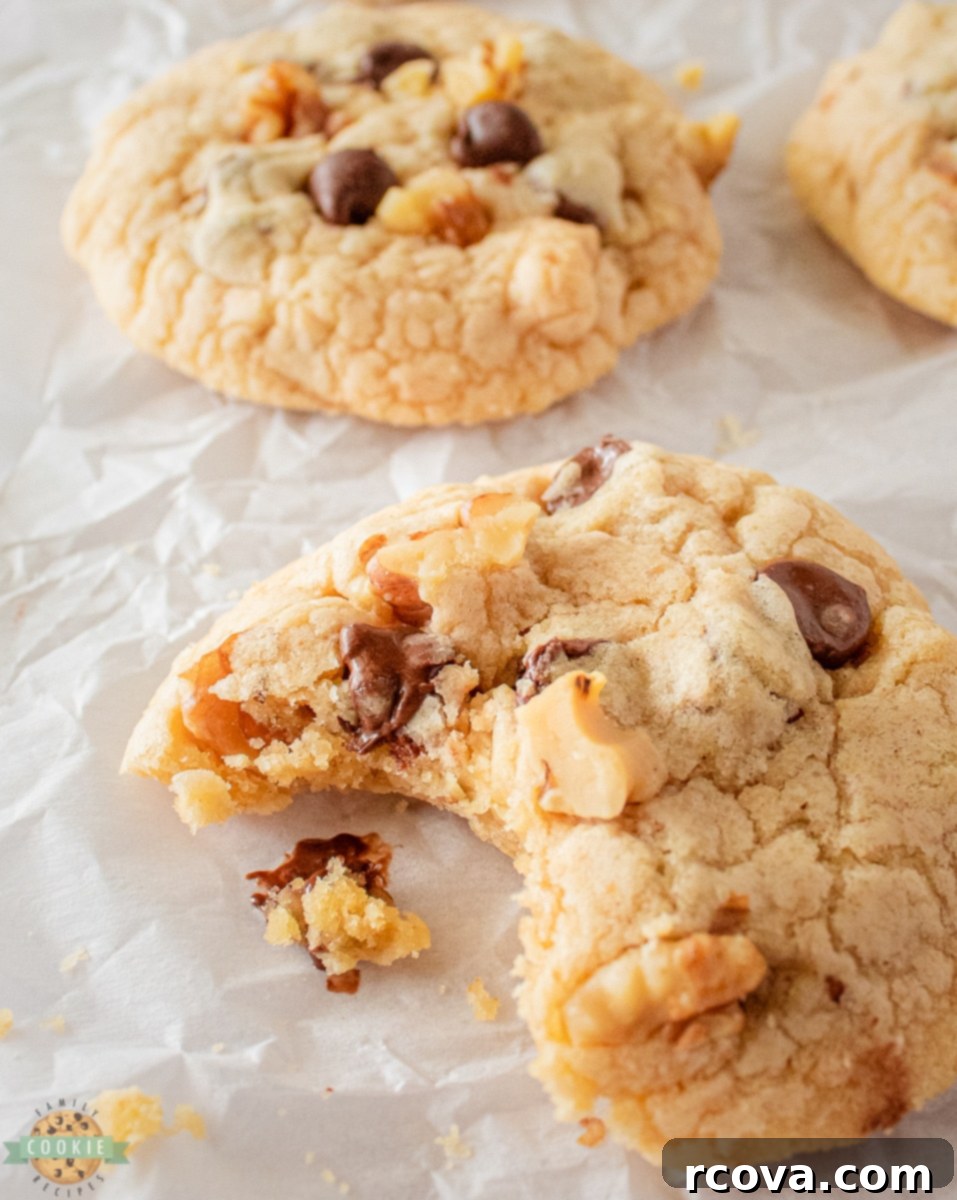
What makes these walnut chocolate chip cookies truly special is the secret ingredient: browned butter. This simple yet transformative technique adds a nutty, toasted caramel depth that elevates the entire cookie’s flavor profile. Combined with the satisfying crunch of walnuts and the sweet indulgence of semi-sweet chocolate chips, these brown butter cookies promise a taste unlike any other. Whether you’re baking for a special event, a family gathering, or simply a cozy night in, these cookies are sure to be a showstopper. Get ready to discover your new favorite chocolate chip cookie recipe, guaranteed to impress friends and family with their amazing depth of flavor.
Why Browning Butter is Essential for Extra Scrumptious Cookies
If you’ve never tried browning butter, you’re in for a delightful culinary revelation. This technique is the trick to making these chocolate chip walnut cookies not just good, but “EXTRA scrumptious.” Browning butter involves gently cooking unsalted butter until its milk solids toast, turning a beautiful golden-brown color and releasing an intoxicating, nutty aroma. This process infuses the butter with a deep, sophisticated caramel-like flavor that adds unparalleled richness and complexity to your baked goods.
The transformation of plain butter into browned butter creates a more robust and luxurious taste profile for your cookies. It’s an easy yet impactful way to elevate basic ingredients into something gourmet, making your homemade treats taste like they came from a high-end bakery. This added depth of flavor makes these cookies truly unforgettable, setting them apart from any ordinary chocolate chip cookie. Once you experience the magic of brown butter, we guarantee you’ll be hooked and looking for ways to incorporate this hack into all your favorite recipes. The extra few minutes spent on this step are absolutely worth it for these incredibly flavorful, melt-in-your-mouth walnut chocolate chip cookies, turning them into a sensational treat that will delight all.
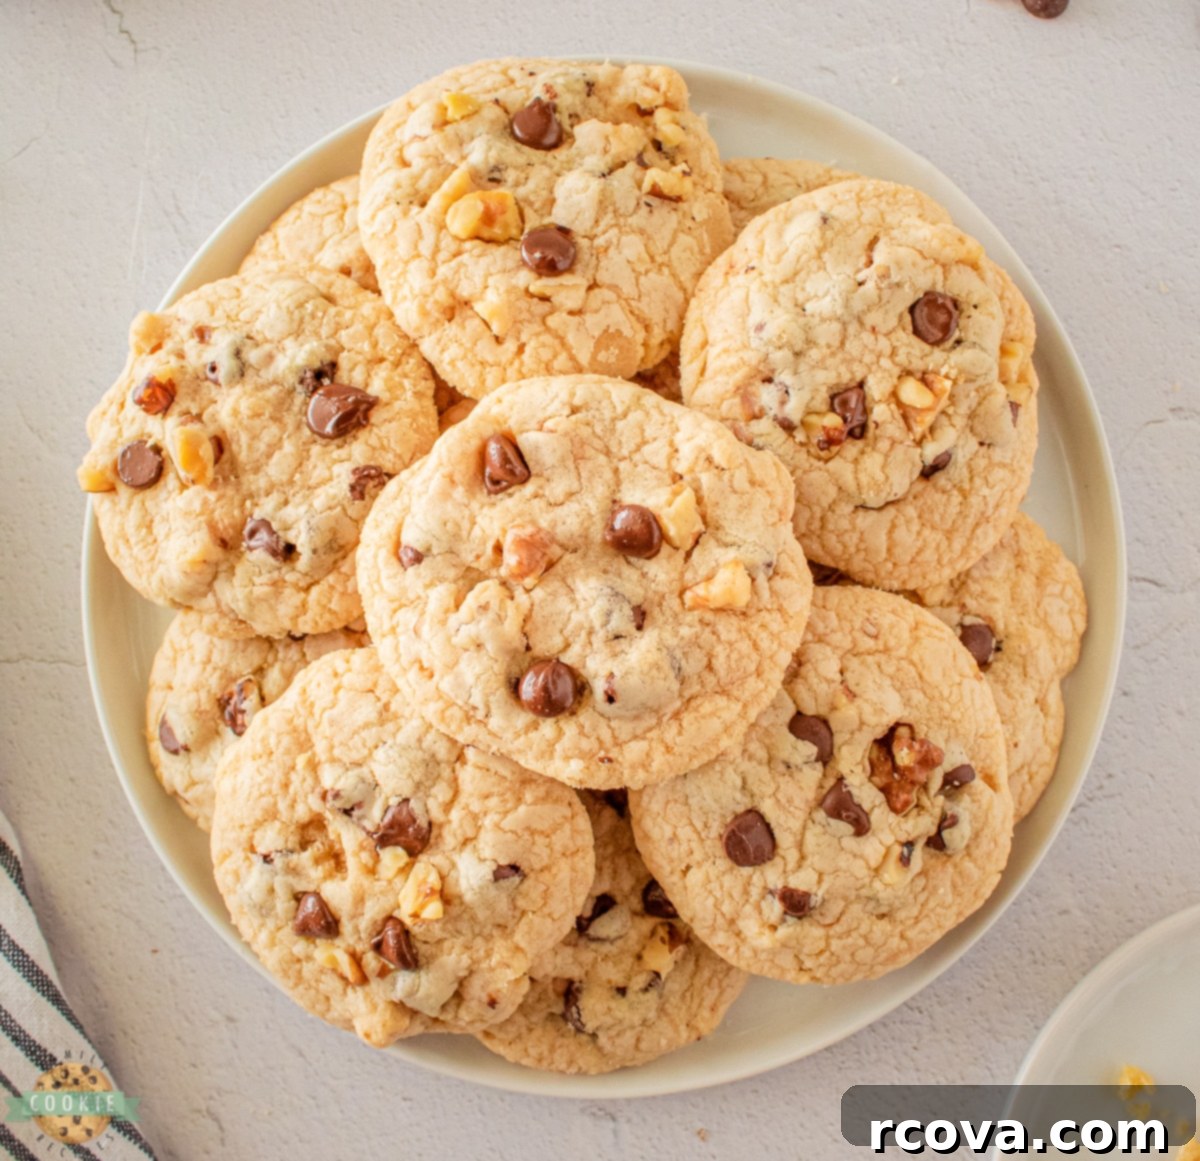
Essential Ingredients for Brown Butter Walnut Chocolate Chip Cookies
Crafting the perfect batch of these irresistible cookies requires a few simple, high-quality ingredients. Here’s a detailed look at what you’ll need to create your own batch of buttery, nutty, and chocolatey goodness:
- All-Purpose Flour: You will need 2 cups of good quality all-purpose flour. This foundational ingredient provides the necessary structure for our cookie dough, ensuring a soft yet chewy bite. For best results, measure your flour by weight or spoon it lightly into the measuring cup and level it off.
- Salt: A crucial ½ teaspoon of salt enhances all the other flavors in the dough, especially the rich brown butter and sweet chocolate. It also perfectly balances the sweetness, preventing the cookies from tasting overly sugary.
- Baking Powder: We use ½ teaspoon of baking powder to give these cookies a lovely lift and a slightly soft, cake-like interior without losing their signature chewiness. It helps them puff up nicely as they bake.
- Unsalted Butter: You’ll need 1 cup (which is equivalent to two sticks) of unsalted butter. Using unsalted butter is key for controlling the salt content in your recipe. This butter will be browned, and its transformation is what imparts the incredible rich, nutty flavor to every single cookie. Remember, only real butter will brown correctly; margarine is not a suitable substitute.
- Granulated Sugar: A ¼ cup of granulated sugar contributes to the classic cookie sweetness and helps achieve those desirable slightly crisp edges.
- Brown Sugar: For that signature chewy texture and a deeper, more complex molasses-rich sweetness, ¾ cup of packed light or dark brown sugar is essential. The moisture in brown sugar keeps the cookies wonderfully soft and moist.
- Large Eggs: Two large eggs act as a crucial binding agent, bringing the cookie dough together and adding essential moisture. They also contribute to the overall richness and structure of the cookies. Ensure they are at room temperature for better emulsion with the butter and sugar.
- Semi-Sweet Chocolate Chips: We recommend ⅔ cups of semi-sweet chocolate chips for a balanced and wonderfully chocolatey taste that complements the other flavors without being overly sweet. You can use standard chips or chocolate chunks.
- Chopped Walnuts: To add an enjoyable crunch and a complementary earthy, slightly bitter note that pairs beautifully with the brown butter, ⅔ cups of chopped walnuts are a must. Make sure they are roughly chopped to ensure a good distribution of texture in every bite.
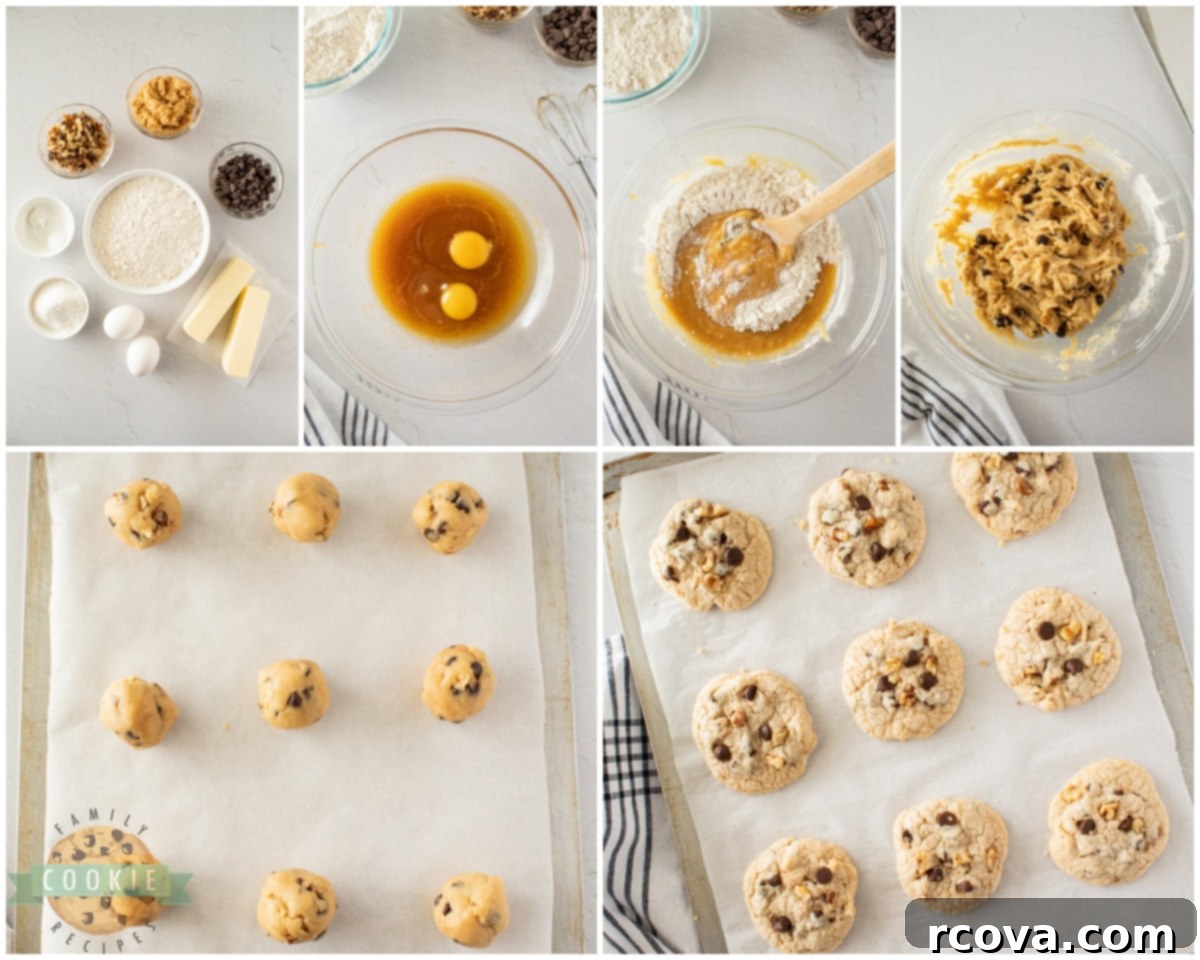
Step-by-Step Guide: How to Make Brown Butter Walnut Chocolate Chip Cookies
Ready to bake the best batch of cookies you’ve ever tasted? Follow these detailed instructions for perfect results, incorporating all the wonderful flavors of brown butter, walnuts, and chocolate:
1. Prepare Your Dry Ingredients
In a medium-sized mixing bowl, thoroughly whisk together the 2 cups of all-purpose flour, ½ teaspoon of salt, and ½ teaspoon of baking powder. Whisking ensures these dry ingredients are well combined and evenly distributed, which is crucial for the consistent texture of your cookie dough. Set this bowl aside for later use.
2. The Art of Browning Butter
This is where the magic truly begins! Take your 1 cup (two sticks) of unsalted butter and place it into a small, light-colored saucepan. Using a light-colored pan is important because it allows you to easily observe the butter’s color change, preventing it from burning. Place the saucepan over medium heat.
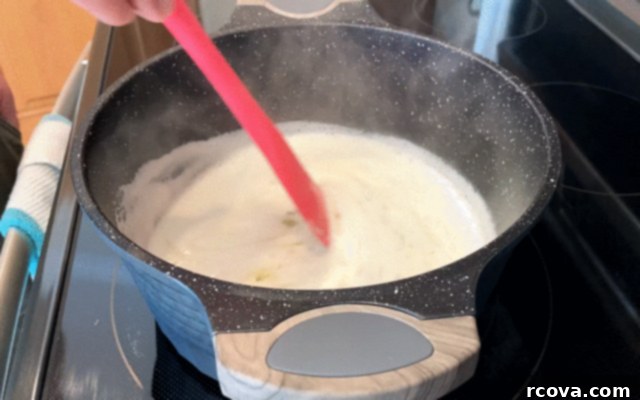
As the butter melts, it will begin to foam. Stir constantly with a rubber spatula or whisk. Continue to cook and stir as the butter moves from a liquid state to bubbling, then to a beautiful golden brown. Small, light brown specks will begin to form at the bottom of the pan – these are the toasted milk solids that give brown butter its signature nutty, caramelized flavor. This process typically takes about 5-10 minutes. You’ll notice a distinct, slightly sweet, caramel-like aroma filling your kitchen. Once you see these brown specks and smell that wonderful aroma, immediately remove the pan from the heat. Continue stirring for another minute or so to dissipate residual heat and prevent further cooking.
Pour the browned butter (including all those delicious brown specks!) into a heat-safe bowl or measuring cup. Allow it to cool for at least 10 minutes, or until it’s just warm but not hot. You don’t want the hot butter to cook your eggs when added later. For a visual guide and more detailed tips, see the comprehensive “How to Brown Butter” video and section below!
3. Creating the Perfect Cookie Dough
Once your browned butter has cooled slightly (it should still be liquid or slightly thickened, but not hot to the touch), transfer it to a large mixing bowl. Add the ¼ cup of granulated sugar and ¾ cup of brown sugar to the browned butter. Using a handheld electric mixer, cream together the sugars and butter until the mixture is light and fluffy. This usually takes 2-3 minutes and incorporates air, which contributes to the cookies’ final texture.
Next, crack in the two large eggs, one at a time, mixing well after each addition until fully combined. Scrape down the sides of the bowl with a spatula to ensure all ingredients are thoroughly incorporated. Gradually add your reserved dry ingredient mixture (flour, salt, baking powder) to the wet ingredients, mixing on low speed or by hand until just combined. Be careful not to overmix, as this can develop the gluten in the flour and lead to tough cookies.
Finally, gently fold in the ⅔ cups of semi-sweet chocolate chips and ⅔ cups of chopped walnuts using a spatula until they are evenly distributed throughout the dough. Ensure every spoonful of dough promises a delightful mix of flavors and textures.
4. Chill the Dough for Optimal Results
Cover the bowl containing your cookie dough tightly with plastic wrap, pressing it directly onto the surface of the dough to prevent a skin from forming. Place it in the refrigerator to chill for at least one hour. This chilling step is essential for several reasons: it solidifies the butter, which helps prevent the cookies from spreading too much during baking, and it allows the flavors to meld and deepen, resulting in a more flavorful and perfectly textured cookie. For an even richer flavor and better texture, you can chill the dough for up to 24-48 hours.
5. Bake to Golden Perfection
Preheat your oven to 325 degrees F (160 degrees C). While the oven preheats, line two baking sheets with parchment paper. Parchment paper is highly recommended as it prevents sticking, ensures even baking, and makes cleanup significantly easier.
Once the dough is chilled, scoop it into 1-inch sized balls. Using a cookie scoop helps ensure consistent cookie size, which leads to even baking. Place the dough balls onto the prepared baking sheets, leaving enough space (about 2 inches) between them for spreading. Gently flatten the tops of the balls slightly with your palm or the back of a spoon; this helps the cookies bake more evenly and achieve that desirable slightly crinkled, perfect shape.
Bake in the preheated oven for 17-18 minutes, or until the edges are golden brown and the centers are still slightly soft and puffy. The bottoms of the cookies should be lightly browned. Remember that baking times can vary depending on your oven, so keep a close eye on them.
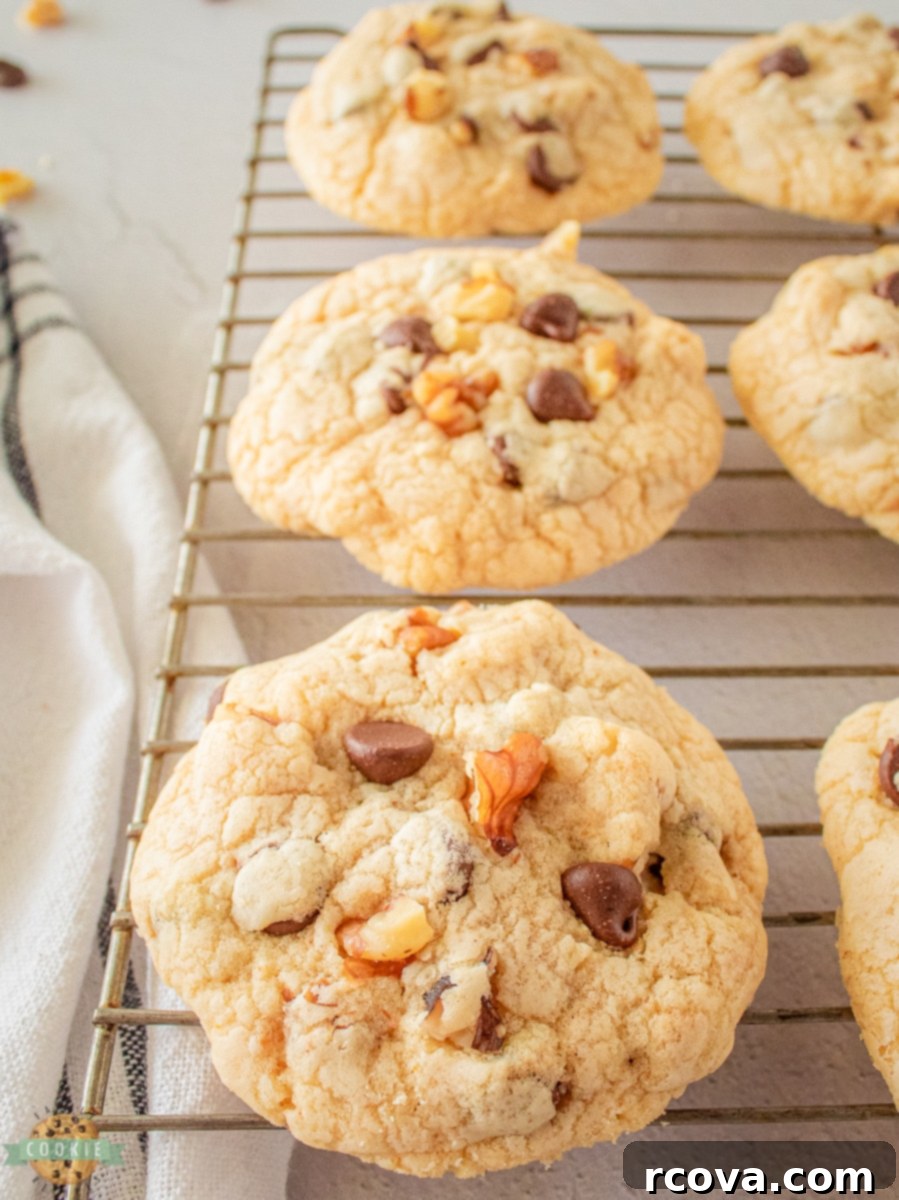
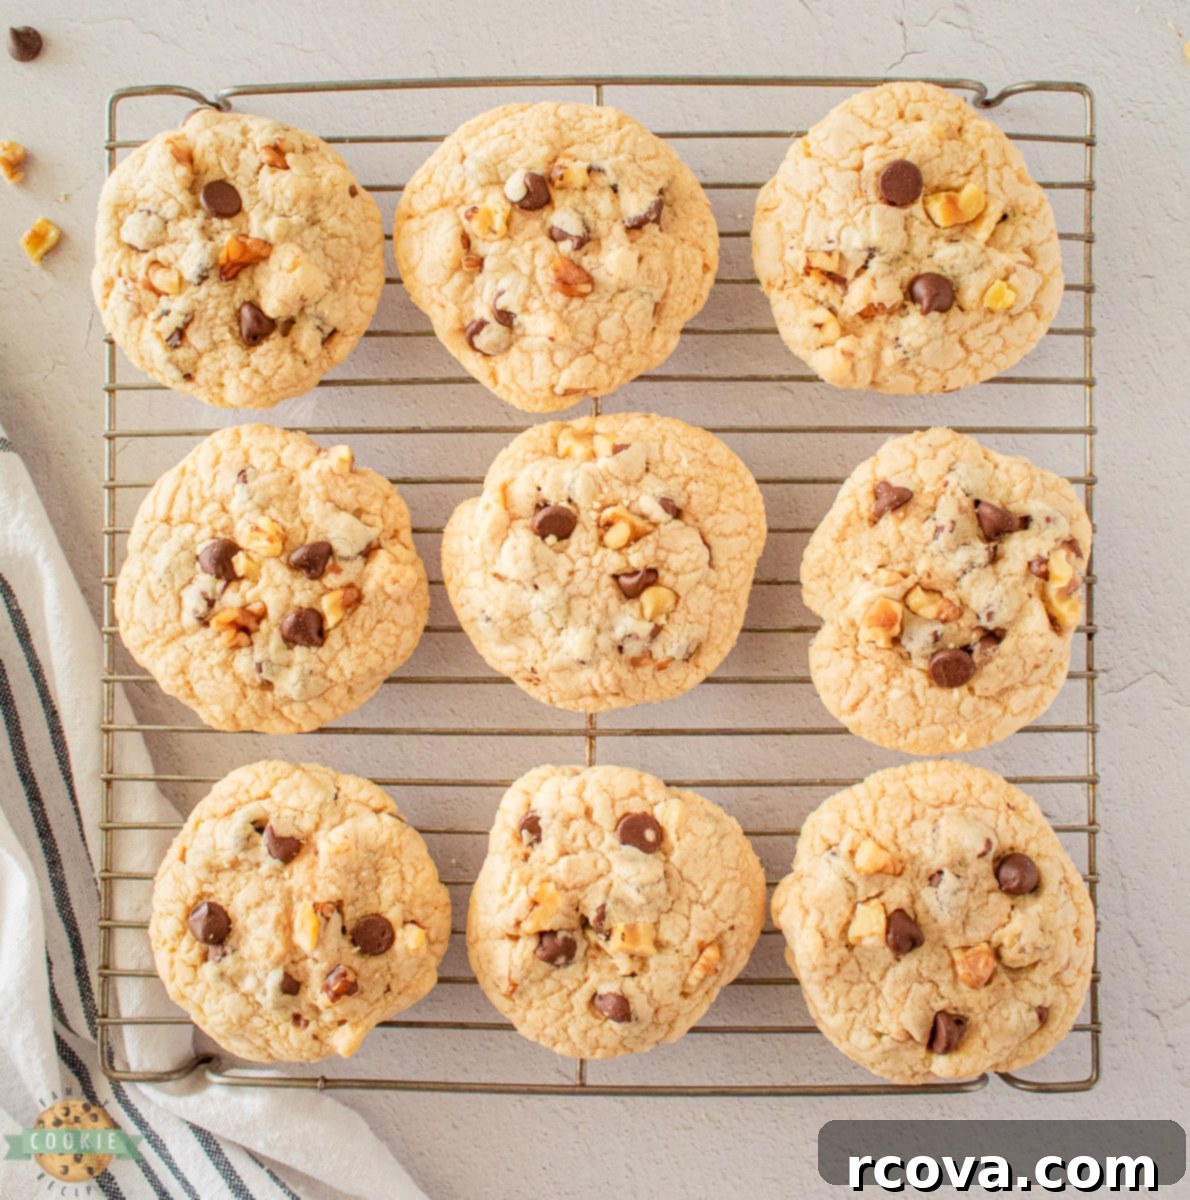
Once baked, remove the baking sheets from the oven and let the cookies cool on the sheets for about 5 minutes. This allows them to set up properly, preventing them from breaking when transferred. Then, transfer the cookies to a wire cooling rack to cool completely. While a warm cookie straight from the oven is always a delightful treat, cooling allows the flavors to fully develop.
Serve and enjoy these irresistible brown butter walnut chocolate chip cookies!
Detailed Guide: How to Brown Butter Successfully Every Time
Browning butter is a simple process that yields incredible flavor, but it requires a bit of attention and understanding of the stages. Here’s a more in-depth look at how to get it right every time, ensuring you don’t burn it and achieve that perfect nutty, caramel taste for your brown butter walnut chocolate chip cookies:
1. Choose the Right Pan: Start with a large, light-colored saucepan. A larger pan provides more surface area for the butter to brown evenly, preventing scorching. The light color of the pan is crucial as it allows you to easily monitor the milk solids as they toast; in a dark pan, they can burn before you even notice. Trust us on the size – the butter will foam up significantly, and a bigger pan helps prevent overflow.
2. Melt and Stir Continuously: Add your unsalted butter to the saucepan over medium-high heat. Stir gently but continuously using a rubber scraper or whisk as the butter melts. This constant stirring helps prevent the butter from settling and scorching at the bottom, and it ensures that the heat is evenly distributed for consistent browning.
3. Observe the Stages: As the butter heats, it will go through several distinct visual and aromatic stages:
- Liquefying: The butter will first fully melt into a clear, yellow liquid.
- Bubbling & Foaming: The water content in the butter will begin to evaporate, causing it to bubble vigorously and then develop a layer of foam on top. Continue stirring through this stage.
- Color Change & Specks Appear: After about 5-7 minutes of bubbling and foaming, you’ll notice the foam begin to subside slightly, allowing you to see the liquid butter underneath. The butter will start to change color, transitioning from a light golden hue to a rich amber. Simultaneously, tiny brown bits (these are the toasted milk solids, packed with flavor) will appear at the bottom of the pan. This is your cue! Keep stirring so you can see the brown bits clearly.
4. Remove Promptly to Prevent Burning! Once the butter reaches a rich amber color and the milk solids at the bottom are golden brown (they should smell nutty and toasted, not acrid or burnt), immediately remove the pan from the heat. I personally like to cook it for about 45 seconds to 1 minute past when it first starts changing color to ensure maximum flavor development, but you must be very vigilant. The residual heat in the pan will continue the cooking process, so prompt removal is absolutely key to prevent burning. Burnt butter tastes bitter and will ruin your cookies.
5. Cool Down Appropriately: Once off the heat, continue to stir for another minute or so until the bubbling completely stops and the foam settles. Pour the browned butter, including all those delicious brown specks, into a separate heat-proof bowl. Allow it to cool until it solidifies somewhat, reaching a consistency similar to sour cream or soft butter. It won’t return to its original solid stick form, but it needs to be cool enough not to scramble your eggs when you add them to the dough.
Important Note: Always use REAL BUTTER for browning! Margarine or butter substitutes will not brown correctly, as they lack the milk solids required for this chemical reaction, and thus will not yield the same rich, nutty flavor that makes these cookies so special.

Brown Butter Walnut Chocolate Chip Cookies
Print
Pin
Rate
Ingredients
- 2 cups all-purpose flour
- ½ teaspoon salt
- ½ teaspoon baking powder
- 1 cup butter unsalted
- ¼ cup white sugar
- ¾ cup brown sugar
- 2 eggs
- ⅔ cup semi-sweet chocolate chips
- ⅔ cup chopped walnuts
Instructions
-
Prep: In a small bowl mix the flour, salt, and baking powder together. Set aside.
-
Brown butter: In a small sauce pan over medium heat, melt butter for about 5 minutes. Bring to a simmer, stirring constantly until butter clears and light brown specks form, about 10 minutes. Should smell faintly of caramel. Remove from heat and continue stirring until bubbling stops. Let cool for 10 minutes.
-
Dough: In a separate medium bowl, whip both sugars and butter with handheld mixer until combined. Add eggs and mix until combined. Mix in flour by hand, a little at a time until all is incorporated. Add chocolate chips and walnuts.
-
Chill: Cover dough and let chill in refrigerator for 1 hour.
-
Bake: Preheat oven to 325 degrees Fahrenheit. Line baking sheet with parchment paper.
-
Roll dough into 1 inch balls and place on baking sheet. Flatten slightly.
-
Bake for 17-18 minutes or until bottoms of cookies are slightly brown. Transfer to wire cooling rack and let cool before serving. Enjoy!
Notes
Nutrition
Knowing When Your Brown Butter is Perfectly Done
The key to perfect brown butter, crucial for these incredible cookies, is vigilance and knowing what to look for at each stage. Once you notice the butter becoming clear or transparent after melting, keep a very close watch as it’s nearing completion. The butter will undergo a gradual transformation, developing a beautiful darker tone from a light golden hue to a rich amber.
The most important indicator of doneness is the appearance of small, light brown specks at the bottom of the pan. These are the milk solids that have toasted and developed that desirable nutty, caramel flavor. Simultaneously, a fragrant, sweet, and nutty aroma will fill your kitchen. As soon as you see these brown specks and smell that wonderful fragrance, immediately remove your saucepan from the heat. It’s critical to act quickly at this stage, as the residual heat in the pan will continue the cooking process. If you leave it over the heat for too long, even for a few extra seconds, you run the risk of burning your butter. Burnt butter will have very dark brown or black specks that can resemble coffee grounds, and it will emit a sharp, acrid smell rather than a pleasant, nutty one. When in doubt, it’s always better to slightly under-brown than to burn it, as burnt butter cannot be salvaged.
Storing Your Delicious Brown Butter Walnut Chocolate Chip Cookies
To keep your brown butter walnut chocolate chip cookies tasting their best, proper storage is key. Once completely cooled, these cookies can be kept stored in an airtight container at room temperature for up to 3-5 days. For an optimal soft and chewy texture, especially in warmer environments, we highly recommend keeping them stored in the refrigerator. This helps solidify the butter within the cookies, maintaining their structure and moistness. Simply allow them to come to room temperature for a few minutes before serving, or warm them briefly in the microwave for that delightful freshly-baked feel.
For longer-term storage, these cookies freeze exceptionally well. Once they are fully cooled, arrange them in a single layer on a baking sheet and freeze until solid. Once frozen, transfer the cookies to a freezer-safe airtight container or a heavy-duty freezer bag. They can be stored in the freezer for up to 2-3 months without losing their quality. When you’re ready to enjoy a frozen treat, simply thaw them at room temperature for an hour or so, or gently reheat them in a low oven for a few minutes to bring back that warm, gooey texture.
Customizing Your Cookies: Ingredient Substitutions and Variations
While this recipe for Brown Butter Walnut Chocolate Chip Cookies is perfect in its classic form, it’s also wonderfully adaptable! Don’t hesitate to personalize them to suit your taste or what you have on hand. Here are a few ideas for ingredient substitutions and exciting variations:
- Flour Alternatives: This recipe has been meticulously developed and tested using all-purpose flour for consistent, optimal results. If you’re considering using other types of flour, such as whole wheat pastry flour or a gluten-free blend, we recommend substituting only half of the all-purpose flour initially. Different flours absorb liquids at varying rates, so you may need to adjust the amount of liquid slightly to achieve the correct dough consistency. Always observe how the dough behaves and adjust accordingly.
- Nut Varieties: Walnuts provide a distinctive crunch and an earthy flavor that perfectly complements the brown butter. However, you can easily swap them for other favorite nuts to create a new experience. Pecans are a fantastic alternative, offering a buttery richness that harmonizes beautifully with the brown butter. For a different profile, consider toasted hazelnuts or blanched almonds for their unique notes. Ensure any nuts you use are roughly chopped to a similar size for even distribution and a pleasant texture in every bite.
- Chocolate Choices: Semi-sweet chocolate chips are a timeless choice and balance the cookie’s sweetness well, but don’t limit yourself! For a sweeter, creamier cookie, milk chocolate chips are an excellent option. If you prefer a more intense, sophisticated cocoa flavor, opt for dark chocolate chips or finely chopped dark chocolate bars (around 60-70% cacao). You could even use white chocolate chips for a sweeter contrast or mix different chocolate types to create a “triple chocolate” effect.
- Additional Flavor Boosts: Consider adding a pinch of cinnamon or nutmeg to the dry ingredients for a warm, comforting spice note. A dash of instant espresso powder can also subtly enhance the chocolate flavor without making the cookies taste like coffee. For a delightful sweet and salty contrast, sprinkle a tiny bit of flaky sea salt on top of the cookie dough balls before baking.
Have fun experimenting with this recipe to discover your absolute favorite combination of chocolate and nuts, making these chocolate chip walnut cookies truly your own!
The Science Behind Chilling Cookie Dough: Why It’s Crucial for Perfect Texture
You might be tempted to skip the chilling step, believing it’s merely an extra wait, but resisting this urge is absolutely vital for achieving the perfect brown butter walnut chocolate chip cookies. Chilling the dough for at least an hour, and even longer, serves several important scientific and culinary purposes:
- Solidifies Fats: The primary reason to chill the dough is to solidify the butter. When butter is cold and firm, it melts much more slowly in the hot oven. This slow melting process allows the cookie edges to set and crisp up before the entire cookie spreads too much, resulting in thicker, chewier cookies with a beautifully defined shape. If you bake warm dough, the butter melts rapidly, leading to thin, flat, and often greasy cookies that lack the desired texture.
- Develops Flavor: Chilling provides the ingredients with additional time to meld and deepen in flavor. The flour has more time to fully hydrate, and the sugars and liquids can absorb more thoroughly into the dry ingredients. This prolonged contact intensifies the flavors, making your cookies taste richer, more nuanced, and significantly more complex. The desirable brown butter notes, in particular, will become even more pronounced and harmonious throughout the dough.
- Improves Texture: Beyond just shape and flavor, chilling also significantly impacts the overall texture of the cookie. It contributes to a chewier cookie by concentrating the sugars and slightly reducing the moisture content of the dough through evaporation, which occurs even in the refrigerator. This results in a more desirable, less crumbly chew.
- Easier to Handle: From a practical standpoint, cold dough is much less sticky and significantly easier to scoop, roll, and shape. This makes your baking process smoother, cleaner, and much more enjoyable, especially when working with a rich dough like this one.
So, while it requires a little patience, the chilling time is an invaluable investment that pays off handsomely in superior flavor, texture, and appearance for your homemade brown butter walnut chocolate chip cookies.
Parchment Paper vs. Cooking Spray: The Best Choice for Baking Perfect Cookies
When it comes to baking cookies, particularly rich and flavorful ones like these brown butter walnut chocolate chip cookies, using parchment paper is almost always the superior choice over cooking spray. Here’s why it makes a significant difference:
- Ensures Even Baking: Parchment paper creates a consistent, uniform, and non-stick surface on your baking sheet. This consistency promotes even heat distribution across the entire sheet, meaning your cookies will bake uniformly. This reduces the risk of having some cookies with burnt bottoms while others are still undercooked, leading to a perfectly golden and evenly textured batch every time.
- Prevents Sticking and Easy Release: While cooking spray offers some non-stick properties, parchment paper provides a foolproof release. Your cookies will effortlessly slide right off the sheet once baked, without any risk of breaking or leaving behind stubborn bits. This preserves their perfect shape and delicate texture, making cleanup much simpler.
- Avoids Greasy Residue: These cookies contain a good amount of butter and melted chocolate, which can sometimes leave a greasy residue on baking sheets. Parchment paper acts as an effective barrier, collecting any excess grease and preventing it from baking onto your pan. This eliminates the need for vigorous scrubbing and makes cleanup incredibly easy – simply discard the used parchment paper!
- No Flavor Alteration: Some cooking sprays, particularly those with added propellants or oils, can occasionally leave a subtle, undesirable taste on baked goods or create a gummy residue on pans over time. Parchment paper is a neutral, inert material that won’t impart any unwanted flavors to your delicate cookies, allowing the rich taste of the brown butter, walnuts, and chocolate chips to shine through unadulterated.
For consistent, beautifully baked, and effortlessly easy-to-clean-up cookies, parchment paper is unequivocally the best way to go!
Explore More Irresistible Chocolate Chip Cookie Recipes
If you’ve fallen in love with these exceptional Brown Butter Walnut Chocolate Chip Cookies and are craving more delightful cookie adventures, you’re in luck! Our collection features a variety of fantastic chocolate chip cookie recipes, each with its unique twist. Here are some other must-try recipes from our kitchen that you and your family are sure to enjoy:
- RICE KRISPIE CHOCOLATE CHIP PEANUT BUTTER COOKIES
- CHERRY CHOCOLATE CHIP COOKIES
- ORANGE CINNAMON CHOCOLATE CHIP COOKIES
- BEST BROWN BUTTER CHOCOLATE CHIP COOKIES
- CHEWY CHOCOLATE CHIP COOKIES
- BUTTER PECAN CHOCOLATE CHIP COOKIES
- MARBLED CHOCOLATE CHIP COOKIES
- COCONUT CHOCOLATE CHIP COOKIES
- PUMPKIN OATMEAL CHOCOLATE CHIP COOKIES
- CHOCOLATE CHIP PUFF PASTRY COOKIES

After navigating a couple of unexpected cruise cancellations due to past global events, our family was overjoyed to finally set sail recently! We had an absolutely amazing time, cherishing every moment and already dreaming of our next adventure. Here’s a lovely snapshot of my middle son and me enjoying a leisurely walk on the ship’s deck, soaking in the incredible ocean views. These majestic cruise ships truly are something to behold, offering unforgettable experiences and a perfect backdrop for creating lasting family memories.

You are truly going to fall head over heels in love with the rich, complex flavors and perfectly chewy texture of these brown butter walnut chocolate chip cookies. They are generously packed with the perfect combination of crunchy walnuts and melty, decadent chocolate chips, all brought together by the incredible depth and nutty aroma of browned butter. What’s not to love about such a sensational and utterly irresistible treat? Bake a batch today for your family and friends, and savor every soft, chewy, and exquisitely delicious bite. These cookies are destined to become a cherished favorite!
