Homemade Chocolate Fruit Cups: A Guilt-Free Indulgence for Any Occasion
Craving something sweet but want to keep it light and healthy? Look no further than these delightful homemade chocolate fruit cups! They offer all the rich, indulgent taste of a decadent dessert without the guilt, making them an absolutely perfect treat for any time of year. Simple to prepare and incredibly versatile, these little cups of joy are sure to become a favorite in your kitchen.
The inspiration for these elegant yet straightforward chocolate fruit cups often comes from a desire to enjoy a sweet moment without overdoing it. Originally, this recipe came to life around Valentine’s Weekend, a time synonymous with all things sweet and romantic. I had planned a cozy supper club with my girlfriends, and the theme was festive shades of red, white, and pink. My mind was buzzing with ideas: refreshing Moscow Mules with muddled strawberries, my sister’s famous Chicken Caprese Skillet, and a friend’s anticipated red-velvet brownies. I was genuinely excited for our monthly get-together.
However, as often happens with busy schedules, plans began to shift, and our lively group dwindled down to a more intimate gathering of four. While I might have missed out on sharing my special, healthier dessert with the larger group, it certainly meant more for me to enjoy! And yes, I still have a few more of these delicious cups chilling in the fridge, waiting to be savored. It’s a wonderful reminder that cooking for others, or even just for yourself, is a profound act of love and care, whether it’s for my dearest friends or my beloved partner.
The Wholesome Choice: Cacao Nibs vs. Traditional Chocolate
When it comes to selecting the chocolate for these cups, I often reach for cacao nibs. I discovered these wonderful little gems and bought a large bag on Amazon, quickly realizing they were my new secret weapon for a sweet fix with less guilt. Cacao nibs are essentially just cacao beans that have been roasted, hulled, and broken into small, edible pieces. Think of them as nature’s chocolate chips, but without the added sugars, dairy, or unhealthy fats typically found in processed chocolate. They offer an intense, slightly bitter, and rich chocolate flavor, packed with antioxidants and essential minerals, making them an excellent choice for a truly guilt-free indulgence.
However, for special occasions like Valentine’s Day, or simply if you prefer a sweeter profile, feel free to use your favorite type of chocolate. Any good quality dark, semi-sweet, or even milk chocolate will work beautifully when melted down. The key is to choose a chocolate you genuinely enjoy, as its flavor will be the star of these cups. The versatility of this recipe means you can tailor it to your dietary preferences or simply what you have on hand. For a romantic dinner at home, which my partner Jason and I often enjoy when he’s deep in study mode, these chocolate fruit cups are an ideal dessert. They are light, perfectly sweet, and won’t leave us feeling overly full after a delicious main course. I’m already planning a romantic meal that will conclude with these delightful treats.

Mastering the Art of Melting Chocolate for Perfect Cups
Making these elegant chocolate cups starts with perfectly melted chocolate. While some recipes might suggest using a microwave, I’ve often found that method leads to uneven melting or even burnt chocolate, which can ruin the texture and flavor of your dessert. For consistently smooth and glossy chocolate that will set beautifully, the double boiler method (or bain-marie) is your best friend. This gentle, indirect heating technique ensures your chocolate melts evenly without seizing or scorching. Here’s how to achieve that silky-smooth consistency:
- Take a medium saucepan and fill it halfway with water. Bring the water to a gentle simmer over low to medium-low heat. You want steam, not a rolling boil, to avoid scorching the chocolate or getting water into it.
- Place a heat-proof metal or glass bowl over the saucepan. Crucially, ensure the bottom of the bowl does not touch the simmering water. The steam from the water will provide the necessary heat.
- Add your chocolate of choice – whether it’s cacao nibs, dark chocolate chips, or a finely chopped bar – to the bowl. Stir or whisk continuously with a rubber spatula or whisk. You’ll notice it transforms into a smooth, luxurious liquid surprisingly quickly. Be patient and keep stirring to ensure all pieces melt evenly.
- Once the chocolate is completely melted and smooth, remove the bowl from the heat. Don’t leave it over the hot water, as even residual heat can cause it to overheat and thicken.
This careful method guarantees a beautifully tempered chocolate that will set perfectly, providing a lovely snap when bitten into, which is essential for sturdy and visually appealing chocolate cups. Proper melting is the foundation for avoiding cracks and achieving a professional finish.
Tips for Crafting Perfect Chocolate Fruit Cups Every Time
My culinary journey with these chocolate cups wasn’t without its learning curves. The very first time I attempted them, I was a bit too conservative with the chocolate, resulting in cups that were too fragile and cracked easily upon handling. But as with any labor of love in the kitchen, persistence pays off! The second attempt was much more successful, yielding beautifully formed cups. However, then came the challenge of photographing them in natural sunlight – a glorious idea until they started to gently melt, causing a few minor cracks. While mine might have a few imperfections from their photoshoot, yours will be pristine if you follow these precise steps and tips:
- **Prepare Your Liners:** Lightly spray the inside of your paper cupcake or muffin liners with non-stick cooking spray. This is a crucial, non-negotiable step that ensures easy demolding later, preventing the chocolate from sticking.
- **Achieve Even Coating:** When brushing the melted chocolate into the cupcake liners, ensure an even layer all around, including the sides and up to the rim. Aim for a thickness of about ¼ inch or slightly less. This provides enough structure without making the cup overly thick and brittle. Use a spoon to drizzle and spread, or a clean pastry brush for precision.
- **Don’t Skimp on the Sides:** Pay special attention to coating the sides thoroughly. These are the structural pillars of your cup! A thin, even coat on the sides is paramount for a cup that holds its shape. You might even consider doing two thin coats, allowing the first to set slightly before applying the second, for extra strength.
- **The Power of Chill Time:** Once coated, transfer the chocolate-lined cups to the refrigerator immediately. Allowing the chocolate to harden completely for at least 30 minutes (or longer if your chocolate layer is thicker) ensures they are firm enough to be removed from the liners without breaking or leaving chocolate residue. Don’t rush this step!
- **Gentle Demolding:** Once fully chilled and hard, carefully peel away the paper cupcake liners. The non-stick spray should facilitate their release, but always handle the chocolate shells gently with clean, dry hands to avoid any smudges or cracks.
- **Work Smart in Warm Conditions:** If working in a warm kitchen, consider chilling your workspace or working in smaller batches. You can also place the chocolate-coated liners on a baking sheet and pop them in the freezer for 5-10 minutes if you’re short on time, but the refrigerator is generally preferred for a slower, more even set.
Recipe: Effortless Homemade Chocolate Fruit Cups

Chocolate Fruit Cups
Enjoy a sweet treat without guilt! These homemade chocolate fruit cups taste indulgent, but couldn’t be any simpler to enjoy!
Prep Time: 6 minutes
Servings: 6
Author: Nichole Crews
Rating: 5 out of 5 stars (based on 2 votes)
Print Recipe | Pin Recipe
Ingredients
- 1 cup dark chocolate (cacao nibs, chocolate chips, or your preferred melting chocolate)
- 6-10 paper cupcake liners
- 1-2 cups fresh berries (your choice, e.g., strawberries, blueberries, raspberries)
- Non-stick cooking spray
Instructions
- Melt your chosen chocolate in a small heat-proof bowl placed over a larger saucepan filled halfway with simmering water (double boiler method) on low heat. Stir or whisk continuously until the chocolate is completely smooth and melted. This happens quickly, so watch it carefully.
- Lightly spray the inside of your paper cupcake or muffin liners with non-stick cooking spray. This crucial step helps in easy demolding later.
- Using a spoon or a pastry brush, carefully spread the melted chocolate evenly inside each liner. The chocolate layer should be thin but robust enough to hold its shape—about ¼ inch or less. Ensure the sides are well-coated for structural integrity.
- Transfer the chocolate-coated liners to the refrigerator for at least 30 minutes to allow the chocolate to harden completely.
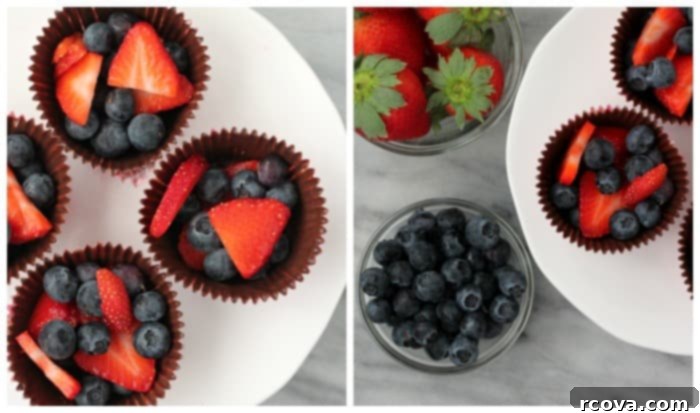
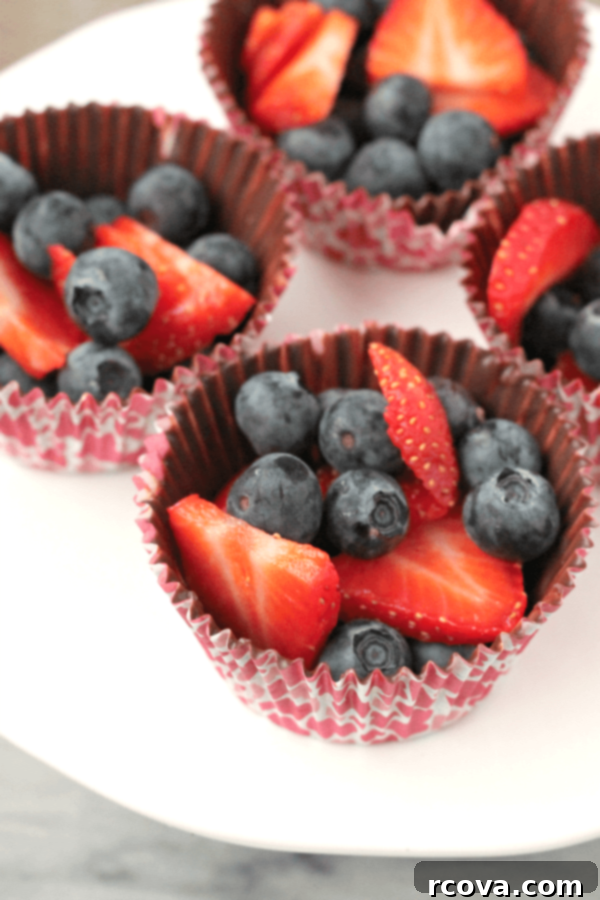
- Once the chocolate cups are firm, gently peel away the paper liners. Fill them with your favorite fresh berries and enjoy your homemade, guilt-free treat!
Notes
These chocolate fruit cups can be made in advance and stored in the refrigerator until ready to fill and serve. This makes them a perfect make-ahead dessert for entertaining or meal prepping your sweet cravings.
Did you make this recipe? We want to see! Tag @casadecrews on Instagram or use the hashtag #casadecrewseats so we can find you!
Customization and Serving Suggestions for Your Chocolate Fruit Cups
One of the best aspects of these homemade chocolate cups is their incredible versatility. While fresh berries are a classic and undeniably delicious filling, don’t hesitate to get creative and customize them to your heart’s content! The simple chocolate shell acts as a canvas for endless flavor combinations, allowing you to tailor them for any palate or occasion.
Creative Fillings and Toppings:
- Beyond Berries: While strawberries, blueberries, and raspberries are fantastic, explore other fresh fruits like sliced bananas, kiwi, juicy mango chunks, tart orange segments, or even roasted apples or pears for a unique, seasonal twist.
- Creamy Delights: Add a dollop of freshly whipped cream, a spoonful of creamy Greek yogurt (perhaps mixed with a touch of honey or vanilla extract), or a light fruit compote to introduce another layer of texture and flavor. For a truly decadent option, a small scoop of your favorite ice cream or sorbet nested inside the chocolate cup is pure bliss.
- Nutty Additions: For a delightful crunch and added protein, sprinkle in some finely chopped nuts like almonds, walnuts, pecans, or pistachios. A swirl of smooth peanut butter, almond butter, or cashew butter can also create a wonderfully savory-sweet combination.
- Extra Indulgence & Presentation: Elevate the presentation and taste with a dusting of cocoa powder, a sprinkle of mini chocolate chips (white, milk, or dark), shredded coconut, or even some colorful sprinkles for a festive touch. A delicate drizzle of caramel sauce, white chocolate sauce, or a contrasting fruit coulis can add a gourmet flair.
Serving Ideas for Every Occasion:
- Elegant Dessert Course: Serve them individually on small dessert plates for an elegant end to any meal, whether it’s a casual weeknight dinner, a sophisticated dinner party, or a special holiday feast.
- Charming Party Favors: These cups make charming individual party favors or delightful additions to a dessert bar. Prepare the chocolate shells in advance, and let guests choose their own fillings, turning dessert into an interactive experience.
- Wholesome Breakfast or Snack: For a healthier twist that can be enjoyed any time, fill your chocolate cups with Greek yogurt and a sprinkle of granola, nuts, or seeds for a delightful breakfast or a satisfying, wholesome snack.
- Coffee or Tea Companion: Pair these exquisite little treats with a freshly brewed cup of coffee, an aromatic espresso, or a comforting herbal tea for a sophisticated afternoon indulgence or a cozy evening treat.
Experiment with different combinations to find your perfect chocolate fruit cup. The possibilities for flavor, texture, and presentation are truly endless, making this recipe a versatile staple in your dessert repertoire!
The Irresistible Benefits of Crafting Your Own Sweet Treats at Home
In a world full of processed foods and readily available sugary snacks, taking the time to create your own desserts offers numerous advantages beyond just a delicious outcome. Homemade chocolate fruit cups are a prime example of a treat that delivers on multiple fronts, enriching both your palate and your overall well-being:
- Unmatched Ingredient Control: When you bake or cook at home, you are the master of your ingredients. You get to choose every single component, opting for high-quality dark chocolate or nutritious cacao nibs, organic fresh fruits, and avoiding artificial flavors, preservatives, and excessive, hidden sugars commonly found in store-bought desserts. This transparency ensures you know exactly what you’re consuming.
- Healthier Choices, Naturally: As beautifully demonstrated with the option of cacao nibs, you can significantly reduce added sugars and unhealthy fats, transforming an otherwise indulgent dessert into a more nutritious option. Fresh fruits naturally infuse your treat with essential vitamins, antioxidants, and dietary fiber, contributing to a healthier lifestyle without sacrificing flavor.
- Remarkable Cost-Effectiveness: Making desserts at home is almost always much more economical than purchasing gourmet treats from a specialty bakery or even a supermarket. With a few basic ingredients, you can produce a larger quantity of delicious, high-quality desserts for a fraction of the price, making indulgence more accessible.
- Superior Freshness and Flavor Profile: There’s nothing quite like the taste of freshly made food. The vibrant, crisp flavors of fresh berries combined with just-melted chocolate are far superior in taste and texture to pre-packaged alternatives that often sit on shelves for days. The aroma alone is a treat!
- Tailored Customization for Dietary Needs: Homemade recipes offer incredible flexibility. You can easily adapt these chocolate fruit cups for various dietary restrictions or preferences. Use dairy-free chocolate for lactose intolerance, sugar-free options for diabetes-friendly versions, or specific fruits to cater to allergies or simply personal taste.
- The Deep Joy and Satisfaction of Creation: Beyond the nutritional and practical benefits, there’s immense satisfaction and a sense of accomplishment in creating something delicious with your own hands. It’s a rewarding activity that can be enjoyed solo as a meditative practice, or with family and friends, creating cherished memories in the kitchen.
These chocolate fruit cups are not just a dessert; they are an embodiment of mindful indulgence – a delicious, beautiful, and wholesome way to enjoy life’s sweet moments, entirely on your terms.
This post may contain affiliate links. Purchasing through them helps support this website. Please see the disclaimer here.
