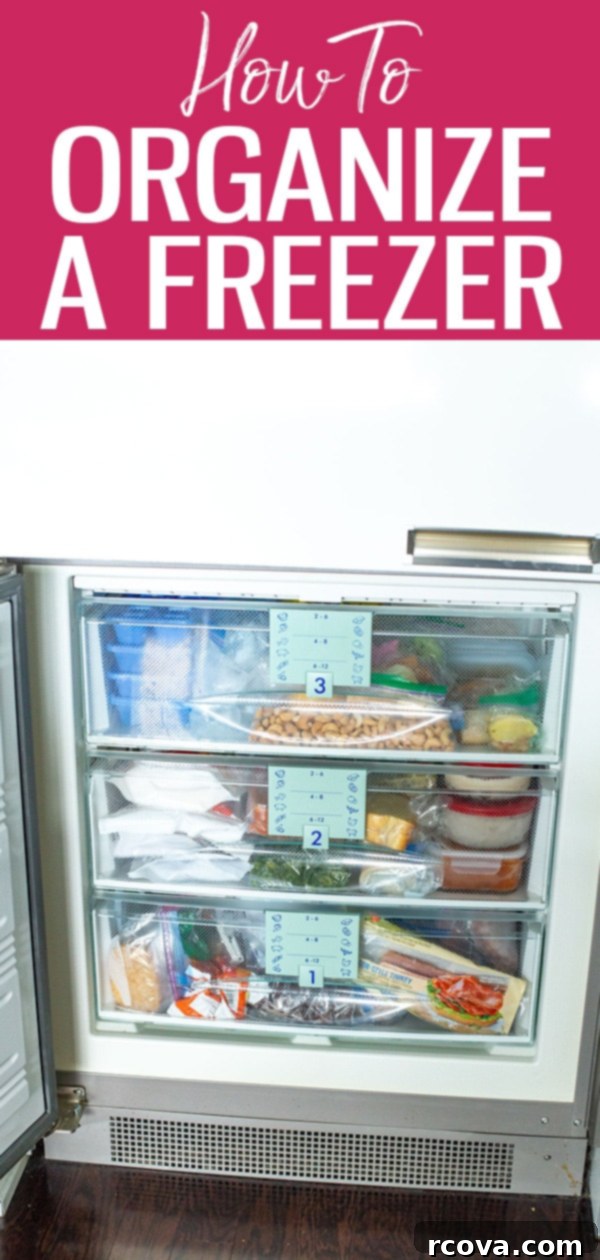
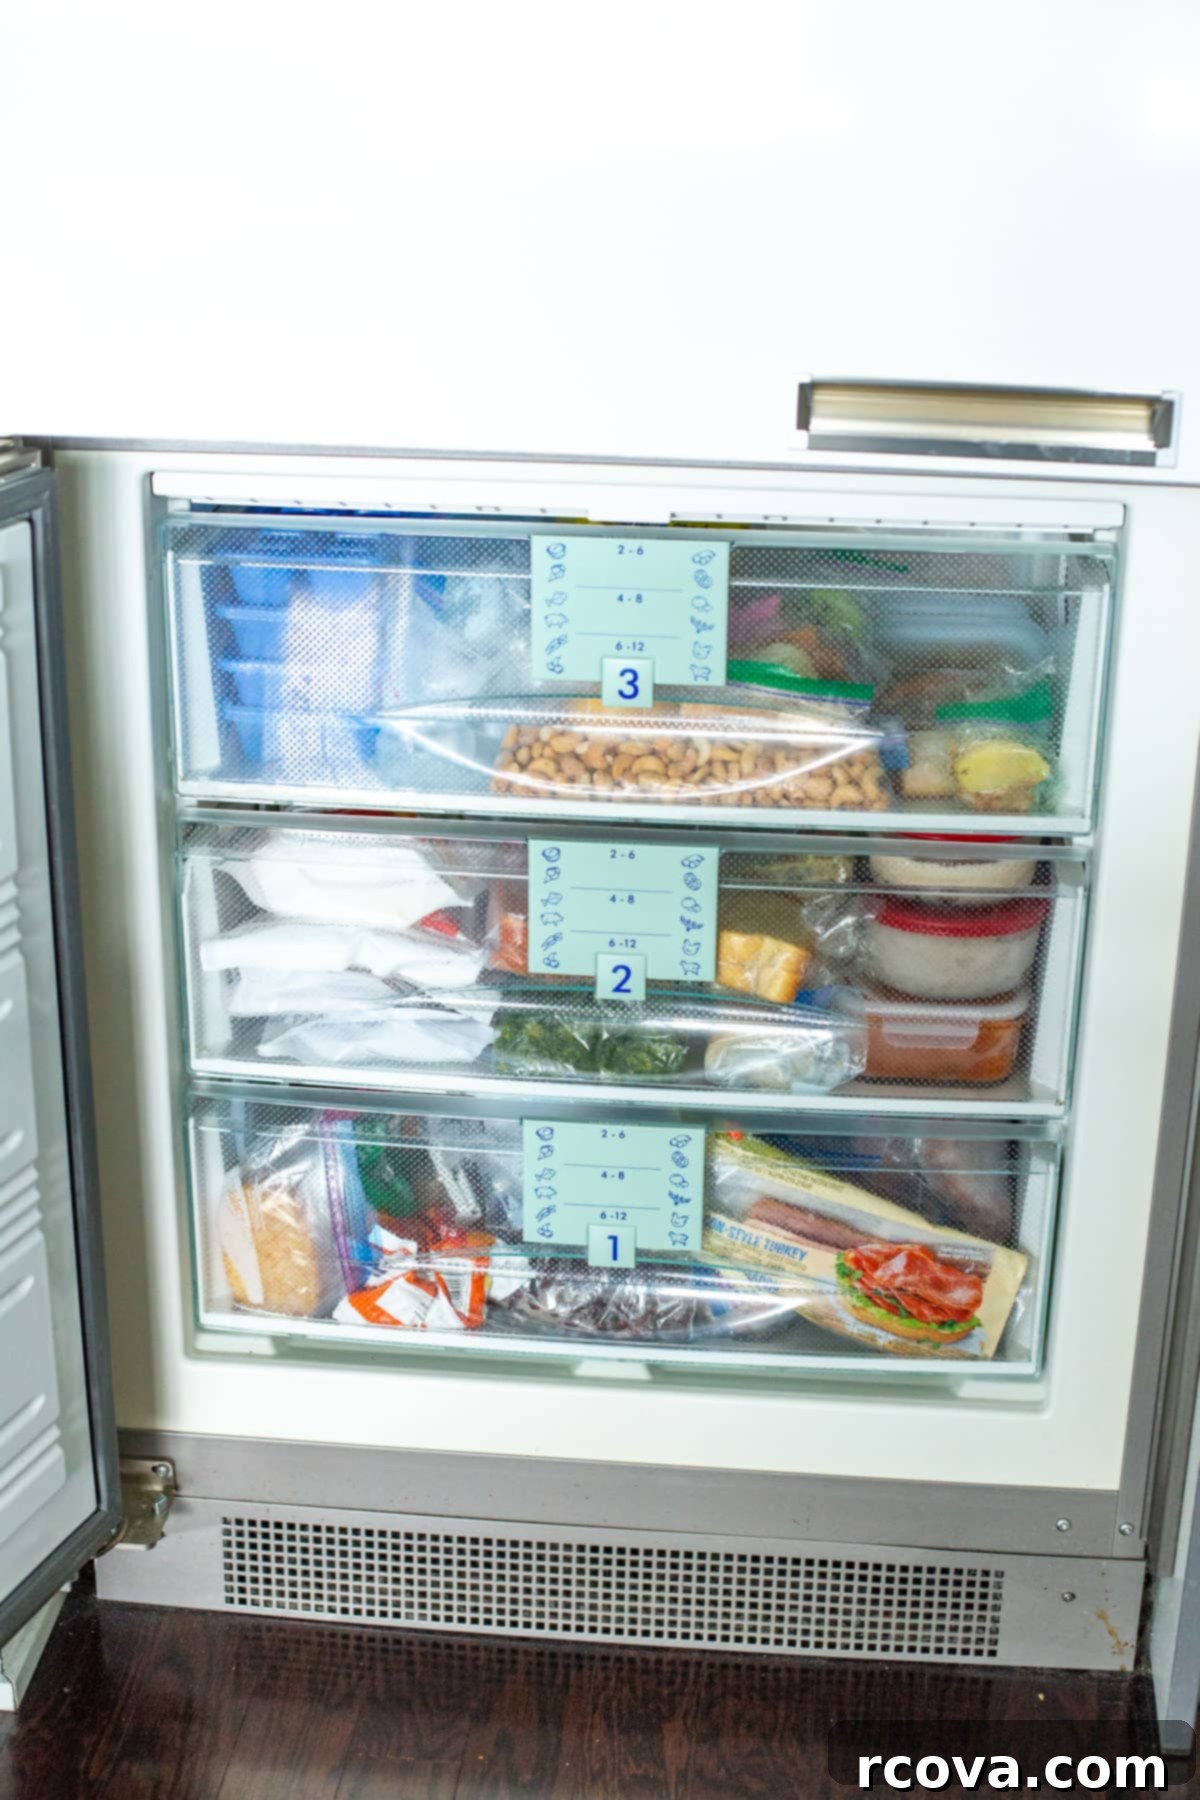
The Ultimate Guide to Freezer Organization: Declutter, Maximize Space, and Reduce Food Waste
Is your freezer a daunting abyss where food goes in, but is rarely seen again? Do you spend precious minutes digging through icy packages, only to find forgotten ingredients or freezer-burnt leftovers? If so, you’re not alone! A messy, unorganized freezer can lead to wasted food, wasted money, and endless frustration. But what if you could transform that chaotic space into an efficient, easy-to-navigate storage solution? With our comprehensive 6-step guide, you’ll learn exactly how to organize your freezer, making finding ingredients and meal prepping an absolute breeze.
FREE Budget-Friendly Meal Plan!
Save thousands of dollars on food every year with my free budget-friendly meal plan ebook.
Benefits of an Organized Freezer
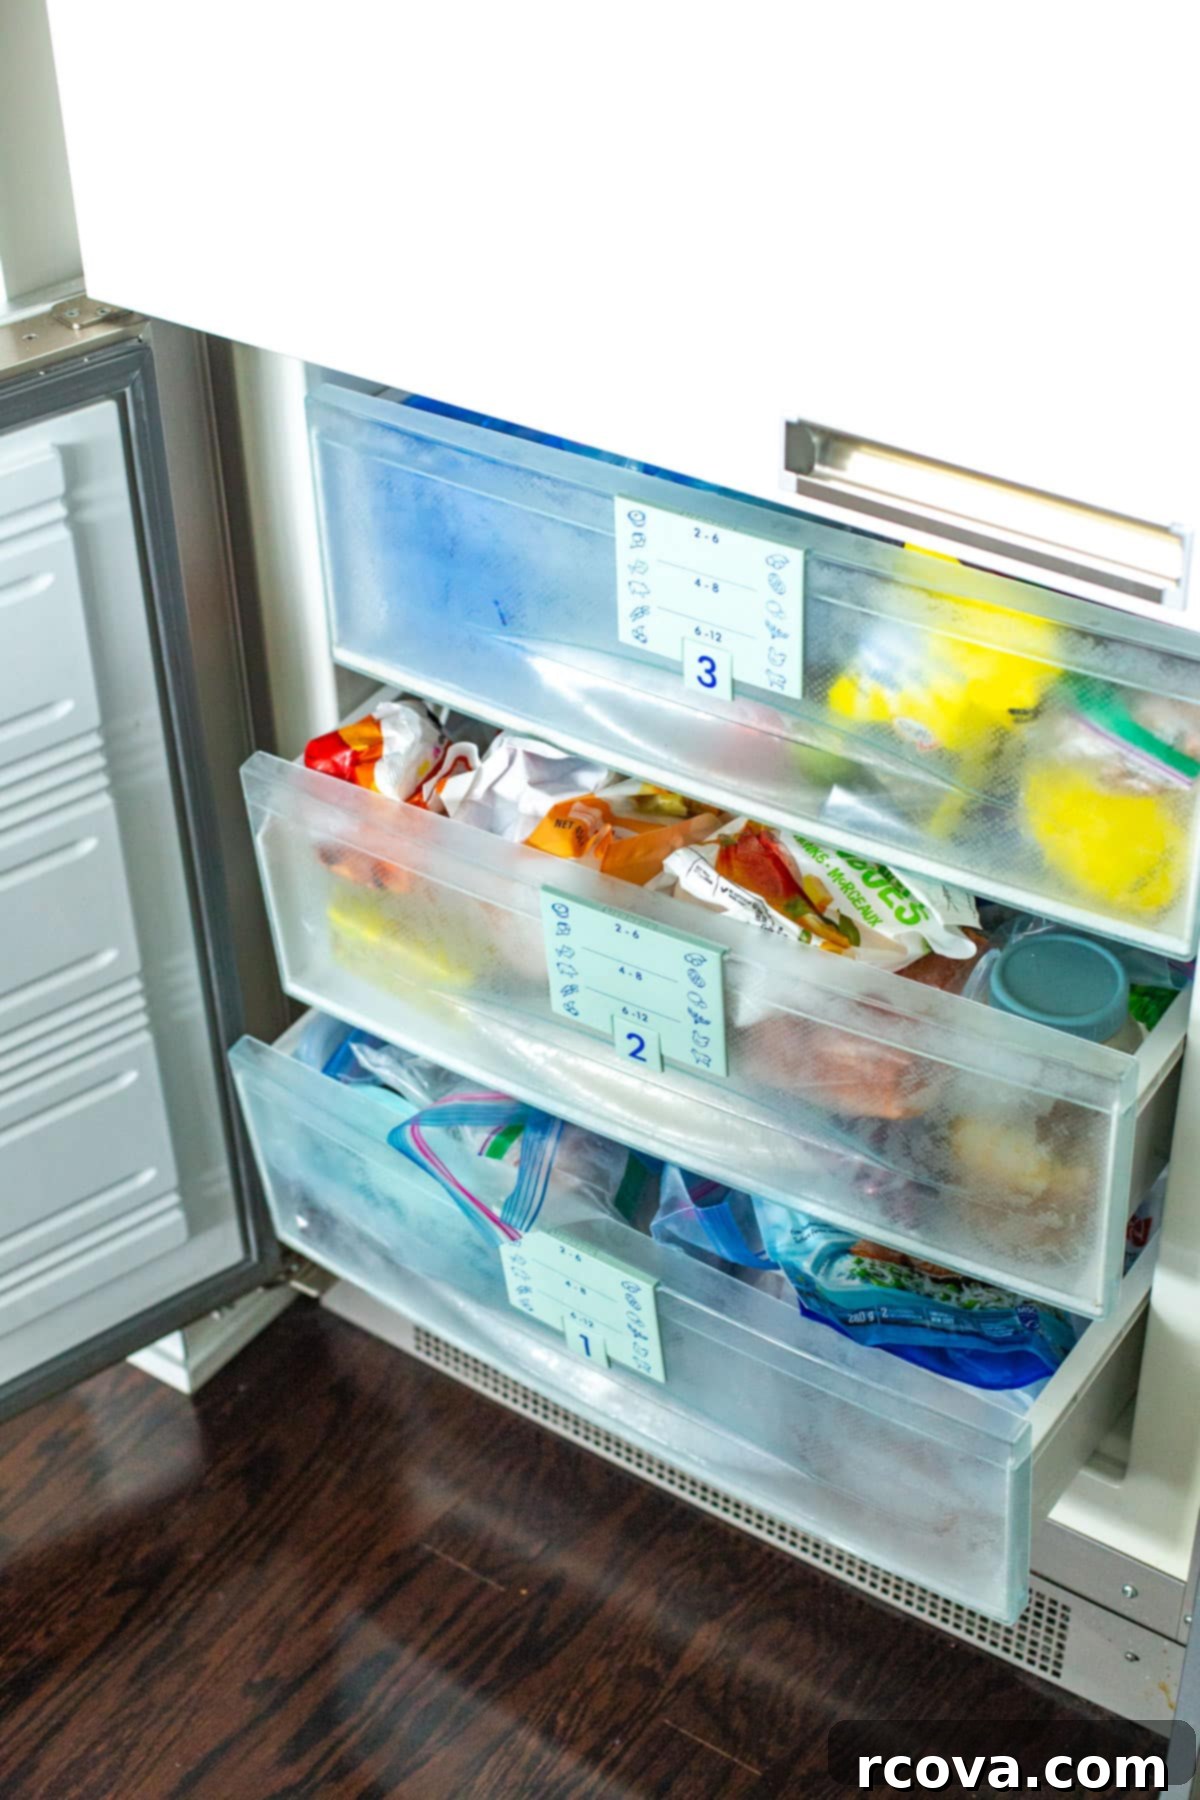
Ever felt a pang of despair or frustration when attempting to locate something specific in your freezer? It’s a common kitchen challenge! This guide on how to organize your freezer is designed to make finding and freezing items a wonderfully simple task. Regardless of whether you own a top-mount freezer, a spacious chest freezer, or a convenient drawer-style freezer, effective organization is paramount. Every item should have a designated spot, ensuring that anything you need is easily accessible and not buried under a mountain of mystery meals.
There are numerous compelling benefits to taking the time to organize your freezer, extending far beyond just aesthetics:
- Saves Time: Bid farewell to endless rummaging! When your freezer is thoughtfully organized by category and date, you’ll instantly spot that bag of chicken or those frozen vegetables you need. This efficiency streamlines meal preparation, reduces stress, and gives you back precious minutes in your busy day.
- Saves Money: An organized freezer is a powerful tool for budget-friendly meal planning. By clearly seeing what you already have on hand, you can “shop your freezer” before heading to the grocery store. This prevents impulse buys, duplicate purchases, and ensures you’re utilizing every ingredient, ultimately saving you significant money on your food bill.
- Maximizes Space: Freezer space, whether limited or abundant, is valuable real estate. Organizing everything into defined zones or groups allows you to optimize every inch. Techniques like flat freezing and vertical stacking can unlock surprising amounts of storage, especially in chest freezers or side-by-side models, preventing a cramped and inefficient freezer.
- Reduces Food Waste: How many times have you discovered a forgotten container of soup or a bag of berries at the bottom of your freezer, long past its prime? A structured freezer prevents items from getting lost and ensures you can easily find and use ingredients before they develop freezer burn or pass their recommended storage time. This conscious consumption significantly cuts down on household food waste.
- Enhances Food Safety: Knowing what’s in your freezer and when it was frozen helps you adhere to proper food rotation (First In, First Out). This minimizes the risk of consuming food that has degraded in quality or safety due to prolonged storage.
- Simplifies Meal Planning: With a clear overview of your frozen inventory, meal planning becomes significantly easier. You can quickly identify proteins, vegetables, and pre-made meals, simplifying your weekly menu and reducing last-minute cooking stress.
How to Organize Your Freezer: A Step-by-Step Guide
Ready to tackle that frosty frontier? Follow these six practical steps to transform your freezer from a chaotic cold box into an efficient, accessible storage system.
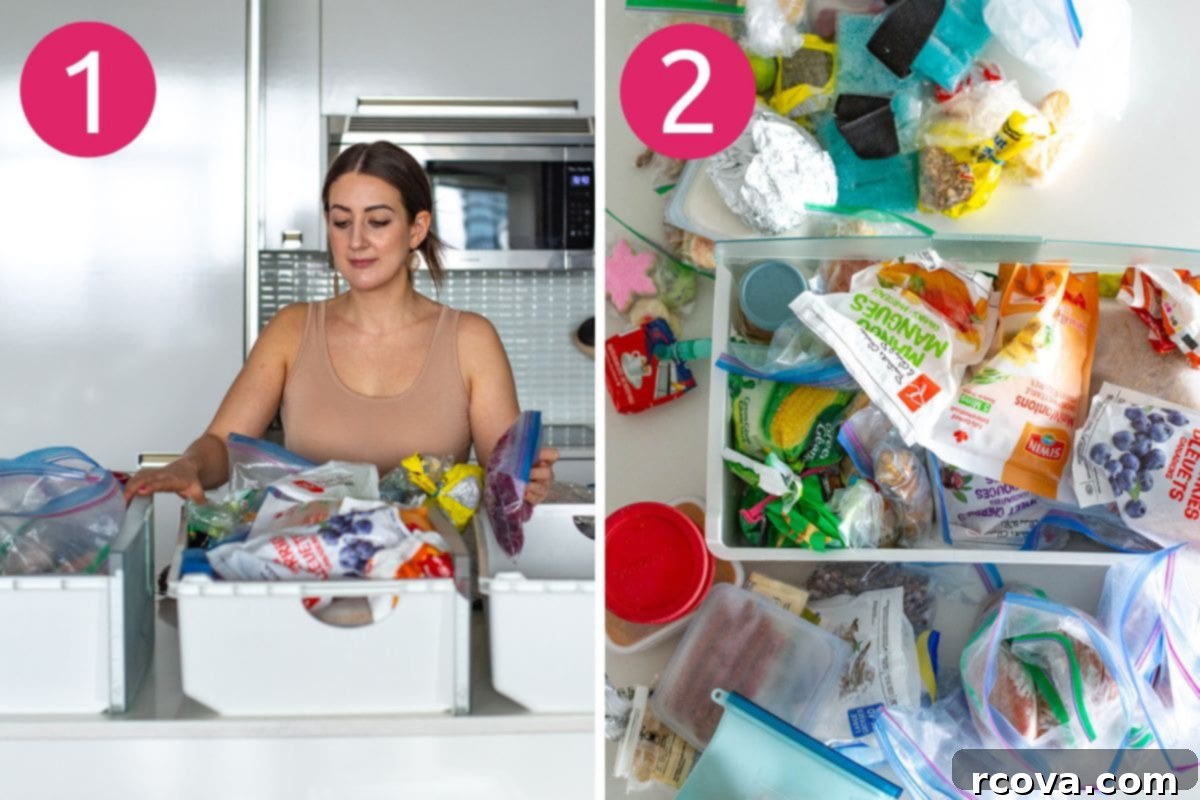
Step 1: Empty Out Your Entire Freezer
The first and most important step is to completely empty your freezer. This might seem daunting, and yes, it will likely look worse before it gets better, but it’s essential to start with a truly clean slate. Pull out every single item – all the frozen pizzas, ice packs, containers of leftovers, bags of vegetables, and mystery meats. Place everything on a clean counter or, even better, in coolers with ice packs to ensure food safety while you work. This allows you to see the true scope of your inventory and identify forgotten items.
Step 2: Sort and Declutter Your Inventory
Once your freezer is empty, it’s time for a thorough inventory and declutter. Go through each item one by one. mercilessly throw out anything that is clearly expired. Pay close attention to items with freezer burn – visible ice crystals, discoloration, or dry spots on food indicate a loss of quality and flavor, even if still technically safe to eat. Discard these items as they won’t provide an enjoyable eating experience. Begin sorting the remaining items into preliminary piles: “keep,” “use soon,” and “relocate” (if something ended up in the freezer that shouldn’t be there).
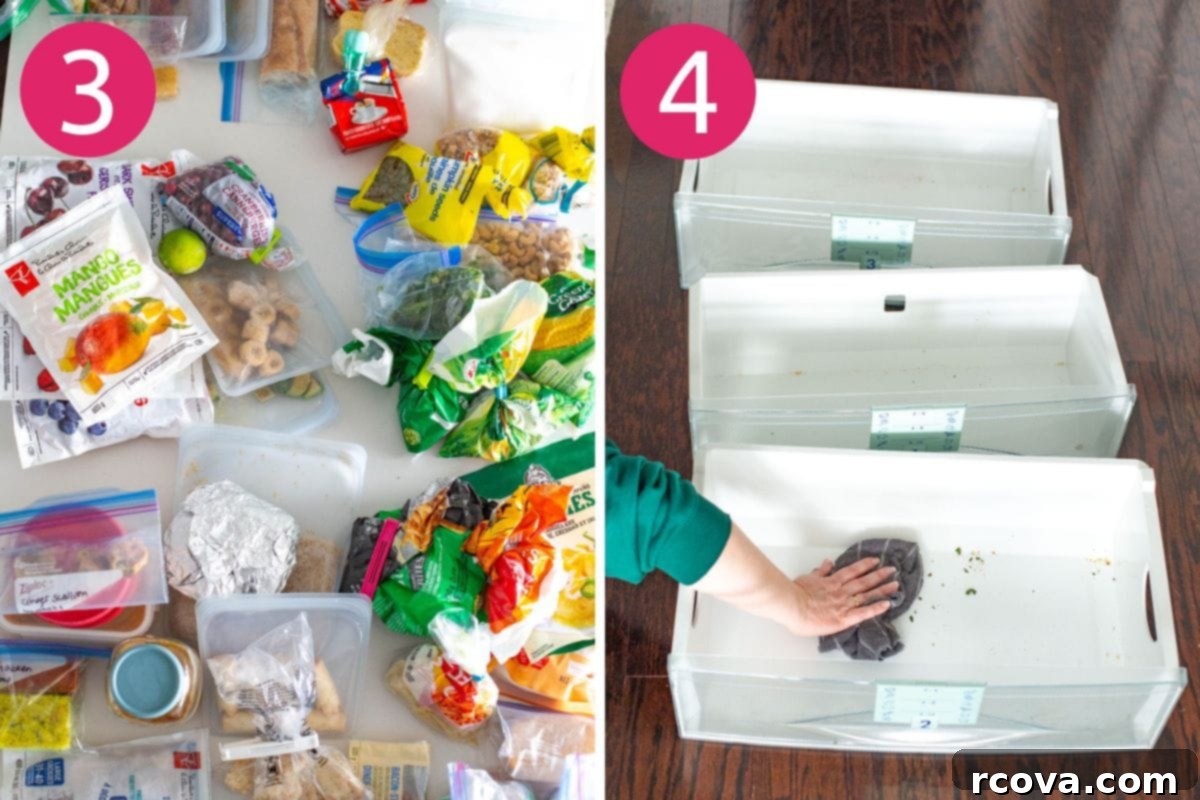
Step 3: Group Similar Items Together (Create Zones)
Now that you’ve decluttered, it’s time to bring order to what remains. Start making distinct stacks or groups of items that logically belong together. Think about how you use these foods. Common categories or “zones” might include:
- Proteins: Chicken, beef, fish, pork, plant-based alternatives
- Vegetables & Fruits: Bagged frozen veggies, homemade frozen produce, smoothie ingredients
- Baked Goods: Breads, muffins, cookie dough, pastries
- Meal Prep/Leftovers: Soups, stews, chili, pre-cooked meals, casseroles
- Breakfast Items: Waffles, pancakes, breakfast burritos
- Desserts/Treats: Ice cream, popsicles, frozen fruit bars
- Pantry Overstock: Large bags of flour, nuts, seeds, coffee beans
This grouping process helps you determine how many different categories you’ll have and gives you a clear idea of how to allocate space within your freezer, possibly using freezer baskets or bins for these groups.
Step 4: Thoroughly Clean Out Shelves and Drawers
Your freezer, like any other appliance in your kitchen, benefits from a good cleaning. Before you start putting everything back, give the interior of your freezer a deep clean. Remove all shelves, drawers, and removable components. Wash them with warm soapy water and a clean cloth. For the interior walls and floor, use a mild solution of warm water and a little baking soda or white vinegar to wipe down surfaces and absorb any lingering odors. Dry everything thoroughly before reassembling. This step not only creates a hygienic storage environment but also offers a fresh start for your newly organized system.
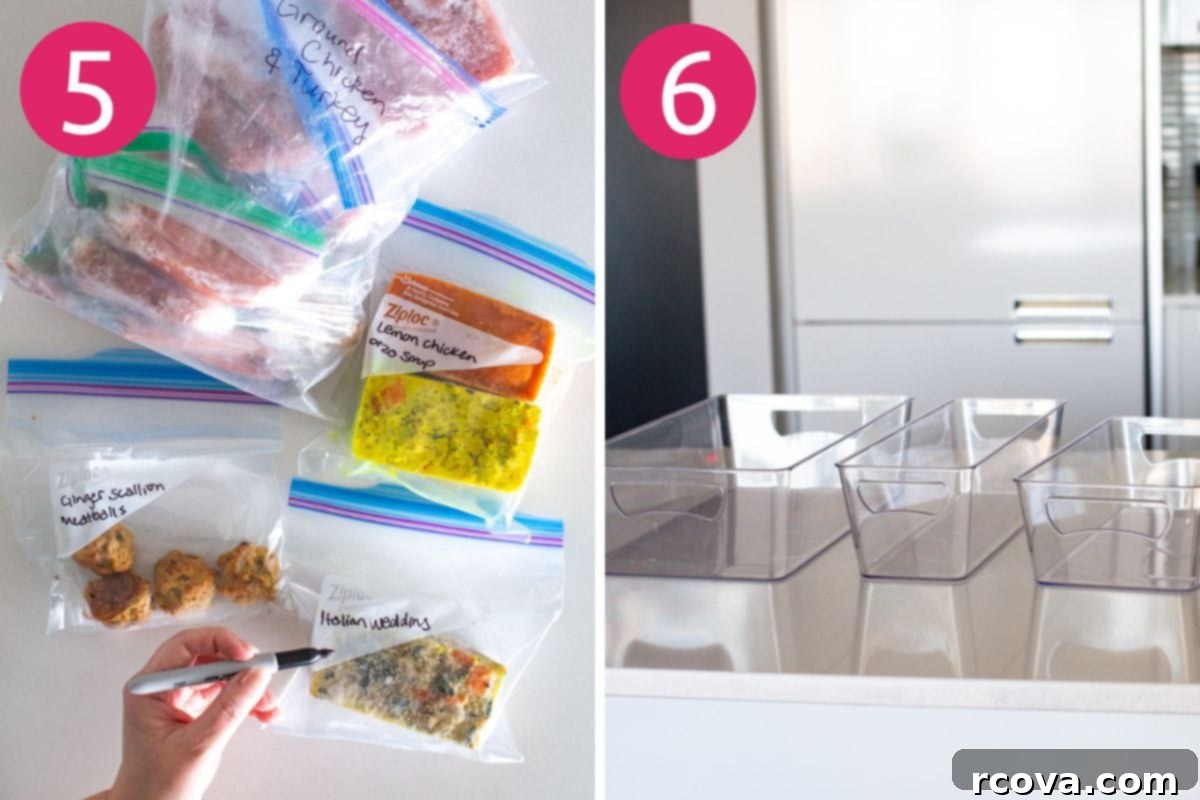
Step 5: Label and Date All Freezer Items
This step is non-negotiable for an efficient and waste-free freezer. For every item going back into your freezer, clearly label it with two crucial pieces of information: what the item is (e.g., “ground beef,” “chicken broth,” “berry mix”) and the date it was frozen. You can use a permanent marker directly on freezer bags, plastic containers, or use masking tape and a sharpie for glass food storage containers or reusable bags. For optimal food rotation and safety, always include a “use by” date if known. When placing items back, arrange them in order of date, following the “First In, First Out” (FIFO) principle: oldest items at the front, newest at the back. This ensures you consume food before its quality degrades or it goes past its recommended freezer life.
Step 6: Utilize Smart Storage Containers and Bins
To take your freezer organization to the next level, consider investing in appropriate storage bins and containers. Clear, freezer-safe plastic or wire bins are game-changers, especially for chest or side-by-side freezers, as they allow you to pull out an entire category of food at once without disturbing other items. Assign specific bins to your established categories – a bin for proteins, one for vegetables, another for grains, etc. For items like soups, sauces, or liquids, freeze them flat in freezer-safe bags. Once solid, they can be stacked vertically like files, saving immense space. Vacuum sealing is another excellent option for maximum space efficiency and preventing freezer burn, extending the life and quality of your food. Choose containers that fit your freezer type and your food items effectively.
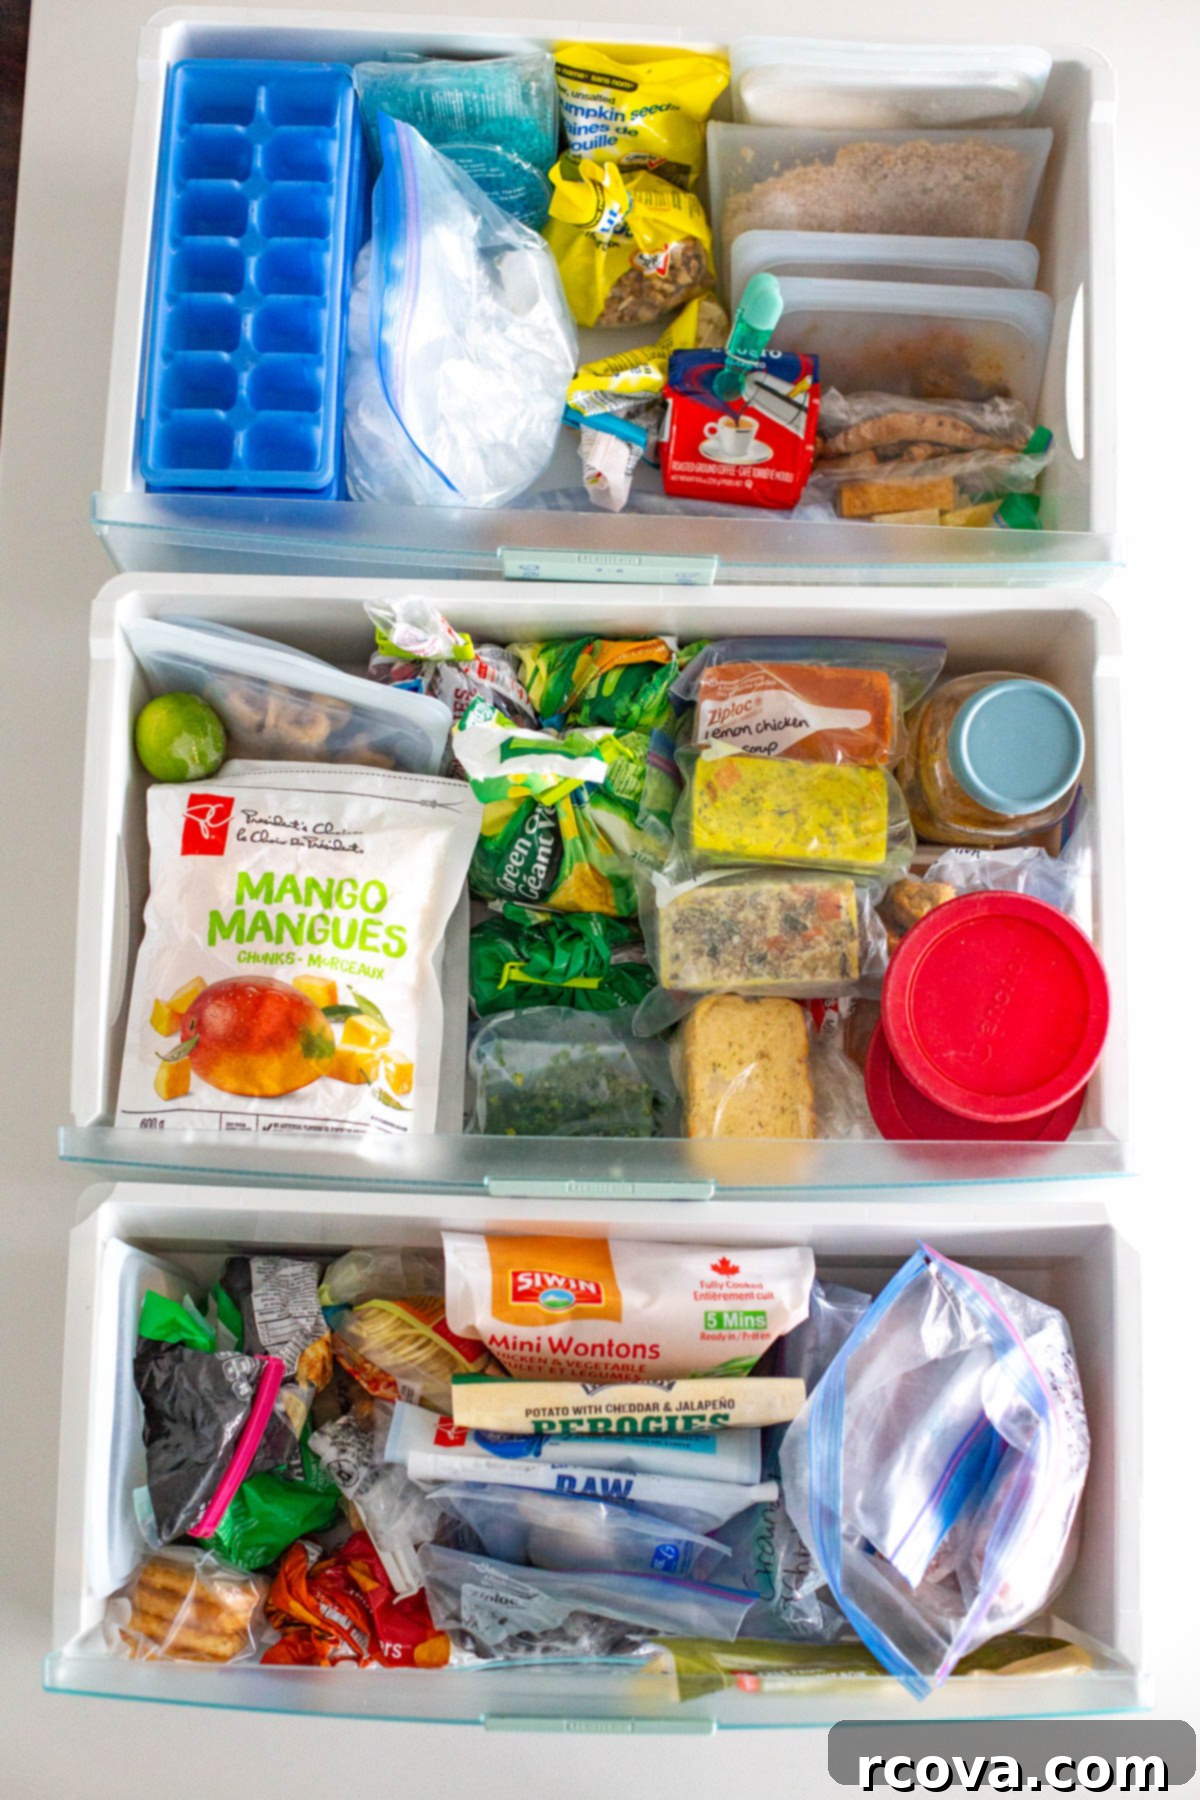
Tips for Maintaining an Organized Freezer
Congratulations, you now have a beautifully organized freezer! The real challenge, however, is keeping it that way. Consistency is key. Here are some of my top tips to ensure your freezer remains as tidy and functional as possible:
- Organize by Date (First In, First Out): Always keep the oldest food items at the front or top of their designated section, and new additions at the back or bottom. Every time you freeze something new, make it a habit to place it behind or below existing items of the same type. This simple practice ensures you’re always using up food before it approaches its freezer expiration date, preventing waste and ensuring freshness.
- Store Items Upright: For maximum space efficiency and visibility, especially with items stored in freezer bags, aim to freeze food flat first. Once frozen solid, stack these flattened bags upright like files in a filing cabinet. This method works exceptionally well in drawers or deep bins, allowing you to quickly flip through your inventory rather than unstacking a pile.
- Maintain a Freezer Inventory List: This is a powerful organizational hack! Keep a running list of everything in your freezer. You can use a simple notepad and pen taped to the freezer door, a whiteboard, or a digital app like your phone’s Notes app. Include the item, quantity, and date frozen. This list becomes invaluable for meal planning and grocery shopping, allowing you to know exactly what you have without even opening the freezer door.
- Adhere to Your Zones: After putting in all the effort to group and categorize items into zones, commit to maintaining this system. Don’t simply toss a new item into the nearest open spot. Take those extra few seconds to place it in its correct zone with similar items. This discipline prevents your freezer from devolving back into disarray.
- Use Appropriate Packaging: Always use freezer-safe containers or bags that are designed to withstand low temperatures and prevent freezer burn. Remove as much air as possible from bags to minimize ice crystal formation and preserve food quality.
- Don’t Overfill: While it’s tempting to cram as much as possible into your freezer, overfilling can actually hinder its efficiency. Cold air needs to circulate to maintain proper temperatures and freeze food evenly. Leave a little space for air circulation.
Frequently Asked Questions About Freezer Organization
I highly recommend arranging your freezer food into distinct zones or categories. For example, you could have a dedicated zone for various proteins like frozen chicken, beef, or fish, another zone for grains like frozen rice and quinoa, a section for frozen soups and broths, and a separate area for frozen cooked meals or leftovers. Additionally, within each zone, arrange your food by date, placing the oldest items towards the front and newer items towards the back. This “First In, First Out” (FIFO) method ensures you use items before they expire, significantly reducing food waste.
To effectively declutter your freezer, start by emptying everything out. Inspect each item carefully. Immediately discard anything that has visibly expired or shows significant signs of freezer burn (e.g., dry spots, discoloration, excessive ice crystals) as its quality will have degraded. Once you’ve removed the expired and freezer-burnt items, group the remaining food into logical categories or “zones.” This initial sorting is crucial to prevent the freezer from becoming a disorganized free-for-all again and helps you identify what you truly have on hand.
Absolutely, plastic bins can be excellent for freezer organization, but it’s essential to ensure they are explicitly labeled as “freezer-safe.” Some standard plastics can become brittle and crack in extremely cold temperatures, leading to shattered bins and scattered food. Look for sturdy plastics, often polypropylene or BPA-free options, designed to withstand freezing. Clear bins are particularly useful as they allow you to see the contents at a glance, further enhancing your freezer’s efficiency. Alternatives like silicone containers or even some glass containers (ensure they are freezer-safe and leave headspace for expansion) can also be used.
Maximizing freezer space involves a few key strategies. First, for soft or liquid items like soups, purees, or ground meat, freeze them flat in heavy-duty freezer bags. Once frozen solid, these flat packages can be stacked vertically like files, saving significant space compared to bulky containers. Second, consider investing in a vacuum sealer; removing air from food packages dramatically reduces their volume and prevents freezer burn, allowing you to fit more into your freezer. Finally, utilize storage bins and baskets to create defined zones and contain smaller items, preventing them from scattering and making it easier to pull out entire categories of food. This combination of flat freezing, vacuum sealing, and clever container use will greatly enhance your freezer’s storage capacity.
More Kitchen Resources
Discover more expert tips and guides to optimize your kitchen and culinary life.
-
Best Kitchen Essentials List {Tools + Appliances}
-
Small Pantry Organization Ideas to Maximize Your Space
-
Freezer Meal Plan: 5 Recipes to Get You Started
