The Ultimate Frosted Rose Sugar Cookies: Soft, Buttery, No-Chill Recipe with Beautiful Rosette Frosting
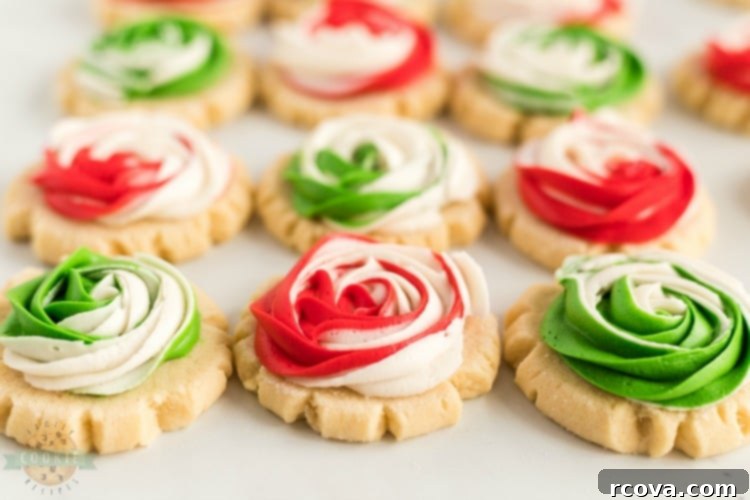
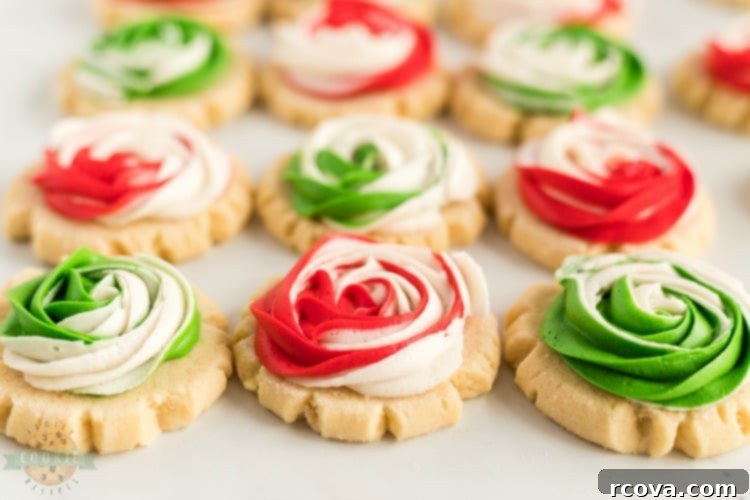
Welcome to the enchanting world of Frosted Rose Sugar Cookies! Imagine a cookie that’s incredibly soft, delightfully buttery, and crowned with a stunning, edible rose made of luscious frosting. This isn’t just any sugar cookie recipe; it’s an experience. What makes these cookies truly special is their elegant presentation coupled with surprising simplicity. You won’t need to chill the dough for hours, nor will you have to meticulously roll them out. This streamlined approach means you can enjoy homemade, bakery-quality sugar cookies with a fraction of the effort, making them perfect for any occasion, from thoughtful gifts to charming party treats.
These beautiful sugar cookies are designed to impress without the stress. Each bite offers a melt-in-your-mouth texture, a delicate sweetness, and the rich flavor of homemade goodness. The signature swirled rosette frosting not only adds visual appeal, transforming each cookie into a miniature work of art, but also provides a creamy, tangy counterpoint that elevates the entire experience. Whether you’re a seasoned baker or just starting your culinary journey, this recipe guides you through creating impressive rose-adorned sugar cookies that are sure to become a cherished favorite.

Expert Tips for Baking the Best Soft Sugar Cookies
Crafting the perfect soft and chewy sugar cookie is an art, but with these essential tips, you’ll achieve consistent, delicious results every time. Pay close attention to these details, as they can significantly impact the texture, flavor, and overall success of your Frosted Rose Sugar Cookies.
- Use Softened, Not Melted Butter: This is perhaps the most crucial tip. Your butter needs to be at room temperature, soft enough to make an indentation when pressed, but not oily or melted. Melted butter will incorporate too much air into the dough, leading to flat, greasy, and crispy cookies, which is the opposite of the thick, soft texture we’re aiming for. Proper softening ensures a creamy, emulsified dough that bakes beautifully.
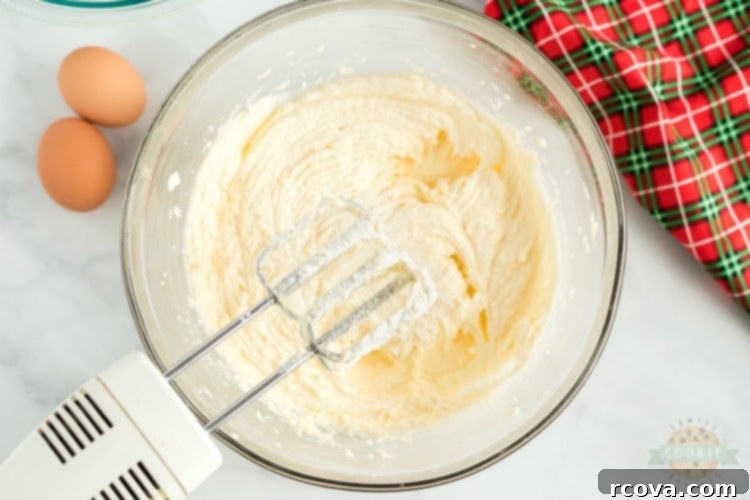
- Cream Butter and Sugars Thoroughly: Don’t rush this step! Creaming the butter (or shortening) and sugars together for a solid 2-3 minutes is vital. This process incorporates air into the mixture, creating a light and fluffy base. This aeration contributes directly to the soft, tender consistency of your final cookies, ensuring they aren’t dense or heavy. The mixture should become pale in color and visibly fluffy.
- Achieve the Right Dough Thickness: When you press your cookie balls, aim for them to be approximately 1/4 inch thick. Resist the urge to press them too thin. Thinner cookies will spread out more and bake quickly, resulting in a crispy rather than the desired soft and chewy texture. A thicker cookie holds its shape better and maintains its delightful chewiness, making it the perfect canvas for your rosette frosting.
- Always Preheat Your Oven: A properly preheated oven is non-negotiable for consistent baking. Placing cookies into a cold or still-heating oven can lead to uneven baking, unpredictable spreading, and a less-than-ideal texture. Preheating ensures that the cookies begin baking immediately at the correct temperature, allowing them to rise properly and set consistently.
- Avoid Overbaking at All Costs: This is where many home bakers go wrong with sugar cookies. Sugar cookies often don’t look completely “done” on top when they are finished baking. The key is to watch the edges. As soon as the bottoms just begin to turn a very light golden brown, take them out of the oven. They will continue to cook slightly on the hot baking sheet, and this residual heat will finish them perfectly. Overbaking even by a minute or two can turn your soft cookies firm and dry.
- Utilize Parchment Paper or Silicone Mats: For effortless removal and consistent baking, line your baking sheets with parchment paper or a silicone baking mat. This prevents sticking, promotes even heat distribution, and makes transferring your delicate cookies from the pan to a cooling rack a breeze. No more scraping or broken cookies!
Essential Ingredients for Our Frosted Sugar Cookies
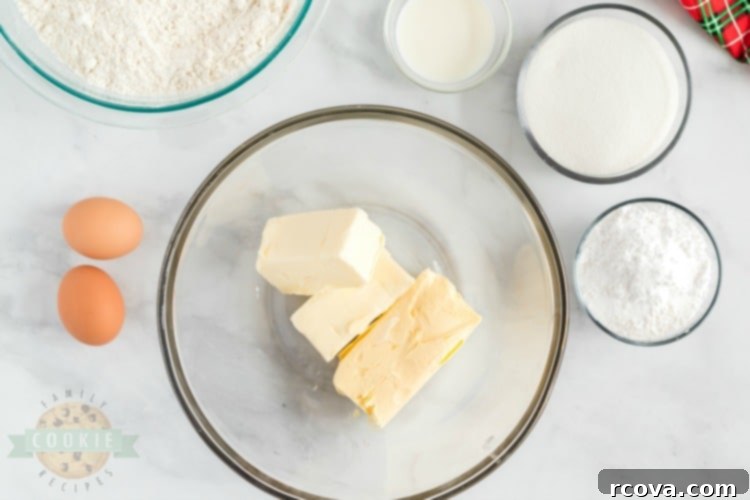
These Frosted Rose Sugar Cookies call for a simple yet precise combination of ingredients to achieve their signature soft texture and delightful flavor. Each component plays a crucial role in the final outcome, so using quality ingredients and measuring accurately is key.
Here’s what you’ll need to make these mouth-watering cookies:
- 2 sticks of butter, softened to room temperature: We recommend using salted butter for an enhanced flavor profile, but unsalted butter works equally well; just add a pinch more salt to the recipe if using unsalted. Softened butter is vital for proper creaming and a tender crumb.
- Butter Flavored Crisco (or coconut oil): This ingredient contributes to the cookies’ characteristic soft chewiness and helps them maintain their shape without excessive spreading. If you opt for coconut oil, be aware it will impart a subtle coconut flavor, which can be a delicious twist! Ensure it’s in a solid, but soft state if substituting.
- Granulated sugar: Provides sweetness and helps create a crisp exterior while maintaining a soft interior. It’s crucial for the creaming process with butter, aerating the dough.
- Powdered sugar (confectioners’ sugar): Adds an extra layer of sweetness and contributes to the delicate, almost melt-in-your-mouth texture of these specific sugar cookies. Unlike granulated sugar, it dissolves more readily, ensuring a smooth dough.
- Milk: Adds moisture to the dough, helping to bind ingredients and contribute to the overall tenderness of the cookie. Any type of milk (dairy or non-dairy) can be used.
- 2 large eggs: Act as a binder, provide structure, and add richness to the cookie dough, contributing to its luscious texture. Ensure they are at room temperature for better emulsion.
- Baking soda, Cream of Tartar & salt: This powerful trio of leavening agents and seasoning is essential. Baking soda, when combined with cream of tartar, creates a gentle lift and a slightly chewy texture, while also preventing excessive spreading. Salt balances the sweetness and enhances all the other flavors in the cookie.
- All-purpose flour: The structural backbone of our cookies. Make sure to measure it correctly, either by weight or using the spoon-and-level method, to avoid a dense or dry cookie.
Baking Christmas Rose Sugar Cookies: A Step-by-Step Guide
Creating these beautiful Frosted Rose Sugar Cookies is a straightforward process that doesn’t require any special equipment beyond a mixer and a baking sheet. Follow these steps carefully to ensure your cookies turn out perfectly soft, thick, and ready for frosting.
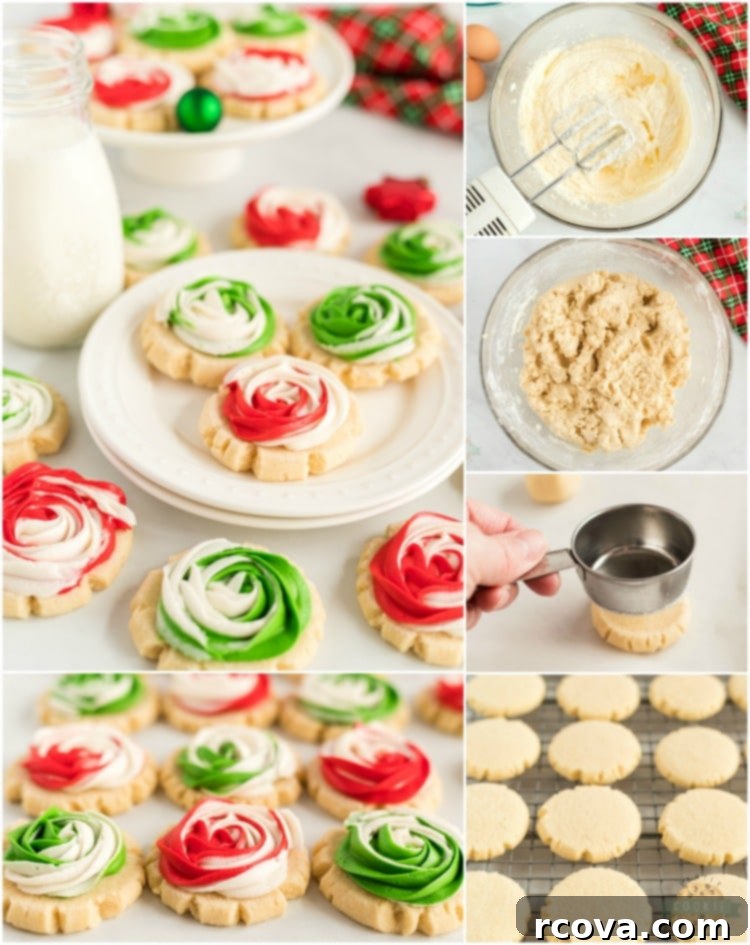
- Cream Wet Ingredients: In a large mixing bowl or the bowl of your stand mixer, begin by combining the softened butter, Crisco (or coconut oil), granulated sugar, powdered sugar, and milk. Beat these ingredients together on medium-high speed for 2-3 minutes. This crucial creaming process incorporates air, resulting in a light and fluffy mixture that forms the foundation for tender cookies. The mixture should appear pale and well-combined.
- Incorporate Eggs: Add the two eggs to the creamed mixture. Continue mixing on medium speed until the eggs are fully incorporated and the mixture is smooth and cohesive. Scrape down the sides of the bowl as needed to ensure everything is evenly blended.
- Combine Dry Ingredients: In a separate, medium-sized bowl, whisk together the all-purpose flour, baking soda, cream of tartar, and salt. This ensures that the leavening agents and salt are evenly distributed throughout the flour, preventing pockets of unmixed ingredients in your final dough.
- Mix Dry and Wet: Gradually add the dry flour mixture to the wet butter mixture, mixing on low speed until just combined. Be careful not to overmix the dough once the flour is added; overmixing can develop the gluten too much, leading to tough cookies. Mix until smooth and cohesive, but stop as soon as no streaks of flour remain.
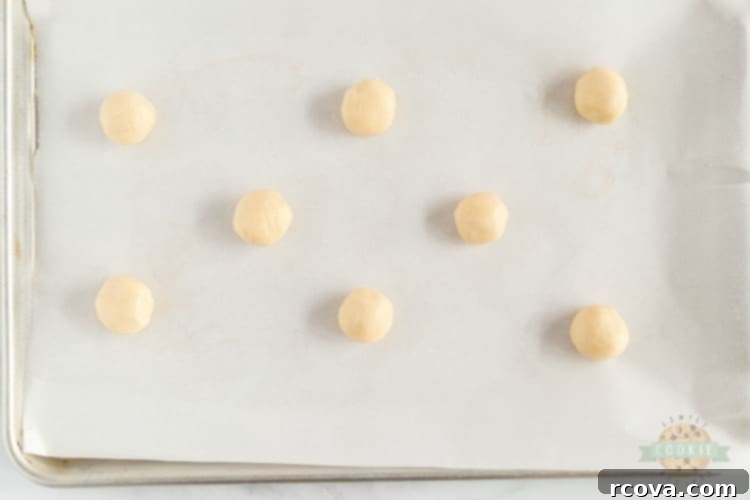
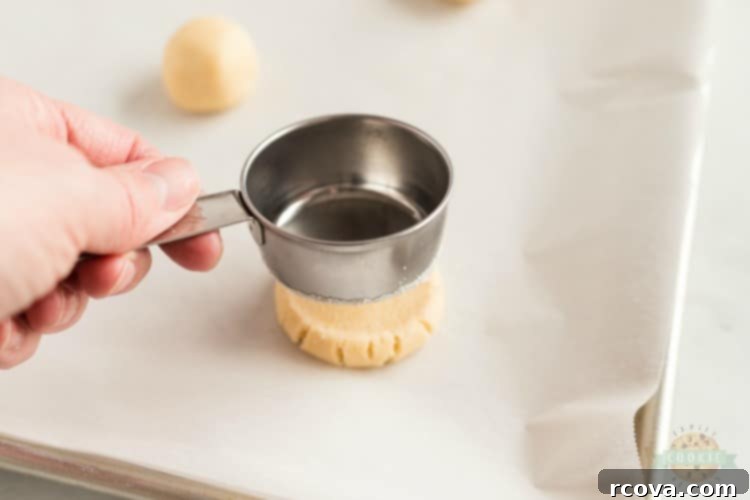
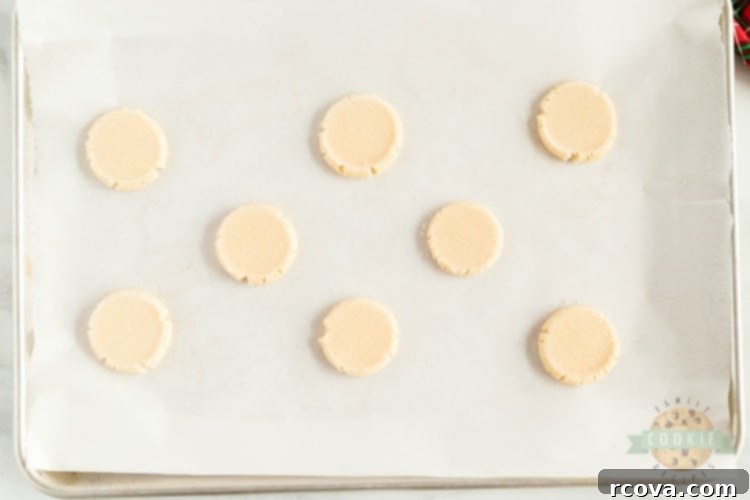
- Form and Press the Cookies: Roll the dough into *1-inch balls. For precision and consistency, you can use a small cookie scoop. Place these dough balls onto a lightly greased cookie sheet. Now, for the signature “Swig cookie” rough edge: Lightly spray the bottom of a flat-bottomed glass or a measuring cup with cooking spray, then dip it into a plate coated with a thin layer of granulated sugar. Use this sugared glass to gently press each dough ball down slightly. You want them to be about 1/4 inch thick, creating a slight indentation and that characteristic rough edge without smashing them too flat. Remember, these cookies are best when they remain thick and soft!
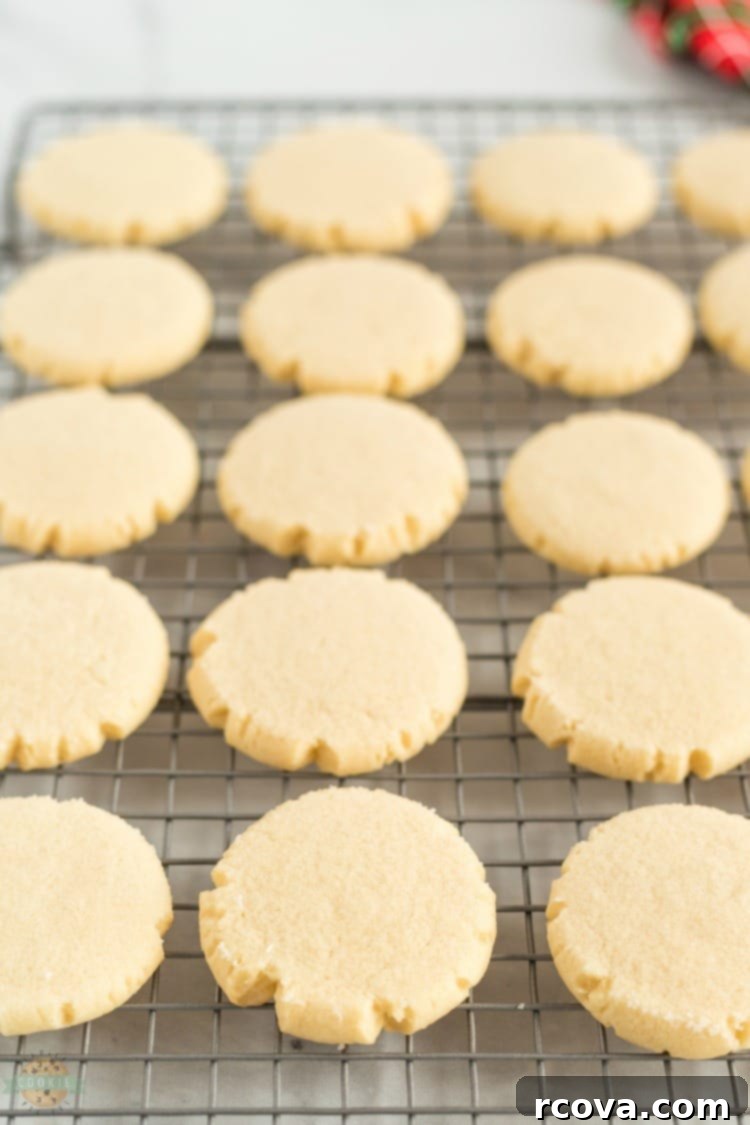
- Bake and Cool: Bake the cookies in your preheated oven at 350°F (175°C) for 8-9 minutes. Baking time will vary slightly depending on your oven and the size of your cookies. Watch for the edges to be just set and slightly golden, but the centers may still look a bit soft. Remove them from the oven and let them cool on the baking sheet for 2-3 minutes before transferring them to wire racks to cool completely. It is essential for cookies to be completely cool before frosting to prevent the frosting from melting or sliding off.
*If you consistently make 1-inch balls, you should yield approximately 48 cookies per batch. If you prefer larger cookies, using a larger cookie scoop might give you around 24-28 cookies. Keep in mind that larger cookies will require closer to 9 minutes of baking time, while smaller ones will be done closer to the 8-minute mark.
Ingredients for the Irresistible Sour Cream Frosting
The unique sour cream frosting is what truly elevates these Frosted Rose Sugar Cookies, offering a delightful tang that perfectly balances the sweetness of the cookie. Don’t be skeptical about the sour cream; it adds an incredible depth of flavor and a silky smooth texture that traditional buttercream often lacks. Trust me, once you try it, you’ll understand why this frosting is non-negotiable for these cookies!
Here’s what you’ll need to create this amazing frosting:
- 1/2 cup butter, softened: Just like for the cookies, softened butter is essential for a smooth, lump-free frosting. It provides richness and a creamy base.
- 2 Tbsp sour cream: The star ingredient! Sour cream adds a wonderful tang that cuts through the sweetness, giving the frosting a balanced and sophisticated flavor. It also contributes to its incredibly smooth and pipeable consistency.
- 4 cups powdered sugar (confectioners’ sugar): This superfine sugar dissolves easily, ensuring a velvety smooth frosting without any gritty texture. Be sure to sift it if it’s lumpy.
- 2 tsp vanilla extract: A classic flavor enhancer that complements both the cookie and the sour cream tang beautifully. Use pure vanilla extract for the best flavor.
- Food coloring (if desired): To create your beautiful rose hues! Gel food colorings are recommended as they provide vibrant colors without adding excess liquid to the frosting.
- 1-2 Tbsp of milk, to consistency: Used sparingly to adjust the frosting’s thickness. You want a consistency that’s easy to pipe but still holds its shape well. Start with a small amount and add more only if necessary.
How to Master Your Sugar Cookie Frosting
Making this incredible sour cream frosting is quite simple, but achieving the perfect consistency is key for beautiful rose piping. Follow these steps for a smooth, pipeable frosting that’s bursting with flavor.
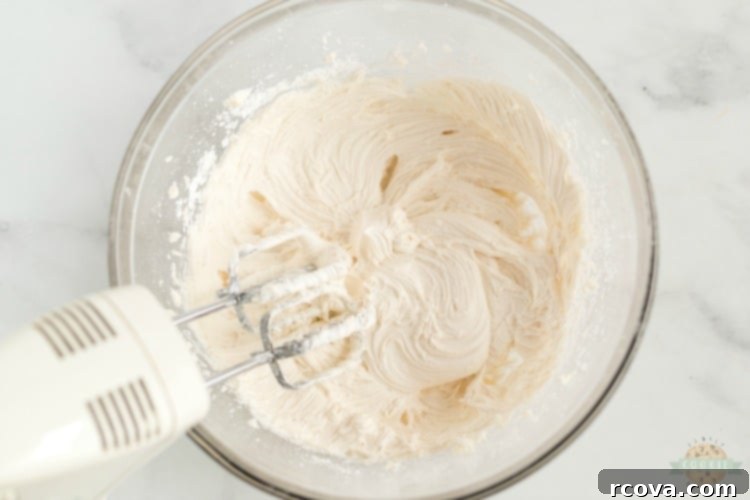
To make the frosting, begin by placing the softened butter, sour cream, powdered sugar, and vanilla extract into a large mixing bowl. Using an electric mixer (either a hand mixer or stand mixer with a paddle attachment), start mixing on low speed to gradually combine the ingredients, preventing a cloud of powdered sugar from escaping. Once loosely combined, increase the speed to medium-high and beat for 2-3 minutes until the frosting is light, fluffy, and completely smooth. Scrape down the sides of the bowl periodically to ensure all ingredients are fully incorporated.
Next, if you desire colored frosting for your roses, now is the time to add food coloring. Add a few drops of your preferred gel food coloring and mix until the color is evenly distributed. For vibrant hues, add more coloring a drop at a time until you reach your desired shade. Finally, assess the consistency. If the frosting is too thick to pipe easily, add milk one teaspoon at a time, mixing well after each addition, until you reach a smooth, pipeable consistency that still holds its shape. You’re looking for a texture similar to soft-serve ice cream – firm enough to hold a peak, but soft enough to flow smoothly through a piping bag.
Creating Beautiful Frosting Roses on Your Cookies
The rosette frosting is the crowning glory of these sugar cookies, transforming them into elegant treats. With a little practice, you’ll be piping stunning edible roses in no time. The key is to use the right tools and a consistent motion.
First, transfer your prepared frosting to a piping bag fitted with a closed star tip. A Wilton 2D tip is highly recommended for creating beautiful, defined rose petals. Ensure your piping bag is filled correctly to avoid air bubbles, which can cause breaks in your frosting lines. Twist the top of the bag to create pressure.
To pipe the rosette, hold the piping bag perpendicular to the cookie, with the tip just above the surface. Begin piping in a tight, small circle in the very middle of the cookie. This forms the center of your rose. Without lifting the tip, continue piping in a continuous circular motion, slowly moving outwards, overlapping the previous circle slightly, until you reach the edge of the cookie. Release pressure and pull up to create a clean finish. Voilà! You now have a beautiful frosting rosette. Repeat this process for all your cooled cookies.
While the frosting will set, it’s generally recommended not to stack cookies adorned with rosettes, especially for transport, as this can easily squish and damage your beautiful frosting designs. Store them in a single layer or use parchment paper dividers if stacking is absolutely necessary.
Swirling Two-Tone Frosting for Extra Flair
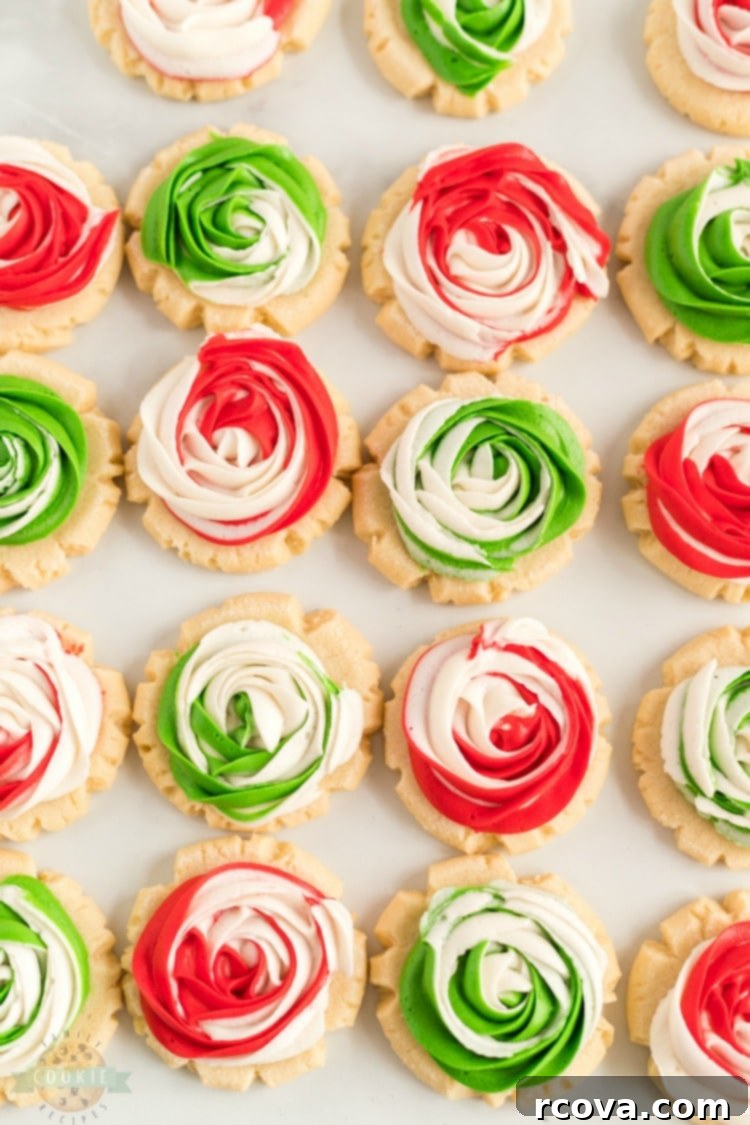
For an even more visually captivating effect, try swirling two colors of frosting! This technique adds depth and artistry to your rosettes, making them even more festive and impressive. To achieve this, simply divide your prepared white frosting into separate bowls. Add your desired food coloring to each bowl (e.g., red for a vibrant rose, green for a subtle accent, or any other complementary shades you envision for your themed cookies).
Once you have your colored frostings, prepare your piping bag. Instead of filling it with just one color, carefully alternate dollops of white frosting with dollops of your colored frosting inside the piping bag. For example, add a scoop of white, then a scoop of red, then white again, and so on. As you begin piping the rosettes on the cookies, the different colors will swirl together as they come out of the tip, creating a stunning marbled or two-tone effect that is truly lovely and unique to each cookie!

Can You Freeze Frosted Rose Sugar Cookies? Yes!
The good news is that these Frosted Rose Sugar Cookies are incredibly freezer-friendly, allowing you to prepare them in advance and enjoy them at your convenience. Freezing is a fantastic option for holiday baking, meal prep, or simply having a stash of delicious cookies on hand.
I’ve found the best method is to bake the cookies first, allow them to cool completely, and then freeze them *without the frosting*. Once completely cooled, arrange the baked cookies in a single layer on a baking sheet and flash freeze them for about an hour until solid. This prevents them from sticking together. Then, transfer the frozen cookies to an airtight container or a heavy-duty ziplock freezer bag. They can be frozen for up to two months. When you’re ready to serve, simply pull them out of the freezer a few hours before and lay them out on a clean surface or wire rack to thaw at room temperature. Once thawed, prepare the fresh sour cream frosting and pipe your beautiful rosettes. This method ensures the freshest tasting frosting with perfect texture.
Alternatively, you can also freeze the raw cookie dough once it has been formed into balls. After rolling the dough into 1-inch balls, arrange them on a baking sheet lined with parchment paper and freeze them individually for about an hour until they are firm. Then, transfer all of the frozen dough balls into a ziplock freezer bag. When you’re ready to bake, remove the desired number of dough balls, place them on a greased baking sheet, and allow them to thaw for about 30-60 minutes at room temperature until they are soft enough to press down gently with your sugared glass. Then, bake them as normal according to the recipe instructions, cool completely, and frost. Freezing the dough is an excellent way to have fresh-baked cookies on demand with minimal effort!
Mastering the Art of Softening Butter
Properly softened butter is a cornerstone of successful baking, especially for cookies like these Frosted Rose Sugar Cookies. It allows for optimal creaming with sugar, incorporating air for a light texture, and creating a smooth, emulsified dough. Here are three reliable methods to achieve perfectly softened butter:
- The “Set it and Forget It” Method (Room Temperature): The absolute best way to soften butter is to simply set it out at room temperature for a few hours before you plan to bake. If your kitchen is particularly cool, you might need to take it out the night before. This slow, natural softening ensures the butter warms evenly all the way through without any risk of melting, resulting in the ideal pliable consistency. The butter should be cool to the touch but yield easily to a gentle press.
- The Quick Microwave Burst Method: This is my go-to when I’m short on time, but it requires careful attention to avoid melting. Place the entire stick of butter (unwrapped from foil, if applicable) in your microwave. Microwave on 50% power for 6-7 seconds. Check the butter – it should feel slightly soft. If it’s still very cold, give it another 5-7 seconds at 50% power. You might need a few short intervals, checking after each one. The goal is soft, not melted, so reduce subsequent intervals to just a few seconds as it gets closer to the right consistency. It should be pliable but not shiny or greasy.
- The Defrost Setting Advantage: I’ve found that using the defrost setting on my microwave is often more forgiving than regular power settings. While it takes a bit longer – typically around 30 seconds for a stick of butter – it seems to heat the butter more gently and evenly, significantly reducing the chance of accidental melting. This method is a great middle-ground if you need to soften butter quickly but are nervous about overdoing it with the standard microwave setting. Always check periodically and flip the stick if necessary for even softening.
Regardless of the method you choose, the ideal softened butter will be opaque, pliable, and leave a slight indentation when pressed gently with your finger, without any liquid separation.

Enjoy More Sugar Cookie Delights? Try These Other Fantastic Recipes:
If you’ve fallen in love with the charm and taste of these Frosted Rose Sugar Cookies, you’ll be delighted to explore our other fantastic sugar cookie recipes. Each one offers a unique twist on this classic treat, perfect for expanding your baking repertoire!
- Frosted Lemon Sugar Cookies: Zesty, bright, and perfectly frosted for a burst of citrus flavor.
- Best Ever Sugar Cookie Recipes: A curated collection of our top sugar cookie creations.
- Lime Sugar Cookies: A refreshing and tangy cookie with a vibrant twist.
- LEMON POPPYSEED COOKIES: A delightful combination of nutty poppy seeds and bright lemon.
- GLAZED LEMON COOKIES: Soft cookies drizzled with a simple, sweet lemon glaze.
- SUGAR COOKIELEMONBARS: All the flavor of lemon sugar cookies in an easy-to-make bar format.
- Jello Sugar Cookies: Fun, colorful, and surprisingly flavorful cookies made with gelatin.


My youngest daughter was just baptized! Isn’t she lovely? She is quite the girly-girl so we looked for her dress for MONTHS beforehand. It was SO important to her. We had to compromise on a few things- I finally drew the line at having a petticoat and a train, which is just hilarious to me. My oldest daughter wanted a very simple dress without frills or anything but not this girl! I thought we did well. The dress was perfect and her day was incredibly special.


Frosted Rose Sugar Cookies are buttery, soft & have a delicious swirled rosette on top! No chilling or rolling needed in this elegant sugar cookie recipe that are perfect as gifts!
