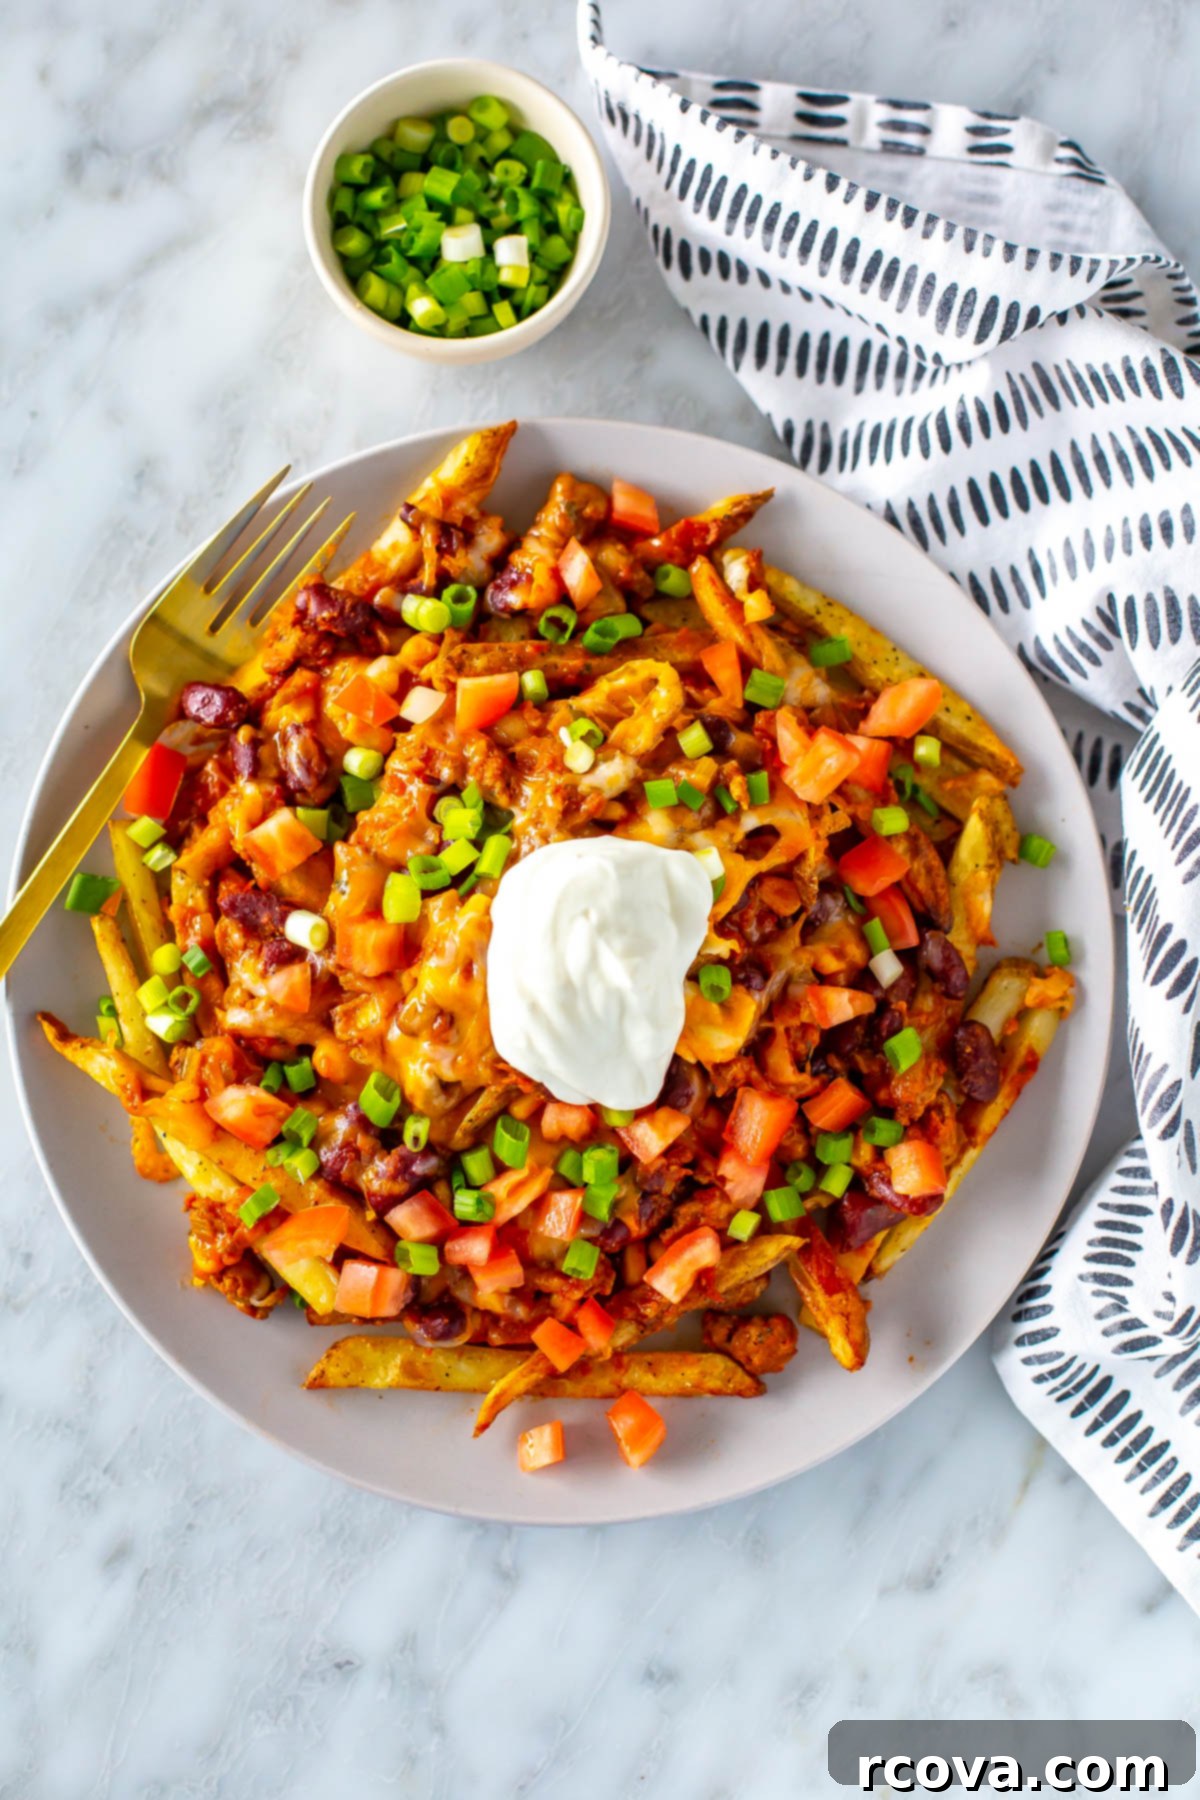
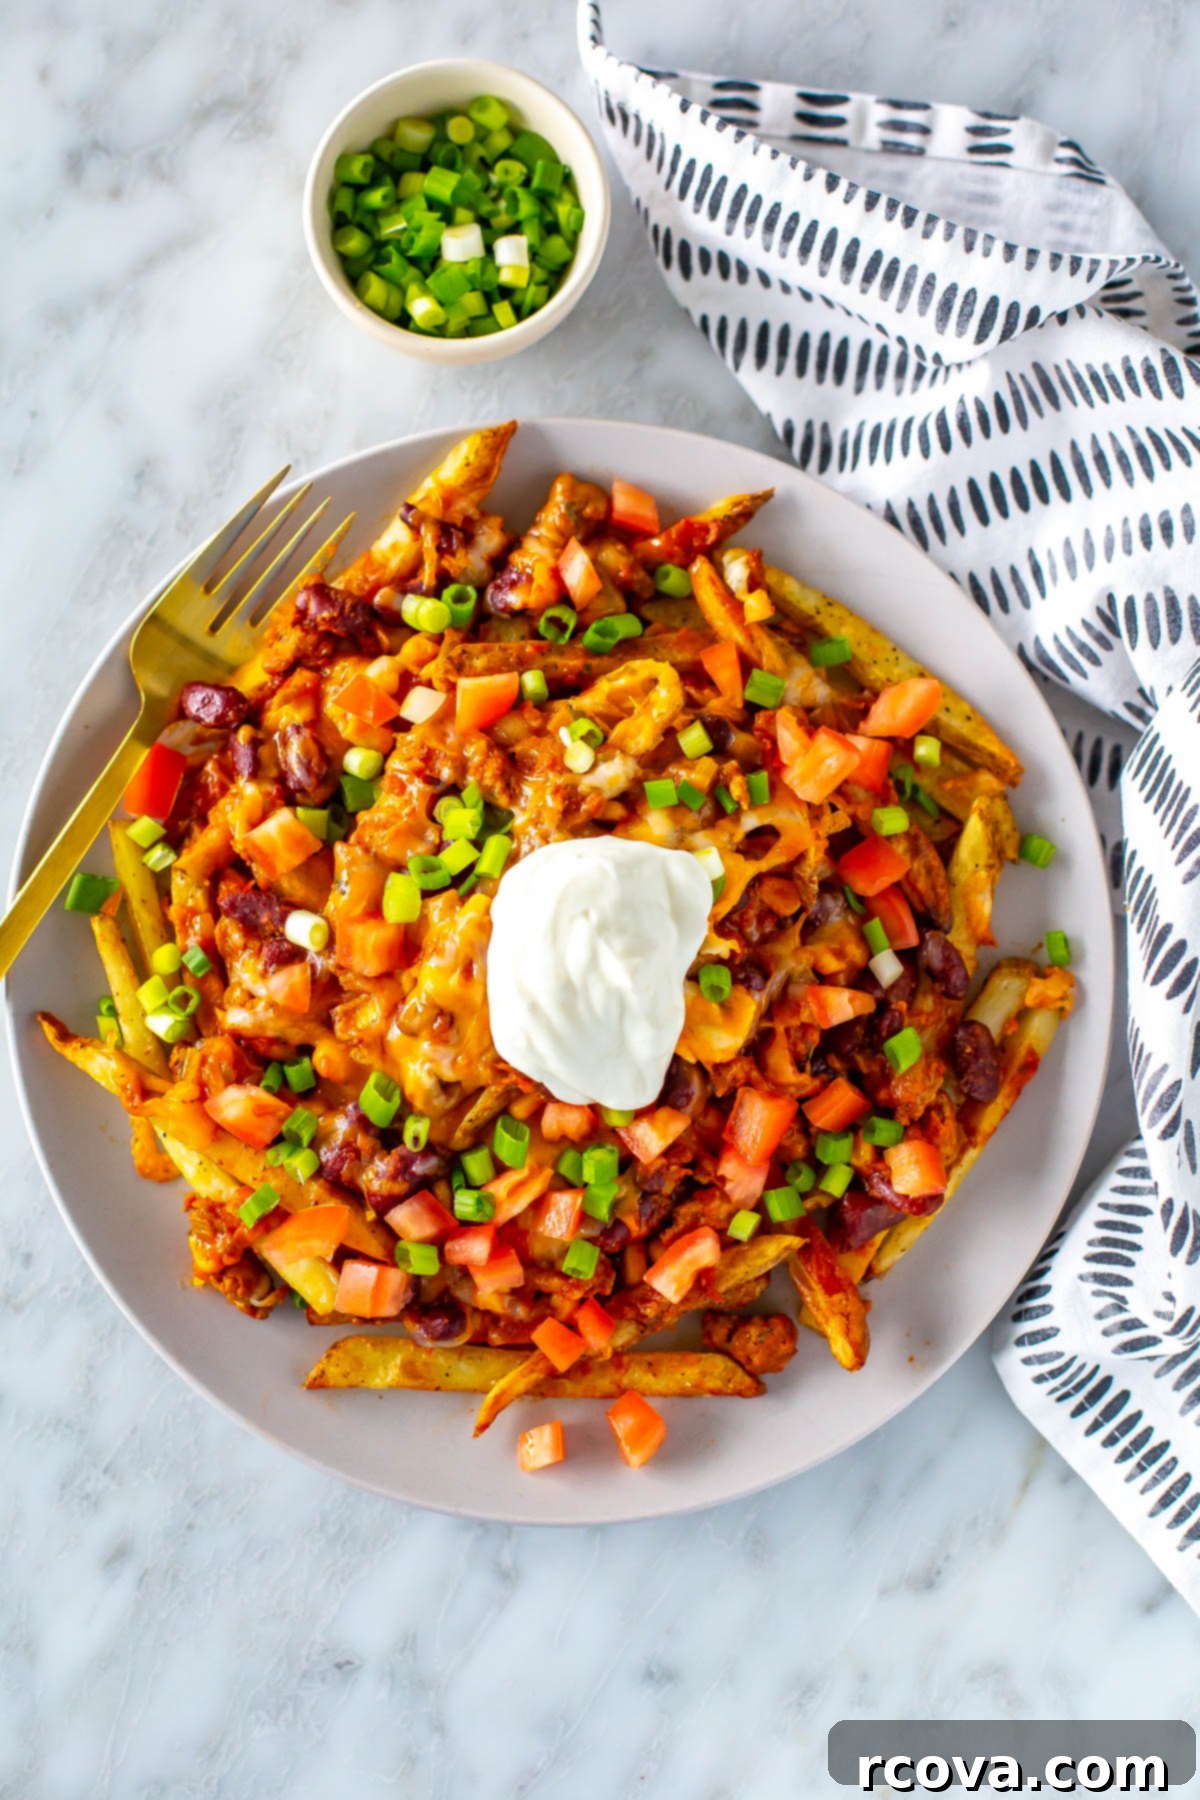
Ultimate Homemade Chili Cheese Fries Recipe: Crispy, Cheesy Perfection
Welcome to the definitive guide for crafting the most incredible homemade chili cheese fries! Imagine perfectly crispy potatoes, generously smothered in rich, savory chili, blanketed with gooey melted cheese, and crowned with all your favorite fresh toppings. This isn’t just a snack; it’s an experience, a true comfort food masterpiece that promises to delight your taste buds and impress your guests. Whether you’re hosting a game day, a casual get-together, or simply craving an indulgent treat, this recipe delivers maximum flavor with minimal fuss. Get ready to dive into a world of crispy, cheesy, chili-loaded goodness!
FREE Budget-Friendly Meal Plan!
Save thousands of dollars on food every year with my free budget-friendly meal plan ebook.

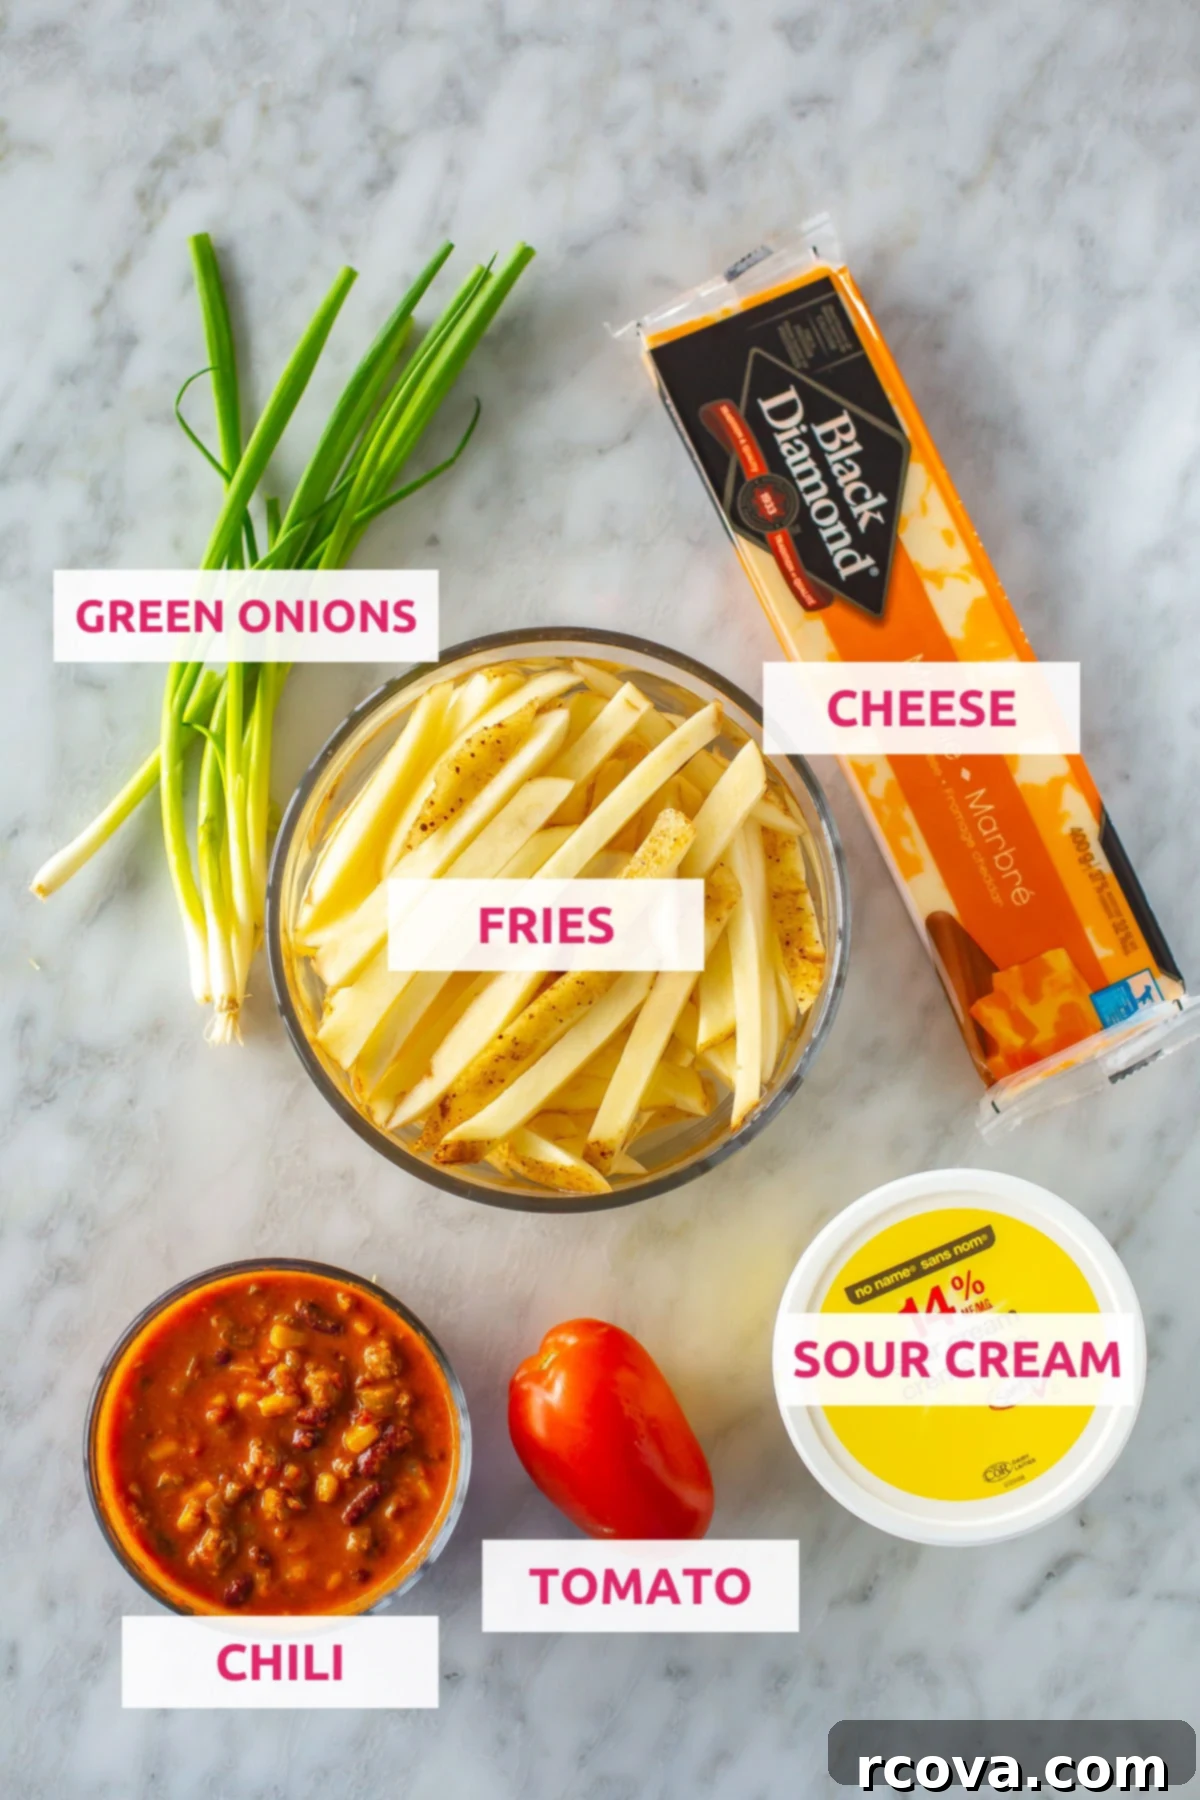
Key Ingredients and Smart Substitutions for the Best Chili Cheese Fries
Crafting the perfect chili cheese fries starts with selecting high-quality ingredients. Here’s what you’ll need, along with some clever substitutions to suit your preferences and what you have on hand:
- Russet potatoes: These starchy potatoes are ideal for making exceptionally crispy fries due to their low moisture content. They get wonderfully golden and crunchy when baked.
- Substitution Tip: You can also achieve great results with sweet potatoes for a slightly different flavor profile and added nutrients, or other types of baking potatoes like Yukon Golds for a creamier interior. For convenience, good-quality frozen french fries work perfectly!
- Olive oil: Essential for coating your potatoes to ensure they crisp up beautifully in the oven. It also adds a lovely flavor to the chili.
- Substitution Tip: Any neutral cooking oil, such as avocado oil or canola oil, can be used instead.
- Salt & pepper: Basic seasonings that are crucial for enhancing the flavor of both your fries and chili. Always season to taste!
For the Flavorful Chili Base
- Ground chicken or turkey: A leaner alternative to traditional ground beef, offering a delicious and lighter chili. This choice helps to keep the calorie count down without sacrificing flavor.
- Substitution Tip: Feel free to use ground beef for a richer, more classic chili. If you opt for beef, consider draining excess fat after browning to prevent the chili from becoming greasy. For a vegetarian chili, you can omit the meat entirely and add extra beans or a plant-based ground meat substitute.
- Olive oil: Used for sautéing the ground meat and vegetables, building the foundational flavors of your chili.
- Substitution Tip: Refer to the notes above for suitable alternatives like avocado or canola oil.
- Yellow onion: Provides a sweet and aromatic base for the chili.
- Substitution Tip: Red onion or white onion can be used for a slightly sharper taste, or even shallots for a milder, more delicate flavor.
- Celery: Adds a subtle earthy note and essential texture to the chili.
- Substitution Tip: Diced carrots can be a good substitute, adding a touch of sweetness. If you’re not a fan, you can certainly leave it out, though it contributes to the overall depth of flavor.
- Green bell pepper: Offers a fresh, slightly bitter counterpoint to the rich chili spices.
- Substitution Tip: Any color bell pepper (red, yellow, orange) works well, providing varying degrees of sweetness. For a spicier kick, consider dicing up some green chilies or jalapeños instead.
- Chili powder: The star spice that defines the chili’s signature flavor.
- Substitution Tip: In a pinch, a blend of cumin, paprika, and a touch of cayenne pepper can mimic the profile of chili powder. Adjust ratios to taste.
- Cumin: Earthy and warm, cumin is indispensable in chili, adding depth and a distinctive aroma.
- Substitution Tip: If you don’t have cumin, a bit of extra chili powder or even coriander can serve as an alternative, though the flavor will be slightly different.
- Coriander: Lends a bright, citrusy note that complements the other spices beautifully.
- Substitution Tip: If unavailable, use a bit more cumin or a tiny dash of dried oregano.
- Salt & pepper: Fundamental seasonings for balancing and enhancing all the flavors in the chili. Always adjust to your personal preference.
- Sriracha: Adds a lovely warmth and a hint of garlic spice to the chili.
- Substitution Tip: Any favorite hot sauce will work here, or you can omit it entirely if you prefer a milder chili.
- Crushed tomatoes: Forms the rich, saucy base of the chili.
- Substitution Tip: Canned diced tomatoes are a good alternative if crushed tomatoes aren’t available, but San Marzano tomatoes are often preferred for their superior flavor and lower acidity, leading to a richer, sweeter chili.
Delicious Toppings for Your Loaded Chili Cheese Fries
The toppings are where you truly personalize your chili cheese fries and add layers of fresh flavor and texture. Don’t shy away from experimenting!
- Tomato: Diced fresh tomatoes provide a burst of acidity and freshness.
- Substitution Tip: For extra flavor and convenience, consider using fresh or jarred salsa, or homemade pico de gallo.
- Shredded cheddar and mozzarella cheese: This classic combination delivers a perfect melty, gooey, and savory cheese blanket.
- Substitution Tip: Any cheese blend that melts well would be delicious, such as Monterey Jack, a Tex-Mex blend, or even pepper jack for a little heat. For the best melt, grate your own cheese from a block.
- Green onions: Adds a mild oniony bite and vibrant color.
- Substitution Tip: Diced chives or thinly sliced red onions would also be excellent choices for a similar aromatic freshness.
- Sour cream: A cool, creamy dollop of sour cream provides a delightful contrast to the warm chili and cheese.
- Substitution Tip: For a lighter option, use non-fat sour cream or plain Greek yogurt.
Mastering the Art of Chili Cheese Fries: A Step-by-Step Guide
Making these ultimate chili cheese fries is simpler than you might think. Follow these easy steps to achieve crispy fries and a rich, satisfying chili, all loaded to perfection.
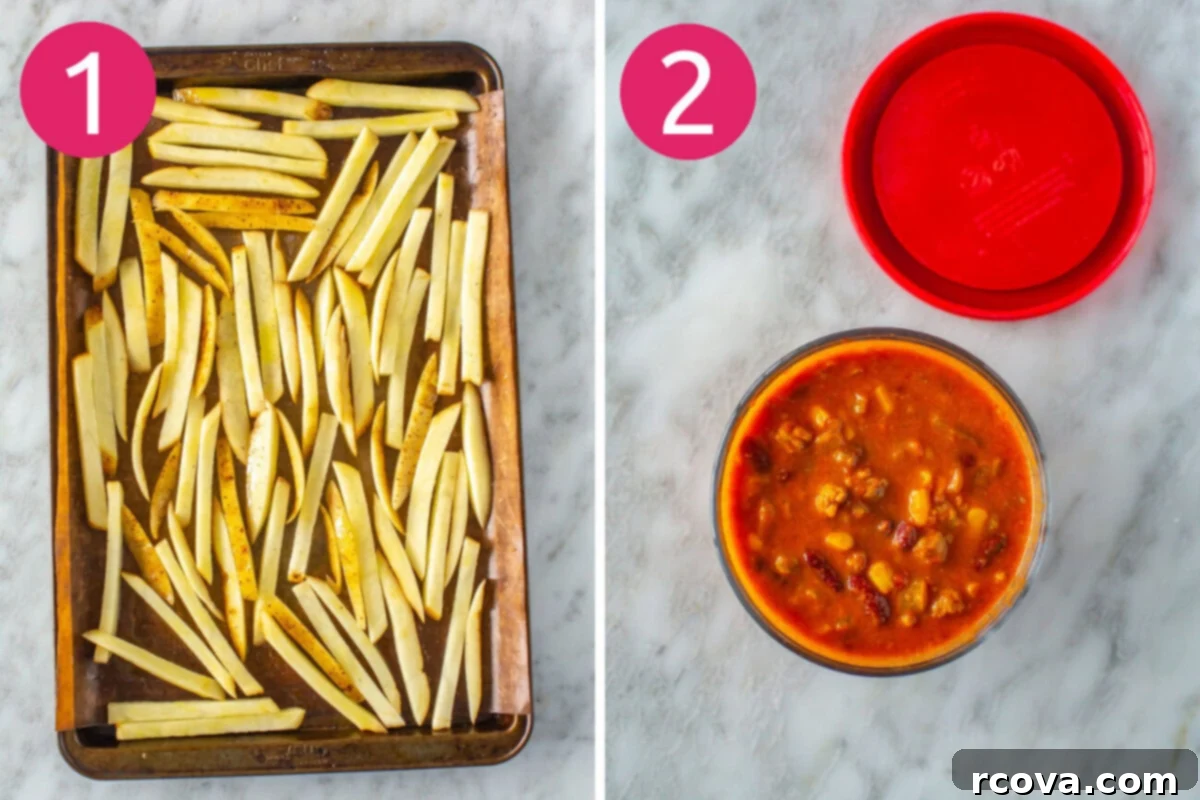
Step 1: Achieve Perfect Fry Cuts.
Begin by preheating your oven to 450°F (230°C). This high temperature is key to achieving that desirable crispiness. Next, prepare your potatoes. For truly exceptional fries, thinly slice your Russet potatoes. You can use a mandoline for uniform, thin cuts that cook evenly and crisp up beautifully, or a very sharp knife if you’re confident in your knife skills. Aim for a thickness similar to classic fast-food fries – around ¼ inch thick – for the best texture. The thinner the slices, the crispier your fries will be!
Step 2: Craft Your Flavorful Chili.
While your oven heats and potatoes are prepped, it’s time to create the heart of your chili cheese fries: the savory chili. In a large pot or Dutch oven, heat one tablespoon of olive oil over medium-high heat. Add your chosen ground meat (chicken, turkey, or beef) and break it up with a spoon, cooking until browned and no longer pink. Drain any excess fat if necessary. Next, add the diced yellow onion, finely chopped celery, and green bell pepper. Sauté these vegetables until they soften, typically about 5-7 minutes, allowing their flavors to meld with the meat. Stir in the chili powder, cumin, coriander, salt, pepper, and sriracha (if using). Cook for another minute until fragrant. Finally, pour in the crushed tomatoes and half a cup of water. Bring the chili to a boil, then reduce the heat to a simmer, cover, and let it cook for at least 20 minutes. This simmering time allows the flavors to deepen and the chili to thicken slightly, creating the perfect consistency for loading onto your fries.
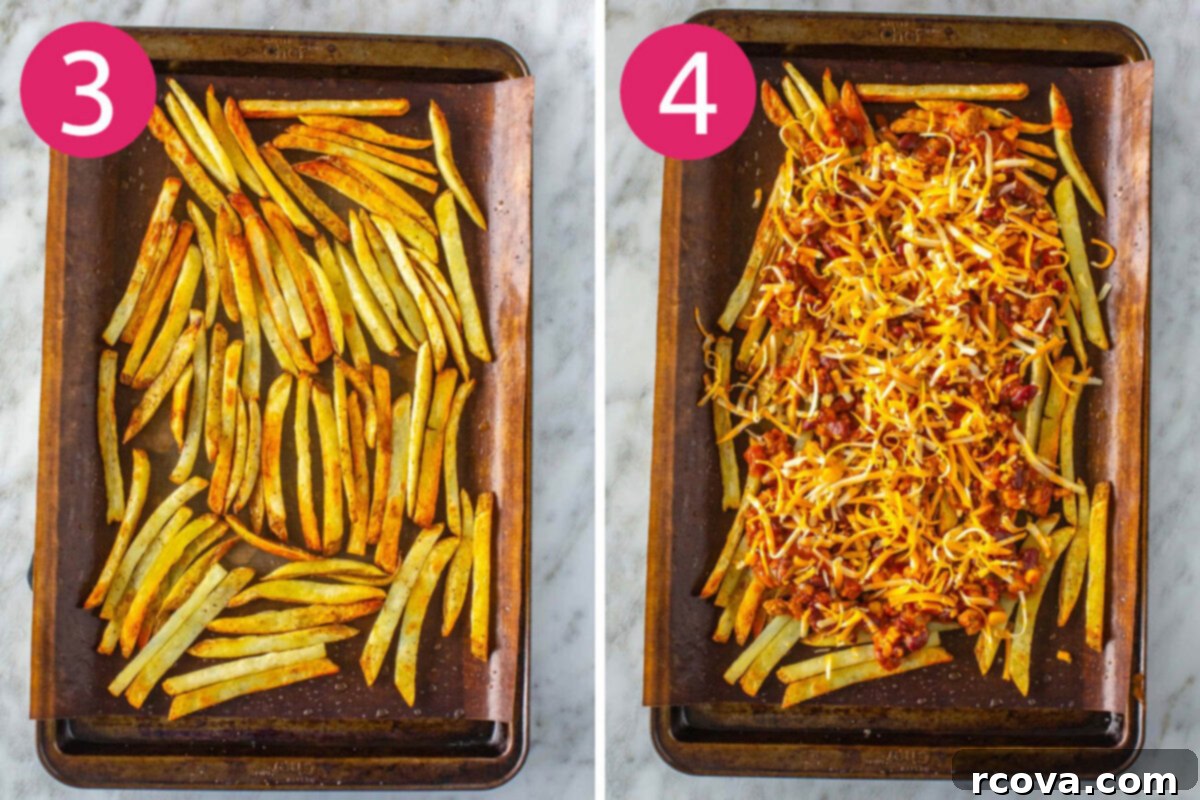
Step 3: Bake Your Fries to Golden Perfection.
Once your potatoes are sliced, toss them thoroughly with one tablespoon of olive oil, 1½ teaspoons of salt, and ½ teaspoon of pepper. Ensure each fry is lightly coated for even seasoning and crisping. Spread the seasoned potatoes in a single layer on baking sheets, making sure not to overcrowd them. Overcrowding can steam the fries instead of baking them, leading to a soggy result. You might need to use two or more baking sheets. Bake in the preheated oven for approximately 20 minutes, flipping them halfway through to ensure all sides get beautifully golden and crisp. Your goal is a uniformly golden-brown, crispy fry that can hold up to the delicious toppings.
Step 4: Load and Melt the Cheese.
As your fries finish cooking and your chili is simmering, prepare for the grand assembly. Once the fries are crispy, arrange them onto oven-safe plates or back onto a single baking sheet (if serving family style). Ladle a generous amount of your warm, homemade chili over the fries, ensuring good coverage. Then, sprinkle a hearty layer of your shredded cheddar and mozzarella cheese blend on top. Switch your oven setting from bake to broil. Place the loaded fries back into the oven under the broiler for about 2-3 minutes, or until the cheese is perfectly melted, bubbly, and slightly golden. Watch carefully, as broilers can vary in intensity and cheese can burn quickly!

Step 5: Prepare Any Additional Toppings.
While your chili cheese fries are briefly under the broiler, quickly prepare any additional fresh toppings you plan to use. This could include dicing extra tomatoes, chopping green onions, or portioning out sour cream. Having these ready ensures you can serve your chili cheese fries immediately once the cheese is melted.
Step 6: Serve Immediately and Savor Every Bite!
As soon as the cheese is gloriously melted and bubbling, carefully remove your chili cheese fries from the oven. Add a dollop of sour cream, a sprinkle of fresh diced tomatoes, and a generous scattering of chopped green onions. Don’t hesitate to add any other favorite toppings you desire, like jalapeños, avocado, or a dash of hot sauce. Serve these ultimate chili cheese fries immediately while they are piping hot and the fries are at their crispiest. Enjoy the symphony of flavors and textures!

Pro Tips for Making the Best Chili Cheese Fries Every Time
Even though this recipe is straightforward, a few expert tips and tricks can elevate your chili cheese fries from great to absolutely unforgettable:
- Embrace Frozen Fries for Speed: While I love the taste and texture of homemade fries, sometimes convenience is key. A high-quality bag of frozen fries works perfectly! Just follow the package instructions for baking until golden and crispy. Don’t limit yourself to straight-cut either; curly fries, waffle fries, or even tater tots can offer a fun twist and unique texture to your loaded fries.
- Grate Your Own Cheese for Superior Melt: This tip is a game-changer for truly gooey chili cheese fries. Store-bought pre-shredded cheese is often coated with cellulose or potato starch to prevent clumping. While convenient, this coating can hinder its ability to melt smoothly, sometimes resulting in a grainy texture. For the best, most luscious melt, I highly recommend grating fresh blocks of cheddar and mozzarella yourself. The difference in texture and flavor is remarkable.
- Prepare the Chili in Advance: Chili often tastes even better the next day, as the flavors have more time to meld and deepen. You can cook the chili ahead of time and store it in an airtight container in the fridge for up to 3 days. This also allows the chili to thicken slightly, which is ideal for loaded fries as it adheres better to the crispy potatoes. Simply reheat gently on the stovetop or in the microwave before assembling. You can even freeze chili for up to 3 months!
- Strategize Your Toppings Prep: Efficient ingredient preparation is one of my favorite meal prep hacks. Chop your fresh tomatoes, slice your green onions, and even shred your cheese a day or two in advance. Store these toppings in separate airtight glass containers in the refrigerator. This way, when it’s time to assemble your chili cheese fries, all you have to do is cook the fries, reheat the chili, and layer everything together.
- Serve Immediately for Peak Crispness: The most crucial rule for chili cheese fries: serve them right away! Once the warm, saucy chili and melted cheese hit the hot, crispy fries, they will begin to soften. To enjoy the ultimate contrast of textures – crispy fries, warm chili, and gooey cheese – bring them to the table as soon as they emerge from the broiler. Nobody likes soggy fries!
Frequently Asked Questions About Chili Cheese Fries
The beauty of chili cheese fries is their versatility when it comes to toppings! Think of it like a blank canvas. Beyond the classic sour cream, chopped green onions, and diced tomatoes, you can get incredibly creative. Popular additions include creamy avocado slices or guacamole, savory black beans, pickled or fresh jalapeño slices for a kick, and even a sprinkle of crunchy corn chips or fritos for added texture. Consider ingredients you’d typically enjoy on nachos or in a bowl of chili, such as cilantro, hot sauce, or a squeeze of lime juice for brightness. The possibilities are truly endless!
This particular chili cheese fries recipe, when prepared as directed, contains approximately 319 calories per serving. It’s important to remember that this calorie count is an estimate and can fluctuate based on the specific ingredients you use, especially the type of ground meat (e.g., ground beef will increase calories) and the amount and type of toppings you add. For instance, using full-fat sour cream versus a non-fat option, or adding extra cheese and avocado, will impact the final nutritional values. Always account for your additions!
Absolutely! This recipe is incredibly adaptable for a vegetarian diet. Simply omit the ground chicken or turkey from the chili base. To ensure your vegetarian chili is still satisfying and provides a good source of protein, consider adding extra beans (such as kidney beans, pinto beans, or black beans), lentils, or a high-quality plant-based ground meat substitute. You can also bulk it up with additional vegetables like corn, zucchini, or mushrooms for a more robust and flavorful meat-free chili.
Soggy fries are the arch-nemesis of loaded fries, but there are several tricks to keep them crisp! First, ensure you don’t overcrowd the baking pan when cooking the fries; give them plenty of space to breathe and crisp up, using multiple pans if necessary. Second, slicing the potatoes thinly helps them achieve maximum crispiness. Another excellent technique is to soak the cut potato slices in cold water for 30 minutes to an hour before baking. This removes excess starch, which contributes to sogginess, helping them get extra crispy. Always pat them thoroughly dry before tossing with oil and seasoning. Lastly, the timing is crucial: serve your chili cheese fries immediately after assembling, as the hot, moist chili and melted cheese will naturally soften the fries over time.
For the ultimate chili cheese fries, I highly recommend a blend of shredded cheddar and mozzarella cheese. This combination provides both the classic sharp, savory flavor of cheddar and the incredible stretch and melt of mozzarella. However, don’t limit yourself! Monterey Jack is another fantastic choice for its smooth melting quality, or a pre-made Tex-Mex blend can offer a convenient and flavorful option. For those who enjoy a bit of heat, Pepper Jack cheese adds a wonderful spicy kick. As always, for the best possible melt and flavor, grating your own cheese from a block rather than using pre-shredded varieties is preferable, as previously mentioned in our tips section.

Storing and Reheating Chili Cheese Fries & Components
While freshly assembled chili cheese fries are undeniably the best, you don’t have to let good food go to waste. I strongly advise against storing the chili cheese fries once they’ve been put together. The fries will inevitably become soggy under the chili and cheese, losing their delightful crispness. However, you can absolutely store the leftover chili and fries separately to enjoy them later!
Any leftover chili should be transferred to an airtight container and stored in the refrigerator. It will keep well for up to 5 days, making it perfect for meal prepping. To reheat, you can gently warm the chili in a pot on the stovetop over medium-low heat, stirring occasionally until heated through. Alternatively, microwave it in an uncovered, microwave-safe dish for a few minutes, stirring halfway through. Enjoy your reheated chili as is, perhaps with some fresh cornbread, or use it to create a brand new batch of crispy chili cheese fries!
As for the fries, if you have any leftovers (which is rare!), they can also be stored in an airtight container in the fridge for up to 5 days. To revive them and bring back their crisp texture, avoid the microwave. Instead, spread them in a single layer on a baking sheet and reheat them in a preheated oven at 350°F (175°C) for 5 to 10 minutes. Keep a close eye on them to prevent overcooking. Once they’re hot and crisp again, you can assemble a fresh serving with reheated chili and a new sprinkle of cheese, broiling briefly until melted.
Freezing Your Delicious Homemade Chili
One of the best ways to enjoy this chili recipe again and again, and to save time on future meal prep, is to freeze it. Your homemade chili freezes beautifully! Simply transfer the cooled chili (ensure it’s cooled to room temperature first to prevent ice crystals from forming and to maintain quality) into an airtight container or a heavy-duty Ziploc freezer bag. It can be safely stored in the freezer for up to 4 months. Unfortunately, cooked fries do not freeze well and will lose their texture upon thawing, so it’s best to enjoy them fresh or prepare a new batch when you’re ready for more chili cheese fries.
When you’re ready to enjoy your frozen chili, you have a couple of reheating options. You can reheat it directly from frozen in the microwave; place it in a microwave-safe dish, cover loosely, and microwave for about 8 minutes, stirring well a few times throughout the cooking process to ensure even heating. Alternatively, for a slower reheat, you can let the chili defrost in the refrigerator overnight. Once thawed, reheat it as normal in a pot on the stovetop or in the microwave until it’s bubbling and thoroughly warmed. Serve this versatile chili on its own, over rice, or with a freshly baked batch of crispy fries for another round of glorious chili cheese fries!
More Irresistible Loaded Fries Recipes
If you’ve fallen in love with these ultimate chili cheese fries, you’ll be thrilled to explore more of our fantastic loaded fries creations. From savory carne asada to spicy nacho fries, there’s a loaded potato dish for every craving. Discover your next favorite indulgent treat below!
-
Carne Asada Fries Recipe
-
Copycat Taco Bell Nacho Fries
-
In-N-Out Animal Style Fries {Copycat}
Essential Meal Prep Tools for Chili Cheese Fries
Having the right tools can make your chili cheese fries preparation even smoother and more enjoyable. Here are some of my top recommendations for streamlining your meal prep:
- Grab some high-quality glass meal prep bowls if you plan on packing any components of this recipe, like leftover chili, for a delicious and easy lunch.
- For freezing larger batches of chili, consider using durable glass microwave-safe bowls with secure lids. These are perfect for storing and reheating directly from the freezer.
- A good quality mandoline slicer will make quick work of thinly slicing your potatoes for perfectly crispy fries.
- A sturdy baking sheet (or two!) is essential for baking your fries in a single layer to ensure even cooking and maximum crispiness.
- Don’t forget a large pot or Dutch oven for simmering your flavorful chili.
- **Discover my full list of essential meal prep tools and kitchen gadgets here!**

Ultimate Chili Cheese Fries Recipe
Print
Pin
Rate
SEND ME MY PLAN
Ingredients
- 2 Russet potatoes (for crispy fries)
- 1 tbsp olive oil (for fries)
- 1 1/2 tsp salt (for fries)
- 1/2 tsp pepper (for fries)
Chili
- 1 lb Ground chicken or turkey (or lean ground beef)
- 1 tbsp olive oil (for chili)
- 1 small yellow onion diced (for aromatic base)
- 2 stalks celery finely chopped
- Half green pepper finely chopped (or other bell pepper)
- 1 tbsp chili powder
- 1 tsp cumin
- 1/2 tsp coriander
- 1 tsp salt (for chili)
- 1 tsp pepper (for chili)
- 1 tsp Sriracha (optional, for heat)
- 1 cup crushed tomatoes (or diced)
- 1/2 cup water
Toppings
- 1 tomato seeded and diced (or salsa)
- Shredded cheddar and mozzarella cheese (freshly grated for best melt)
- green onions chopped
- sour cream (or plain Greek yogurt)
- Anything else you may want such as pickled jalapeños, black beans, guacamole, or cilantro.
Instructions
-
Preheat your oven to 450°F (230°C) to ensure perfectly crispy fries.
-
Using a mandoline or a very sharp knife, thinly slice the Russet potatoes as consistently as possible. Aim for a thickness similar to classic McDonald’s style french fries for the crispiest results!
-
Toss the sliced potatoes with 1 tablespoon of olive oil, 1½ teaspoons of salt, and ½ teaspoon of pepper until evenly coated. Spread them out in a single layer on baking sheets, ensuring they are not overcrowded. This is crucial for crispiness. Bake for 20 minutes, flipping the fries halfway through to brown evenly.
-
While the fries are baking, prepare your chili. Heat 1 tablespoon of olive oil in a pot. Sauté the ground meat (chicken/turkey/beef) until browned. Add diced yellow onion, finely chopped celery, and green pepper; cook until softened. Stir in chili powder, cumin, coriander, 1 teaspoon salt, 1 teaspoon pepper, and sriracha. Finally, add crushed tomatoes and ½ cup water. Bring to a boil, then reduce heat and simmer for 20 minutes to allow flavors to meld and chili to thicken.
-
Ideally, your chili and fries should finish cooking around the same time. Once fries are done, change your oven setting from bake to broil.
-
Carefully transfer the crispy fries to oven-safe plates or a serving platter. Ladle a generous amount of hot chili overtop, then sprinkle liberally with shredded cheddar and mozzarella cheese. Place immediately under the preheated broiler for approximately 2-3 minutes, or until the cheese is beautifully melted and bubbly. Watch closely to prevent burning!
-
Finish your loaded chili cheese fries with your favorite additional toppings, such as diced tomatoes, chopped green onions, and a dollop of sour cream. Serve immediately while the cheese is molten and the fries are still hot and crispy for the best experience!
Notes
Feel free to customize your loaded fries with a variety of toppings! Popular choices include fresh salsa, black beans, pickled jalapeños, creamy avocado, or crunchy corn chips for extra texture and flavor.
Store any leftover chili separately in an airtight container in the fridge for up to 5 days. It reheats wonderfully in a pot on the stovetop or quickly in the microwave.
Leftover fries can be revived! Spread them on a baking sheet and reheat in the oven for 5-10 minutes at 350°F (175°C) until crispy again. Then, load them up with fresh chili and cheese.
For convenient future meals, freeze your chili for up to 3 months. Reheat it from frozen in the microwave for approximately 8 minutes (stirring occasionally) or defrost in the fridge overnight before reheating as usual.
Nutrition
