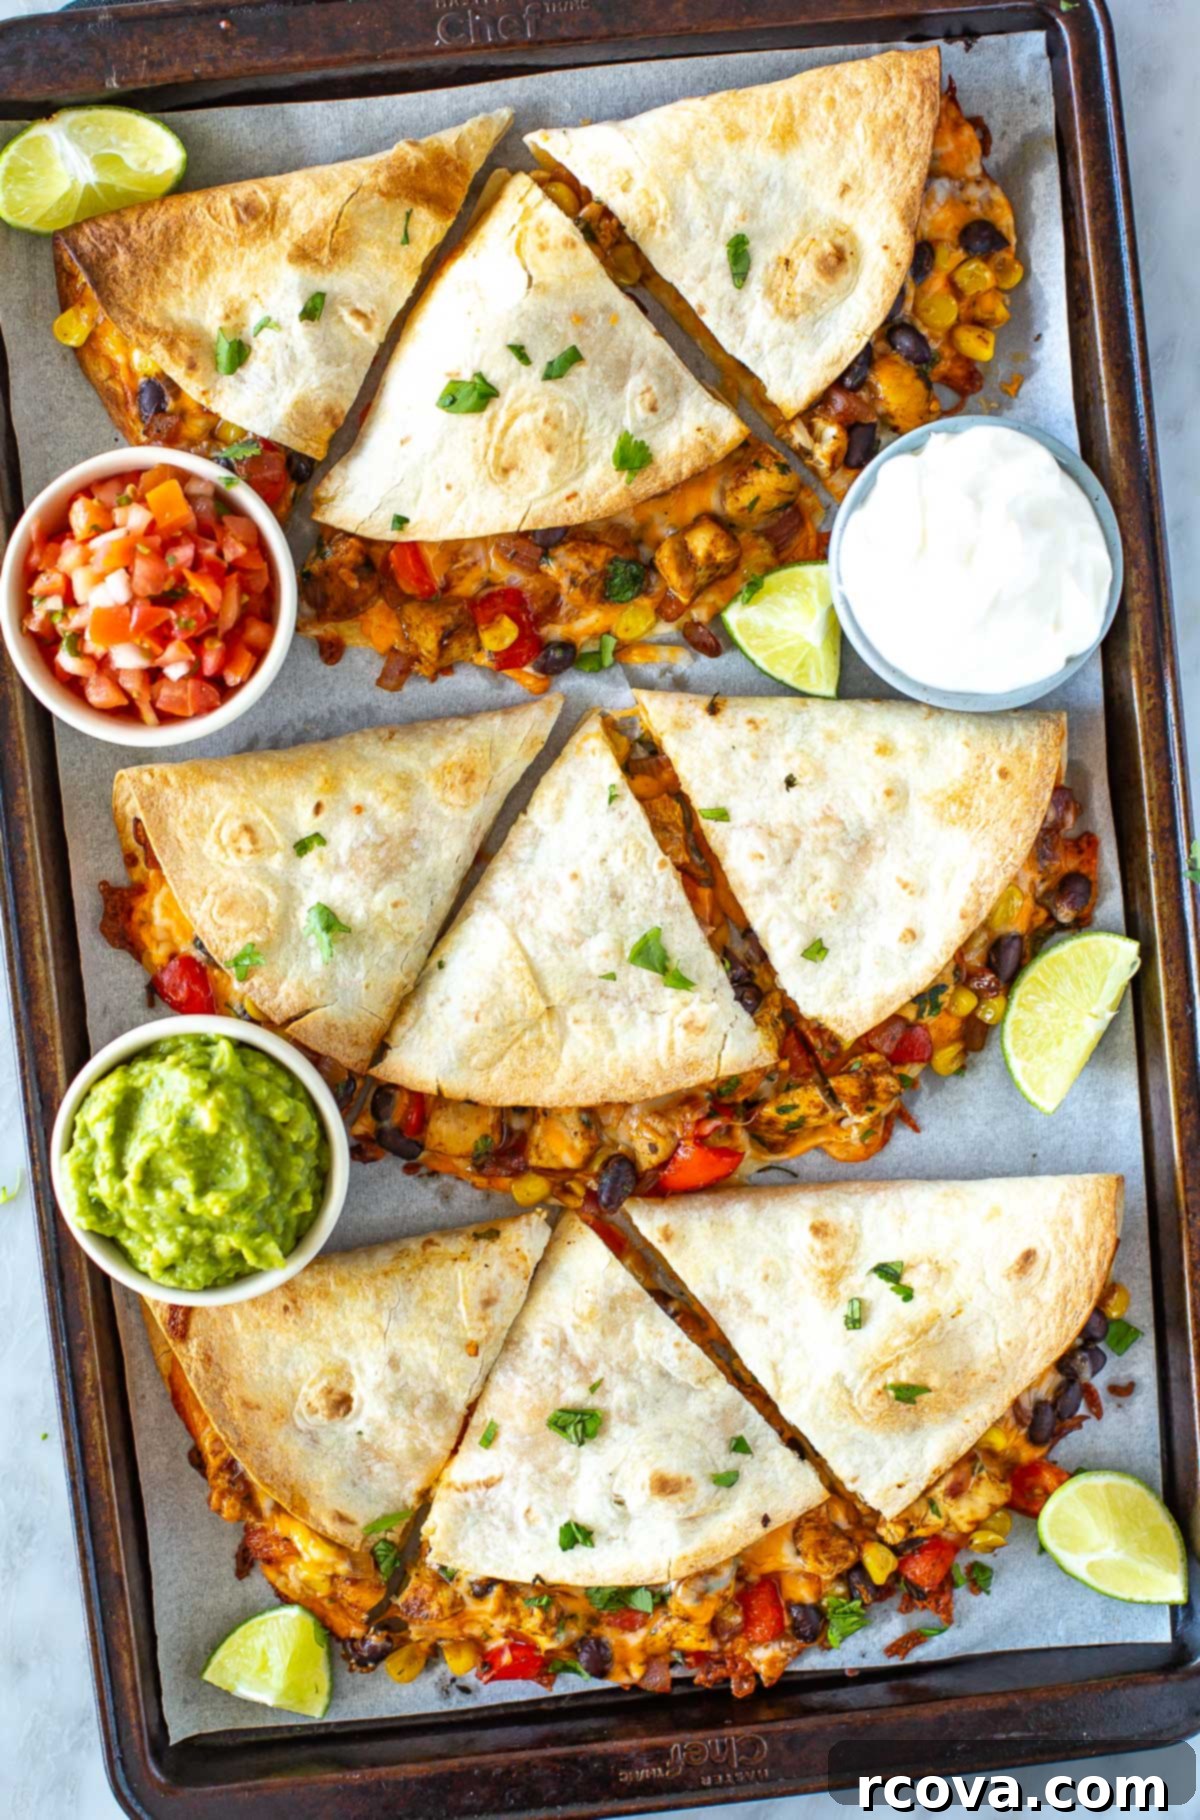
Effortless Sheet Pan Chicken Quesadillas: Your Go-To Recipe for Easy Weeknight Dinners & Crowd-Pleasing Meals
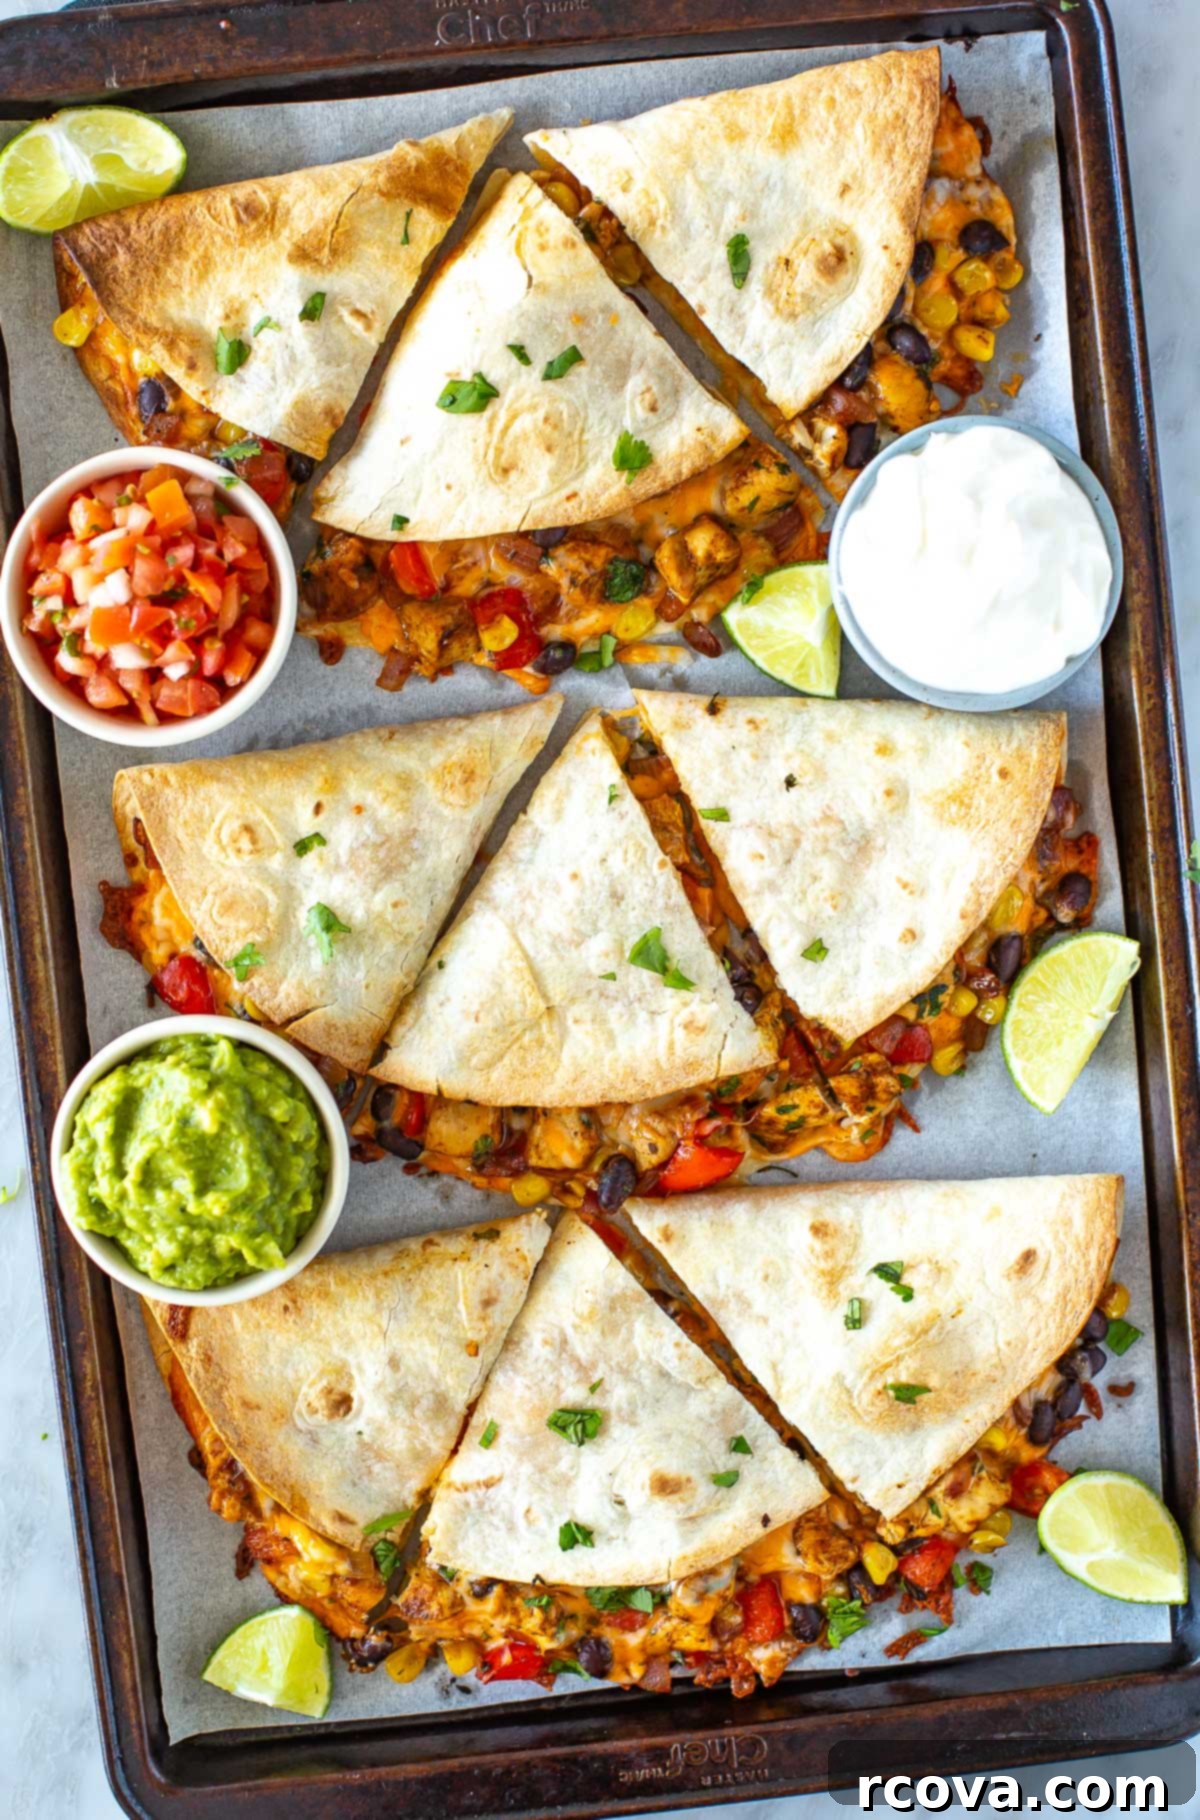
Experience the ultimate convenience and deliciousness with these incredible sheet pan quesadillas! They’re generously loaded with a mouthwatering blend of perfectly seasoned chicken, creamy melted cheese, hearty black beans, and vibrant vegetables – making them an ideal solution for feeding a hungry crowd or simplifying your weeknight dinner routine.
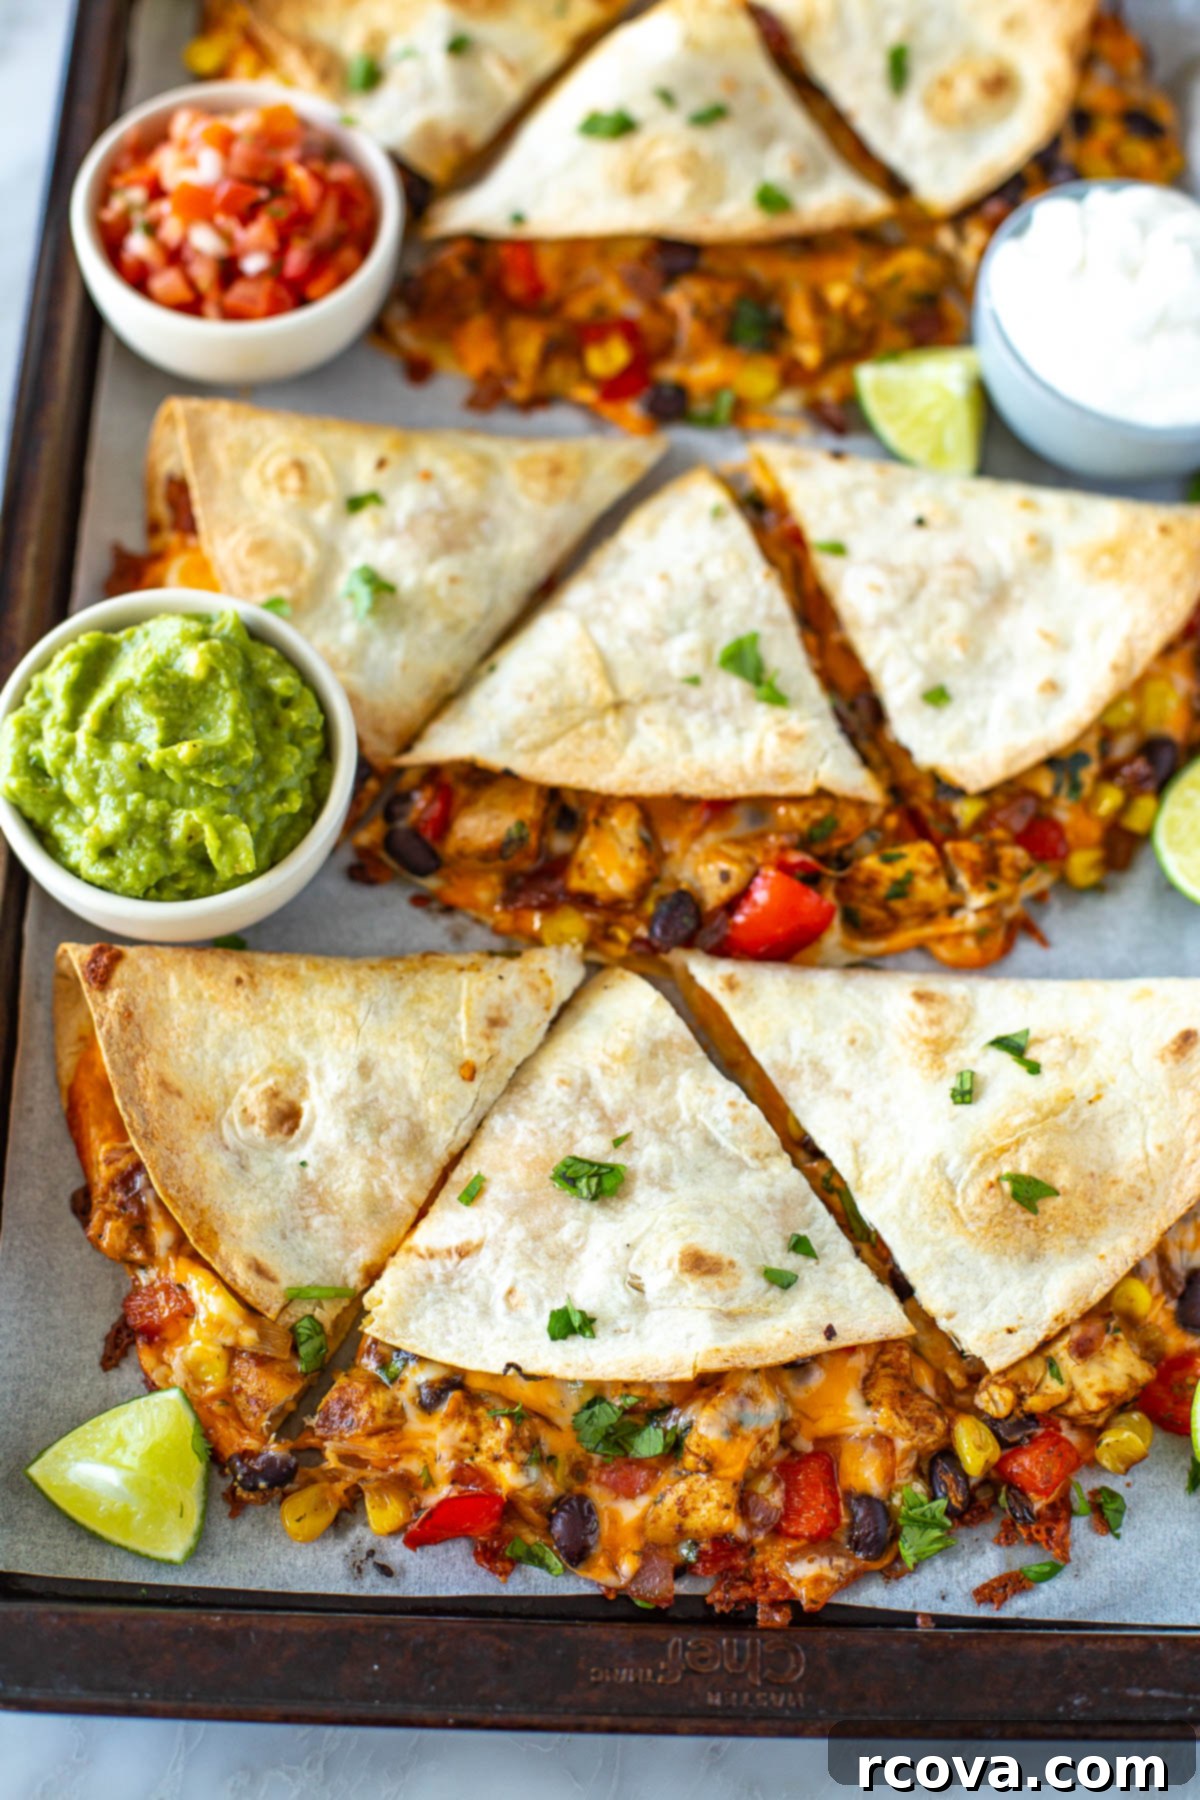
Forget standing over the stove flipping individual tortillas; this game-changing recipe brings all the cheesy, flavorful goodness to one convenient sheet pan. Each quesadilla square is bursting with succulent chicken, tender black beans, and a medley of colorful veggies, all embraced by gloriously melty cheese. Prepare yourself for the ultimate cheese pull! This recipe is my absolute favorite one-pan solution, guaranteed to be devoured in minutes, whether it’s for a casual family meal or a lively gathering with friends.
Why You’ll Fall in Love with This Sheet Pan Quesadilla Recipe
These sheet pan quesadillas aren’t just easy; they’re incredibly versatile and satisfying. Here’s why this recipe will quickly become a staple in your kitchen:
- Effortless Weeknight Dinner Solution: The beauty of this recipe lies in its simplicity. Everything bakes directly on a single sheet pan, eliminating the need for constant supervision and messy cleanup. You can prepare a hearty and delicious meal for the entire family without being tied to the stove, giving you more time to relax.
- Perfect for Feeding a Crowd or Parties: Planning a party or need to feed a large group? These sheet pan quesadillas are your answer. Once baked, simply slice them into convenient squares, and you’ve got a shareable, finger-food-friendly meal or snack that’s perfect for entertaining. They’re always a hit!
- Highly Customizable Flavors: This recipe is a fantastic canvas for your culinary creativity. Easily adapt the fillings to suit your taste preferences or whatever ingredients you have on hand. Whether you’re adding different proteins, extra vegetables, or varying the spice levels, these quesadillas are incredibly forgiving and delicious every time.
- Kid-Friendly and Family Approved: Quesadillas are universally loved, and this sheet pan version makes them even more appealing. The mild yet flavorful seasoning and familiar ingredients are sure to please even the pickiest eaters, making it a stress-free meal for families.
- Excellent for Meal Prepping: Looking to save time during the week? These quesadillas are fantastic for meal prep. You can assemble them ahead of time and bake them when ready, or bake a large batch and store the leftovers for quick lunches and dinners throughout the week. They reheat beautifully, maintaining their delicious flavor.
Claim Your FREE Budget-Friendly Meal Plan Today!
Discover how to slash thousands of dollars off your annual food budget with my exclusive, free budget-friendly meal plan ebook. Get smart about your groceries and enjoy delicious meals without breaking the bank!
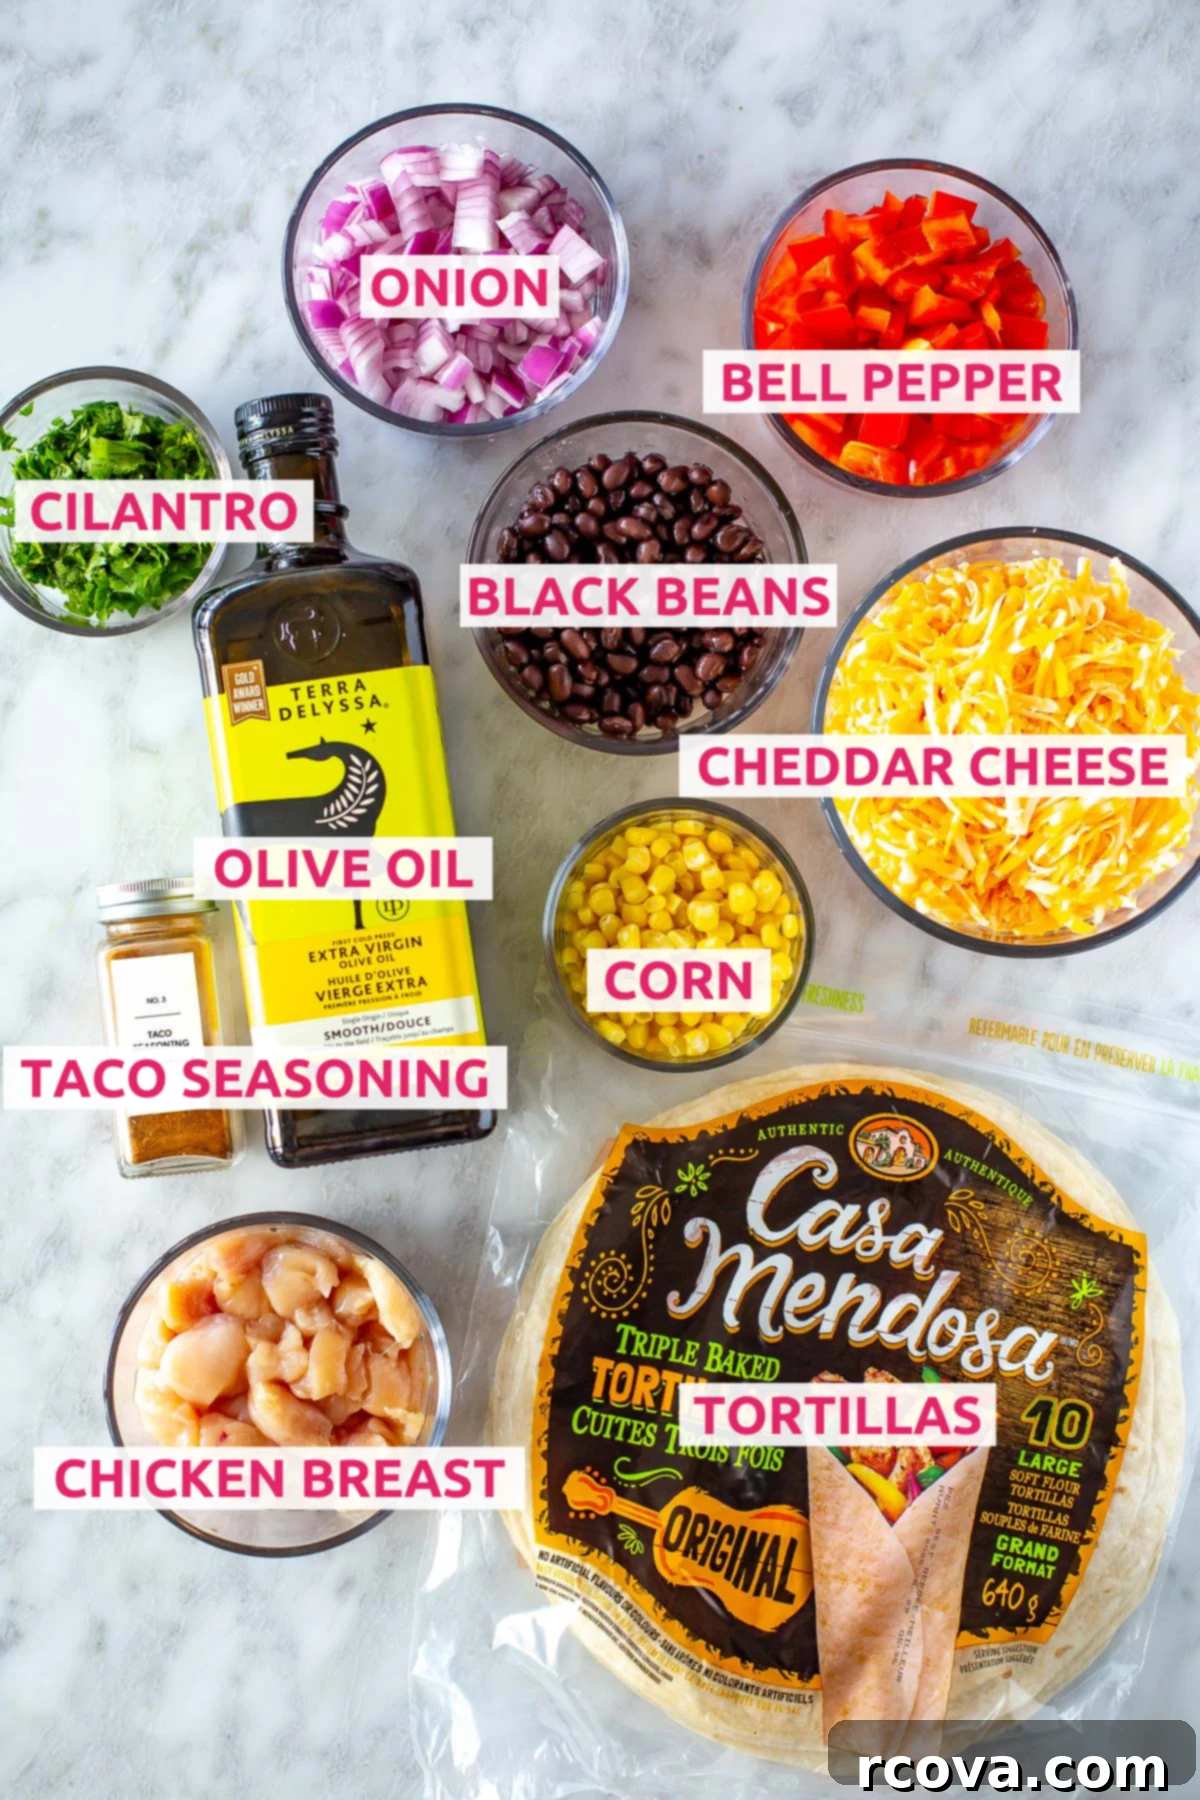
Key Ingredients & Smart Substitutions for Your Quesadillas
Crafting the perfect sheet pan quesadilla starts with fresh, flavorful ingredients. But don’t worry if you’re missing something; most components are easily adaptable to suit your pantry or dietary needs. Here’s a detailed look at what you’ll need and how to make savvy swaps:
- Olive Oil: A foundational ingredient for sautéing, olive oil adds a rich, aromatic base to our chicken and veggies. For a lighter or alternative flavor profile, feel free to use avocado oil, grapeseed oil, or any other neutral-flavored cooking oil you prefer.
- Chicken Breast: Lean and versatile, diced chicken breast forms the protein heart of these quesadillas. If you’re looking for different textures or flavors, consider using chicken thighs for a juicier result, ground chicken for a more integrated filling, or even pre-cooked rotisserie chicken for ultimate convenience – simply shred and add it in!
- Taco Seasoning: This blend of spices is crucial for that authentic Tex-Mex flavor. While a store-bought packet is quick, you can easily whip up your own homemade blend using chili powder, cumin, paprika, garlic powder, onion powder, and a pinch of oregano. Adjust the spice level to your liking!
- Bell Pepper: Any color of bell pepper (red, yellow, orange, or green) will add a lovely crunch and sweetness to the filling. For those who appreciate a deeper, smoky flavor with a touch of heat, poblano peppers make an excellent substitution.
- Red Onion: Red onion provides a sharp, zesty flavor that mellows beautifully when cooked. If you don’t have red onion on hand, yellow or white onions can be used instead, offering a slightly milder but equally delicious flavor.
- Black Beans: These add a fantastic source of plant-based protein and fiber, contributing to the hearty texture of the quesadillas. They can be replaced with other canned beans like kidney beans, pinto beans, or even chickpeas for a different nutritional profile. Remember to drain and rinse them thoroughly before adding.
- Corn: Whether you use fresh kernels sliced right off the cob, defrosted frozen corn, or well-drained canned corn, it adds a burst of sweet flavor and vibrant color to the filling. All forms work wonderfully in this recipe.
- Cilantro: Fresh cilantro brightens the entire dish with its distinctive herbaceous aroma. If you’re not a fan of cilantro (we know it’s a polarizing herb!), fresh parsley or thinly sliced green onions are fantastic alternatives that offer a similar fresh note.
- Cheddar Cheese: The quintessential cheese for quesadillas, cheddar melts beautifully and offers a rich, tangy flavor. For variety, try mozzarella (for extra stretch), Monterey Jack (for a milder, creamier melt), or a pre-shredded Mexican cheese blend that often includes a mix of complementary cheeses.
- Flour Tortillas: Large flour tortillas are ideal for this sheet pan method, as they are flexible and robust enough to hold all the delicious filling. For a healthier twist, opt for whole wheat tortillas. If you’re gluten-sensitive, gluten-free tortillas work just as well and ensure everyone can enjoy this meal.
For Serving (Optional but Highly Recommended)
While these quesadillas are fantastic on their own, serving them with a few key accompaniments elevates the entire meal and adds layers of fresh flavor and texture:
- Guacamole: Creamy, rich guacamole is a classic pairing. If you don’t have pre-made guacamole, a simple mashed avocado with a squeeze of fresh lime juice and a pinch of salt makes a quick and delicious substitute.
- Sour Cream: A dollop of cool sour cream provides a lovely contrast to the warm, spicy filling. For a lighter, tangier alternative, plain Greek yogurt works exceptionally well and adds a protein boost.
- Salsa or Pico de Gallo: A fresh, vibrant salsa or pico de gallo adds acidity and a fresh kick. Use your favorite store-bought salsa for convenience, or quickly prepare a homemade pico de gallo with diced tomatoes, red onion, fresh cilantro, and a splash of lime juice.
Step-by-Step Guide: How to Make Amazing Sheet Pan Quesadillas
Making these quesadillas on a sheet pan is incredibly straightforward and significantly cuts down on active cooking time. Follow these simple steps for perfectly golden and cheesy results every time:
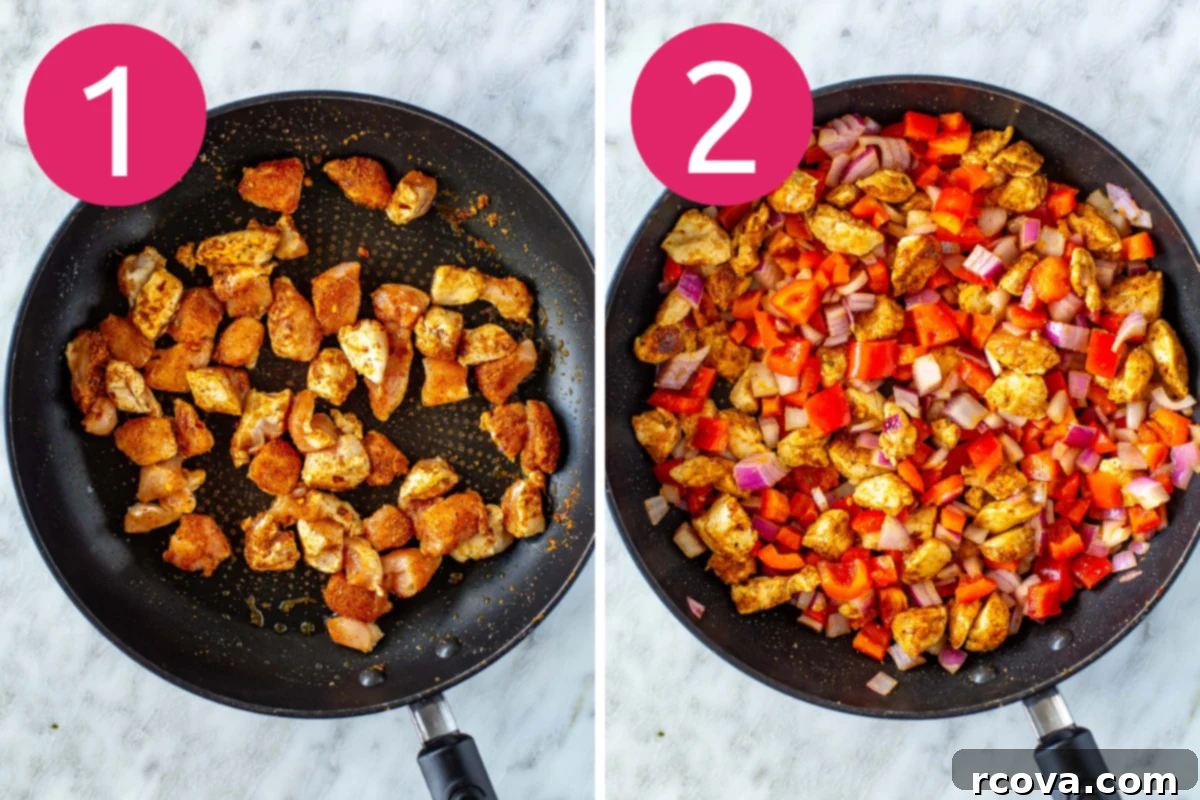
Step 1: Prepare and Cook the Chicken.
Begin by heating a tablespoon of olive oil in a large skillet over medium-high heat. Add your diced chicken breast to the hot oil, ensuring it’s spread in a single layer for even cooking. Immediately sprinkle the chicken with taco seasoning, salt, and pepper. Sauté the chicken for approximately 2 minutes, stirring occasionally, until it’s beautifully browned on all sides and mostly cooked through. This initial browning adds depth of flavor to the entire dish.
Step 2: Add Bell Pepper and Red Onion.
Once the chicken has a nice sear, add your diced bell pepper and red onion to the skillet. Continue to cook for another 5 minutes, stirring periodically. The vegetables should soften slightly and develop a vibrant cooked color, releasing their aromatic flavors into the chicken mixture. Don’t overcook them; you want them to retain a slight crispness for texture.
Step 3: Incorporate Corn, Black Beans, and Cilantro.
Next, stir in the corn and black beans, ensuring they are well combined with the chicken and vegetables. Cook for an additional 2 minutes to allow all the flavors to meld together and for the corn and beans to heat through. If you’re using cilantro, now is the time to stir in the fresh, finely chopped herb. Its vibrant flavor will complement the rich filling beautifully. Once thoroughly mixed, remove the skillet from the heat.
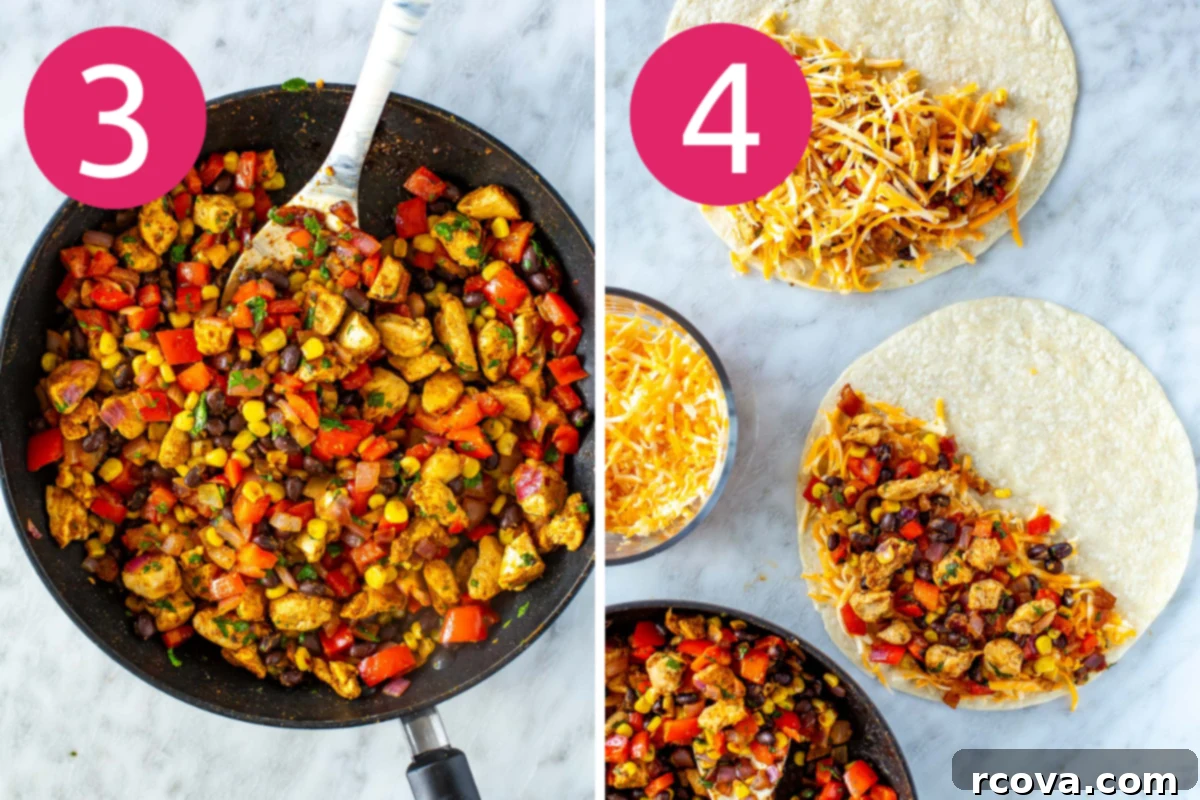
Step 4: Assemble Your Sheet Pan Quesadillas.
Preheat your oven to 425°F (220°C). Line a large baking sheet with parchment paper; this is key for preventing sticking and ensuring easy cleanup. Arrange your flour tortillas on the prepared sheet pan. For each tortilla, sprinkle a small amount of grated cheese over one half. This initial layer of cheese acts as a delicious glue. Next, evenly divide your prepared chicken and vegetable filling over the cheese-covered half of each tortilla. Finally, sprinkle the remaining cheese over the filling. This double layer of cheese ensures maximum meltiness and flavor.
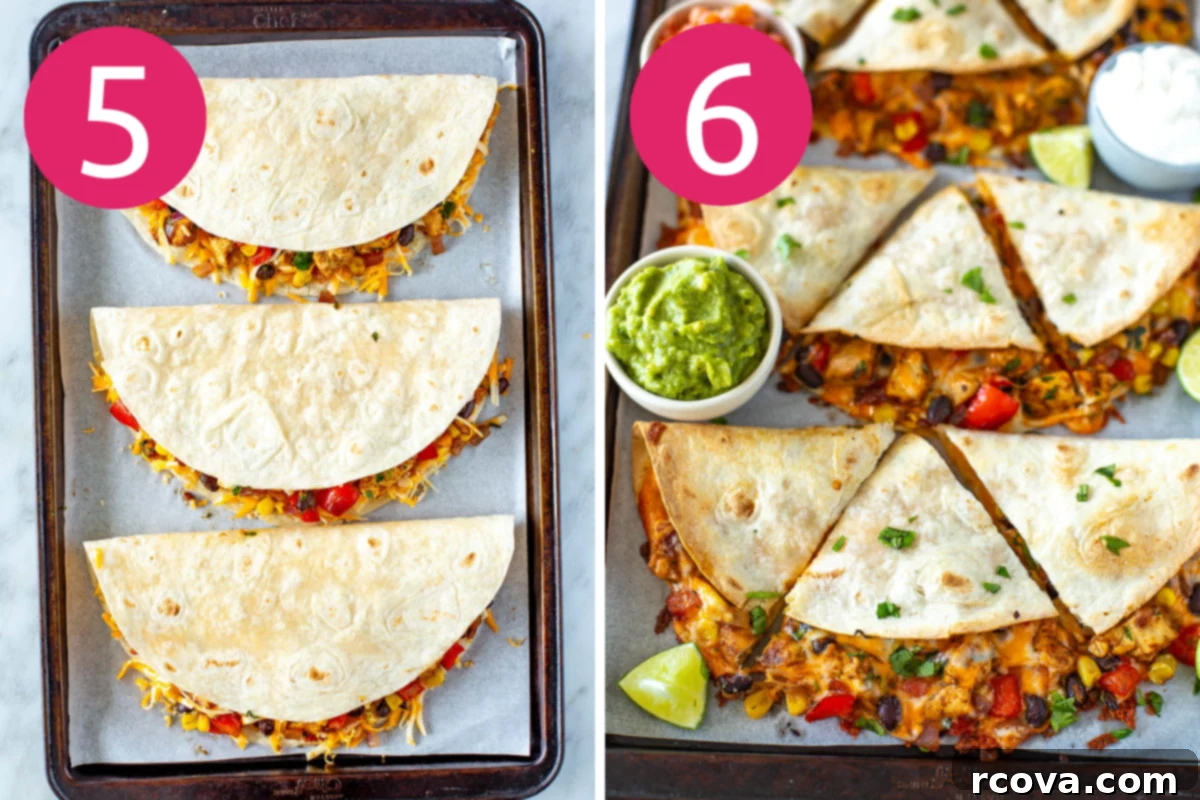
Step 5: Bake to Golden Perfection.
Carefully fold the empty half of each tortilla over the filling to close the quesadillas. You can gently press down to seal them. Transfer the baking sheet to the preheated oven and bake for 10-12 minutes, or until the tortillas are golden brown and crispy, and the cheese is gloriously melted and bubbly. For extra crispiness and even cooking, you can place another baking sheet on top of the quesadillas during the first half of baking to gently press them down.
Step 6: Serve and Savor!
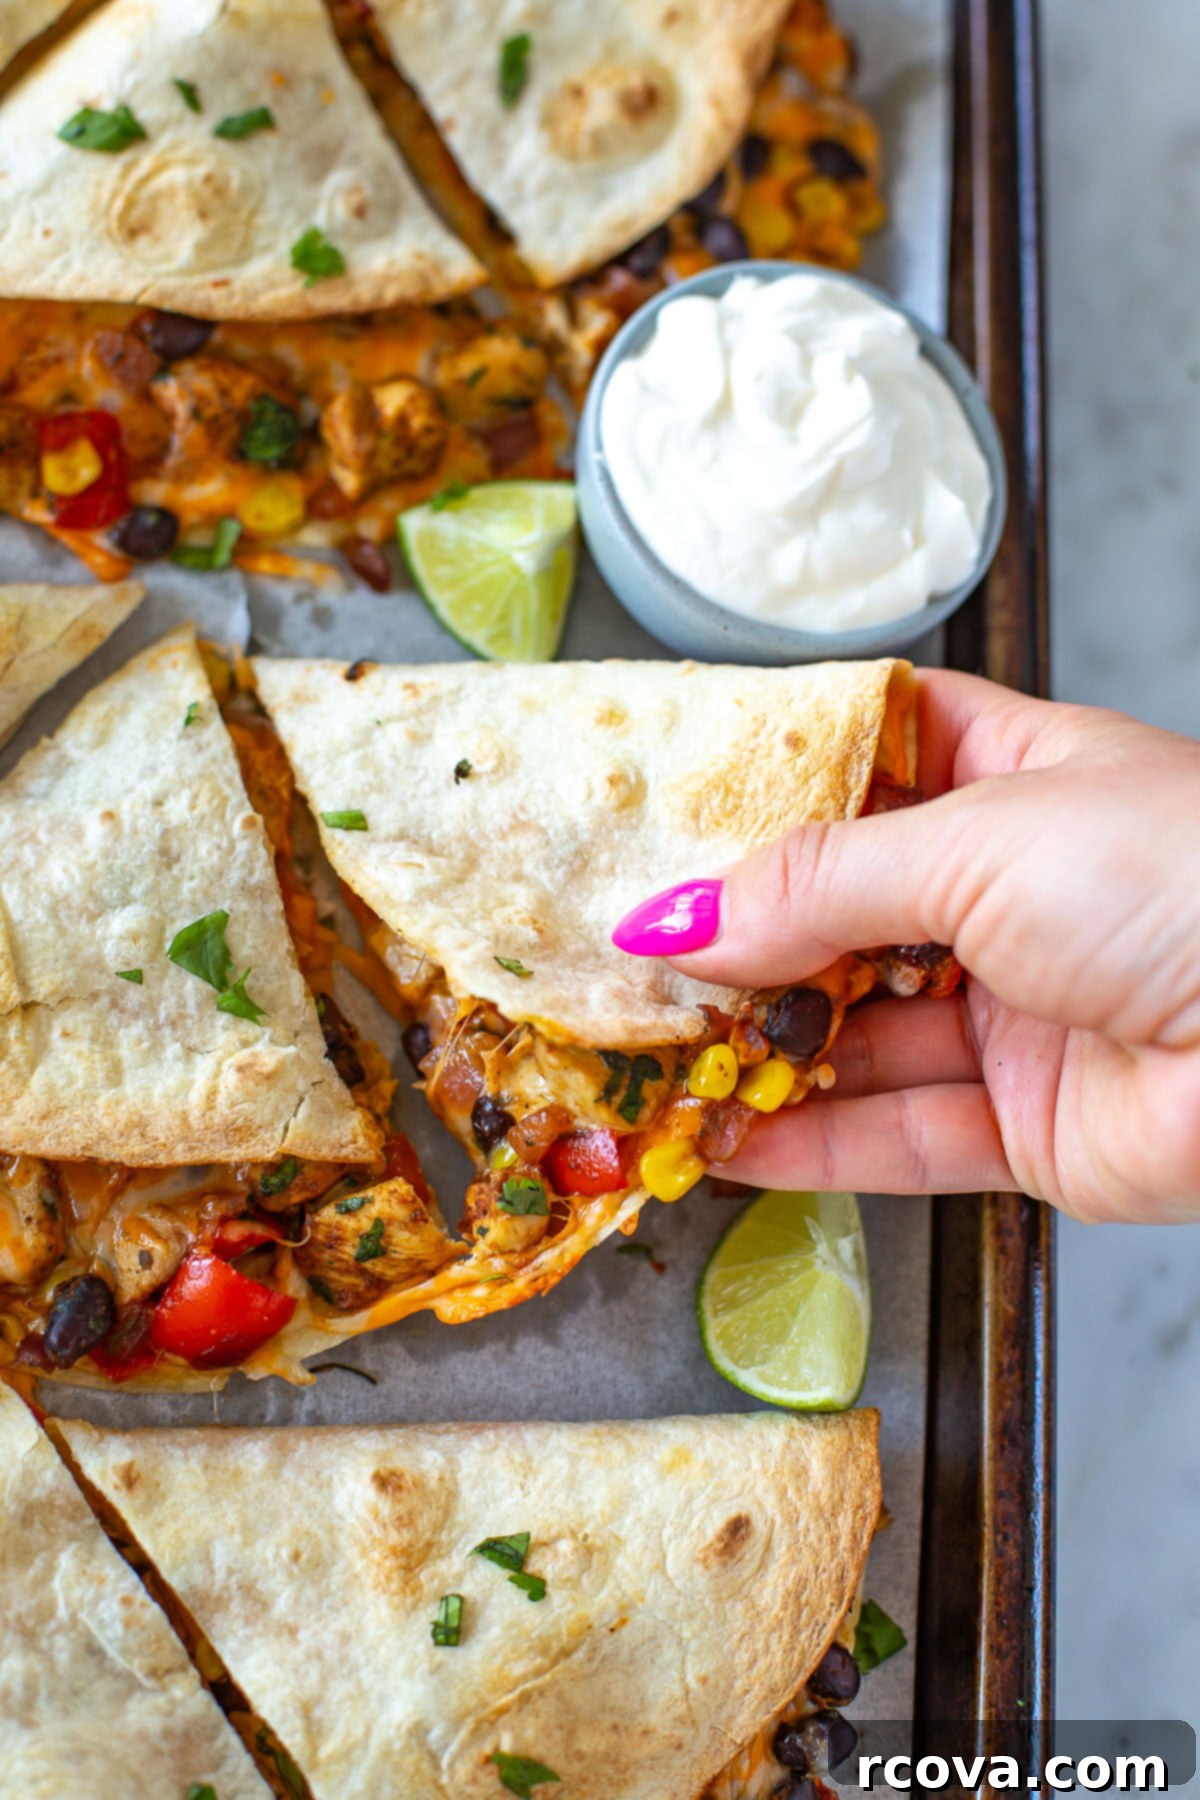
Once baked, carefully remove the sheet pan from the oven. Using a pizza cutter or a sharp knife, slice each large quesadilla into three convenient pieces. Arrange them on a platter and serve immediately while they are warm and the cheese is still perfectly gooey. Offer an array of delicious toppings like fresh guacamole, cool sour cream, or tangy salsa to complement the rich flavors. Enjoy your incredibly easy and satisfying sheet pan quesadillas!
Recipe Tips and Flavorful Variations
This sheet pan quesadilla recipe is incredibly forgiving and adaptable. If you’re looking to add a personal touch, cater to specific dietary needs, or just switch things up for next time, here are some creative ideas to help you customize and elevate your dish:
- Change the Protein: While chicken is classic, don’t hesitate to experiment! Cooked ground beef or turkey, shredded rotisserie chicken (for even faster prep!), or plant-based crumbles can easily replace the chicken. Just ensure any meat is fully cooked before adding it to the tortillas.
- Make it Vegetarian or Vegan: To create a delicious meat-free version, simply omit the chicken entirely. Instead, bulk up the filling with extra beans, sautéed mushrooms for an umami kick, tender zucchini, or even crumbled firm tofu seasoned with taco spices. For a vegan option, use dairy-free cheese and tortillas.
- Add More Spice and Heat: If you love a fiery kick, incorporate finely diced jalapeños or serrano peppers into the filling with the other vegetables. For a subtle, deep warmth, stir in a pinch of cayenne pepper or a dash of your favorite hot sauce. Adjust to your desired heat level!
- Bulk Them Up with Extra Veggies: Boost the nutritional content and flavor by adding more vegetables. Fresh spinach or kale can be wilted into the hot filling just before removing it from the heat. Roasted sweet potatoes, corn, or diced zucchini are also fantastic additions that add both sweetness and substance.
- Transform Them into Mini Appetizers: For a fun party appetizer or smaller portions, use small street taco-sized tortillas. Fill, fold, and bake as directed, then cut them into cute wedges. These mini quesadillas are perfect for dipping and easy to handle at gatherings.
- Boost the Flavor with Herbs: Beyond cilantro, consider adding other fresh herbs like chives or finely chopped parsley for an extra layer of freshness. A squeeze of lime juice over the finished quesadillas also brightens all the flavors.
- Ensure Peak Crispiness: For the crispiest quesadillas, don’t overfill them. A thinner layer of filling allows the tortillas to become golden and crunchy. You can also lightly brush the outside of the folded tortillas with a tiny bit of olive oil before baking for an even crispier finish.
Frequently Asked Questions About Sheet Pan Quesadillas
Here are answers to some common questions that arise when making sheet pan quesadillas, helping you achieve the best results every time:
Why use flour tortillas over corn tortillas for sheet pan quesadillas?
Flour tortillas are generally recommended for sheet pan quesadillas because of their superior flexibility and durability when baked. They are less prone to cracking and tearing, which is essential when loading them with filling and folding them. Their pliability makes the assembly process smoother and ensures they hold together better during baking and slicing, resulting in a more satisfying, intact quesadilla.
How can I ensure my quesadillas stay crispy and avoid sogginess?
To achieve maximum crispiness and prevent soggy bottoms, there are a few key tricks. First, don’t overfill your tortillas; a lighter filling allows the tortilla to crisp up better. Second, ensure your filling isn’t overly wet – drain any excess liquid from beans or cooked vegetables. Additionally, you can lightly toast both sides of the tortillas in a dry skillet for about 30 seconds per side before assembly. This pre-toasting adds extra crunch and creates a barrier against moisture from the filling. Finally, using parchment paper on your sheet pan helps promote even crisping and prevents sticking.
How much filling is too much for a quesadilla?
When it comes to quesadilla filling, moderation is key. Aim for enough filling to create a substantial layer without overstuffing. Too much filling can make the tortilla difficult to fold, lead to spillage during baking, and significantly increase the chances of the tortilla breaking or becoming soggy. A good rule of thumb is to leave a small border around the edges and ensure the folded quesadilla isn’t bulging excessively.
Can I prepare the quesadilla filling in advance?
Absolutely! Preparing the chicken and vegetable filling in advance is a fantastic way to streamline your meal prep. You can cook the entire filling mixture, let it cool completely, and then store it in an airtight container in the refrigerator for up to 2-3 days. When you’re ready to make the quesadillas, simply reheat the filling slightly (or use cold if preferred) before assembling and baking. This makes for an even quicker weeknight meal!
Delicious Pairings: What to Serve with Your Sheet Pan Quesadillas
While these chicken quesadillas are a satisfying meal all on their own, they truly shine when accompanied by complementary side dishes. Here are some of my favorite pairings that add freshness, texture, and an extra layer of flavor to your Mexican-inspired feast:
- Refreshing Salads: A light and zesty salad cuts through the richness of the cheese and chicken, offering a delightful balance.
- Mexican Street Corn Pasta Salad: Combines creamy pasta with the vibrant flavors of elote.
- Best Easy Quinoa Salad Recipe: A healthy, protein-packed option with fresh vegetables.
- Southwest Dense Bean Salad: Another hearty bean-based salad that complements the quesadilla filling.
- Comforting Soups: For a heartier meal, especially on a cooler day, a warm bowl of soup pairs wonderfully.
- Easy Cream of Asparagus Soup: A delicate and creamy soup for a touch of elegance.
- Roasted Red Pepper Soup: Sweet and smoky, enhancing the Tex-Mex flavors.
- Chili’s Chicken Enchilada Soup: A robust and flavorful soup that perfectly matches the theme.
- Crispy Fries (with a Twist!): Elevate your side game with these unique and flavorful “fries.”
- Homemade Greek Fries With Chicken {Oven Baked}: A delightful fusion that adds a different culinary dimension.
- Crispy Green Bean Fries: A healthier, crunchy alternative to traditional potato fries.
- Healthy Air Fryer Sweet Potato Fries: Sweet and savory, offering a vibrant color and taste.
- Crispiest Air Fryer Zucchini Fries: Light and crispy, a great way to sneak in more vegetables.
Storage and Reheating Instructions for Your Quesadillas
These sheet pan quesadillas are just as delicious leftover as they are fresh, making them perfect for meal prep or quick future meals. Proper storage and reheating will ensure they retain their texture and flavor.
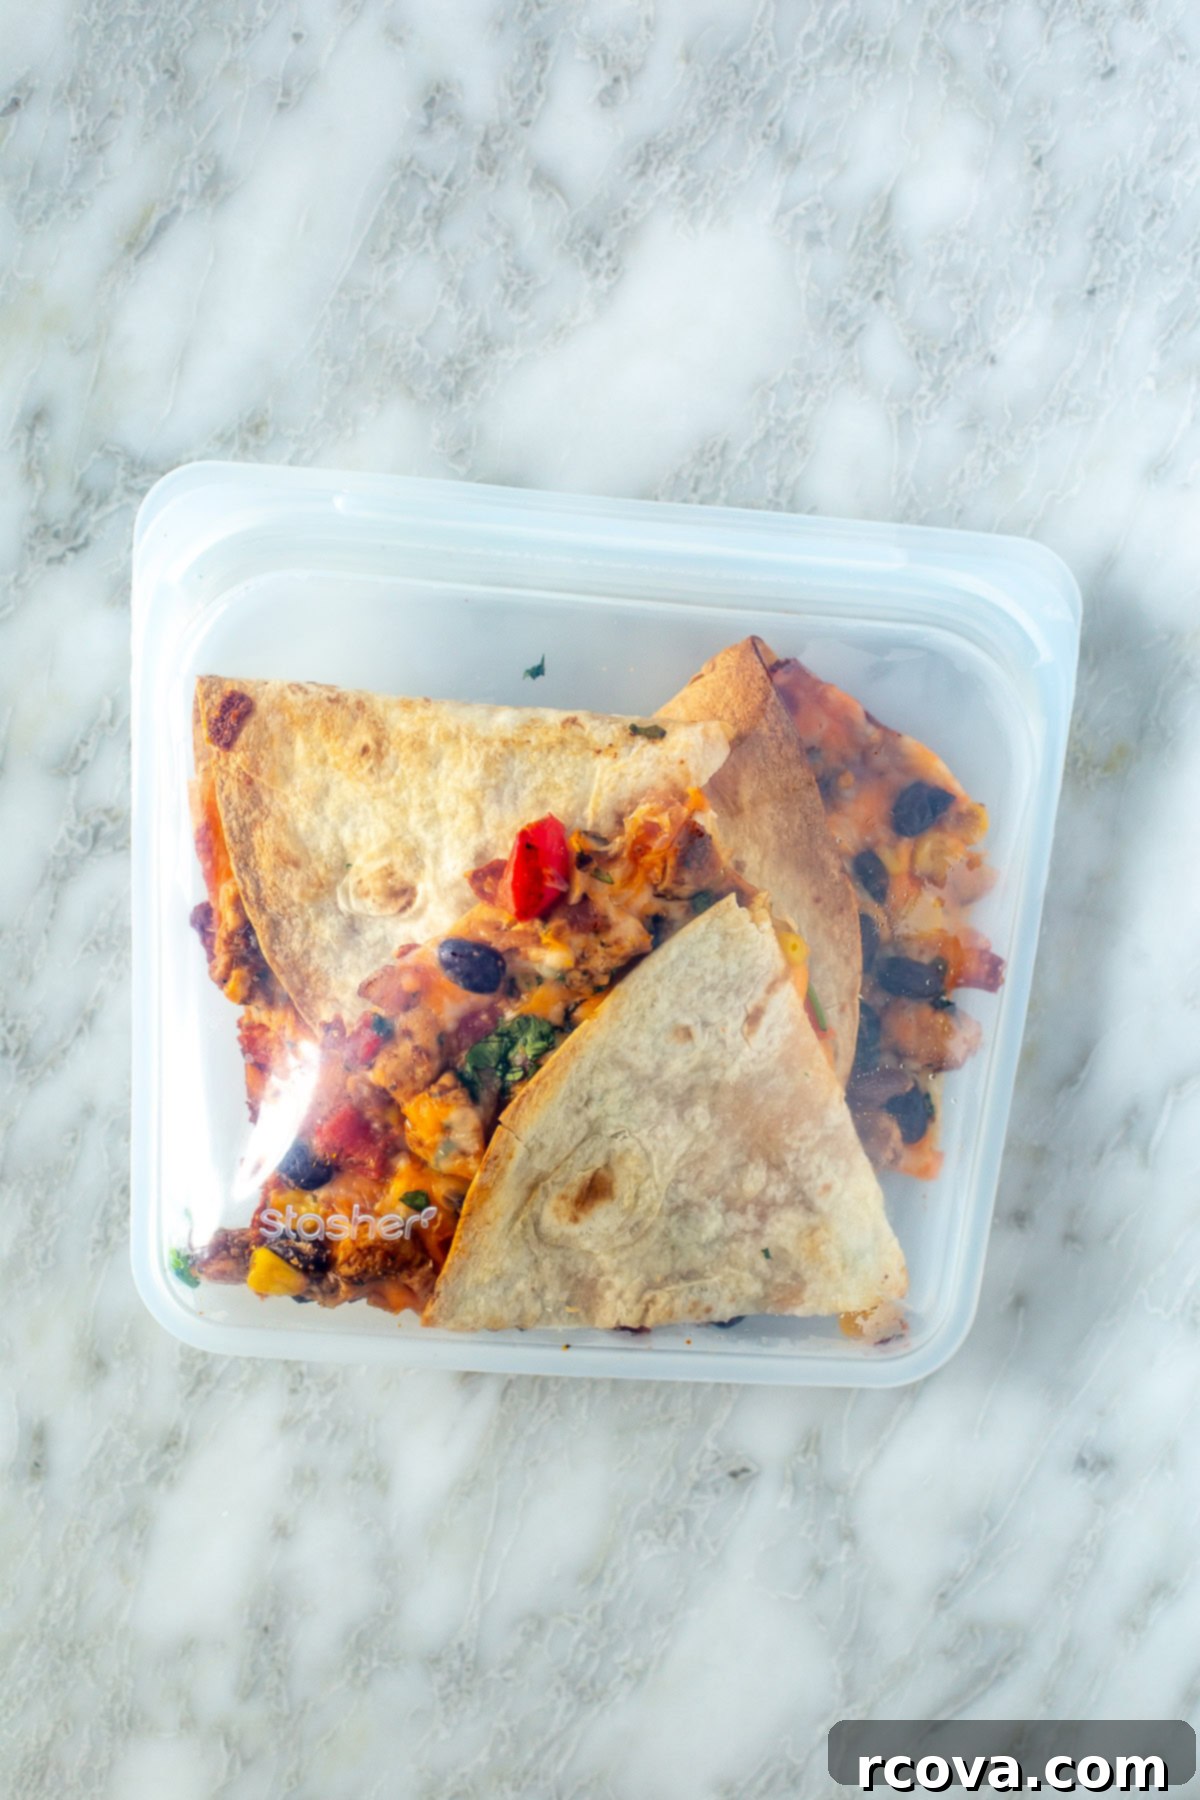
To Store Leftovers: Allow any cooled quesadilla pieces to come to room temperature before storing. Place them in an airtight container in the refrigerator. They will stay fresh and delicious for up to 3 days. To prevent them from becoming soggy, you might place a paper towel at the bottom of the container to absorb any excess moisture.
To Reheat for Best Results: For the crispiest results, reheating in an oven or a skillet is recommended over a microwave.
- Oven Method: Preheat your oven to 350°F (175°C). Arrange the quesadilla pieces in a single layer on a baking sheet. Heat for 8-10 minutes, or until the cheese is re-melted and the tortillas are crisp again.
- Skillet Method: Heat a dry skillet over medium heat. Place the quesadilla pieces in the skillet and cook for 2-4 minutes per side, or until golden brown and heated through. This method is excellent for bringing back that fresh-baked crunch.
To Freeze and Reheat from Frozen: Sheet pan quesadillas freeze beautifully, making them an excellent option for long-term meal planning.
- Freezing: Once your quesadillas are fully cooked and cooled to room temperature, arrange the individual pieces in a single layer on a baking sheet. Place the baking sheet in the freezer for 1-2 hours until the pieces are solid. This prevents them from sticking together. Once frozen, transfer the quesadilla pieces to a freezer-safe bag or airtight container. They can be stored in the freezer for up to 2 months.
- Reheating from Frozen: To reheat, you can bake them directly from frozen. Preheat your oven to 350°F (175°C). Place the frozen quesadilla pieces on a baking sheet and bake for 15-20 minutes, or until thoroughly heated through and crispy. For quicker reheating, you can also thaw them overnight in the refrigerator before warming them using the oven or skillet methods described above.
Explore More Delicious Quesadilla Recipes
If you’ve enjoyed the simplicity and flavor of these sheet pan quesadillas, you’ll love discovering more ways to enjoy this versatile Mexican dish. From classic versions to innovative twists, here are some other fantastic quesadilla recipes to add to your culinary repertoire:
-
Chicken Quesadilla Recipe {Best Ever!!!}
-
Copycat Applebee’s Quesadilla Burger Recipe
-
Freezer-Friendly Tex Mex Breakfast Quesadillas
Easy Sheet Pan Chicken Quesadillas
Print
Pin
Rate
SEND ME MY PLAN
Equipment
-
Standard Baking Sheet (half-sheet size recommended)
-
Pizza Cutter (for easy slicing)
Ingredients
- 1 tbsp olive oil (or avocado oil)
- 1/2 lb boneless, skinless chicken breast diced into small, even pieces
- 1 tbsp taco seasoning (store-bought or homemade)
- Salt & pepper to taste
- 1 bell pepper (any color, diced)
- 1/2 red onion (diced)
- 1/2 cup black beans (canned, rinsed, and drained)
- 1/2 cup corn (fresh, frozen, or canned)
- 2 tbsp fresh cilantro (optional, finely chopped)
- 3 cups cheddar cheese (freshly grated, or a Mexican blend)
- 4 large flour tortillas (burrito size)
For serving (optional)
- Guacamole
- Sour cream (or plain Greek yogurt)
- Salsa or pico de gallo
Instructions
-
In a large skillet, heat 1 tablespoon of olive oil over medium-high heat. Add the diced chicken breast to the pan, spread it out, then toss it with the taco seasoning, salt, and pepper until evenly coated. Sauté the chicken for about 2 minutes, stirring occasionally, until it begins to brown. Next, add the diced bell pepper and red onion to the skillet. Continue sautéing for another 5 minutes, or until the vegetables have softened slightly and the chicken is mostly cooked through. Finally, stir in the black beans and corn, cooking for an additional 2 minutes to heat them through and allow the flavors to meld. If you’re using fresh cilantro, stir it in just before removing the skillet from the heat.
-
Preheat your oven to 425°F (220°C). Line a large baking sheet with parchment paper to prevent sticking and for easy cleanup. Arrange your large flour tortillas evenly on the prepared baking sheet. Sprinkle a small amount of cheddar cheese (about 1/4 cup per tortilla) over one half of each tortilla. Evenly divide the prepared chicken and vegetable filling amongst the cheese-covered halves. Finish by sprinkling the remaining cheddar cheese over the filling on each tortilla.
-
Gently fold the empty half of each tortilla over the filling, creating a half-moon shape. Press down lightly to help seal the quesadillas. Bake in the preheated oven for 10-12 minutes, or until the tortillas are beautifully golden brown and crispy, and the cheese inside is fully melted and bubbling. For extra crispiness, you can place a second baking sheet directly on top of the quesadillas for the first 5 minutes of baking. Once baked, remove from the oven, let cool for a minute, then slice each tortilla into three easy-to-handle pieces using a pizza cutter or sharp knife. Serve immediately with your favorite toppings like guacamole, sour cream, and salsa. Enjoy this delicious and hassle-free meal!
Notes
For the best texture and to ensure the tortillas crisp up nicely, avoid overfilling them. A moderate amount of filling allows for even baking and prevents sogginess.
To help the quesadillas bake evenly and achieve a more consistent crispness, consider placing another baking sheet directly on top of the quesadillas during the first half of the baking process. This gentle press helps them stay flat.
You can conveniently prepare and assemble these quesadillas a few hours in advance. Once assembled, cover the sheet pan lightly with plastic wrap and refrigerate until you are ready to bake them. This is a great time-saver for busy days.
Leftover quesadilla pieces can be stored in an airtight container in the fridge for up to 3 days. To bring back their delicious crunch, reheat them in the oven or a dry skillet over medium heat rather than microwaving.
These quesadillas are also freezer-friendly! Freeze individual cooled pieces in a single layer on a baking sheet until solid, then transfer them to a freezer bag or container for up to 2 months. Bake from frozen at 350°F (175°C) until hot and crispy, or thaw them overnight in the fridge for quicker reheating.
