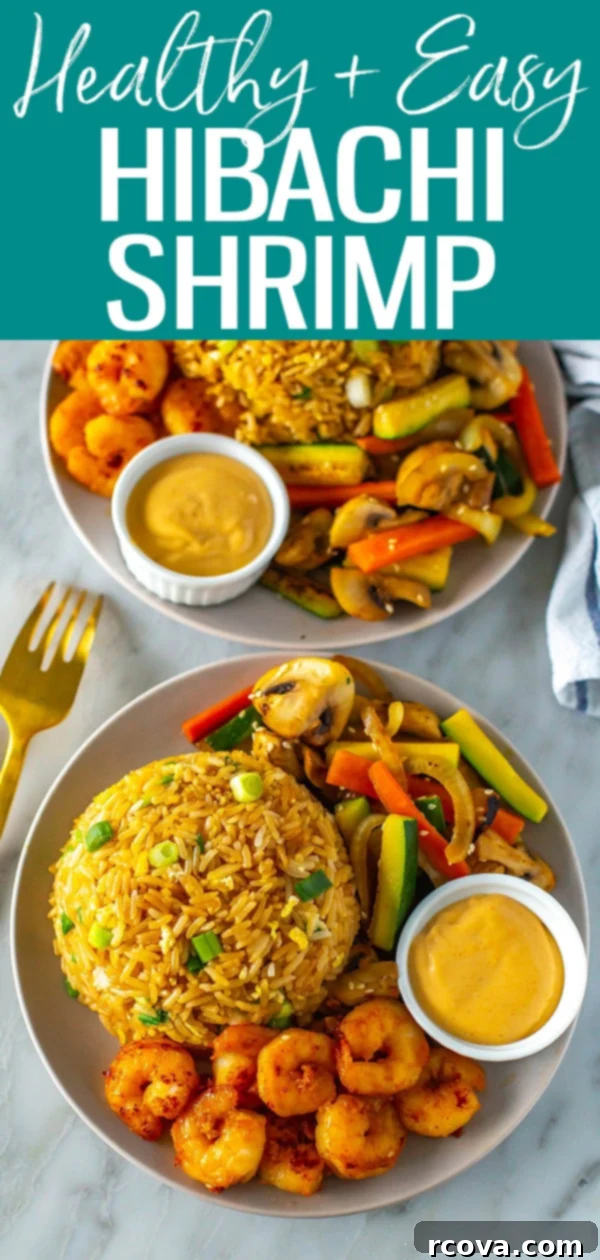
Easy Homemade Hibachi Shrimp Recipe: Benihana Copycat with Fried Rice & Yum Yum Sauce
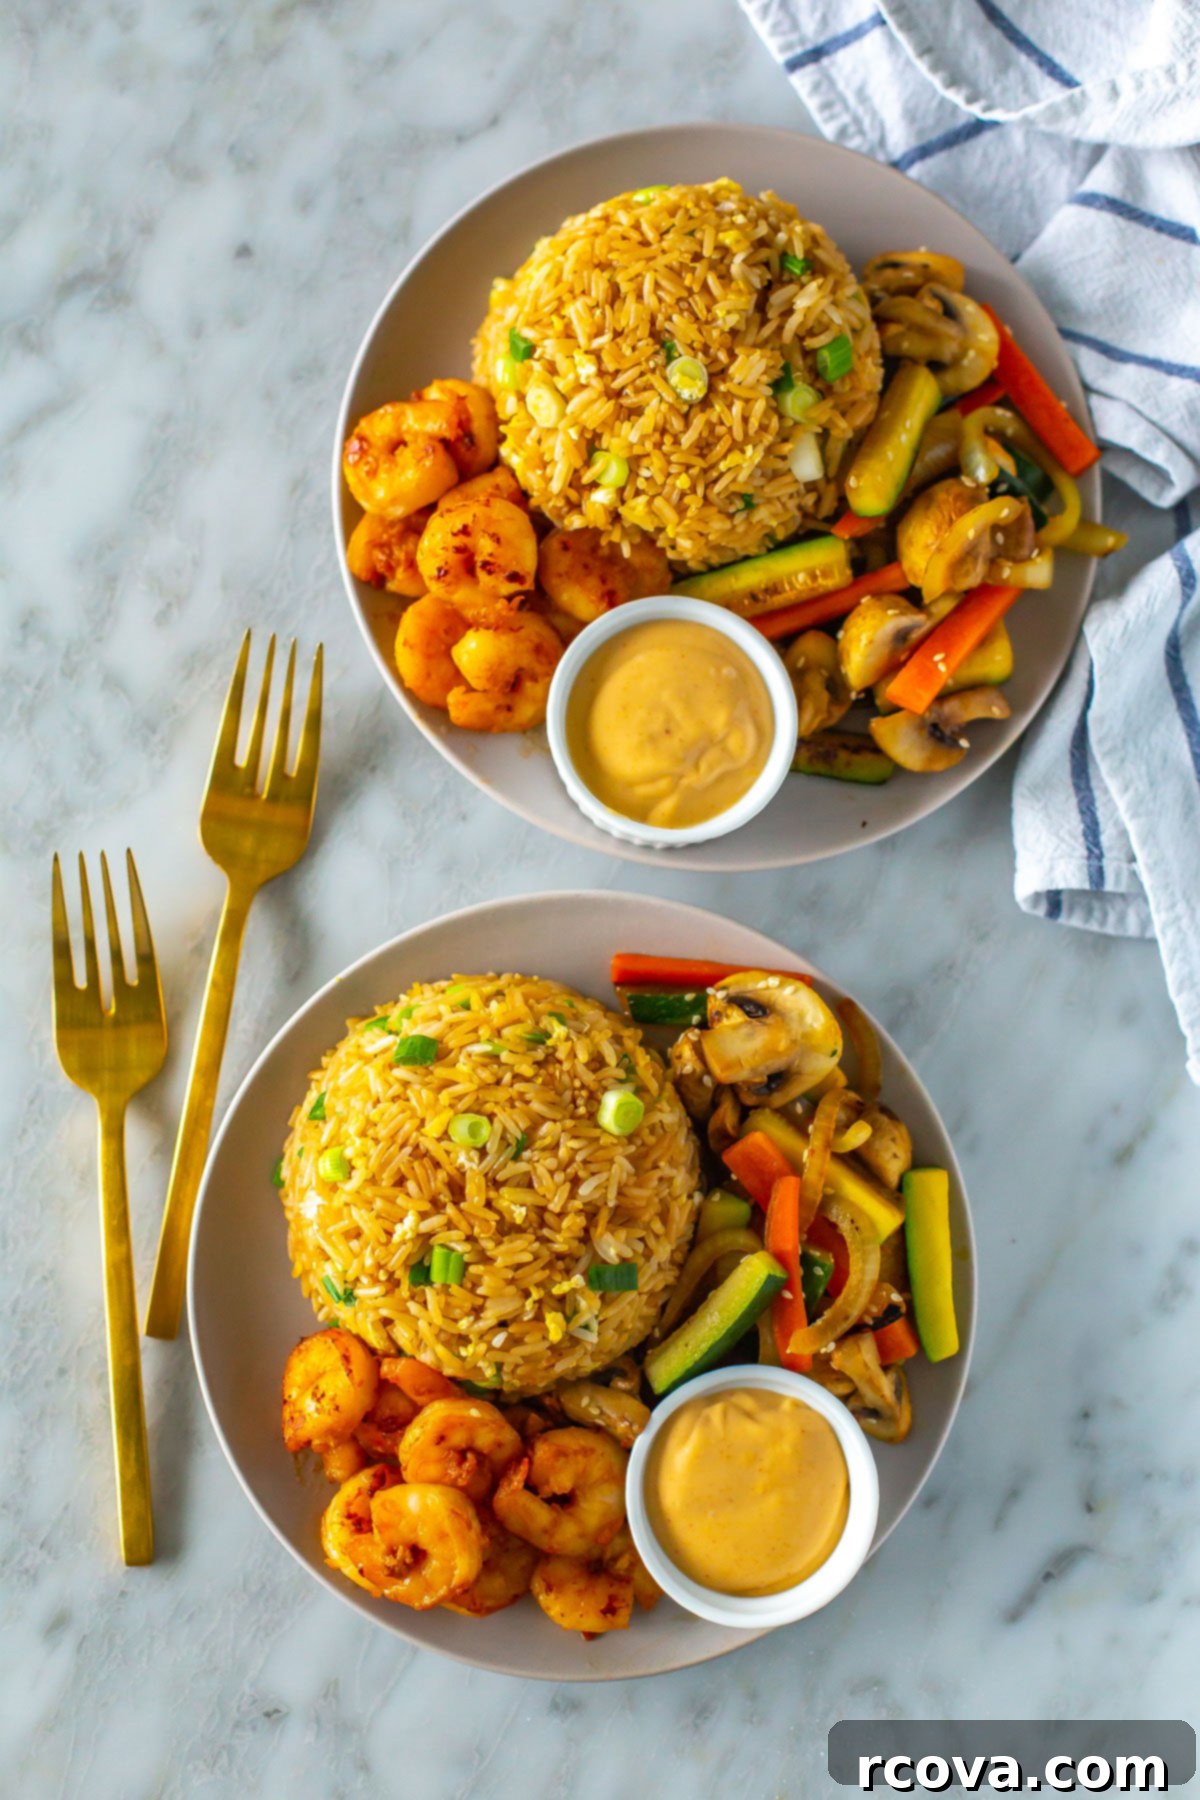
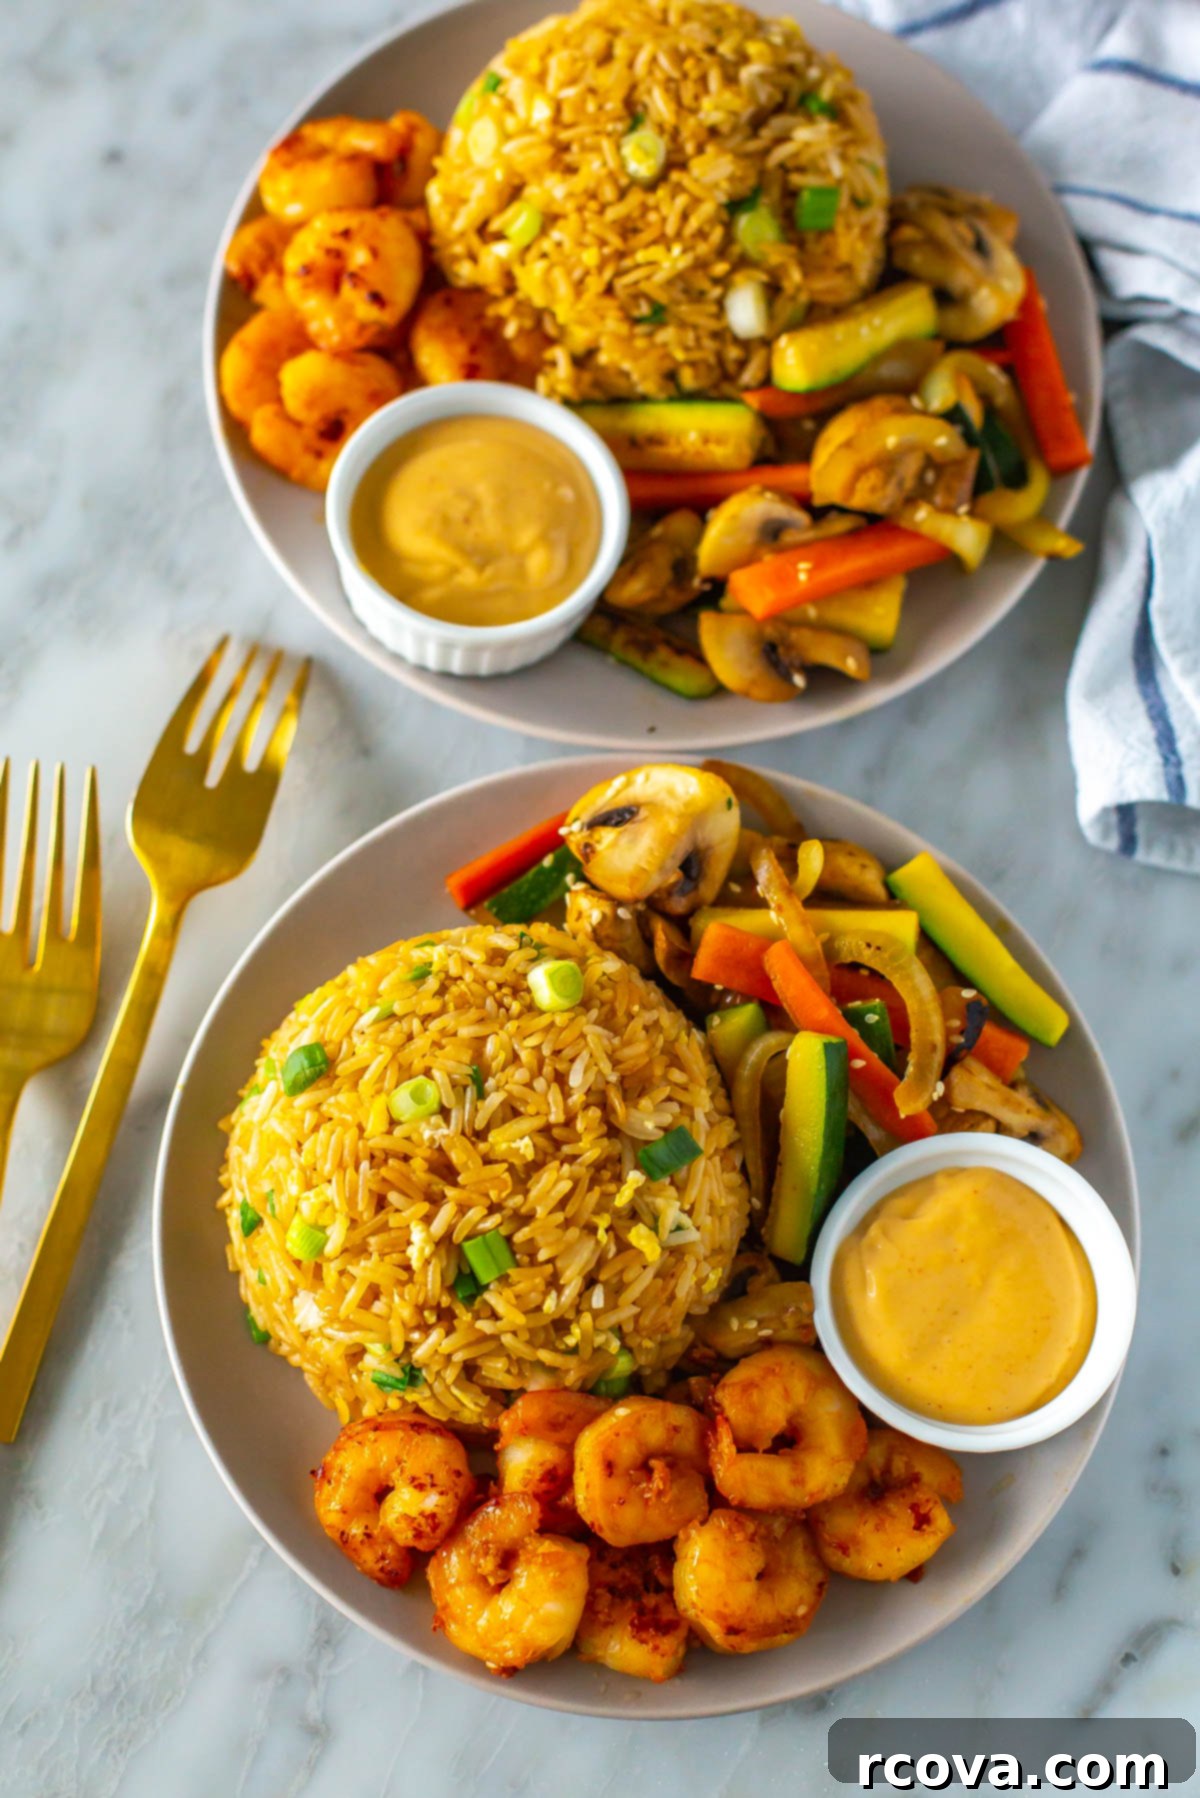
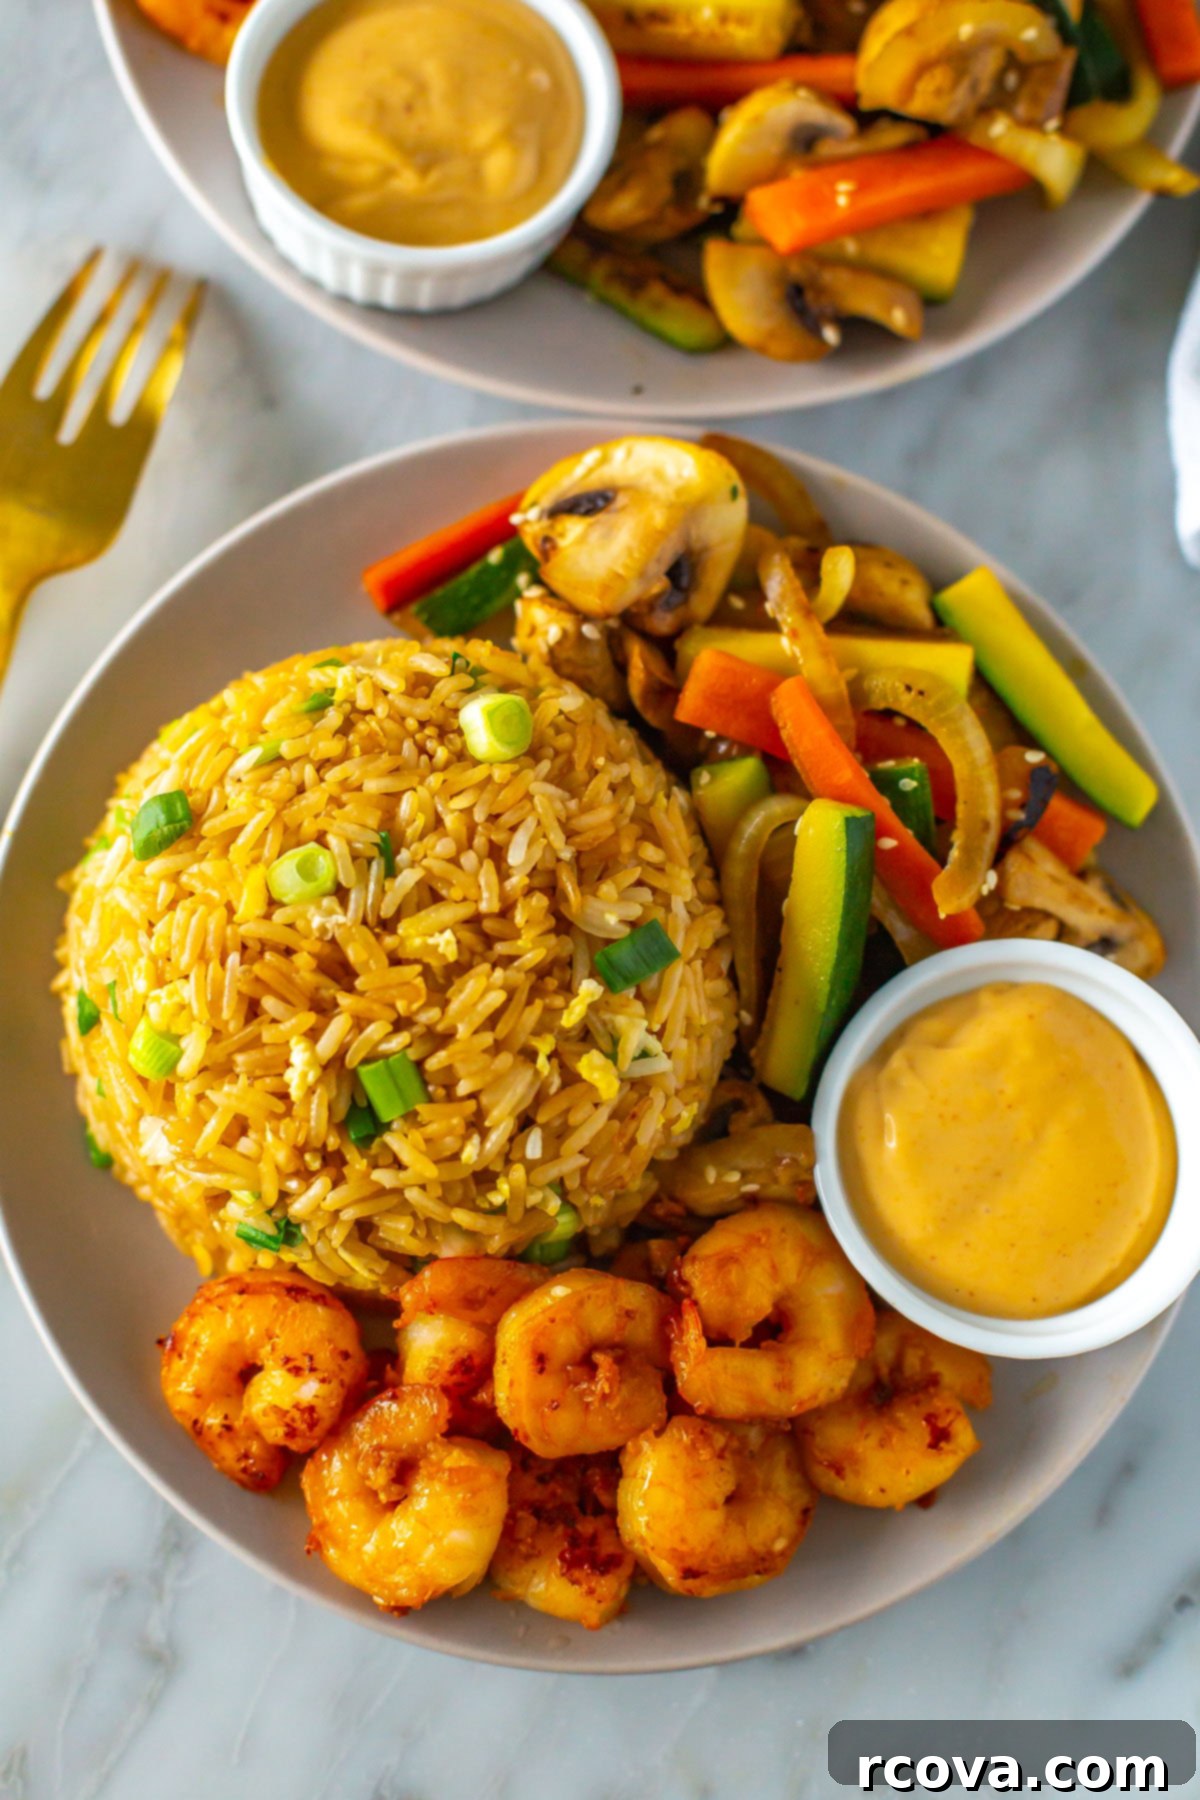
Welcome to your new favorite weeknight dinner! This irresistible hibachi shrimp recipe brings the beloved Japanese steakhouse experience right into your kitchen. Imagine succulent shrimp, perfectly seasoned and cooked, served alongside a hearty portion of savory fried rice, an assortment of tender-crisp mixed vegetables, and a generous dollop of that famously creamy, tangy, and slightly spicy Yum Yum sauce. You’ll be amazed at how simple it is to recreate this Benihana-style favorite at home, making it a fantastic option for both busy weeknights and special occasions. Get ready to delight your taste buds with an authentic hibachi flavor that’s not only incredibly delicious but also surprisingly easy to prepare!
FREE Budget-Friendly Meal Plan!
Save thousands of dollars on food every year with my free budget-friendly meal plan ebook. Discover delicious recipes and smart strategies to stretch your grocery budget without compromising on taste or nutrition. Sign up now and start transforming your meal planning!
Essential Ingredients and Smart Substitutions for Your Hibachi Shrimp
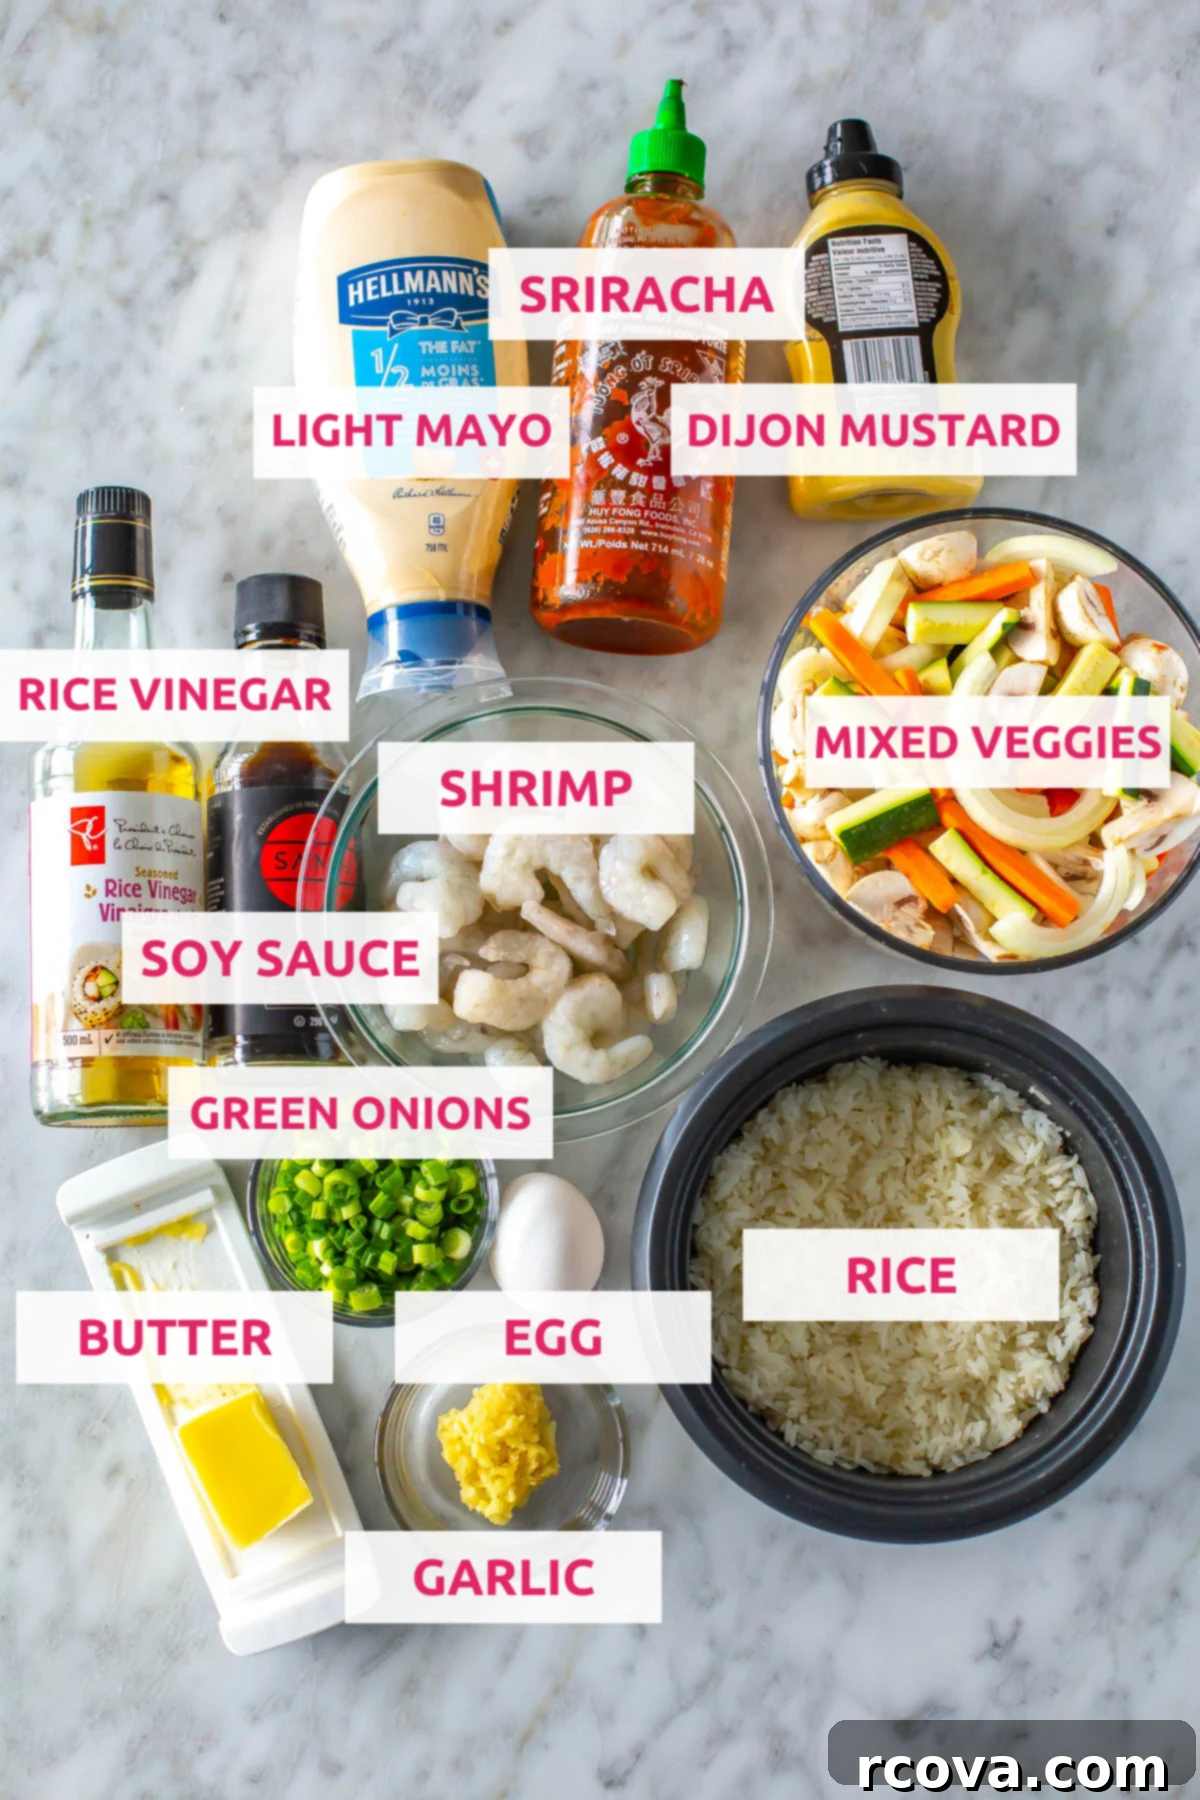
Creating an authentic hibachi experience at home starts with understanding each component and its role. This section details the key ingredients for your delicious hibachi shrimp, vegetables, fried rice, and the indispensable Yum Yum sauce, along with useful substitutions to ensure you can whip up this meal even if your pantry isn’t fully stocked.
Hibachi Shrimp
- Shrimp: For convenience and quality, defrosted frozen shrimp (peeled and deveined) is highly recommended. It thaws quickly and cooks fast. If you’re not a fan of seafood, this recipe is incredibly versatile; you could easily try making it with chicken cut into bite-sized pieces for a delicious hibachi chicken meal.
- Sunflower Oil: A neutral cooking oil is key for high-heat cooking without imparting unwanted flavors. Great alternatives include olive oil (though be mindful of its lower smoke point compared to sunflower or avocado oil) or avocado oil.
- Salt: Essential for seasoning the shrimp and bringing out its natural sweetness. Adjust to your personal taste.
- Soy Sauce: This provides the signature umami and salty kick. For gluten-free options or different flavor profiles, coconut aminos or tamari are excellent substitutes. Coconut aminos offer a slightly sweeter, less salty alternative, while tamari is a very close gluten-free match to traditional soy sauce.
- Garlic: Freshly minced garlic delivers the most vibrant flavor, adding an aromatic depth to your shrimp. However, if you’re in a hurry, jarred minced garlic can be a convenient substitute.
Hibachi Vegetables
- Sunflower Oil: Again, a neutral cooking oil like olive or avocado oil is perfect for sautéing the vegetables to a tender-crisp texture.
- Mushrooms: White button or cremini mushrooms are commonly used and absorb flavors beautifully. Feel free to use any kind of mushrooms you prefer, or even swap them out for other quick-cooking vegetables like broccoli florets, snap peas, or bell peppers to customize your hibachi veggie mix.
- Carrot: Shredded or julienned carrots add a touch of sweetness and vibrant color. You can save time by buying pre-cut carrot matchsticks from the grocery store. Like mushrooms, carrots can be swapped for other vegetables to suit your preference.
- Yellow Onion: Provides a foundational aromatic flavor. White onion, red onion, or even shallots can be used as alternatives, each offering a slightly different nuance to the overall taste.
- Zucchini: Adds a fresh, mild flavor and soft texture when cooked. It pairs wonderfully with the other vegetables. You can substitute zucchini with other vegetables like green beans or asparagus if desired.
- Salt: To season the vegetables, enhancing their natural flavors.
- White Sesame Seeds: Used as a garnish, they add a subtle nutty flavor and visual appeal. Black sesame seeds would also work well and create a striking contrast.
Yum Yum Sauce
- Light Mayo: Forms the creamy base of the sauce. Using light mayonnaise helps reduce the calorie count without sacrificing flavor, but regular mayonnaise can certainly be used if preferred.
- Rice Vinegar: Provides a crucial tangy element. Apple cider vinegar or white wine vinegar can be used as substitutes, though they may alter the sauce’s flavor slightly.
- Soy Sauce: Contributes umami and saltiness. Coconut aminos or tamari are excellent gluten-free alternatives.
- Dijon Mustard: Adds a subtle sharpness and depth of flavor. While regular yellow mustard can be used, be aware that it will give the sauce a distinctly different and perhaps more pronounced mustard flavor.
- Sriracha: Gives the Yum Yum sauce its characteristic mild heat. Adjust the amount to your spice preference, or leave it out entirely if you prefer no spice. Other hot sauces can also be used, but Sriracha is typically preferred for its specific flavor profile.
Fried Rice
- Cooked White Rice: Any variety of white rice works, but for the best fried rice texture, leftover rice is highly recommended. Day-old (or even two-day-old) rice is drier, preventing it from clumping and allowing for better absorption of flavors and a crispier finish.
- Butter: Adds richness and flavor to the fried rice. Margarine or olive oil are suitable butter-free substitutes.
- Garlic: Freshly minced garlic provides the best aroma and taste for fried rice, though jarred minced garlic can be used in a pinch.
- Soy Sauce: Essential for the savory, umami flavor of fried rice. Coconut aminos or tamari are great gluten-free alternatives.
- Egg: Scrambled into the rice, it adds protein and texture. You can easily omit the egg if you have dietary restrictions or simply prefer not to include it.
- Green Onions: Adds a fresh, mild onion flavor and a pop of color. These can be left out if you don’t have them on hand, but they do enhance the overall taste.
How to Make Authentic Hibachi Shrimp at Home
Follow these simple steps to bring the excitement and flavor of a Japanese steakhouse hibachi experience directly to your dining table. This recipe is designed for ease and maximum flavor, ensuring a delicious meal every time.
Step 1: Prep Your Ingredients for Efficiency
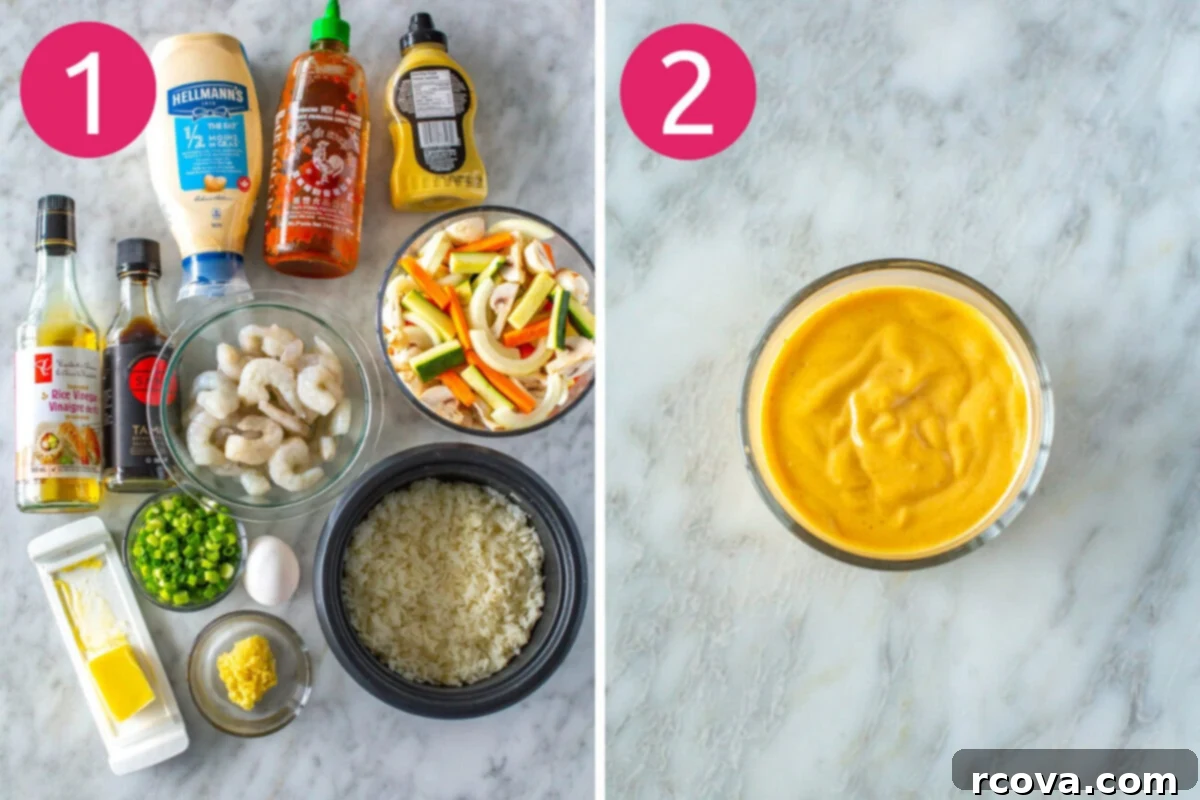
Before you start cooking, it’s crucial to have all your ingredients prepped and ready (this is known as “mise en place” in professional kitchens!). Cook your white rice in a rice cooker or on the stovetop according to package directions. For optimal results in fried rice, consider cooking your rice up to two days in advance and storing it in the refrigerator. This allows the rice to dry out slightly, which prevents it from becoming mushy and ensures individual grains when stir-fried. While the rice is cooking or cooling, chop all your vegetables: slice mushrooms, peel and cut carrots into matchsticks, slice the yellow onion, and cut zucchini into matchsticks. Mince your garlic for both the shrimp and the fried rice. Having everything ready before you turn on the heat will make the cooking process smooth and enjoyable.
Step 2: Craft the Creamy Yum Yum Sauce
The legendary Yum Yum sauce is an absolute must-have for any hibachi meal. To make it, simply combine all the Yum Yum sauce ingredients in a small bowl. Whisk them together thoroughly until the mixture is smooth and well-combined. For the best flavor, make the sauce at least 30 minutes ahead of time and allow it to chill in the refrigerator. This gives the flavors a chance to meld and deepen, creating that perfect tangy, sweet, and slightly spicy balance that complements the hibachi shrimp and vegetables beautifully.
Step 3: Prepare the Flavorful Fried Rice
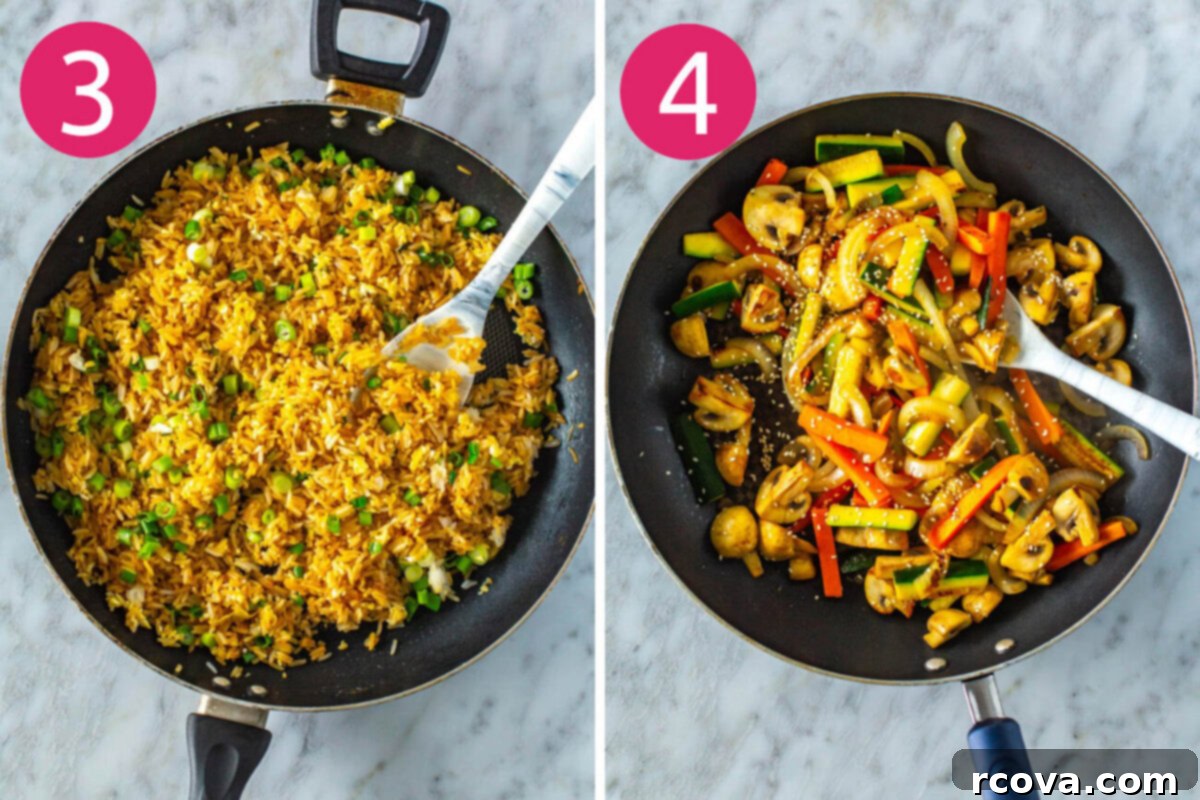
Heat a large pan or wok over medium-high heat. Add butter and let it melt until it shimmers. Toss in the minced garlic and sauté for about 30 seconds until it becomes fragrant – be careful not to burn it! Add your cooked, preferably day-old, white rice to the pan along with the soy sauce. Stir-fry for 2-3 minutes, ensuring the rice is thoroughly heated and evenly coated with the soy sauce. Push the rice to one side, creating a clear space in the center of the pan. Crack in an egg and quickly scramble it in the open space until it’s just set. Once the egg is cooked, mix it into the rice, tossing everything together. Finally, stir in the sliced green onions for a fresh bite and vibrant color. Remove the fried rice from the heat and set it aside while you prepare the rest of your meal.
Step 4: Sauté the Perfect Hibachi Vegetables
Using a separate large pan or cleaning your fried rice pan (though many hibachi chefs don’t!), heat sunflower oil over medium-high heat. Once hot, add your prepared mushrooms, carrots, yellow onion, and zucchini. Season generously with salt. Sauté the vegetables for about 5 minutes, stirring occasionally, until they reach a tender-crisp stage. You want them cooked through but still retaining a slight bite, characteristic of hibachi-style vegetables. Avoid overcooking them, as they can become soggy. Once cooked to your liking, remove the vegetables from the heat, sprinkle with white sesame seeds for added flavor and crunch, and set them aside.
Step 5: Cook the Succulent Hibachi Shrimp
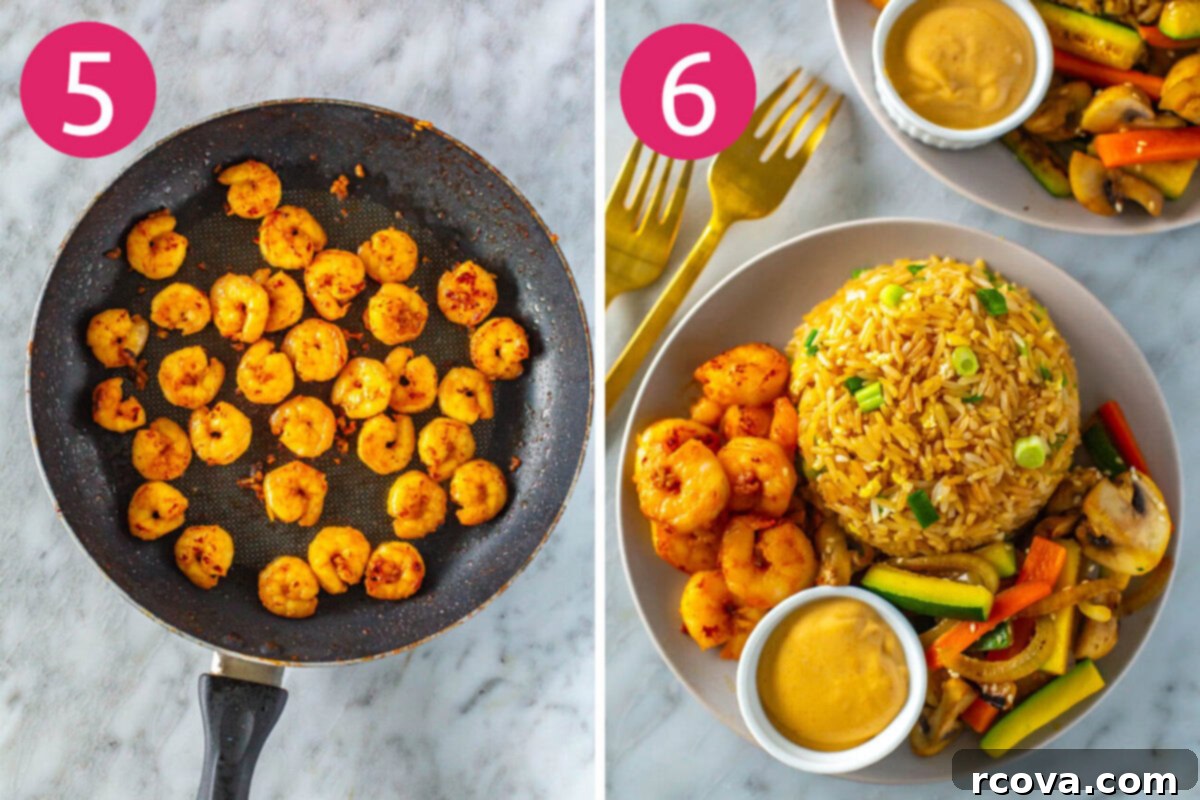
Without wiping the pan clean from the vegetables (those little bits of flavor add to the experience!), add another tablespoon of sunflower oil. Once the oil is hot, add your defrosted shrimp in a single layer. Season the shrimp with a pinch of salt. Cook for approximately 2 minutes per side, or until the shrimp turn pink and opaque. Be careful not to overcook shrimp, as they can become tough and rubbery quickly. They cook very fast!
Step 6: Finish, Plate, and Enjoy Your Hibachi Feast!
Once the shrimp are almost done, add the remaining soy sauce and minced garlic to the pan. Cook for another 30 seconds, tossing the shrimp to coat them in the flavorful sauce. The garlic should be fragrant, but again, avoid burning it. Now it’s time to assemble your delicious hibachi meal! Portion the perfectly cooked shrimp, tender-crisp vegetables, and savory fried rice onto plates. Serve immediately with a generous side of your homemade Yum Yum sauce. Dive in and savor the incredible flavors of your very own homemade hibachi shrimp – it’s a taste sensation that rivals any restaurant!
More Protein Options for Your Hibachi Meal
Not everyone is a fan of seafood, and that’s perfectly fine! This hibachi recipe is incredibly adaptable and can be made with other delicious proteins to suit your preferences. Hibachi chicken is a very popular alternative and just as easy to prepare. Simply cut two boneless, skinless chicken breasts into bite-sized pieces and cook them in the pan over medium-high heat until fully cooked through and slightly caramelized. You’ll use the same delicious soy sauce and garlic seasoning, ensuring a consistent hibachi flavor profile.
For more detailed instructions and alternative preparation methods, you can refer to my dedicated hibachi chicken recipe or even try a robust hibachi steak recipe for a truly hearty meal. The key is to cut your chosen protein into uniform, bite-sized pieces to ensure even and quick cooking, just like they do at your favorite Japanese steakhouse!
Frequently Asked Questions About Homemade Hibachi Shrimp
Hibachi shrimp is a popular Japanese-inspired dish typically found at teppanyaki restaurants, where food is cooked on a large iron griddle. It consists of plump, tender shrimp quickly stir-fried with a savory soy sauce and garlic-based seasoning. Often, it’s served as part of a larger meal with fried rice and mixed vegetables, just like this recipe. Our homemade version is a perfect copycat of the classic hibachi shrimp dish served at popular establishments like Benihana, allowing you to enjoy those authentic flavors without leaving your home.
The beauty of hibachi seasonings lies in their simplicity and the powerful flavor they deliver using common pantry staples. For the shrimp and vegetables, the core seasonings often include a neutral cooking oil (like sunflower or avocado oil), soy sauce for umami, freshly minced garlic for aromatic depth, and salt to taste. Sometimes, a touch of butter or sesame oil is added at the end for extra richness. Beyond the main dish, hibachi meals are almost always accompanied by a creamy Yum Yum sauce, which is typically made from mayonnaise, rice vinegar, soy sauce, Dijon mustard, and a hint of sriracha for a gentle kick.
Absolutely! This homemade hibachi shrimp is a relatively healthy and balanced dinner idea. Shrimp is an excellent source of lean protein, rich in essential vitamins and minerals, and low in calories. The accompanying mixed vegetables add a generous dose of fiber, vitamins, and antioxidants. While the Yum Yum sauce adds some calories and fat from the mayonnaise, you can opt for light mayo as suggested in the ingredients. Using whole, fresh ingredients and cooking at home also allows you to control the amount of sodium and fat, making it a much healthier option than many restaurant versions.
Based on the ingredients and serving sizes outlined in this recipe, each serving of hibachi shrimp, complete with fried rice, vegetables, and Yum Yum sauce, contains approximately 454 calories. This makes it a satisfying yet moderate calorie meal, perfect for those monitoring their intake.
For the best results with hibachi shrimp, opt for large or jumbo shrimp (21/25 count per pound). They are substantial enough to stand up to the high heat cooking and offer a great texture. Fresh or frozen shrimp can be used; if using frozen, ensure they are fully thawed and patted dry before cooking to prevent excess water from steaming them instead of searing. Peeled and deveined shrimp will save you prep time, making this quick dinner even faster!
Yes, absolutely! This recipe is excellent for meal prepping. You can cook the white rice up to 2 days ahead, which actually improves its texture for fried rice. The Yum Yum sauce can be made 2-3 days in advance and stored in the fridge – its flavors actually deepen over time. You can also chop all your vegetables ahead of time and store them in airtight containers in the refrigerator, ready for a quick sauté when dinner time arrives. The shrimp, however, is best cooked fresh right before serving to maintain its tender texture.
Storing and Reheating Your Hibachi Shrimp Leftovers
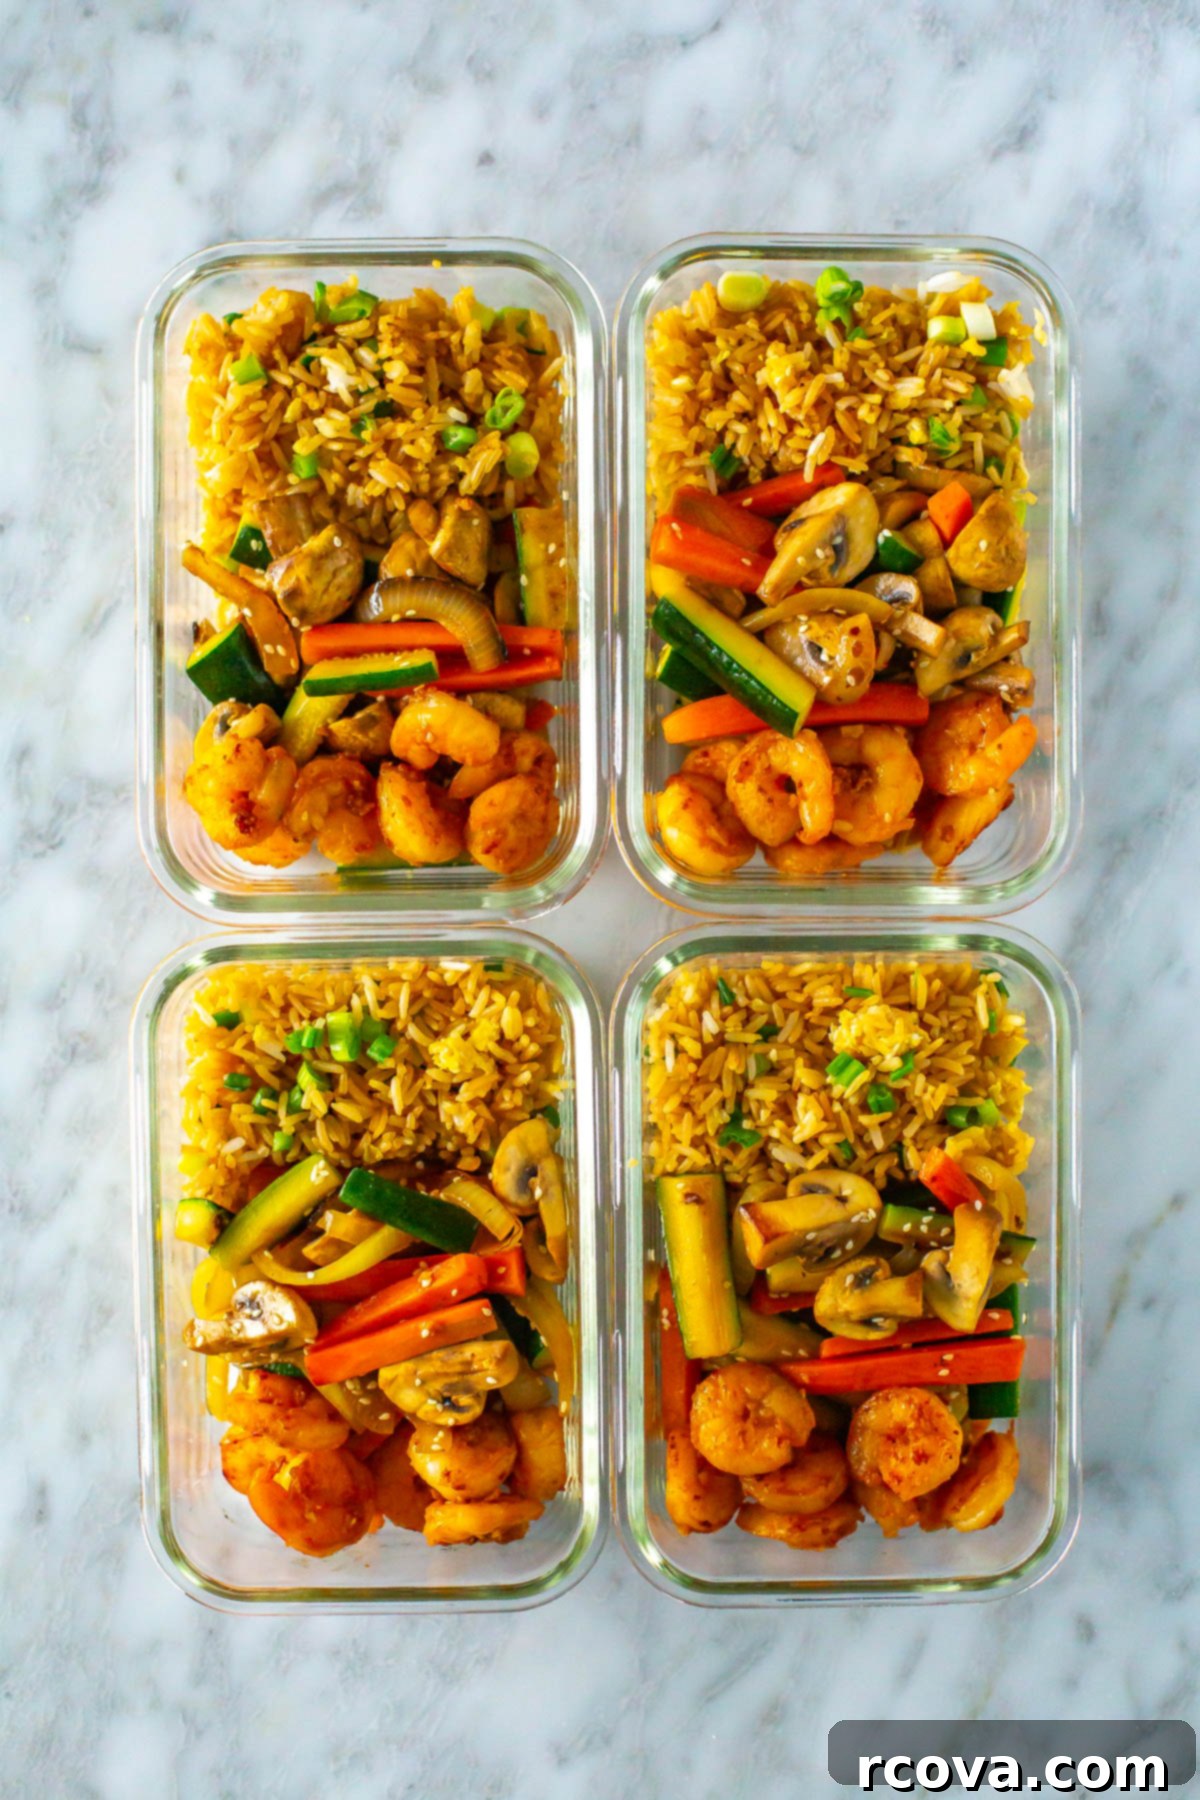
This hibachi shrimp recipe is not only fantastic for an immediate dinner, but it also makes for excellent meal prep! If you’re planning to enjoy leftovers, store any remaining portions in individual glass meal prep containers. Glass containers are ideal as they don’t stain or absorb odors and are microwave-safe. Your hibachi shrimp, fried rice, and vegetables will stay fresh in the refrigerator for 3 to 4 days.
When you’re ready to reheat, the best method to maintain the delicious texture of the shrimp and crispness of the vegetables is to reheat everything in a large pan on the stovetop over medium heat. Add a tiny splash of water or broth to the rice if it seems dry, cover, and heat gently until warmed through, stirring occasionally. This helps prevent the rice from drying out and ensures your veggies don’t get soggy. If you’re short on time, you can also reheat it in the microwave for 1 to 2 minutes, stirring halfway through. For microwave reheating, always sprinkle a tablespoon or two of water over the rice before covering and heating; this creates steam, keeping the rice moist and fluffy.
Freezing This Hibachi Recipe for Later Enjoyment
While some components of this hibachi meal freeze better than others, you can certainly freeze the fried rice and hibachi shrimp separately to extend their shelf life. I generally wouldn’t recommend freezing the cooked vegetables directly within the mixed meal, as most vegetables tend to lose their appealing tender-crisp texture when frozen and subsequently reheated, often becoming watery and soggy. However, if you have a robust stir-fry blend, freezing the veggies separately and quickly sautéing them fresh on reheating can work.
The fried rice, when stored in an airtight freezer-safe container or bag, will last wonderfully in the freezer for up to 6 months without significant loss of quality. The cooked hibachi shrimp will also hold up well in the freezer for up to 3 months. To reheat, transfer the frozen fried rice and shrimp to the refrigerator to defrost overnight. Once thawed, you can reheat both components on the stovetop or in the microwave as described above for fresh leftovers. For the best experience, serve your reheated shrimp and rice with freshly sautéed vegetables and a fresh batch of Yum Yum sauce. This combination ensures maximum flavor and texture, bringing your hibachi meal back to life!
More Restaurant Copycat Recipes to Try
Craving more of your favorite restaurant dishes from the comfort of your home? Explore these other fantastic copycat recipes!
-
Ahi Tuna Sushi Stacks {Cactus Club Copycat}
-
Perfect Hibachi Chicken {Benihana Copycat}
-
Applebee’s Shrimp Wonton Stir Fry
Handy Meal Prep Tools for This Recipe
Having the right tools can make your hibachi shrimp preparation and meal prepping experience even smoother. Here are a few recommendations:
- Grab some glass meal prep bowls if you plan on turning this delicious dinner into convenient leftovers. They’re perfect for portion control and easy reheating.
- A rice cooker is an invaluable kitchen appliance for saving time and consistently cooking perfect rice (and other grains!) with minimal effort.
- These bento boxes are great for separating ingredients, keeping your hibachi shrimp, rice, and veggies neatly compartmentalized until you’re ready to mix and enjoy.

Perfect Hibachi Shrimp {Benihana Copycat}
Print
Pin
Rate
4
servings
454
kcal
Taylor Stinson
20 minutes
20 minutes
40 minutes
Prevent your screen from going dark
FREE budget-friendly meal plan ⬇️
SEND ME MY PLAN
Ingredients
Hibachi Shrimp
-
1
lb
shrimp -
1
tbsp
sunflower oil -
1
pinch
salt -
1
tbsp
soy sauce
or tamari if gluten-free -
2
cloves
minced garlic
Hibachi Vegetables
-
1
tbsp
sunflower oil -
1
cup
mushrooms
sliced -
1
carrot
peeled and cut into matchsticks -
1
yellow onion
sliced -
1
zucchini
cut into matchsticks -
Salt to taste -
1
tbsp
white sesame seeds
for garnish
Yum Yum Sauce
-
1/2
cup
light mayo -
1
tbsp
rice vinegar -
1
tbsp
soy sauce
or tamari if gluten-free -
1
tbsp
dijon mustard -
1
tsp
sriracha
Fried Rice
-
2
cups
cooked white rice -
2
tbsp
butter -
4
cloves
minced garlic -
3
tbsp
soy sauce
or tamari if gluten-free -
1
egg -
4
green onions
sliced
Instructions
-
First, cook your white rice in a rice cooker or on the stovetop according to package directions. For optimal fried rice, prepare the rice up to 2 days prior and chill. While the rice is cooking, prepare all your vegetables and mince the garlic. Separately, mix all the ingredients for the Yum Yum sauce together in a small bowl and set aside.
-
To make the fried rice, melt butter in a large pan or wok over medium-high heat. Add 4 cloves of minced garlic and sauté for 30 seconds until fragrant. Stir in the cooked rice and 3 tbsp soy sauce, cooking for 2-3 minutes until the rice is heated through. Create a well in the center of the rice, crack in the egg, and scramble until just set. Toss the egg with the rice and stir in the sliced green onions. Remove from heat and set aside.
-
Meanwhile, in another large pan, heat 1 tbsp sunflower oil over medium-high heat. Add the sliced mushrooms, carrot matchsticks, sliced yellow onion, and zucchini matchsticks. Season with salt. Sauté for about 5 minutes until the vegetables are tender-crisp. Remove from heat, sprinkle with white sesame seeds, and set aside.
-
Using the same pan (without wiping clean), add 1 tbsp sunflower oil and the shrimp, seasoning with a pinch of salt. Cook for 2 minutes per side until pink and opaque. Add 1 tbsp soy sauce and 2 cloves of minced garlic, cooking for 30 seconds more to coat the shrimp. Finally, plate the hibachi shrimp alongside the fried rice, sautéed vegetables, and a generous portion of Yum Yum sauce. Serve immediately and enjoy your homemade hibachi feast!
Notes
Store any leftovers in airtight containers in the fridge for 3-4 days. For best texture, reheat in a pan on the stovetop; if microwaving, sprinkle water over the rice to prevent drying.
You can freeze the fried rice and shrimp separately for 3-6 months. Defrost in the fridge overnight then reheat as normal, ideally serving with fresh veggies for optimal taste and texture.
Nutrition
Calories:
454
kcal
(23%)
Carbohydrates:
34
g
(11%)
Protein:
31
g
(62%)
Fat:
22
g
(34%)
Saturated Fat:
6
g
(38%)
Polyunsaturated Fat:
5
g
Monounsaturated Fat:
10
g
Trans Fat:
0.3
g
Cholesterol:
243
mg
(81%)
Sodium:
1754
mg
(76%)
Potassium:
703
mg
(20%)
Fiber:
3
g
(13%)
Sugar:
5
g
(6%)
Vitamin A:
3023
IU
(60%)
Vitamin C:
14
mg
(17%)
Calcium:
145
mg
(14%)
Iron:
2
mg
(11%)
