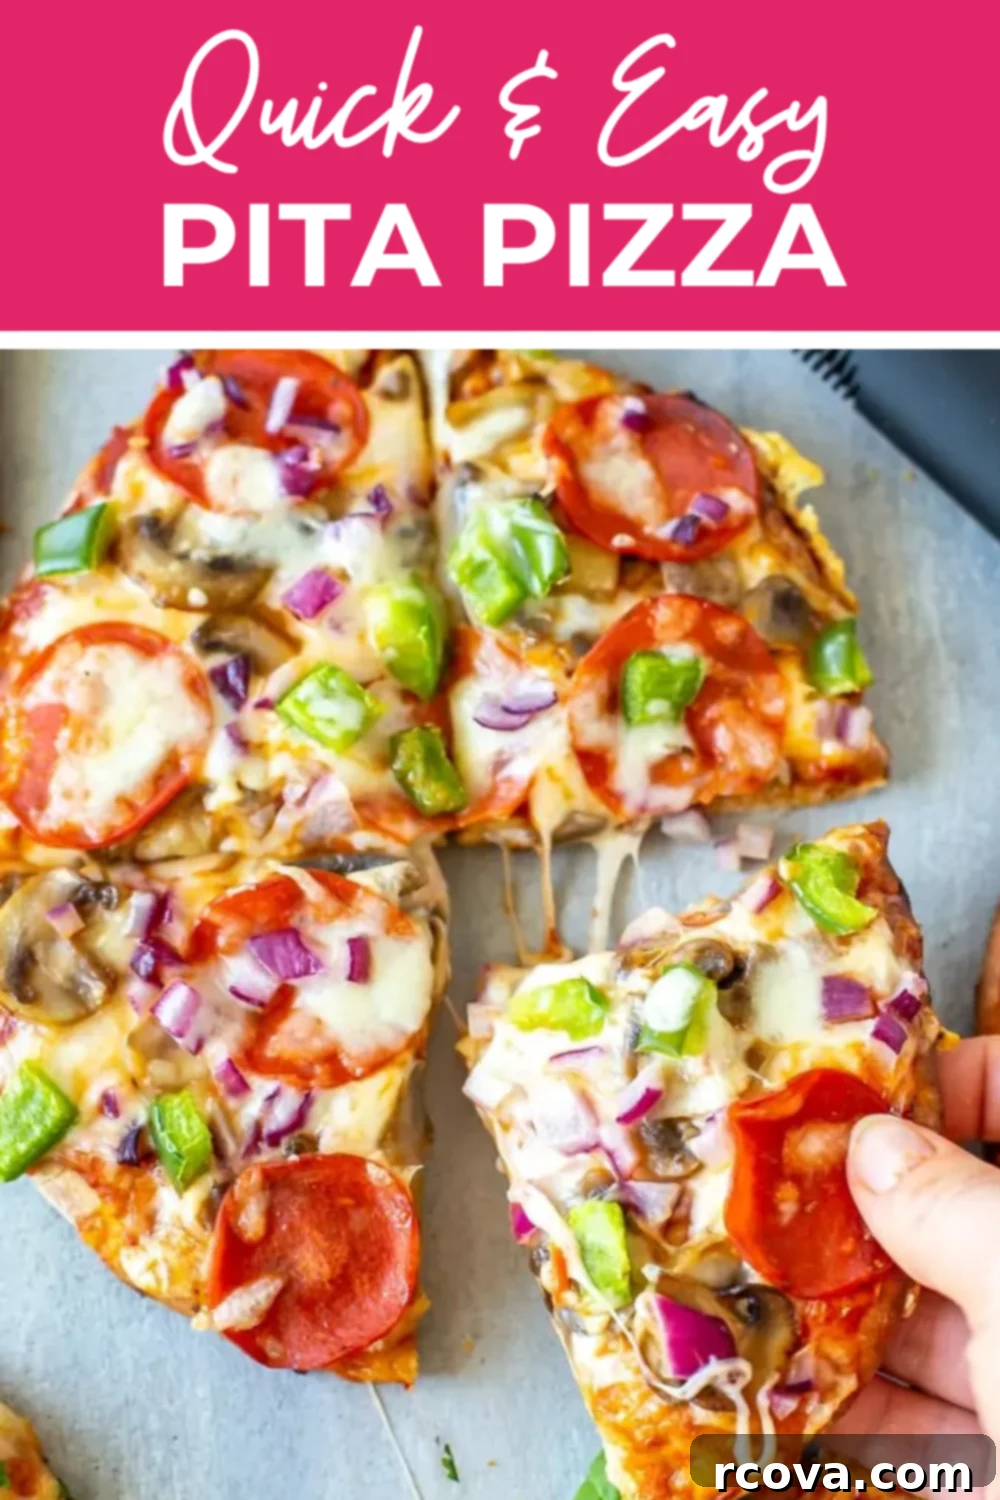
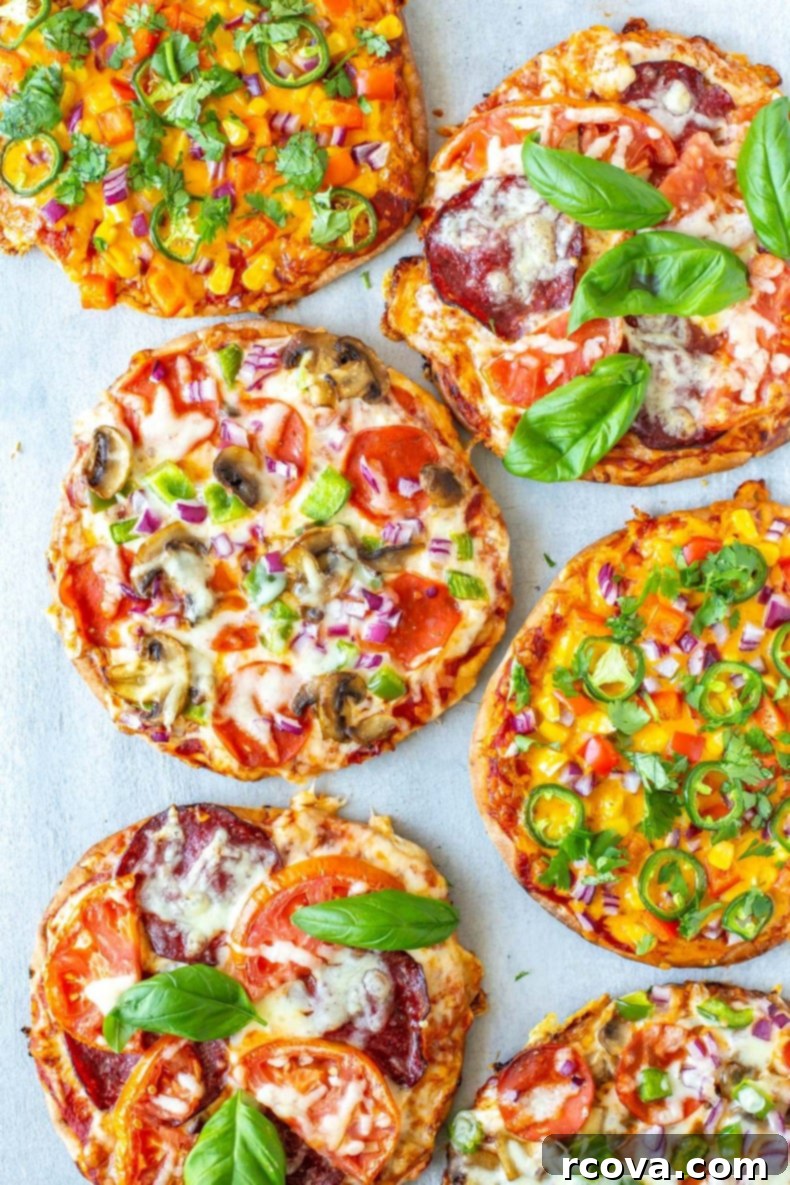
Easy & Delicious Pita Pizza Recipe: 3 Mouthwatering Ways (Deluxe, Margherita, Tex-Mex)
Welcome to the ultimate guide for making the best pita pizza! This versatile recipe features three incredible flavor combinations – Classic Deluxe, vibrant Margherita, and zesty Tex-Mex – ensuring there’s a perfect pizza for every palate. These quick and easy pita pizzas are not only fantastic for busy weeknights but are also incredibly meal-prep friendly and freeze beautifully, making them an ideal solution for convenient homemade meals.
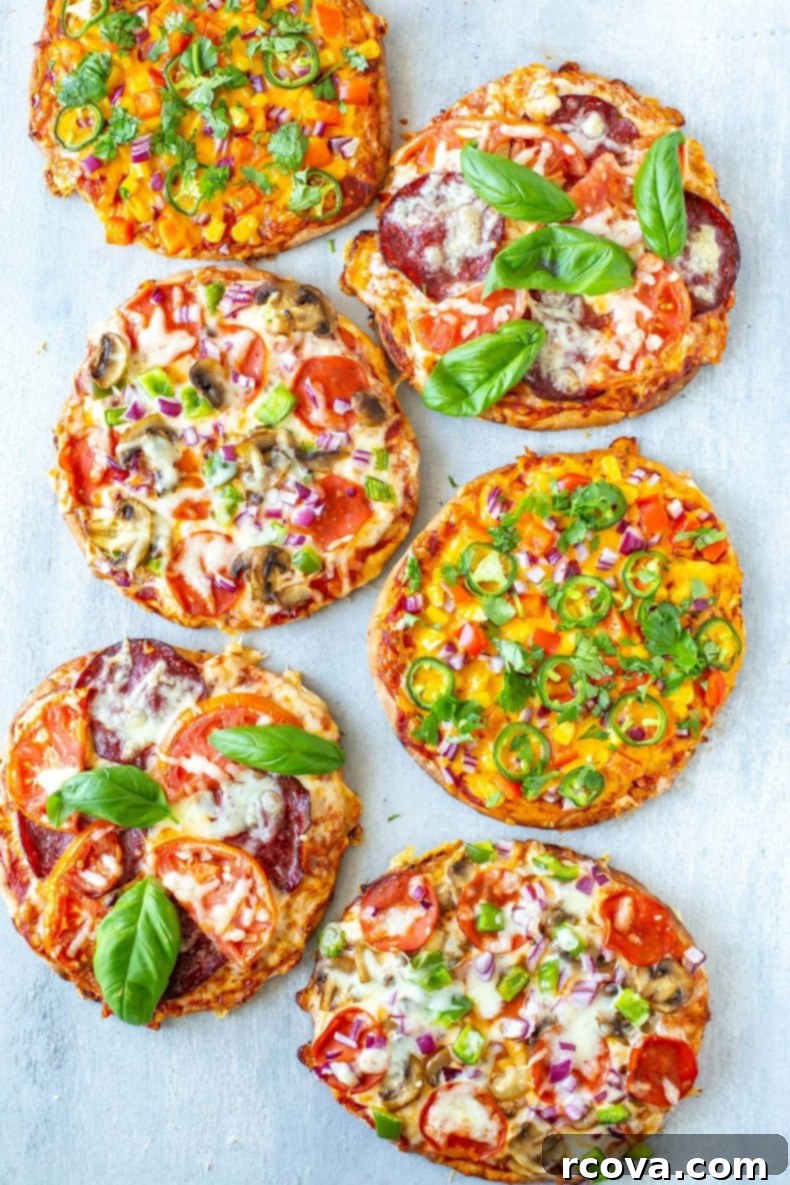
Pita pizzas hold a special place in my heart, often taking me back to my childhood kitchen. There’s a certain nostalgia that comes with whipping up one of these individual pizzas for dinner, and sometimes, nothing else quite hits the spot like a perfectly crispy pita crust topped with your favorite ingredients. They are the epitome of simple comfort food, offering all the joy of a homemade pizza without the fuss of traditional dough.
This recipe isn’t just about quick cooking; it’s about culinary flexibility and making the most out of simple ingredients. Whether you’re craving a meat-lover’s dream, a fresh garden delight, or a spicy kick, these pita pizzas can be tailored to your precise preferences. They are a game-changer for meal planning, ensuring you always have a delicious, customizable meal ready to go.
Why You’ll Love This Easy Pita Pizza Recipe
- Ultimate Customization with Individual Pizzas: One of the biggest advantages of pita pizzas is the ability to personalize each one. This means every family member or dinner guest can choose their favorite toppings, making mealtime fun and accommodating for various tastes and dietary needs. Say goodbye to arguing over pineapple on pizza! Everyone gets exactly what they want.
- Incredibly Meal Prep Friendly: Life gets busy, and having quick meal solutions on hand is a lifesaver. These pita pizzas can be assembled partially or fully baked in advance, making them perfect for school lunches, office meals, or quick dinners after a long day. Prepare a batch on Sunday, and enjoy homemade pizza throughout the week with minimal effort.
- Freezer-Friendly for Future Meals: Planning ahead has never been easier! These pita pizzas freeze beautifully, both cooked and uncooked. This makes them an excellent option for stocking your freezer with ready-to-bake meals, providing a convenient and delicious option for those evenings when cooking from scratch just isn’t an option.
- Quick & Easy Preparation: Forget complicated dough recipes and lengthy rising times. Pita bread serves as the perfect pre-made crust, significantly cutting down on preparation time. From start to finish, you can have a piping hot, delicious pizza on your table in under 30 minutes, making it ideal for busy weeknights.
- Budget-Conscious Cooking: Utilizing pita bread and common pantry staples makes this recipe incredibly economical. You can use up leftover bits of cheese, vegetables, or cooked meats, reducing food waste and making your grocery budget go further. It’s a smart way to enjoy delicious food without breaking the bank.
FREE Budget-Friendly Meal Plan!
Save thousands of dollars on food every year with my free budget-friendly meal plan ebook. Discover delicious and affordable recipes that will transform your meal planning and help you save without sacrificing flavor!
Essential Ingredients and Smart Substitutions for Pita Pizza
Crafting the perfect pita pizza starts with quality ingredients, but don’t be afraid to get creative with substitutions to suit your pantry or preferences. Here’s a breakdown of what you’ll need and how to adapt it:
- Greek-style pitas: The foundation of our pita pizza! These sturdy flatbreads provide a robust base that crisps up beautifully in the oven. If Greek-style pitas aren’t available, you can easily use naan bread for a slightly chewier, thicker crust, or even sandwich thins for a lighter, crispier option. Just avoid anything too thin like regular tortillas, as they can become soggy.
- Pizza sauce: A good quality pizza sauce is key to great flavor. Jarred marinara sauce works wonderfully for convenience, or you can opt for a simple tomato sauce seasoned with Italian herbs for a more homemade touch. Even a pesto or white garlic sauce can offer a delicious alternative.
- Cheese: Mozzarella cheese is the classic choice for its melt-factor and mild flavor, but feel free to experiment! Cheddar cheese adds a sharper taste, while provolone offers a slightly nutty and salty profile. A blend of cheeses can also create a richer, more complex flavor. For a gourmet touch, consider adding a sprinkle of fresh Parmesan after baking.
- Meat: For our Deluxe pizza, we use pepperoni, but the options are endless! Salami adds a savory, spiced flavor. Cooked bacon, diced chicken, or even crumbled Italian sausage can elevate your pizza. For plant-based alternatives, consider sliced veggie pepperoni or plant-based crumbles.
- Veggies: Fresh vegetables add essential nutrients, color, and texture. Mushrooms, bell peppers (any color!), and onions are classic choices for a Deluxe pizza. Consider adding black olives, spinach, cherry tomatoes, or artichoke hearts for more variety. Remember to sauté watery vegetables like mushrooms beforehand to prevent a soggy crust.
- Fresh Herbs: A sprinkle of fresh herbs after baking brightens up the flavors and adds an aromatic finish. Fresh basil is perfect for Margherita, while cilantro complements the Tex-Mex theme. Parsley can be a universal garnish for any savory pizza.

How to Make Quick & Easy Pita Pizza
Making pita pizza is incredibly straightforward, perfect for a fast meal without sacrificing flavor. Follow these simple steps to create your customized pizzas:
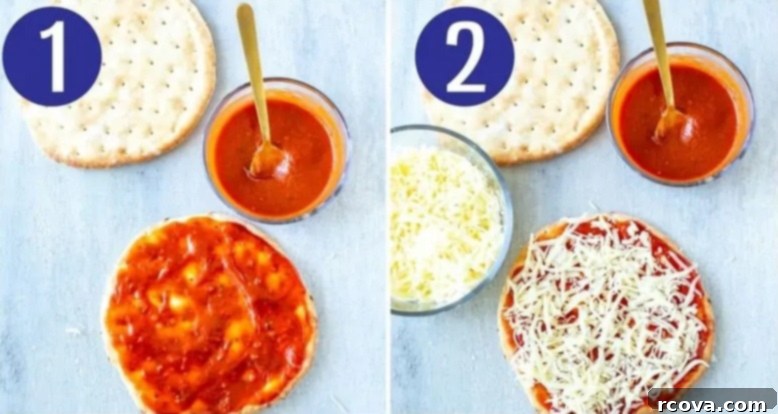
Step 1: Prepare Your Ingredients and Preheat the Oven
Begin by preheating your oven to 400°F (200°C). While the oven heats up, lightly toast your pita breads for about 3-4 minutes. This initial toasting step is crucial as it helps create a firm, crispy base, preventing your pita from becoming soggy under the weight of the toppings. Use this time to also chop and prepare all your chosen toppings, ensuring everything is ready for assembly. If using mushrooms for your deluxe pizza, briefly sauté them until they release their liquid; this extra step will ensure a perfectly non-mushy pizza.
Step 2: Spread the Sauce and Layer the Cheese
Once your pitas are lightly toasted, remove them from the oven. Evenly spread a thin layer of your chosen pizza sauce over each pita. Be careful not to overload the sauce, as too much can make the crust soggy. Next, generously sprinkle your preferred cheese (mozzarella, cheddar, or a blend) over the sauce. The cheese acts as a barrier for the toppings and also helps to create that signature pizza texture and flavor.
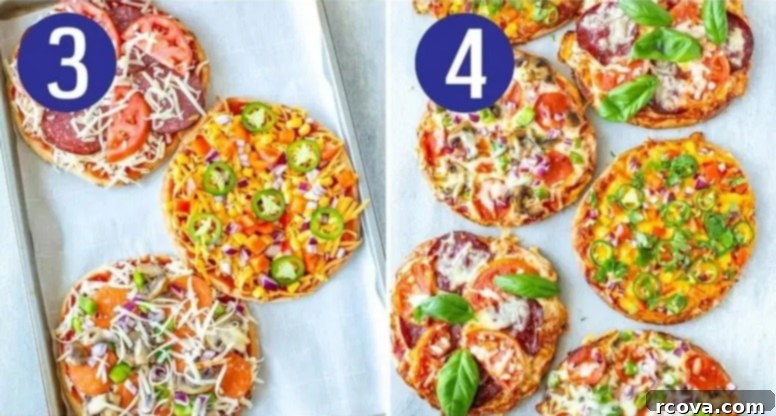
Step 3: Add Your Favorite Toppings
Now for the fun part – customizing your pizzas! Arrange your selected toppings over the cheese layer. For a Deluxe pita pizza, this might include pepperoni, pre-sautéed mushrooms, diced green bell peppers, and red onion. For Margherita, think fresh tomato slices and salami (fresh basil will be added later). For Tex-Mex, you might layer red pepper, corn, red onion, and jalapeno slices. Place the assembled pizzas on a parchment-lined baking sheet. This ensures easy cleanup and helps the crust crisp up evenly. Remember, you can usually fit two pita pizzas per standard baking tray.
Step 4: Bake to Golden Perfection
Carefully transfer the baking sheet with your loaded pita pizzas to the preheated oven. Bake for approximately 12-15 minutes, or until the cheese is beautifully melted and bubbly, and the crust is golden brown and crispy at the edges. Keep an eye on them to prevent burning. Once baked, remove the pizzas from the oven. If you’re making the Margherita or Tex-Mex versions, now is the time to add your fresh basil or cilantro for an aromatic and flavorful finish. Allow them to cool for a minute or two before slicing.
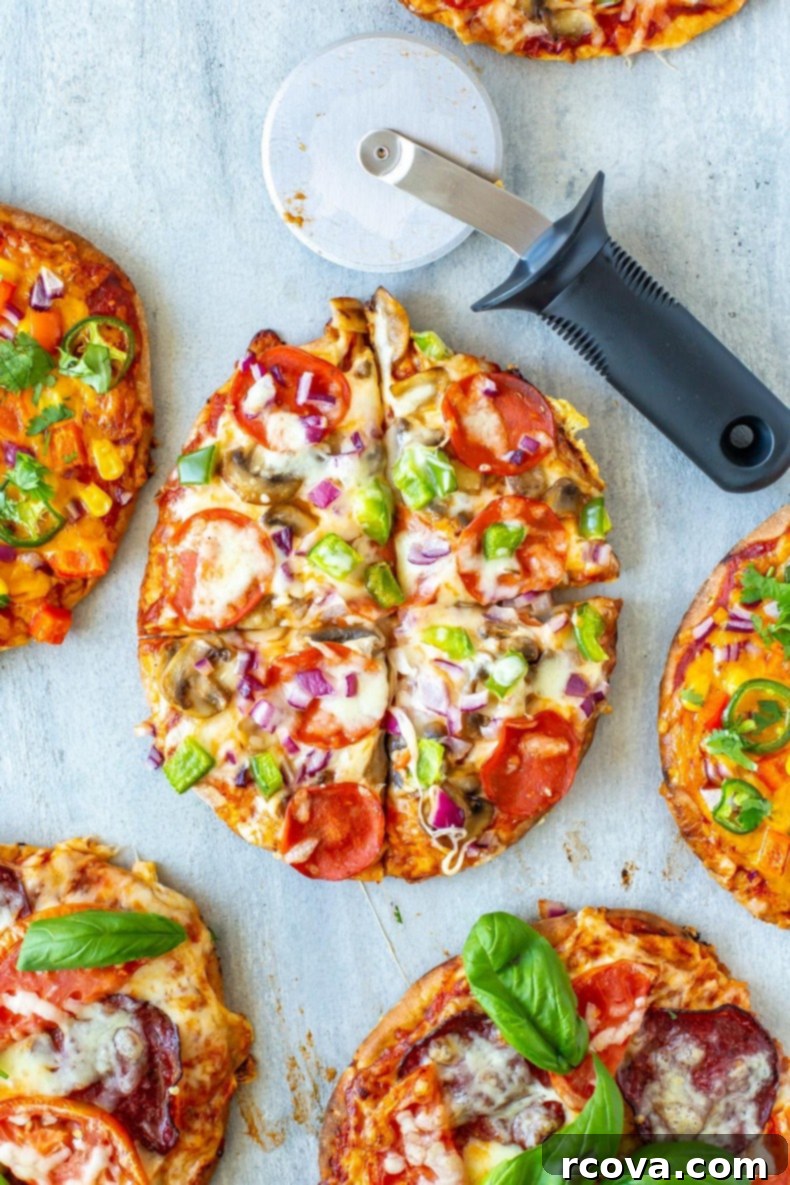
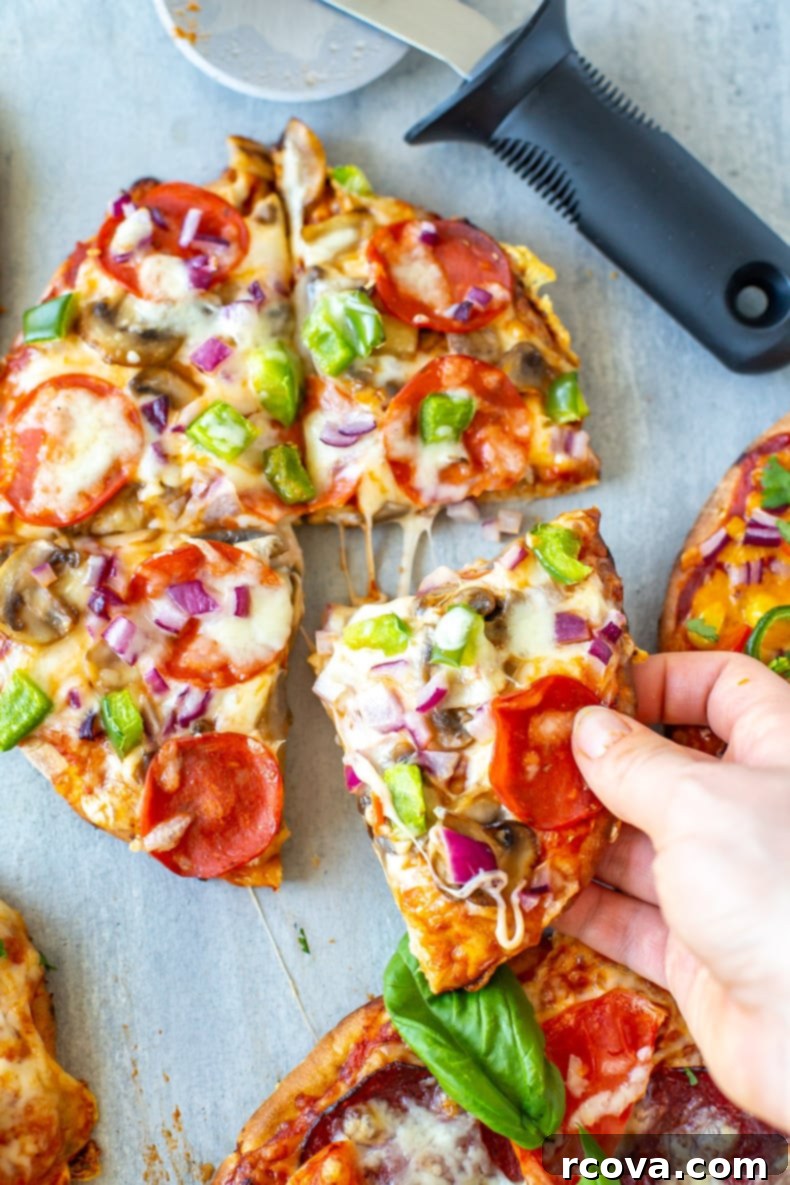
Slice each pita pizza into quarters using a pizza cutter, serve immediately, and enjoy your delicious, homemade creation!
Recipe Tips and Exciting Flavor Variations for Pita Pizzas
The beauty of pita pizza lies in its endless customization! Beyond our Deluxe, Margherita, and Tex-Mex inspirations, here are some fantastic ideas to spark your culinary creativity and ensure everyone gets their ideal pizza:
- Veggie Lovers: Load up your pita with colorful vegetables like sliced mushrooms, black olives, vibrant bell peppers, halved cherry tomatoes, and thinly sliced red onions. For extra flavor, consider grilling or roasting some of the veggies beforehand to bring out their sweetness.
- Classic Greek: Transport your taste buds to the Mediterranean with Kalamata olives, tangy roasted red peppers, crumbled feta cheese, and tender artichoke hearts. A drizzle of olive oil after baking would complete this savory delight.
- Zesty BBQ Chicken: Swap traditional pizza sauce for a smoky barbecue sauce and top with shredded cooked chicken and a generous layer of cheddar cheese. This is a family favorite that’s both hearty and flavorful. For a deeper dive, check out my BBQ chicken flatbread recipe!
- Spicy Buffalo Chicken: If you love a kick, toss shredded chicken with Frank’s Red Hot sauce (or your favorite buffalo sauce), then spread it over the pita with a base of a light ranch or blue cheese dressing, and top with cheddar or crumbled blue cheese before baking.
- Fresh Pesto Perfection: Ditch the red sauce for a vibrant pesto base. Layer with creamy feta cheese and thinly sliced red bell peppers for a light yet incredibly flavorful pizza.
- Tropical Hawaiian: A controversial classic, but undeniably delicious! Combine diced ham (or Canadian bacon) with sweet pineapple chunks for a tropical escape on a pita.
- Sweet Dessert Pizza: Who says pizza can’t be dessert? Spread a layer of peanut butter as your “sauce,” sprinkle with chocolate chips, and top with mini marshmallows. Bake until gooey and golden for a fun, sweet treat!
Frequently Asked Questions About Pita Pizza
Can I make pita pizza on the grill?
Absolutely! Grilling pita pizza adds a fantastic smoky flavor and a beautifully crispy crust. To do this, preheat your grill to medium heat. Lightly brush both sides of your pita bread with olive oil and grill for about 2 minutes per side until slightly toasted and marked. Remove from the grill, add your desired toppings, then return to the grill (indirect heat is best to prevent burning the crust) for another 3-5 minutes, or until the cheese is perfectly melted and bubbly. Keep a close eye on it, as grills can vary in temperature.
Is whole wheat pita a good option for pizza?
Definitely! Whole wheat pita bread is an excellent choice for a healthier, more substantial pita pizza. It adds a boost of extra fiber, giving the pizza a heartier texture and more nutritional value without compromising on taste. The nutty flavor of whole wheat also complements many savory toppings wonderfully. It’s a simple swap that enhances your meal.
Would naan bread or tortillas work as an alternative crust?
Naan bread works exceptionally well as a substitute for pita in this recipe. Its slightly thicker, chewier texture provides a satisfying crust that can hold up to generous toppings and bakes to a lovely golden brown. However, regular flour tortillas are generally too thin and tend to become soggy very quickly once sauce and toppings are added. For a successful pizza, you definitely want a sturdier base to avoid a disappointing, mushy result.
Can I make this pita pizza dairy-free or vegan?
Yes, absolutely! Making these pita pizzas dairy-free or vegan is simple and delicious. Just swap out traditional cheese for your favorite dairy-free shredded cheese alternative. Be sure to load up on a variety of flavorful veggie toppings like mushrooms, olives, peppers, and onions, or add plant-based proteins such as crumbled vegan sausage, seasoned black beans, or grilled tofu to ensure a satisfying and hearty meal. Many brands also offer vegan pepperoni or other plant-based meat substitutes that work wonderfully.
How to Store and Reheat Pita Pizzas for Best Results
One of the many benefits of pita pizzas is how well they store and reheat, making them ideal for meal prep and quick future meals. Here’s how to do it:
To Store Leftover Cooked Pizzas: Allow any leftover cooked pita pizzas to cool completely to room temperature. Once cooled, place them in an airtight container or wrap them tightly in plastic wrap or aluminum foil. Store in the fridge for up to 3 days. This method keeps them fresh and prevents them from drying out.
To Reheat from the Fridge: For the best results, reheat your cooled pita pizzas in the oven or an air fryer. Preheat your oven to 350°F (175°C) or set your air fryer to the same temperature. Place the pizzas directly on a baking sheet (or in the air fryer basket) and cook for 5-10 minutes, or until the crust is crisp again and the cheese is melted and bubbly. Microwaving is not recommended as it can make the crust soggy.
To Freeze Unbaked Pizzas for Later: Assemble your pita pizzas with all desired toppings, but do not bake them. Place the unbaked pizzas on a parchment-lined baking sheet and freeze for about 1-2 hours, or until solid. Once frozen, transfer the individual pizzas to freezer-safe bags or wrap them tightly in plastic wrap followed by aluminum foil. Label with the date. They can be stored in the freezer for up to 2 months. This method is perfect for having quick, homemade frozen pizzas on hand.
To Reheat from Frozen (Unbaked): When you’re ready to enjoy a frozen unbaked pita pizza, there’s no need to thaw! Preheat your oven to a slightly higher temperature, around 425°F (220°C). Place the frozen pizza directly on a parchment-lined baking sheet and bake for about 15-20 minutes, or a few extra minutes beyond the usual bake time for fresh pizzas. Cook until the cheese is fully melted and golden, and the crust is crispy. Cook time will vary based on oven and toppings.

Explore More Fun & Delicious Pizza Recipes!
If you’re as big a fan of pizza as we are, you’re in for a treat! Discover more creative and easy pizza-inspired recipes that are perfect for any occasion, from healthy crust alternatives to savory pockets.
-
Best Cauliflower Pizza Crust {3 Ingredients}
-
Easy Homemade Pizza Pockets
-
Easy Portobello Mushroom Pizzas {Low Carb}
Handy Meal Prep Tools for Your Kitchen
To make your pita pizza adventures even smoother and more enjoyable, here are a few essential meal prep tools that will come in handy, not just for this recipe but for countless others in your culinary repertoire:
- Order a pizza cutter online: A sharp pizza cutter is indispensable for cleanly slicing through your crispy pita pizzas. It makes serving quick and easy, ensuring perfect portions every time.
- Use these Ziploc bag holders if you’re planning on storing these pizzas in the freezer: These clever gadgets keep your freezer bags open and upright, making it mess-free and simple to transfer your prepped or cooked pizzas without spills or struggle. They are a game-changer for efficient freezer meal prep.
- Make cleanup a breeze by lining your sheet pans with parchment paper: A simple sheet of parchment paper prevents sticking, ensures even cooking, and turns a messy pan into one that requires minimal washing. It’s a small step that saves a lot of time and effort in the kitchen.

Easy Pita Pizza Recipe {3 Ways!}
Print
Pin
Rate
SEND ME MY PLAN
Ingredients
- 4 Greek-style pitas or naan
- 2 cups pizza sauce
Deluxe
- 3 cups mozzarella cheese, grated
- 1/2 cup pepperoni
- 1 cup sliced mushrooms
- 1/2 cup green pepper, diced
- 1/2 cup red onion, diced
Margherita
- 4 cups mozzarella cheese, grated
- 12 slices salami
- 1 tomato, sliced
- 1/2 cup basil leaves
Tex Mex
- 4 cups cheddar cheese, grated
- 1/2 cup red pepper, diced
- 1/2 cup corn
- 1/2 cup red onion, diced
- 1 jalapeno, sliced
- Cilantro, for garnish
Instructions
-
Preheat oven to 400 F. Add pitas to oven for 3-4 minutes while prepping toppings to lightly toast them.
-
Meanwhile, prepare toppings of choice. If making the Deluxe pita pizza, saute the mushrooms in a small frying pan until they release liquid to avoid a soggy pizza (this step is optional but I find it’s worth it to avoid mushiness).
-
Remove pitas from oven, top with sauce and divide cheese of choice among pizzas. Divide toppings of choice, then add pizzas to a parchment-lined baking sheet. NOTE: I find you can fit 2 pizzas per tray. If making the Margherita or Tex Mex pizzas, leave the herbs (basil & cilantro) off the pizzas.
-
Bake pizzas for 12-15 minutes until cheese is melted and toppings are cooked. Add herbs of choice if using (basil or cilantro) after pizzas are finished cooking.
-
Cut into 4 pieces with a pizza cutter, then serve and enjoy!
Freezing instructions
-
Wrap cooked pizza (unsliced) in foil and freeze up to 3 months. Reheat from frozen at 375 F for 25 minutes or until heated through.
Video
Notes
Try out different flavour ideas like Greek, BBQ chicken, Hawaiian, pesto and more.
Store the leftovers in the fridge for up to 3 days. Reheat in the oven for 5-10 mins at 350°F.
Freeze any cooked unsliced pizzas for up to 3 months. Reheat from frozen in the oven for 25 minutes at 375°F.
Nutrition
