Easy & Delicious Homemade Pink Sandwich Cookies: Perfect for Valentine’s Day and Beyond!
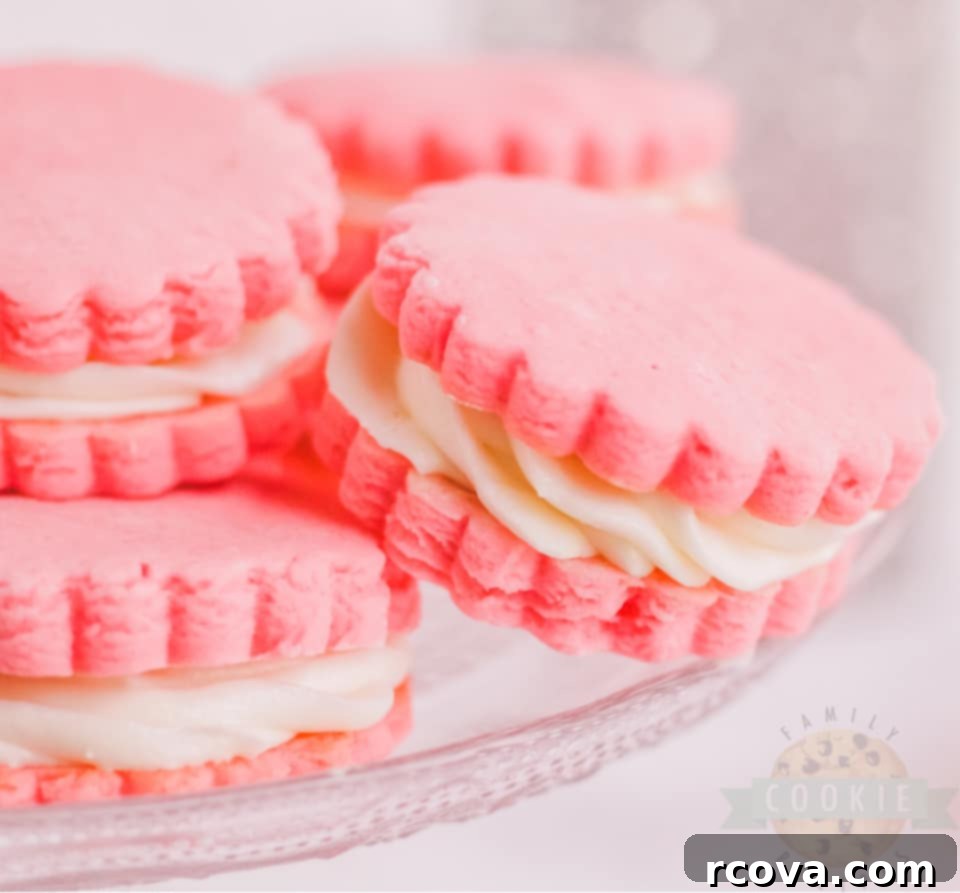
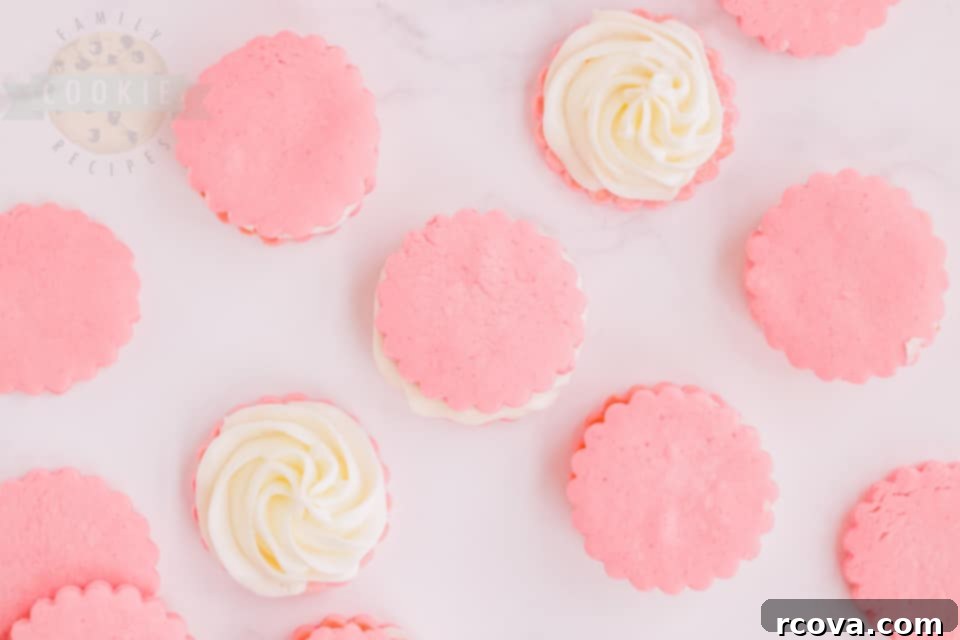
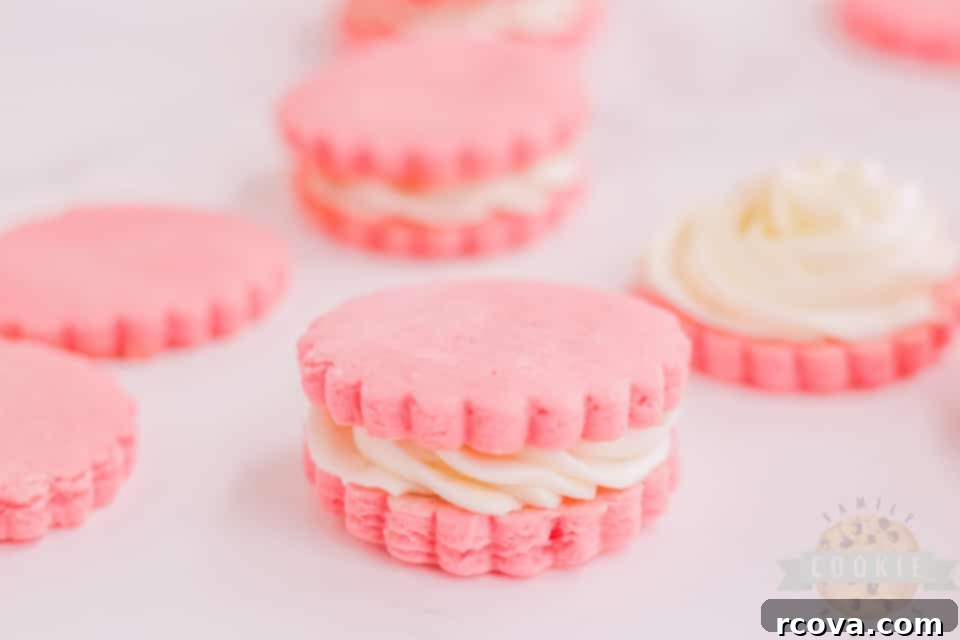
Prepare to fall in love with these absolutely delightful Pretty Pink Sandwich Cookies! Starting with a perfectly soft and flavorful sugar cookie base, colored a charming pink hue, these treats are ideal for celebrating Valentine’s Day, a special birthday, baby shower, or simply to brighten any ordinary day. Each sandwich consists of two tender, melt-in-your-mouth cookies generously filled with a luscious, sweet vanilla buttercream frosting, creating a harmonious blend of textures and tastes that everyone will adore. Forget store-bought desserts; this homemade recipe promises a truly special experience.
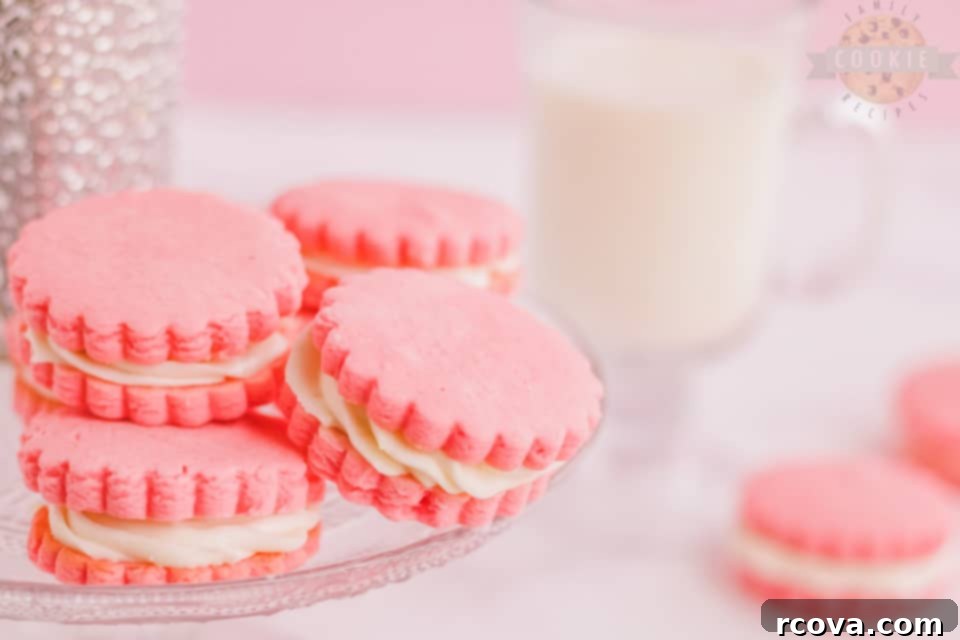
There’s something uniquely satisfying about biting into a perfectly crafted sandwich cookie. The combination of soft, flavorful cookies with a creamy, rich filling is pure bliss. Our pink sandwich cookies are not just a visually appealing dessert; they are a truly tasty treat designed to bring joy with every bite. The delicate pink color makes them a standout for romantic occasions or festive gatherings, but their universal appeal means they’re equally perfect for a cozy afternoon snack. This recipe delivers reliable results, ensuring your cookies hold their shape beautifully and your frosting is wonderfully smooth and pipeable. You’ll want to keep this recipe close by for all your cookie cravings and holiday celebrations!
 What Exactly Are Pink Sandwich Cookies?
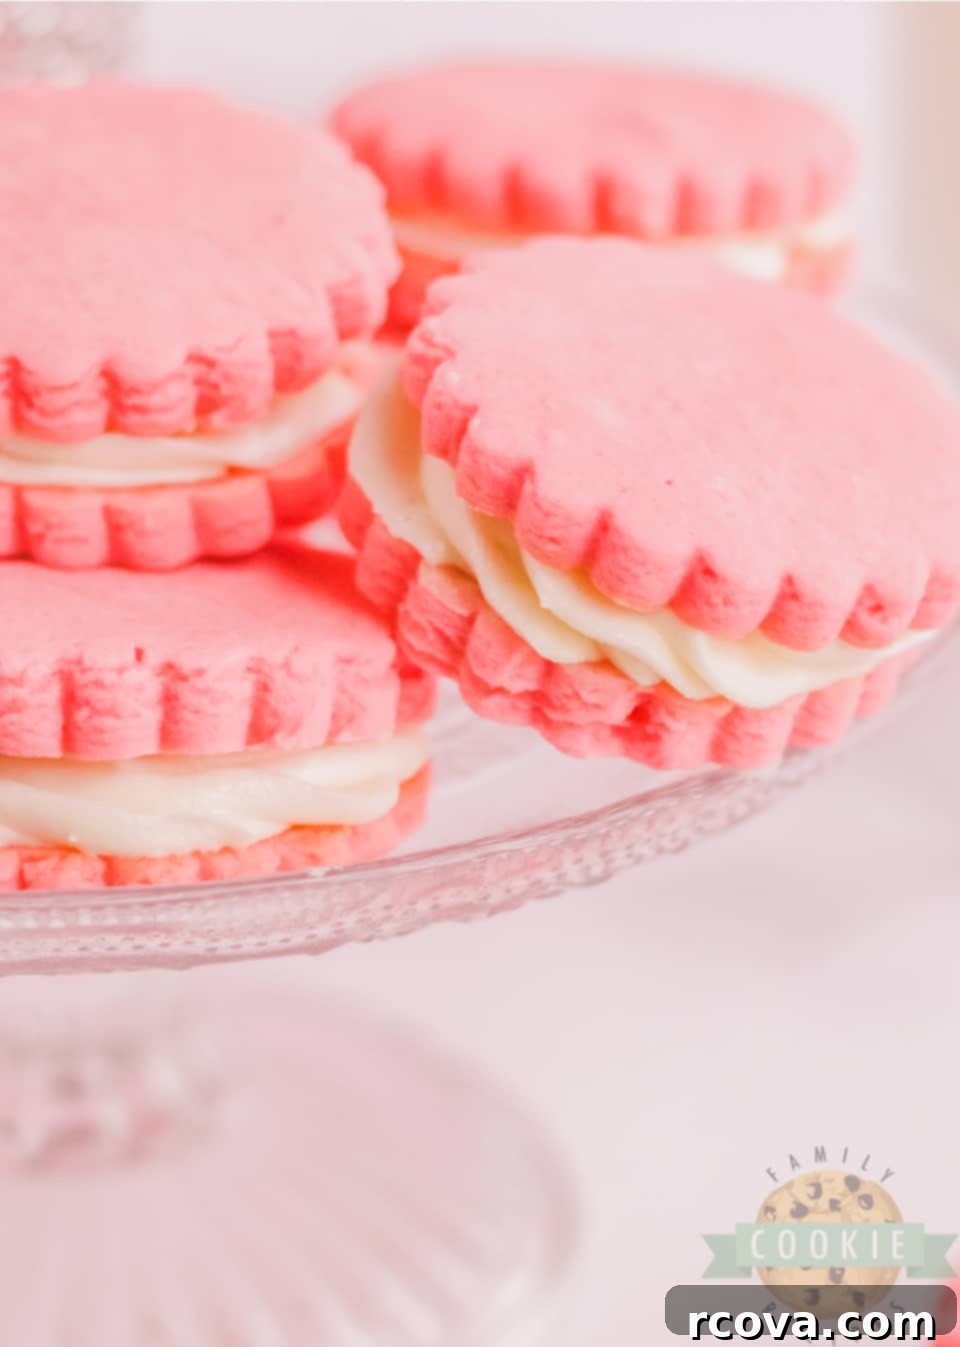
These captivating pink sandwich cookies are essentially a delightful twist on a classic soft sugar cookie. They feature a tender, slightly chewy texture that melts in your mouth, reminiscent of a delicate shortbread but with the satisfying chewiness of a well-made sugar cookie. The dough is infused with vibrant pink food coloring, transforming ordinary cookies into eye-catching delights. The process, from mixing to chilling to baking and filling, takes approximately 1.5 hours, including crucial chill time, making them a manageable project for home bakers. The sweet vanilla buttercream filling acts as the perfect “glue,” binding two colorful cookies together into one irresistible dessert.
One of the best aspects of this recipe is its versatility. While they are naturally charming in their classic round form, you can elevate the fun factor by using holiday-themed cookie cutters – think hearts for Valentine’s, stars for patriotic holidays, or any shape that suits your occasion. Whether kept simple or elaborately decorated, these cookies are as pleasing to the eye as they are to the palate, promising a delicious experience that looks as good as it tastes.
Why This Pink Sandwich Cookie Recipe Is a Must-Try
- Stunning Visual Appeal: The vibrant pink hue makes these cookies instantly captivating and perfect for themed parties, holidays, or gifting.
- Irresistible Flavor Combination: Soft, buttery sugar cookies paired with a rich, sweet vanilla buttercream create a balanced and delicious taste experience.
- Easy to Follow: This recipe is designed with clear, straightforward steps, making it accessible for bakers of all skill levels, even those new to sandwich cookies.
- Versatile for Any Occasion: While perfect for Valentine’s Day, these cookies can be adapted with different food colors and cookie cutter shapes for any celebration throughout the year.
- Homemade Goodness: There’s nothing quite like the taste of fresh, homemade cookies. You control the quality of ingredients, resulting in a superior flavor.
- Kid-Friendly Fun: The process of coloring the dough and cutting shapes can be a fun activity for children, making baking a family affair.
Essential Pink Cookie Ingredients
For the Cookies You Will Need:
- Butter: We’ll use 1 cup (or 2 sticks) of unsalted butter, ideally softened to room temperature. Softened butter is crucial for successful creaming with sugar, leading to a smooth, airy dough that bakes evenly and results in tender cookies. Using unsalted butter allows you to control the exact amount of salt in your recipe.
- Sugar: 1 cup of granulated sugar provides the primary sweetness and contributes to the cookies’ delicate crispness around the edges while keeping the centers soft. It also helps with the spreading of the cookies during baking.
- Salt: A mere 1/2 teaspoon of salt plays a significant role. It enhances all the other flavors in the dough, preventing the cookies from tasting bland and bringing out the natural sweetness of the butter and sugar.
 Eggs: Two large eggs, at room temperature, are essential for binding the ingredients, adding moisture, and contributing to the cookie’s structure and richness. If you forget to take them out ahead of time, a quick trick is to place them in a bowl of warm (not hot) water for about 5-10 minutes.
- Vanilla Extract: With 1 1/2 teaspoons of vanilla extract, we infuse the cookie dough with a warm, classic flavor that complements the sweetness beautifully. Opting for a higher quality pure vanilla extract can truly elevate the overall taste of your cookies, though any vanilla will work well.
- All-Purpose Flour: 3 1/2 cups of all-purpose flour form the primary structure of our cookies. You’ll also need a little extra for flouring your work surface when rolling out the dough, preventing sticking and ensuring smooth handling.
- Pink Food Coloring: To achieve that signature vibrant pink, you’ll need pink food coloring. The exact amount depends on your desired shade intensity. For the best, most vivid results and minimal impact on dough consistency, I highly recommend using a gel-based food coloring over liquid varieties. Gel colors are more concentrated and create richer, more stable hues.
 For the Sweet Vanilla Icing You Will Need:
- Powdered Sugar: 2 cups of powdered sugar (also known as confectioners’ sugar or icing sugar) are fundamental for creating a smooth, sweet, and thick white icing that perfectly “glues” our sandwich cookies together. Its fine texture dissolves easily, ensuring a lump-free frosting.
- Butter: 1/2 cup (one stick) of softened butter adds richness and structure to the buttercream. While the recipe suggests salted butter for an enhanced flavor profile, unsalted butter can be used. If you opt for unsalted, a small pinch of extra salt in the icing will help balance the sweetness and deepen the flavor.
- Vanilla Extract: Just 1/2 teaspoon of vanilla extract provides that essential sweet, aromatic vanilla flavor to the icing. For an absolutely pure white icing, especially if you’re aiming for a stark contrast with the pink cookies, consider using a clear vanilla extract like Wilton’s no-color vanilla.
- Milk: You’ll need 1-3 teaspoons of milk. This ingredient is added slowly and incrementally to achieve the perfect icing consistency. The exact amount can vary based on factors like butter temperature and humidity, so it’s best to add it gradually until your desired thickness is reached.
 How to Make the Best Pink Sandwich Cookies: Step-by-Step Guide
Creating these beautiful pink sandwich cookies is an enjoyable process. Follow these detailed steps for a perfect batch:
Making the Pink Cookie Dough:
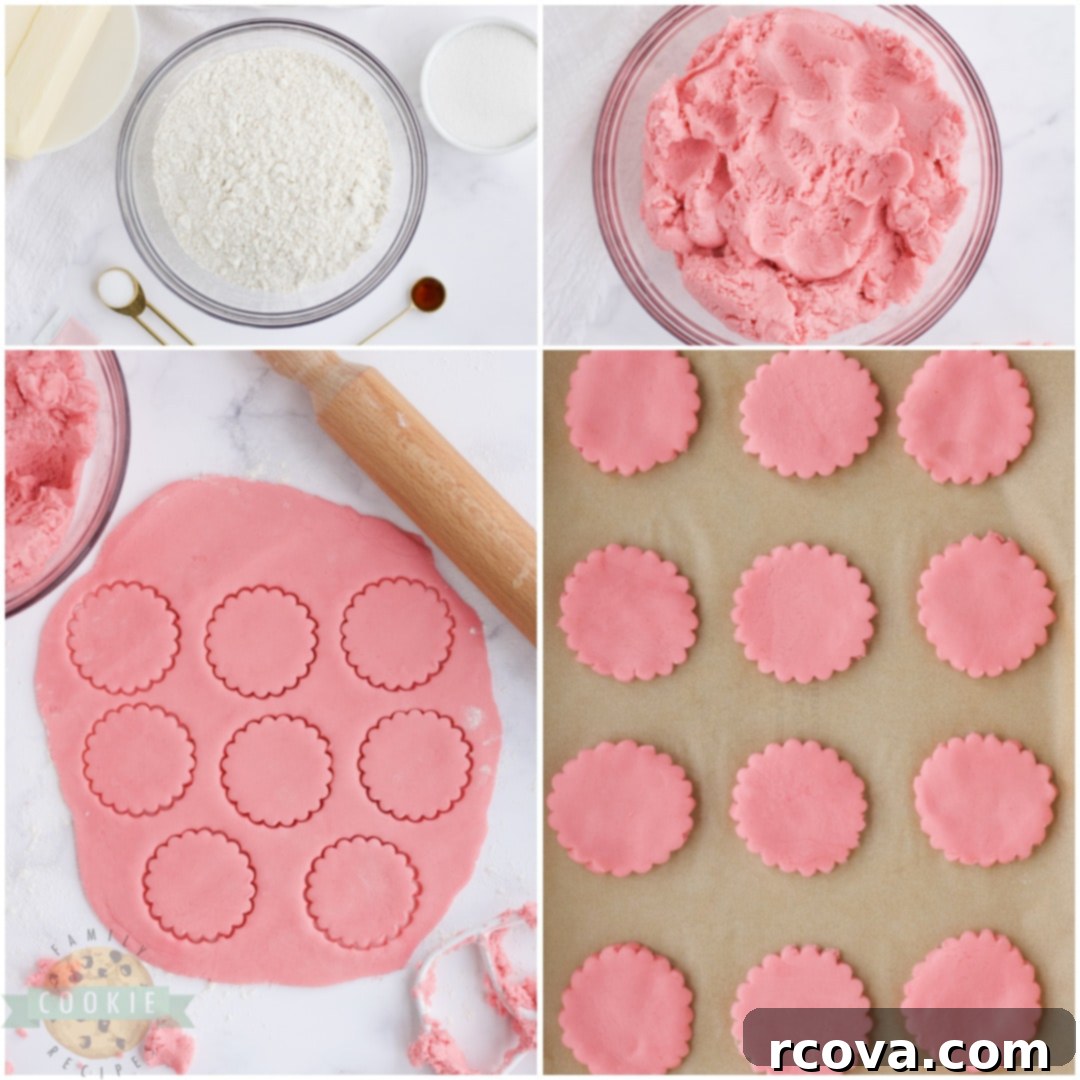
- Cream Butter and Sugar: In a large mixing bowl, combine the softened butter and granulated sugar. Using an electric mixer set to medium speed, beat them together until the mixture is light, fluffy, and pale in color. This creaming process incorporates air, which contributes to the cookies’ tender texture. Remember to scrape down the sides of the bowl often to ensure everything is well combined.
- Incorporate Wet Ingredients: Add the room temperature eggs one at a time, beating well after each addition. Stir in the vanilla extract and salt. Continue mixing until all ingredients are thoroughly blended and smooth.
- Add Food Coloring: Now it’s time to add your pink food coloring. Start with a few drops or a small amount of gel color, mixing until the desired shade of pink is achieved. Gel colors are more concentrated, so you might need less than you think.
- Gradually Add Flour: With the mixer on low speed, slowly add the all-purpose flour to the wet ingredients. Mix just until the flour is incorporated and no dry streaks remain. Be careful not to overmix, as this can develop the gluten in the flour and result in tough cookies.
- Chill the Dough: Gather the dough into a ball, flatten it slightly, cover the bowl with plastic wrap, and refrigerate for at least 1 hour. This chilling step is vital as it prevents the cookies from spreading excessively in the oven, makes the dough easier to handle, and enhances the flavor.
Baking the Cookies:
- Prepare for Baking: While the dough is chilling, preheat your oven to 350 degrees F (175 degrees C). Line a baking sheet with parchment paper or a silicone baking mat to prevent sticking and ensure even baking.
- Roll Out the Dough: Once chilled, remove the dough from the fridge. Lightly flour a clean work surface (like a countertop or large cutting board) and your rolling pin. Roll out the cookie dough until it’s approximately 1/4 to 1/2 inch thick. Consistency in thickness is key for uniform baking.
- Cut Cookie Shapes: Use your favorite cookie cutters to cut out shapes from the rolled dough. For sandwich cookies, you’ll need an even number of each shape. Carefully transfer the cut shapes to your prepared baking sheet, leaving about 1-2 inches between each cookie. These cookie cutters are great for various shapes.
- Bake to Perfection: Bake in the preheated oven for 10-12 minutes. The exact baking time can vary depending on your oven and cookie thickness. Look for cookies that are set around the edges and very lightly golden on the bottom, but not significantly browned on top. Overbaking will make them hard, so keep a close eye on them.
- Cool Completely: Once baked, remove the cookies from the oven and let them cool on the baking sheet for a few minutes before transferring them to a wire rack to cool completely. They must be entirely cool before frosting to prevent the icing from melting.
Preparing the Vanilla Buttercream Icing & Assembling:
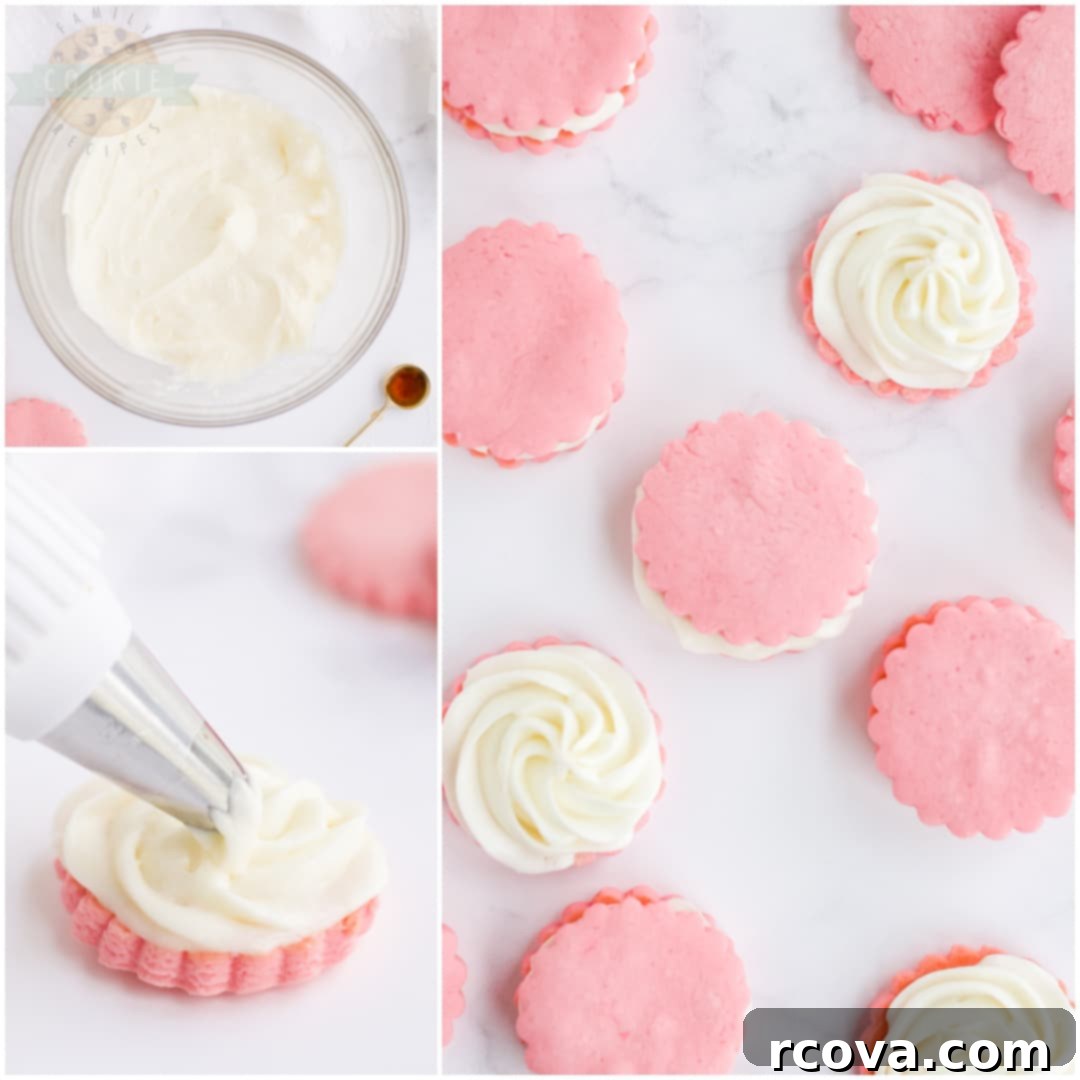
- Make the Icing: While the cookies are cooling, prepare the icing. In a medium bowl, combine the powdered sugar, softened butter, vanilla extract, and 1 teaspoon of milk. Beat with an electric mixer on low speed until smooth and creamy. Gradually add more milk, 1/2 teaspoon at a time, until the icing reaches a spreadable but firm consistency, similar to Elmer’s glue. This consistency is perfect for piping and will hold its shape between the cookies.
- Assemble the Sandwich Cookies: Once the pink cookies are completely cool, transfer the buttercream icing to a piping bag (or a sturdy Ziploc bag with a corner snipped off). Pipe a generous dollop or swirl of icing onto the flat bottom of one cookie.
- Top and Enjoy: Gently place another cookie on top of the piped icing, pressing down lightly to create your sandwich. Repeat with the remaining cookies and icing. Now they’re ready to be devoured!

Pink Sandwich Cookies
Print
Pin
Rate
Ingredients
Pink Cookies
- 1 cup unsalted butter, softened
- 1 cup granulated sugar
- 1/2 tsp salt
- 2 large eggs, room temperature
- 1 1/2 tsp vanilla extract
- 3 1/2 cup all-purpose flour, plus more for rolling dough
- Pink food coloring, as needed
Icing
- 2 cups powdered sugar
- 1/2 cup unsalted butter
- 1/2 tsp vanilla extract
- 1-3 tsp milk, as needed
Instructions
Pink Cookies
-
In a large bowl, cream together the butter and sugar with an electric mixer on medium speed.
-
Add the eggs, vanilla and salt and continue blending until thoroughly combined. Add in desired amount of food coloring.
-
Slowly add the flour, mixing just until combined.
-
Cover the dough and place in the refrigerator for one hour.
-
While the dough is chilling, preheat the oven to 350 degrees and line a baking sheet with parchment paper.
-
Remove dough from the refrigerator and roll out onto a floured surface about a half of an inch thick and cut into desired shapes.
-
Place shapes onto a baking sheet lined with parchment paper.
-
Bake for 10-12 minutes or until the cookies are set.
-
Meanwhile, prepare the icing by combining the powdered sugar, unsalted butter, milk and vanilla in a bowl and beating with an electric mixer on low until smooth.
-
When the cookies are completely cooled, pipe the icing on the bottom of a cookie and top with an additional cookie.
Notes
The number of cookies depends on how large your cookie cutters are. Mine was smaller and yielded 48 cookies, which made 24 sandwich cookies.
Nutrition
Tips for Perfect Pink Sandwich Cookies Every Time
- Room Temperature Ingredients are Key: Ensure your butter and eggs are at room temperature. This allows them to cream together properly, creating a smooth batter that holds air for a light and fluffy cookie texture.
- Don’t Overmix the Dough: Once you add the flour, mix only until just combined. Overmixing develops gluten, which can lead to tough, dense cookies.
- Chill Time is Non-Negotiable: The 1-hour chilling period is crucial. It solidifies the butter in the dough, preventing the cookies from spreading too much in the oven and helping them maintain their cut shapes. It also allows the flavors to meld, resulting in a richer cookie.
- Achieve the Perfect Pink Hue: Use gel food coloring for the most vibrant and concentrated color. Start with a small amount and add more gradually until you reach your desired shade. Remember that the color often deepens slightly after baking.
- Avoid Overbaking: This is perhaps the most important tip for soft sandwich cookies. Bake just until the edges are set and very lightly golden. If the tops start to turn golden brown, you’ve likely overbaked them, resulting in a crispier rather than soft cookie.
- Icing Consistency Matters: The ideal icing consistency for sandwich cookies is like “Elmer’s glue” – firm enough to hold its shape but soft enough to pipe smoothly. Add milk sparingly, a teaspoon at a time, to reach this consistency.
- Cool Cookies Completely: Always wait until your cookies are fully cooled before adding the icing. Warm cookies will cause the buttercream to melt and slide off, making a mess.
Frequently Asked Questions About Pink Sandwich Cookies
Why does the amount of milk vary in the icing recipe?
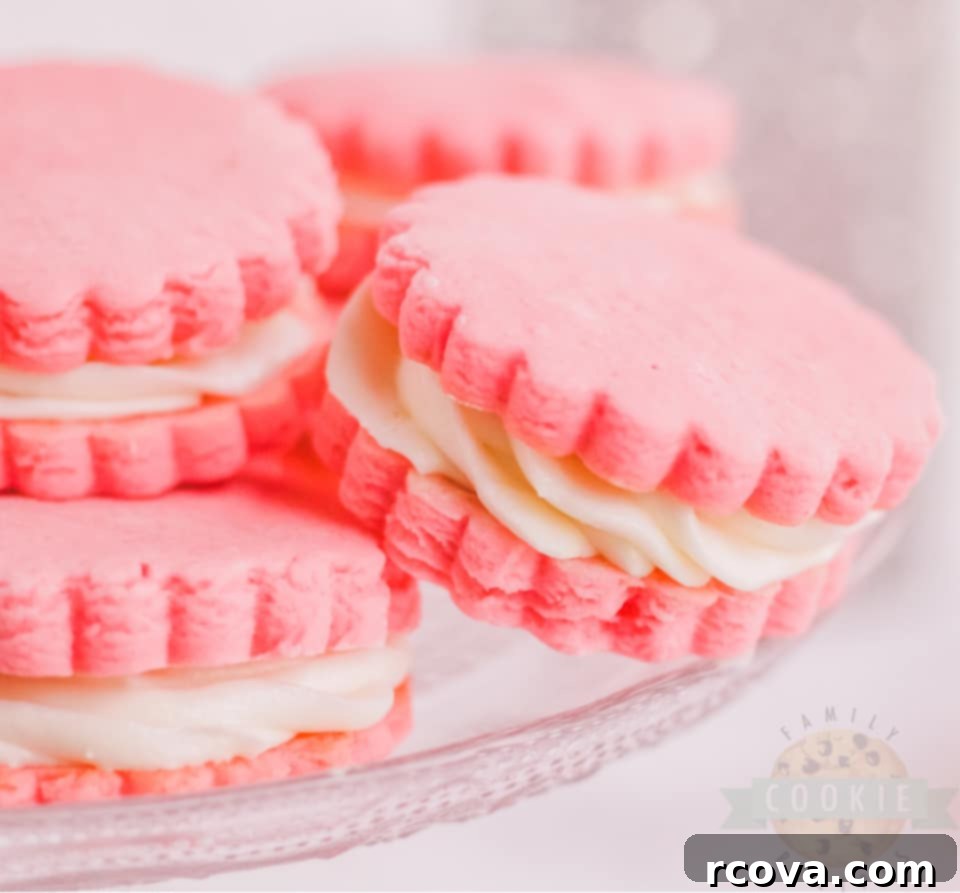
Making homemade buttercream icing can be a bit of an art! The exact amount of milk needed for your icing can vary due to several factors, including the temperature of your butter, the humidity in your kitchen, and even the brand of powdered sugar you use. You’re aiming for a consistency that is thick enough to pipe and hold its shape between two cookies (often described as “Elmer’s glue consistency”), but still smooth and spreadable. The best approach is to start with the minimum amount of milk and add more very slowly, half a teaspoon at a time, until you reach your desired texture. If you accidentally add too much milk and your icing becomes too thin, simply whisk in a little more powdered sugar to thicken it back up.
How long are pink sandwich cookies good for?
When stored properly in an airtight container at room temperature, these delicious pink sandwich cookies can stay fresh and tasty for up to a week. However, like most homemade baked goods, they are always at their absolute best when enjoyed within the first 2-3 days, when the cookies are softest and the filling is at its creamiest. For longer storage, you can freeze un-iced cookies in an airtight container for up to 3 months, then thaw and fill when ready to serve.
What are the best icing tools for filling and decorating cookies?
For simply placing the vanilla buttercream filling between your pink cookies, a frosting piping bag fitted with a round tip (like Wilton 1A or 12) works wonderfully for a clean, professional look. If you don’t have a piping bag, a sturdy freezer-safe sandwich bag with one corner snipped off will do the trick in a pinch! If you’re looking to take your decoration a step further and add designs to the top of your sandwich cookies, consider investing in a set of small frosting piping tips for intricate patterns. You can also experiment with other gel-based food colors for more design variations, use sprinkles for added texture and visual appeal, or even use toothpicks for delicate swirl patterns.
Can I make these cookies ahead of time?
Yes, absolutely! The cookie dough can be made up to 2-3 days in advance and stored tightly wrapped in the refrigerator. You can also bake the cookies ahead of time and store them in an airtight container at room temperature for up to 3 days, or freeze them for up to 3 months. Prepare the buttercream frosting closer to assembly time for the best texture, or make it a day ahead and store it in the fridge, then let it come to room temperature and re-whip before use.
Can I use different colors or flavors?
The beauty of a sugar cookie base is its adaptability! While pink is perfect for Valentine’s, feel free to swap the pink food coloring for any color to match your theme – blue for a baby shower, green for St. Patrick’s Day, or multiple colors for a vibrant celebration. You can also experiment with flavor extracts in both the cookies and the icing. Lemon extract for a zesty twist, almond extract for a marzipan-like flavor, or even a touch of peppermint extract for a holiday cookie would be delicious.
More Incredible Cookie Recipes to Try Soon
- Valentines Cake Mix Cookies
- Chocolate Peanut Butter Cake Mix Cookies
- Caramel Apple Oatmeal Cookies
- Chocolate Peppermint Cookies
- Chocolate Cherry Cookies
- Strawberry Cake Mix Cookies
- Cherry Almond Cookie Bars
- Jello Sugar Cookies
- Christmas Sugar Cookie Bars
- Iced Cinnamon Pumpkin Cookies
- Cast Iron Skillet Cookie
- Butterscotch Pretzel Cookies
- Reese’s Chocolate Peanut Butter Cookies
- Loaded Reeses Cookies
- Chocolate Turtle Cookies
With this comprehensive guide, you are now equipped to create gorgeous and scrumptious pink sandwich cookies that are sure to impress. Whether you’re celebrating Valentine’s Day, a birthday, or simply treating yourself, these cookies are a fantastic choice. They are fast to prepare, simple to assemble, and delightfully fun, making them the perfect festive treat for any occasion. So gather your ingredients, unleash your inner baker, and enjoy the sweet rewards of these pretty pink masterpieces!

 What Exactly Are Pink Sandwich Cookies?
 Eggs: Two large eggs, at room temperature, are essential for binding the ingredients, adding moisture, and contributing to the cookie’s structure and richness. If you forget to take them out ahead of time, a quick trick is to place them in a bowl of warm (not hot) water for about 5-10 minutes.
 For the Sweet Vanilla Icing You Will Need:
 How to Make the Best Pink Sandwich Cookies: Step-by-Step Guide