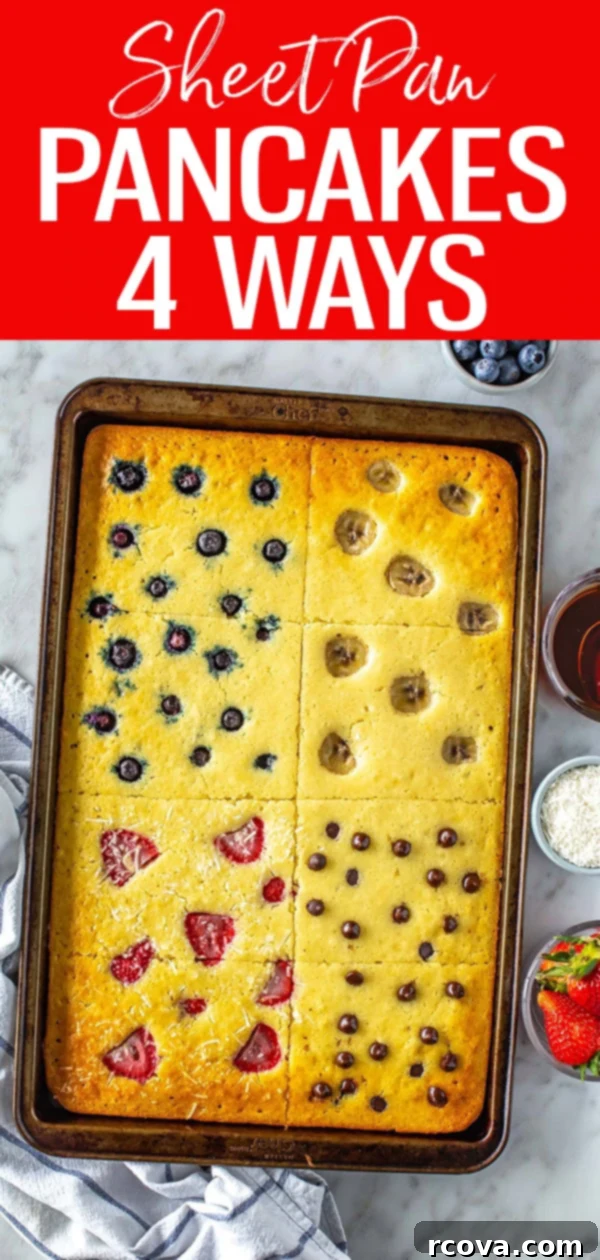
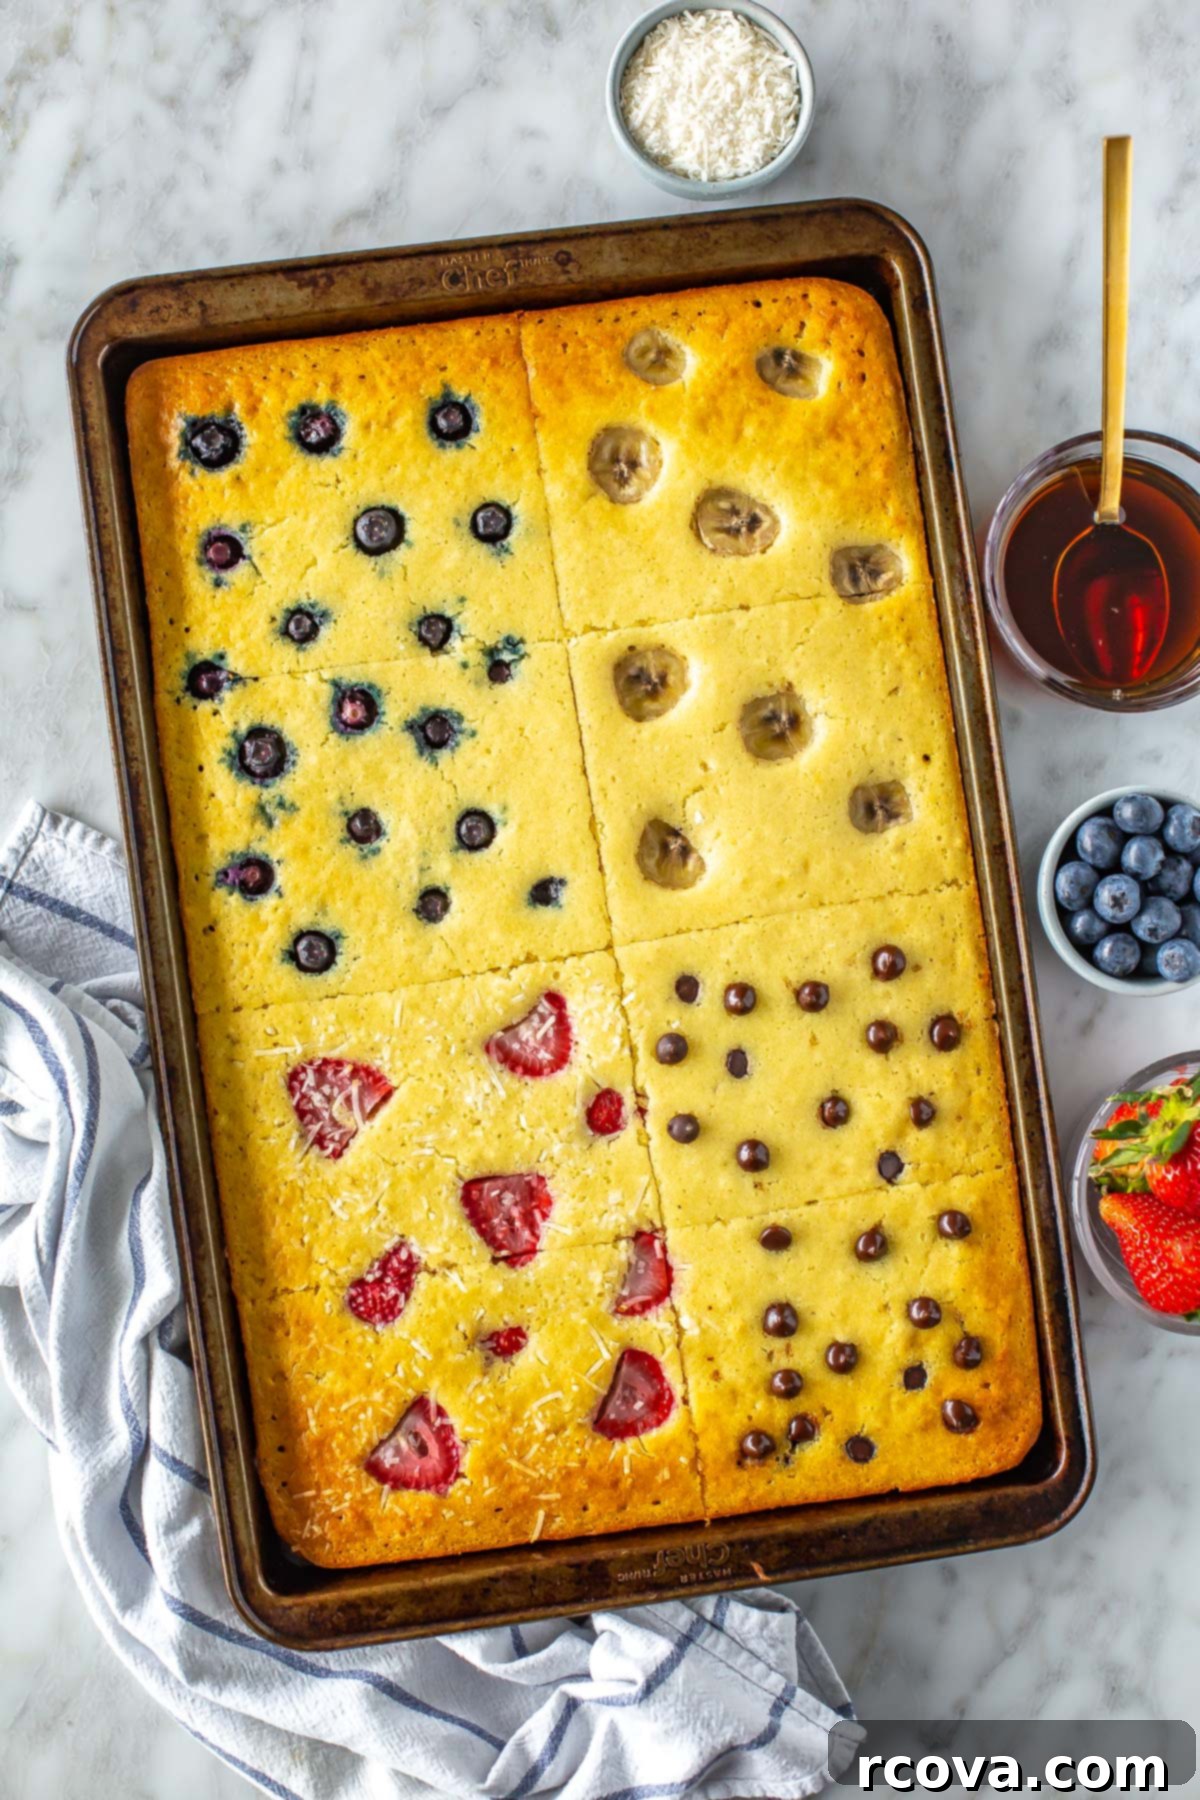
Effortless Sheet Pan Pancakes: Your Ultimate Guide to Easy, Customizable, and Crowd-Pleasing Breakfast
Forget the hassle of flipping individual pancakes and endless griddle time! These Sheet Pan Pancakes are a revolutionary way to simplify your breakfast routine, offering an incredibly easy, hands-off method to feed a crowd or streamline your weekly meal prep. Imagine fluffy, golden pancakes baked to perfection, ready to be sliced and served with your favorite toppings in mere minutes. From sweet berry bursts to rich chocolate delights, the possibilities are endless for customizing each square to everyone’s taste. This ultimate guide will walk you through creating consistently delicious sheet pan pancakes that are light, airy, and utterly satisfying, making breakfast a breeze any day of the week.
FREE Budget-Friendly Meal Plan!
Transform your grocery budget and save thousands of dollars on food every year with my exclusive free budget-friendly meal plan ebook. Get access to delicious, cost-effective recipes designed to make healthy eating affordable and simple for your entire family. Sign up now and start saving!
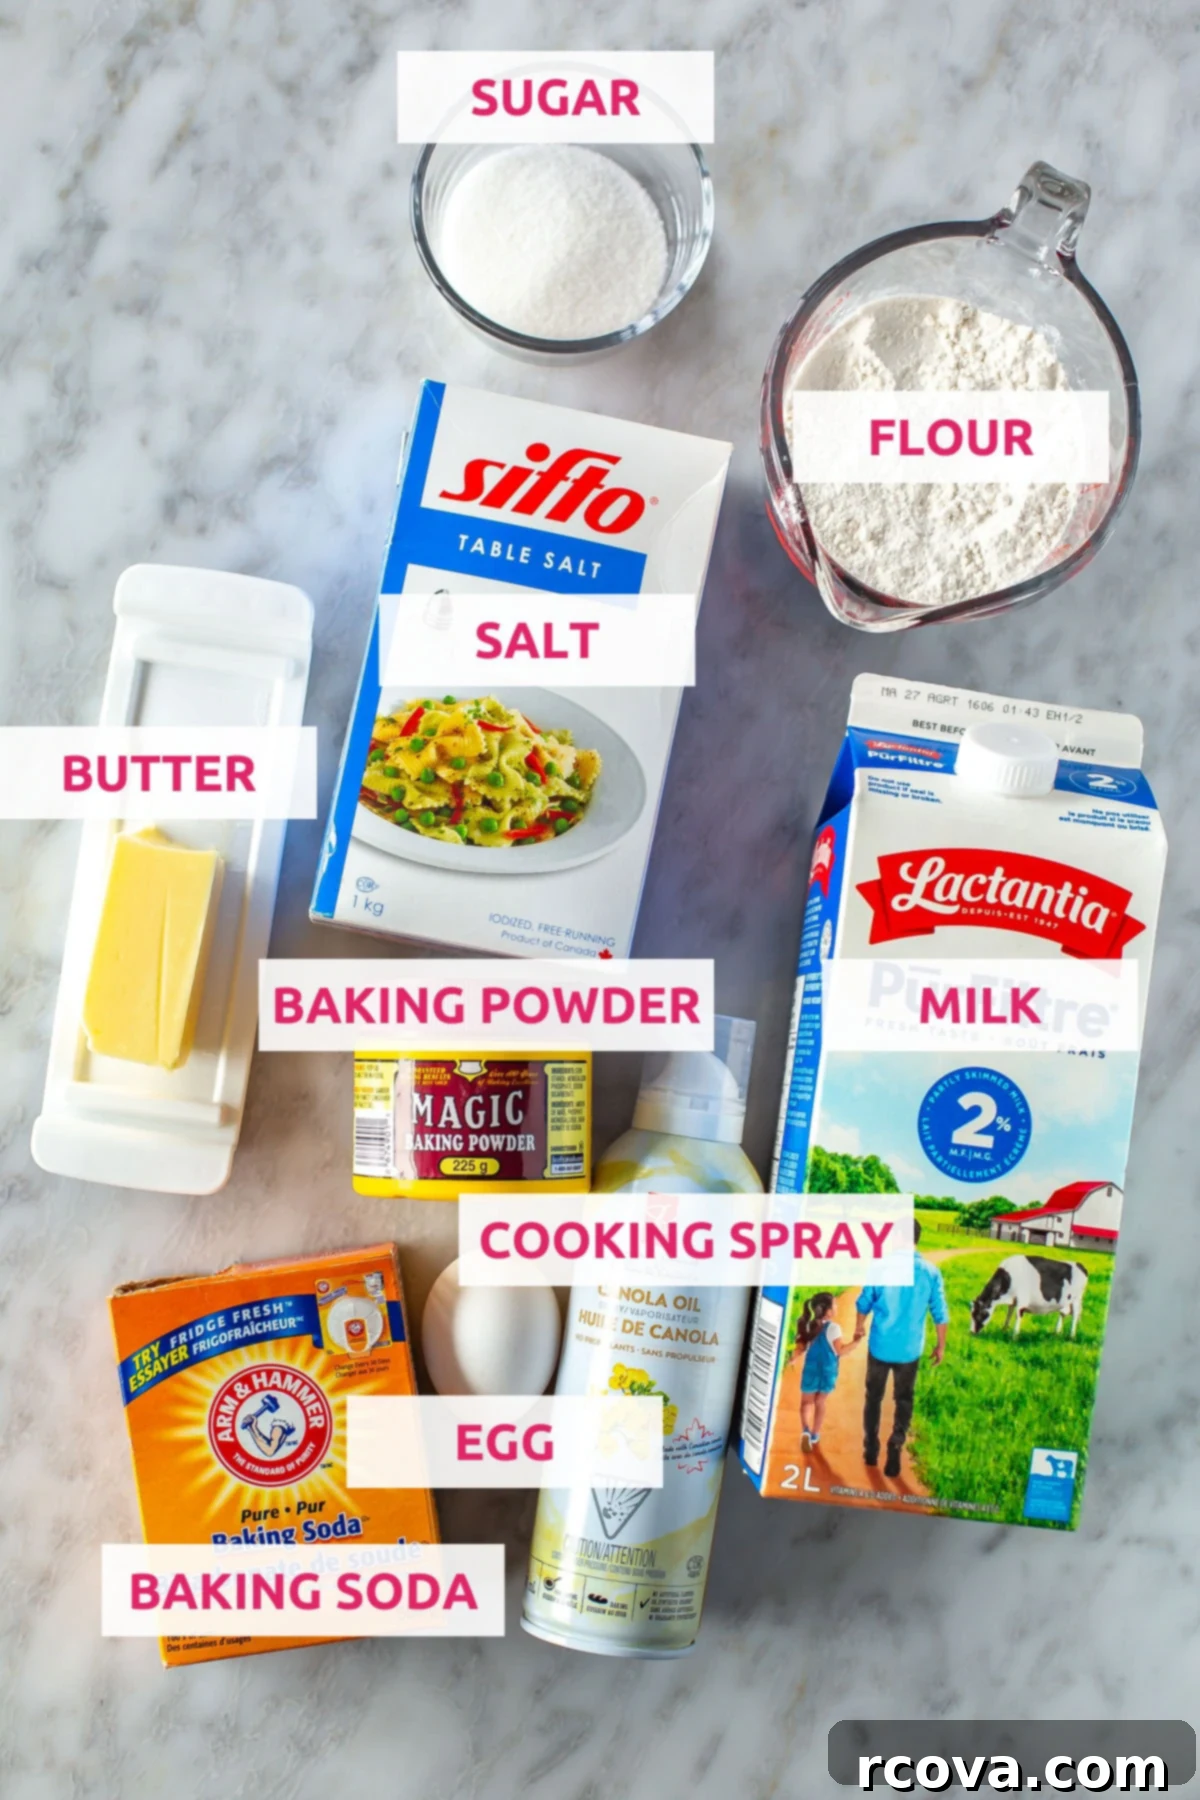
Ingredients and Essential Substitutions for Fluffy Sheet Pan Pancakes
Crafting the perfect sheet pan pancakes starts with understanding the role of each ingredient. Here’s a detailed breakdown to ensure your breakfast is a success, along with handy substitution tips for dietary needs or pantry shortages.
- Flour: All-purpose flour works perfectly for a classic fluffy pancake. For those seeking a slightly healthier alternative or a different texture, unbleached wheat flour or even spelt flour can be used. Spelt flour, in particular, offers a nuttier flavor and a slightly denser crumb, yet still yields delicious results.
- Baking Soda: This leavening agent is crucial for achieving that signature fluffy texture. Baking soda reacts with acidic ingredients (like buttermilk, if used) to create carbon dioxide, which helps the pancakes rise. Unfortunately, there’s no direct substitute that will give the same desired effect, so ensure you have this on hand.
- Baking Powder: Working in conjunction with baking soda, baking powder provides an additional lift, ensuring your pancakes rise beautifully in the oven. Like baking soda, it’s a critical component for texture, and there’s no ideal substitute for it in this recipe.
- Sugar: Granulated white sugar adds a touch of sweetness, enhancing the overall flavor and contributing to a golden crust. Feel free to experiment with brown sugar for a deeper, molasses-like note, or use a cup-for-cup sugar substitute like erythritol or stevia blends for a lower-sugar option. Adjust the amount to your preference.
- Salt: A pinch of salt is vital for balancing the sweetness and enhancing all the other flavors in the pancakes. Don’t skip it, as it really makes the other ingredients sing! Adjust to your personal taste.
- Melted Butter: Unsalted melted butter adds richness and moisture to the batter, contributing to a tender crumb. If you’re looking for a vegan alternative, melted vegan butter or margarine can be seamlessly substituted without compromising taste or texture. Ensure the butter is slightly cooled before adding it to the wet ingredients to avoid scrambling the egg.
- Egg: The egg acts as a binder, helping to hold the pancake batter together and contributing to its structure and richness. For a vegan-friendly option, a flax egg (1 tablespoon ground flaxseed mixed with 3 tablespoons water, let sit for 5 minutes to thicken) can be used as a direct substitute. Chia seeds can also work similarly, providing a good binder.
- Milk: Any type of milk will work here, but buttermilk is highly recommended for its acidic properties that react with the baking soda, resulting in extra fluffy pancakes. If you don’t have buttermilk, you can easily make your own by adding 1 tablespoon of lemon juice or white vinegar to regular milk and letting it sit for 5-10 minutes until it slightly curdles. Dairy-free milks like almond milk, soy milk, or oat milk are also excellent choices for a non-dairy version, delivering equally delicious results.
- Cooking Spray: Ensuring your sheet pan is well-greased is key to preventing sticking. Cooking spray offers a quick and even coating. Alternatively, you can use a pat of butter or margarine, spread thoroughly across the pan, or even a light layer of olive oil or coconut oil.
Customizable Topping Ideas for Your Sheet Pan Pancakes
The beauty of sheet pan pancakes lies in their incredible versatility when it comes to toppings! You can divide your sheet pan into sections, allowing everyone to enjoy their favorite flavors. Here are some fantastic ideas to get you started, ensuring every bite is a unique delight:
- Classic Fresh Fruits:
- Strawberries and Blueberries: These berries are perennial favorites, bursting with sweet-tart flavor and antioxidants. Feel free to use raspberries, blackberries, mixed berries, or even thinly sliced apples or peaches when in season. Both fresh and frozen (no need to thaw) berries work wonderfully.
- Banana: Sliced bananas add natural sweetness and a creamy texture. They pair wonderfully with chocolate chips or a sprinkle of cinnamon.
- Other Fruits: Consider diced mango, chopped kiwi, or even a handful of cherries for a different flavor profile.
- Decadent Additions:
- Chocolate Chips: Whether you prefer dark chocolate, milk chocolate, or sweet white chocolate chips, these melt into glorious pockets of deliciousness. You can also chop up a chocolate bar for varied sizes and intense flavor.
- Nuts: Chopped walnuts, pecans, almonds, or even a sprinkle of shredded coconut add a lovely crunch and depth of flavor. Toasting them lightly beforehand can enhance their aroma significantly.
- Dried Fruits: Raisins, dried cranberries, or chopped apricots can add a chewy texture and concentrated sweetness.
- Savory Surprises (for the adventurous!):
- Crispy Bacon Bits: While traditionally sweet, don’t shy away from savory toppings. A sprinkle of cooked, crumbled bacon can create a fantastic sweet and savory breakfast hybrid.
- Sausage Crumbles: Cooked and crumbled breakfast sausage adds a hearty, savory element that perfectly complements the sweet pancake.
- Cheddar Cheese: A light dusting of shredded cheddar cheese can also be a surprising and delicious hit for those who enjoy a sweet and savory contrast.
- Syrups & Sauces (to serve with):
- Maple Syrup: Of course, pure maple syrup is the quintessential pancake topping.
- Other Syrups: Consider honey, agave nectar, chocolate syrup, or even a drizzle of caramel for an extra special touch.
- Fruit Compote or Coulis: Warm homemade berry compote, apple cinnamon sauce, or a tangy lemon coulis can add gourmet flair and fresh fruit flavor.
- Creamy Toppings:
- Whipped Cream: A dollop of whipped cream elevates the experience, making it feel like a dessert.
- Greek Yogurt: A scoop of plain or flavored Greek yogurt adds tanginess and protein, balancing the sweetness.
Important Tip for Toppings: When adding toppings, remember not to overcrowd the batter, especially with moist ingredients like fruit, as this can affect baking time and the pancake’s rise. Distribute them evenly but sparsely enough to allow the batter to cook through properly. For the best results, experiment with different combinations in each corner or half of the pan!
How to Make Sheet Pan Pancakes: A Step-by-Step Guide for Breakfast Perfection
Creating these sheet pan pancakes is incredibly straightforward, transforming breakfast from a chore into a delightful experience. Follow these simple steps for perfectly fluffy, golden-brown pancakes every time.
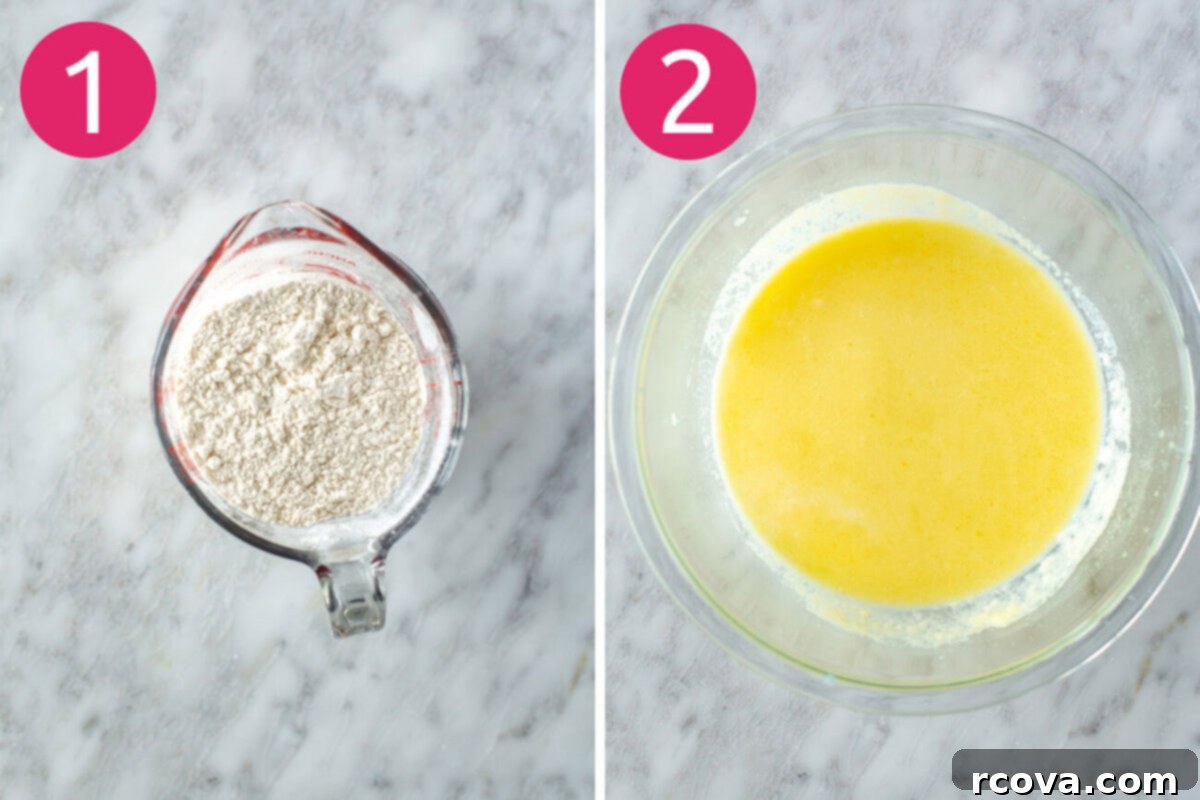
Step 1: Prepare Your Dry Ingredients
First, preheat your oven to 400°F (200°C). This ensures the oven is at the correct temperature for even cooking and proper rise, which is essential for fluffy pancakes. In a large mixing bowl, combine all your dry ingredients: the flour, baking soda, baking powder, sugar, and salt. Use a whisk to mix them together thoroughly until they are uniformly combined. This step is crucial for distributing the leavening agents evenly, which will give you consistent fluffiness throughout your baked pancakes.
Step 2: Combine Your Wet Ingredients
In a separate, medium-sized bowl, whisk together the wet ingredients: the egg, milk, and cooled melted butter. Ensure the melted butter isn’t too hot, as high heat could accidentally scramble the egg in the mixture. Whisk until the mixture is smooth and all ingredients are well-incorporated. Having the wet and dry ingredients pre-mixed separately helps prevent overmixing later.
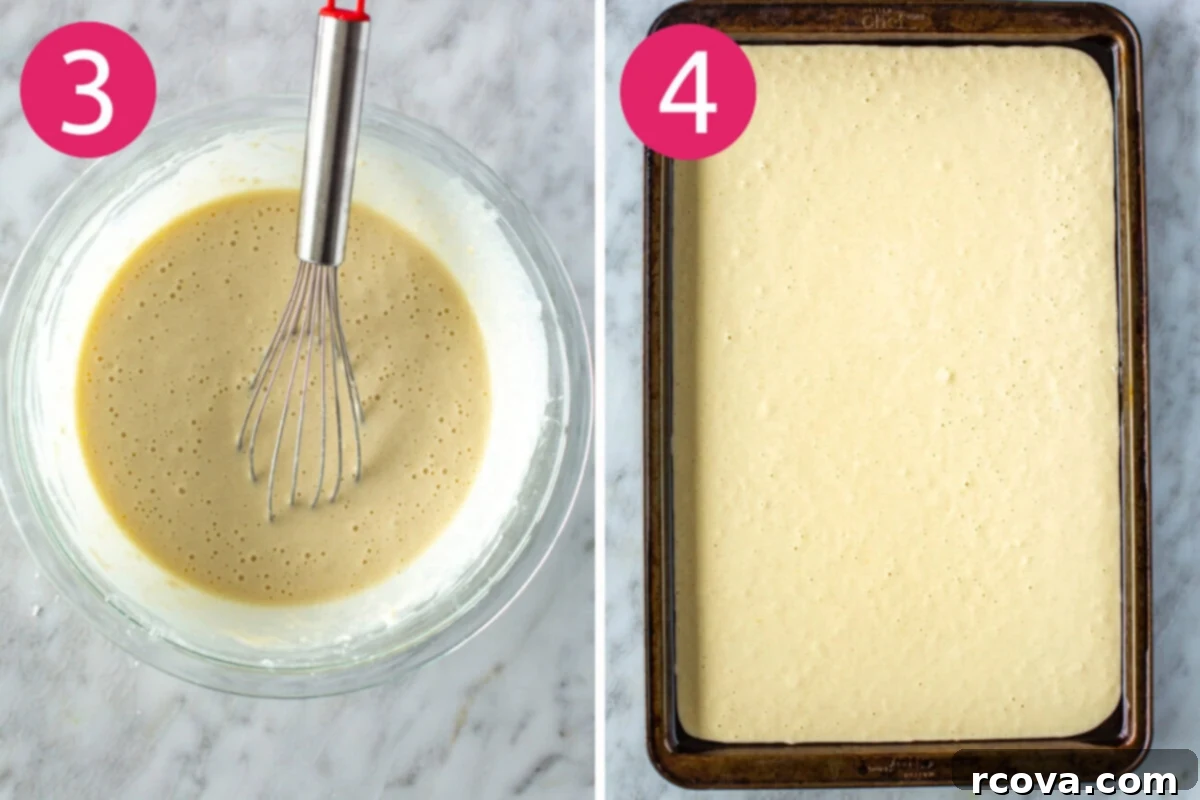
Step 3: Gently Combine Everything Together
Now, it’s time to bring the two mixtures together. Carefully pour the wet ingredients into the bowl containing the dry ingredients. Using a spatula or a large spoon, gently *fold* them together. The most important rule here is: do not overmix! Stir only until the flour streaks have just disappeared and the ingredients are barely combined. A few small lumps in the batter are perfectly normal and actually desirable. Overmixing develops the gluten in the flour, leading to dense, tough, and chewy pancakes instead of the light and airy texture you’re aiming for. This mixing process should take minimal stirring, often less than 30 seconds.
Step 4: Pour the Batter onto the Prepared Pan
Prepare your 9×13 inch baking sheet by generously spraying it with cooking spray. This step is vital to prevent your pancakes from sticking to the pan and ensures easy removal after baking. Alternatively, you can use a small amount of melted butter or margarine to thoroughly grease the pan. Once greased, carefully pour the pancake batter evenly onto the baking sheet. Use your spatula to gently spread the batter into one even layer across the entire pan. Avoid pressing down or overworking the batter, as this will release the precious air bubbles you’ve worked to create, which are crucial for the pancakes’ light texture.
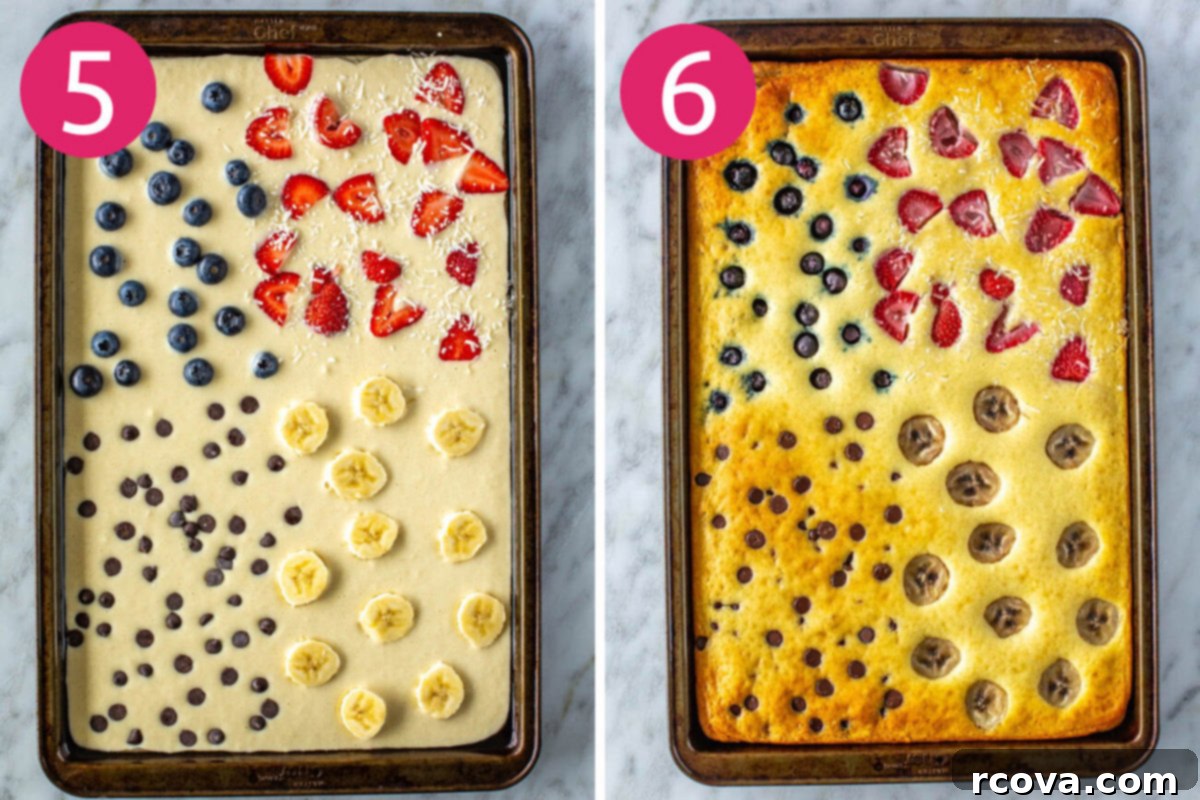
Step 5: Add Your Favorite Toppings
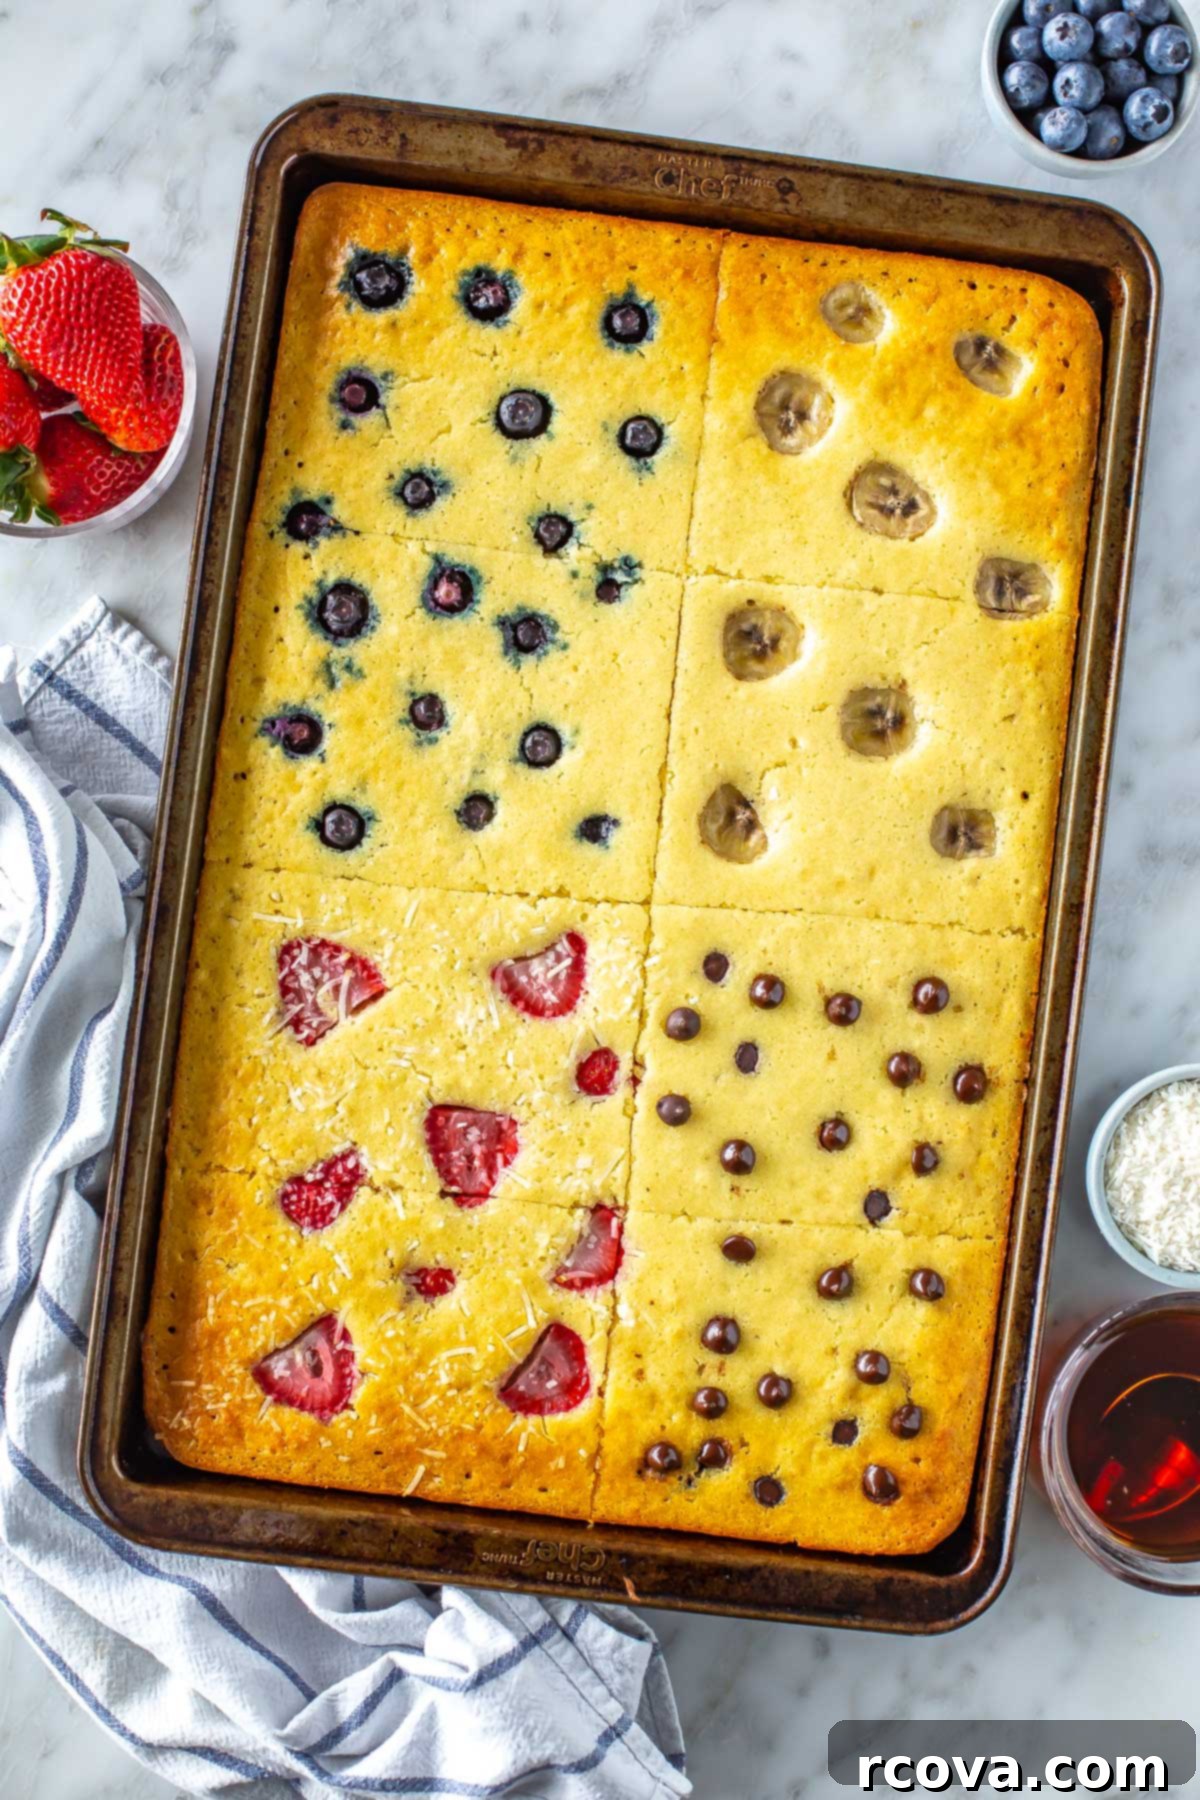
This is where you can get creative and customize your breakfast! Artfully arrange your chosen toppings over the surface of the batter. As suggested in our topping ideas section, you can create different flavor zones. For instance, dedicate one corner to fresh sliced strawberries, another to a sprinkle of juicy blueberries, a third to decadent chocolate chips, and the final section to sweet banana slices. Get creative and mix and match! Just remember not to overload any one area with too many toppings, as excess moisture or weight can prevent the batter from rising properly in that spot. Aim for an even distribution of toppings across their designated sections for optimal baking.
Step 6: Bake Until Golden and Serve!
Carefully transfer the sheet pan to the preheated oven and bake on the middle rack for approximately 12-15 minutes. Baking time can vary slightly depending on your oven and the thickness of your batter or toppings, so start checking for doneness at the 12-minute mark. The pancakes are ready when they are beautifully golden brown on top and a toothpick inserted into the center (avoiding any large fruit or chocolate chunks) comes out clean. Immediately remove the sheet pan from the oven. Using a sharp knife or a pizza cutter, slice the large pancake into 8 individual pieces (or more, if you prefer smaller portions). Serve warm with a generous drizzle of maple syrup, honey, or any other desired toppings. Enjoy your effortless, crowd-pleasing breakfast!
The Secret to Unbelievably Fluffy and Light Sheet Pan Pancakes
Achieving perfectly fluffy and light pancakes, even in a sheet pan, is all about a few simple but crucial techniques. Follow these tips and tricks to ensure your sheet pan pancakes are as airy and delightful as possible, consistently delivering breakfast perfection:
- Opt for Homemade Over Boxed Mix: While boxed pancake mixes offer convenience, choosing a homemade pancake batter is truly the secret to superior sheet pan pancakes. Homemade batter means fresh ingredients, no unnecessary preservatives or artificial flavors, and a flavor profile that store-bought mixes simply can’t match. It allows for better control over sweetness and texture, resulting in a healthier and undeniably tastier breakfast experience. The minimal extra effort is well worth the incredible difference in taste and quality.
- Do Not Overmix the Ingredients: This is arguably the most crucial rule for any pancake, and it applies even more so to sheet pan varieties. Overmixing develops the gluten in the flour, which will make your pancakes dense, tough, and chewy instead of light and airy. The goal is to mix the wet and dry ingredients just until they are combined and no dry flour streaks remain. A few small lumps in the batter are perfectly fine – in fact, they’re a sign you haven’t overmixed! Gentle folding is the technique to master here; stop mixing as soon as everything is moistened.
- Utilize Buttermilk for Extra Rise: For truly restaurant-quality fluffy pancakes, buttermilk is your best friend. The acidity in buttermilk reacts beautifully with the baking soda in the recipe, creating extra carbon dioxide bubbles that give the pancakes an incredible rise and a wonderfully tender texture. If you don’t have buttermilk on hand, a simple homemade substitute can be made by adding a tablespoon of lemon juice or white vinegar to regular milk and letting it sit for 5-10 minutes until it slightly curdles. This quick trick will replicate the necessary acidity and significantly enhance your pancakes’ fluffiness.
Frequently Asked Questions About Sheet Pan Pancakes
Got questions about making, storing, or perfecting your sheet pan pancakes? We’ve got answers to help you master this convenient breakfast!
Absolutely! Sheet pan pancakes are a fantastic option for make-ahead breakfasts or efficient meal prepping. Once baked and completely cooled, you can store them in an airtight glass container or a sealed Ziploc bag in the refrigerator for 2 to 3 days. To reheat, simply pop individual portions in the microwave for 1 to 2 minutes, or for a crispier edge and warmer interior, toast them in a toaster or toaster oven until thoroughly warmed through. This makes for an incredibly convenient and quick breakfast on busy mornings, saving you precious time.
To ensure your sheet pan pancakes don’t stick and are easy to remove in perfect portions, it’s essential to generously coat the baking sheet before pouring in the batter. A good quality cooking spray is highly effective, providing an even, non-stick layer. Alternatively, you can thoroughly grease the pan with a small amount of melted butter or margarine for added flavor, or even a neutral oil like canola or vegetable oil. The key is to create a slick surface that allows the pancakes to release effortlessly after baking.
For this specific sheet pan pancake recipe, the ideal cooking temperature is 400°F (200°C). This relatively high heat helps the pancakes rise quickly and cook through evenly, resulting in a beautiful golden-brown exterior and a tender, fully cooked interior. You should bake them for approximately 12 to 15 minutes, always keeping a close eye on them and testing for doneness with a toothpick around the 12-minute mark.
While it is technically possible to use a store-bought pancake mix for sheet pan pancakes, I strongly recommend opting for a homemade batter for a significantly tastier, healthier, and fresher outcome. Commercial pancake mixes often contain various preservatives, artificial flavors, and excessive amounts of added sugar or salt. Crafting your own batter from scratch, as outlined in this recipe, allows you to control the quality of ingredients, customize the sweetness, and ensure a more wholesome breakfast. If you have the staple ingredients on hand, the minimal extra effort for homemade batter is truly well worth it for the superior flavor and texture of your sheet pan pancakes.
Storing and Reheating Your Delicious Sheet Pan Pancakes
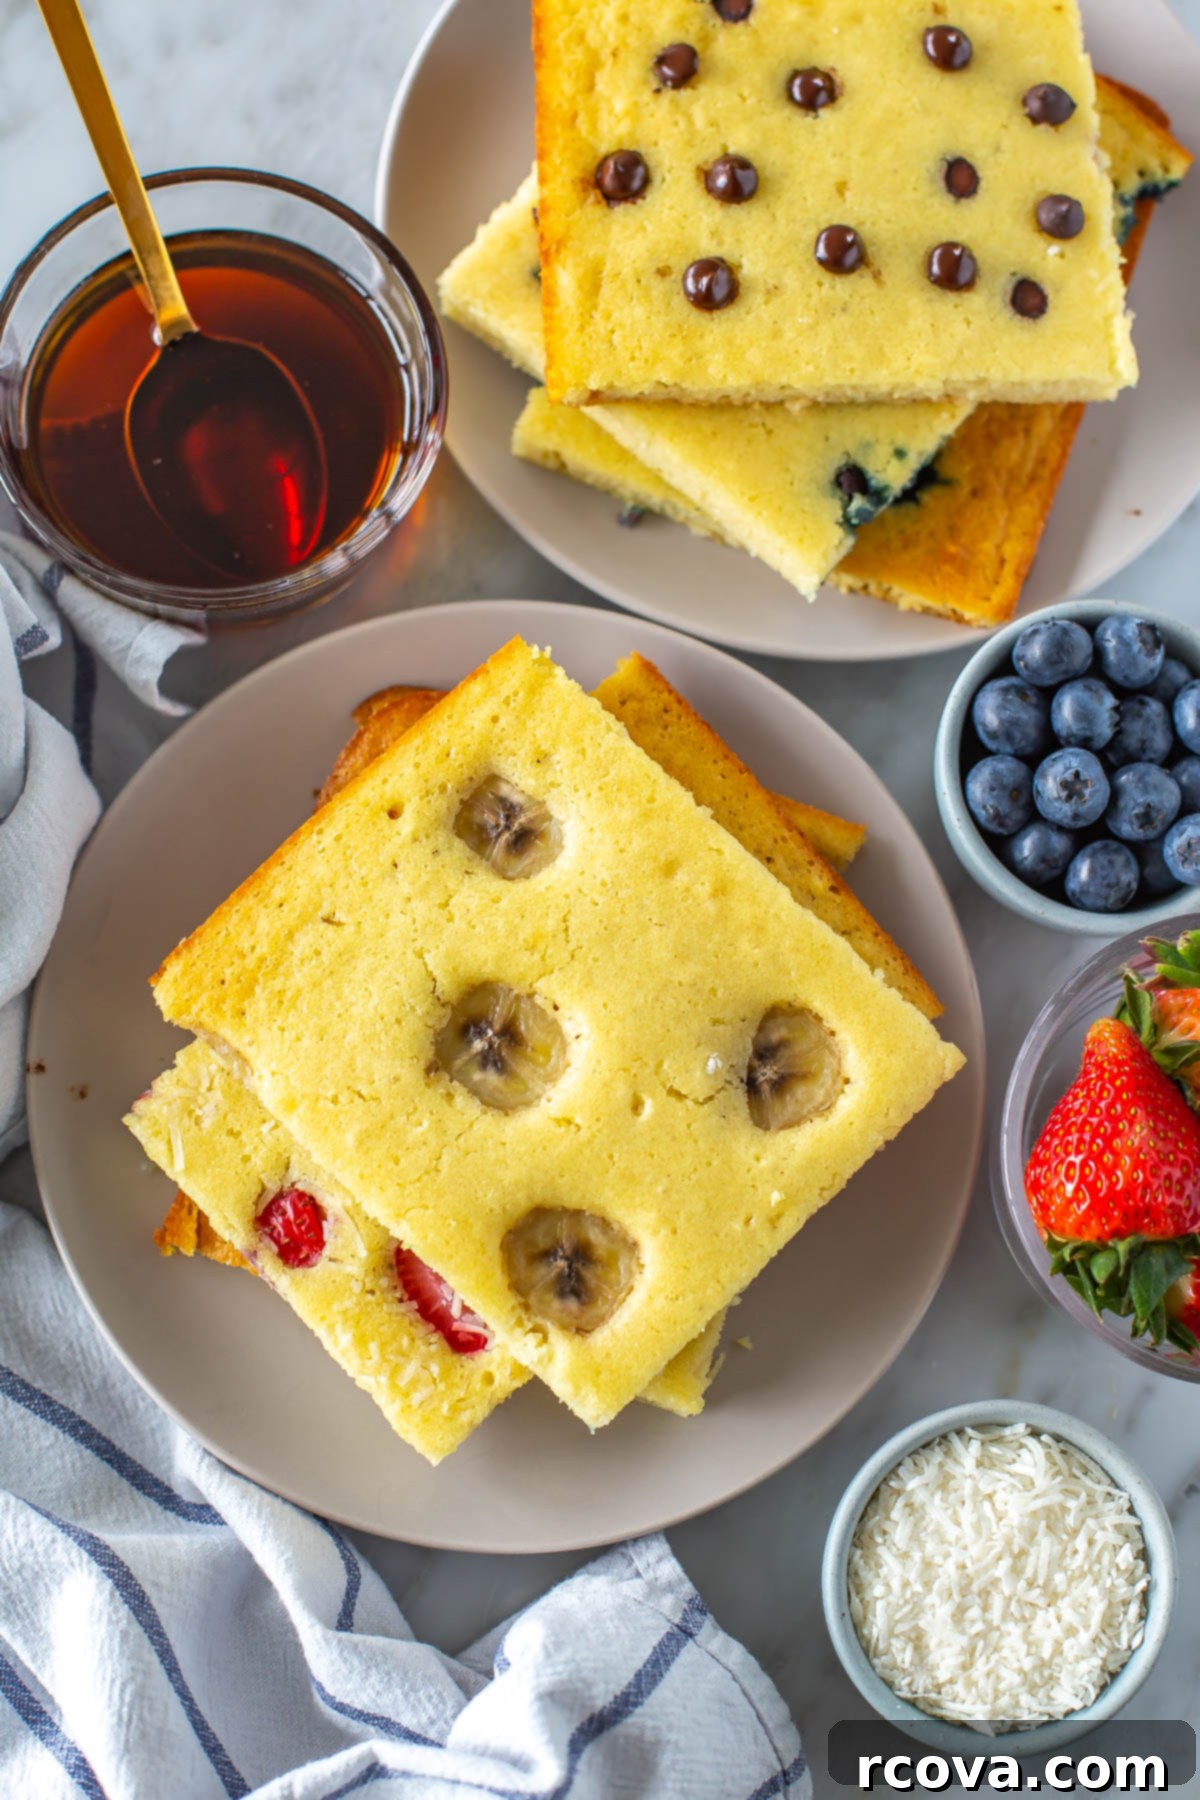
Proper storage ensures your delicious sheet pan pancakes remain fresh and ready to enjoy for days, making them an ideal choice for convenient meal prep. Once your pancakes have completely cooled to room temperature, they can be stored in an airtight container or a sealed Ziploc bag in the refrigerator for up to 2 to 3 days. To prevent them from becoming soggy or losing their texture, it’s best to leave off any wet toppings like syrup or whipped cream before storage; these are always best added just before serving. When you’re ready to indulge, reheating is simple: warm individual portions in the microwave for 1 to 2 minutes, or for a delightfully crisp exterior, pop them into a toaster or toaster oven until thoroughly warmed. Then, pile on your favorite fresh toppings and savor a quick, satisfying breakfast with minimal effort!
Can You Freeze Sheet Pan Pancakes? Absolutely!
This sheet pan pancake recipe is wonderfully freezer-friendly, making it an excellent option for long-term meal prep and ensuring you always have a wholesome breakfast on hand. After the pancakes have cooled completely to room temperature, slice them into individual portions. To prevent them from sticking together in the freezer (which can be frustrating!), place a small piece of parchment paper between each pancake before stacking them. Store these stacked pancakes in a freezer-safe Ziploc bag or an airtight glass container. They will keep beautifully in the freezer for up to 3 months, maintaining their flavor and texture. When you’re ready to enjoy, simply transfer the desired number of pancakes to the refrigerator overnight to defrost. Once thawed, reheat them using your preferred method – microwave, toaster, or even a warm skillet – and top as usual for a delicious, convenient breakfast anytime you crave it.
Serving Suggestions for Your Perfect Pancakes
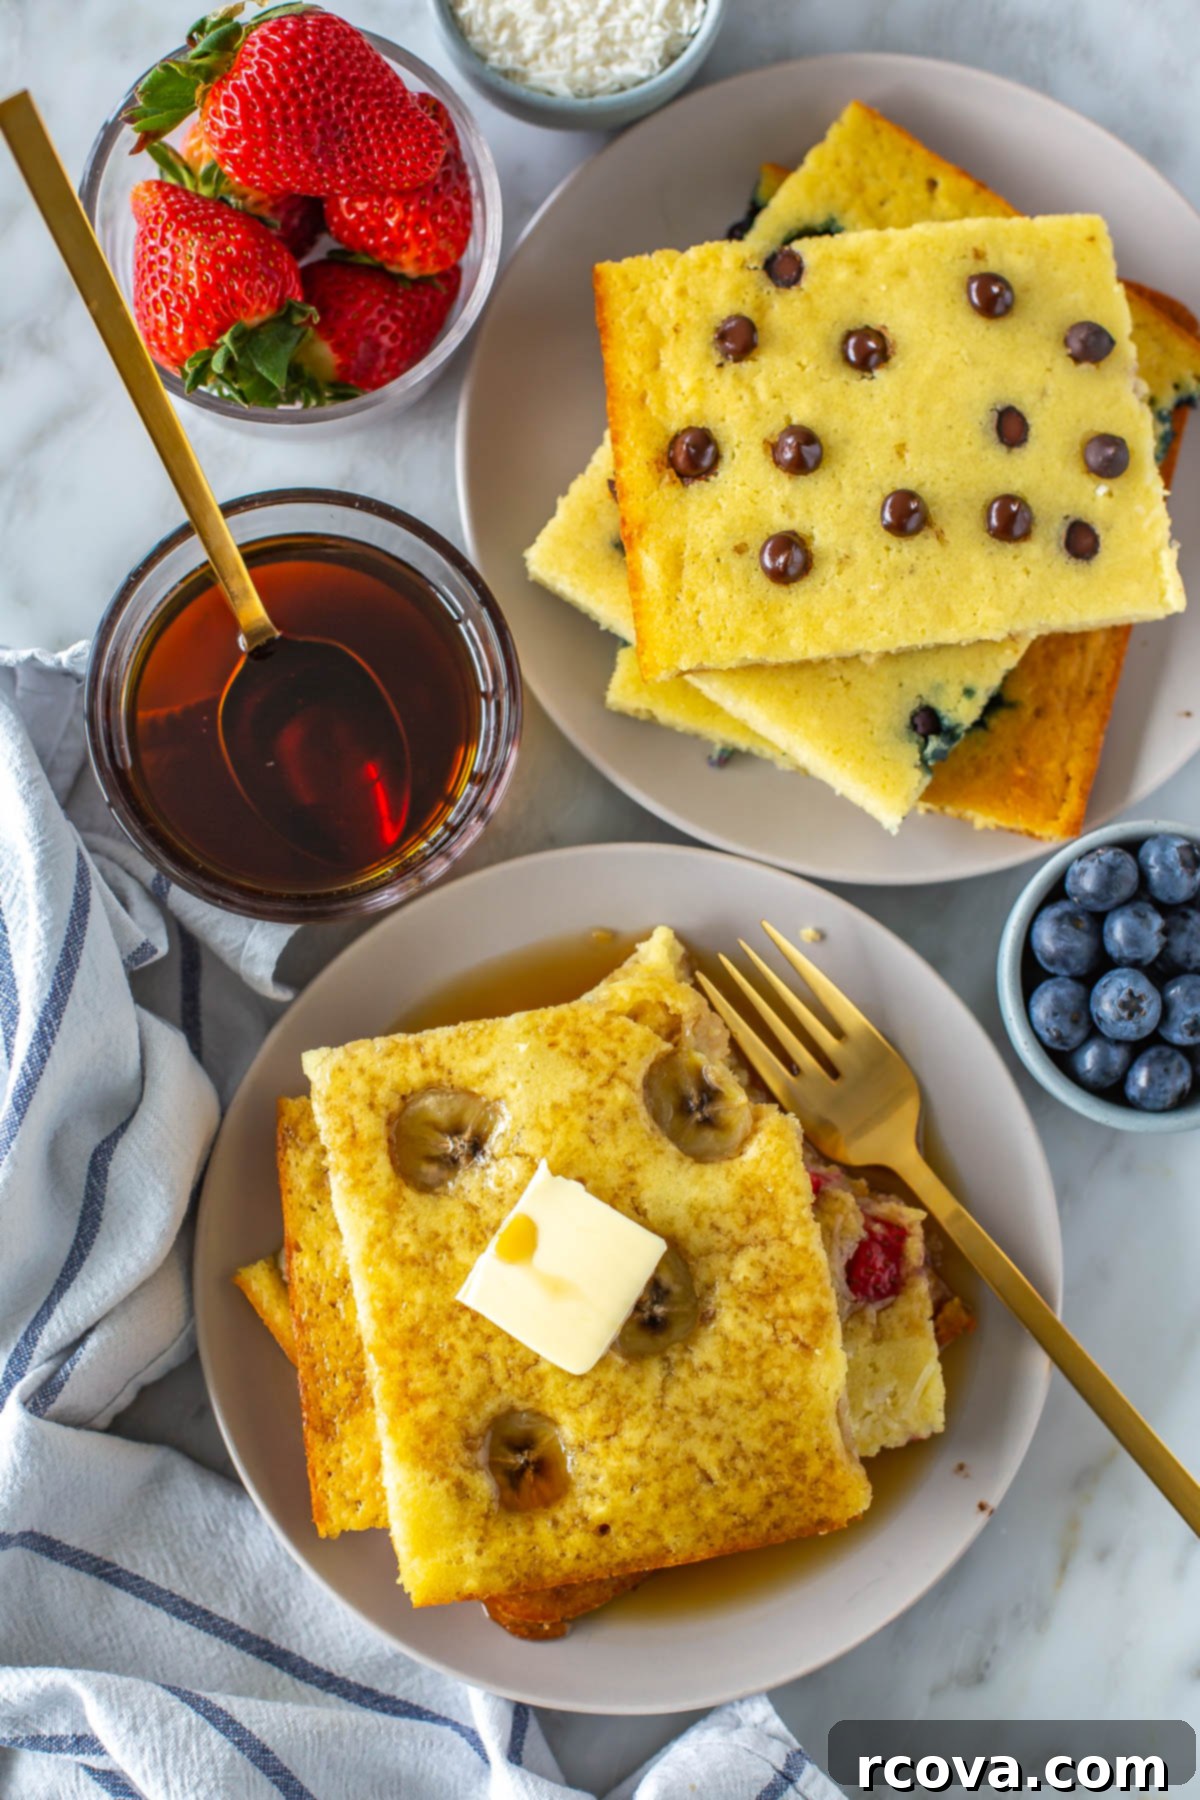
While classic maple syrup is always a winning choice, you can truly elevate your sheet pan pancakes with these delightful serving ideas:
- Fresh Fruit Medley: A colorful mix of sliced berries, kiwi, and mango adds freshness, natural sweetness, and a vibrant touch to your plate.
- Whipped Cream & Chocolate Shavings: For a more indulgent and dessert-like treat, a generous dollop of freshly whipped cream and a sprinkle of decadent chocolate shavings are simply irresistible.
- Nut Butters & Honey: Spread a thin layer of your favorite nut butter (like peanut butter, almond butter, or hazelnut spread) over the warm pancake, then drizzle with honey or agave nectar for a protein-packed and satisfying option.
- Yogurt Parfait Style: Layer pancake pieces with creamy Greek yogurt and your favorite granola for a hearty and healthy breakfast or brunch parfait.
- Homemade Fruit Compote or Coulis: A warm berry compote, a spiced apple cinnamon sauce, or a tangy lemon coulis can add gourmet flair and concentrated fruit flavor, taking your pancakes to the next level.
- Savory Sides for a Complete Meal: Turn your pancakes into a full breakfast spread by serving them alongside crispy bacon, fluffy scrambled eggs, or savory breakfast sausages.
- Ice Cream: For a truly decadent dessert-for-breakfast experience, a scoop of vanilla ice cream melting over warm pancakes is surprisingly delicious and a treat for special occasions.
Essential Tools for Sheet Pan Pancake Success
To make this sheet pan pancake recipe as seamless and enjoyable as possible, having the right kitchen tools on hand will be a huge help. Most of these are common kitchen items, making this recipe accessible for everyone:
- Large Mixing Bowls: You’ll need two – one for thoroughly combining your dry ingredients and another for whisking your wet ingredients.
- Whisk: An essential tool for smoothly blending both your dry and wet ingredients, ensuring no lumps in the batter.
- 9×13 Inch Baking Sheet: The star of the show! A sturdy, light-colored sheet pan works best for even baking and proper browning without overcooking the bottom.
- Measuring Cups and Spoons: Accurate measurements are key to consistent results, so have a reliable set on hand.
- Spatula: Useful for gently folding the batter (remember, no overmixing!) and carefully spreading it evenly onto the prepared sheet pan.
- Cooking Spray (or Butter/Margarine): Absolutely crucial for greasing the pan to prevent the pancakes from sticking.
- Sharp Knife or Pizza Cutter: For easily slicing the baked sheet of pancakes into perfect, individual portions. A pizza cutter is especially efficient for quick, clean cuts.
- Airtight Containers or Ziploc Bags: Essential for storing any delicious leftovers in the fridge or freezer for future enjoyment and meal prep.
More Healthy and Delicious Pancake Recipes
If you’ve loved these easy sheet pan pancakes, you’re in for a treat! Explore more of our favorite healthy and satisfying pancake recipes designed to make your mornings brighter and your meal prep simpler.
-
Fluffy 4-Ingredient Protein Pancakes
-
5-Ingredient Pumpkin Protein Pancakes
-
Gluten-Free Banana Oat Pancakes {5 Ingredients!}
-
Cottage Cheese Pancakes {High Protein}
Recommended Meal Prep Tools & Equipment
To make your sheet pan pancake meal prep even easier and more efficient, having the right tools makes all the difference. These are some of our top recommendations:
- Grab some high-quality glass meal prep bowls to store these freshly baked sheet pan pancakes in the refrigerator. They’re excellent for keeping your portions organized and fresh.
- For freezing, these pancakes can also be stored effectively in durable Ziploc bags, allowing you to freeze them for up to 3 months without freezer burn. Remember to separate each pancake with parchment paper to prevent sticking.
- For a comprehensive guide on all the best meal prepping essentials, make sure to get my full list of tools here, ensuring you’re fully equipped for any meal prep adventure!
Sheet Pan Pancakes {4 Ways!}
Print
Pin
Rate
SEND ME MY PLAN
Ingredients
- 1 1/2 cups all-purpose flour
- 1 tsp baking soda
- 1 tsp baking powder
- 2 tbsp granulated sugar
- 1/4 tsp salt
- 3 tbsp melted butter (cooled)
- 1 large egg
- 1 3/4 cups milk (buttermilk or dairy-free recommended for best results)
- Cooking spray (for greasing the pan)
Topping Ideas (Choose Your Favorites!)
- Fresh Strawberries (sliced)
- Fresh Blueberries
- Chocolate Chips (milk, dark, or white)
- Sliced Banana
- Maple syrup (to serve)
Instructions
-
Preheat your oven to 400°F (200°C). In a large mixing bowl, combine all your dry ingredients: flour, baking soda, baking powder, sugar, and salt. Whisk them together thoroughly until uniformly combined. In a separate, medium-sized bowl, whisk together the wet ingredients: the egg, milk, and cooled melted butter. Ensure the butter isn’t too hot, as it could scramble the egg. Whisk until the mixture is smooth and well-incorporated.
-
Now, gently combine the wet and dry ingredients. Pour the wet mixture into the bowl with the dry ingredients. Using a spatula or large spoon, fold them together. The key here is not to overmix! Stir only until the flour streaks have just disappeared and the ingredients are combined. A few lumps are perfectly normal and actually desirable, as overmixing develops the gluten in the flour, leading to tough, chewy pancakes instead of light and fluffy ones. This takes minimal stirring, often less than 30 seconds.
-
Prepare your 9×13 inch baking sheet by generously spraying it with cooking spray. This step is vital to prevent your pancakes from sticking and makes for easy removal. Alternatively, you can use a small amount of melted butter or margarine to grease the pan thoroughly. Once greased, carefully pour the pancake batter onto the sheet pan. Use your spatula to gently spread the batter into an even layer across the entire pan. Avoid pressing down or overworking the batter, as this will release the precious air bubbles you’ve worked to create, which contribute to the pancakes’ light texture.
-
Artfully arrange your chosen toppings over the surface of the batter. As suggested, you can create different flavor zones: strawberries in one corner, blueberries in another, chocolate chips in a third, and sliced bananas in the last. Feel free to switch up the combos! Just remember not to overload any one area with too many toppings, as excess moisture or weight can affect baking time and the pancake’s rise. Distribute them evenly but sparsely enough to allow the batter to cook through properly.
-
Carefully transfer the sheet pan to the preheated oven and bake on the middle rack for 12-15 minutes. Baking time can vary, so start checking for doneness at the 12-minute mark. The pancakes are ready when golden brown on top and a toothpick inserted into the center (avoiding large fruit or chocolate chunks) comes out clean. Immediately remove from the oven. Using a sharp knife or pizza cutter, slice the large pancake into 8 individual pieces. Serve warm with a generous drizzle of maple syrup, honey, or any other desired toppings. Enjoy your effortless, crowd-pleasing breakfast!
Chef’s Notes & Pro Tips
For maximum fluffiness, use buttermilk! The acidity in buttermilk reacts with the baking soda to create extra carbon dioxide bubbles, resulting in incredibly tender and airy pancakes. If you don’t have buttermilk, remember you can easily make your own by adding lemon juice or vinegar to regular milk.
The golden rule of pancakes: don’t over-mix the batter! Overmixing develops gluten, which leads to tough and chewy pancakes. Stir just until the dry ingredients are combined with the wet; a few lumps are perfectly fine and even desired for a tender texture.
Meal prep made easy: Store any leftover sheet pan pancakes in an airtight container in the fridge for 2-3 days. They reheat beautifully in the microwave for 1-2 minutes, or in the toaster for a crispier edge.
Freeze for future breakfasts: These pancakes are excellent for freezing! Once cooled, separate individual slices with parchment paper and freeze for up to 3 months in a freezer-safe bag. Defrost them in the fridge overnight, then reheat as normal for a quick and convenient breakfast.
Nutrition Information
