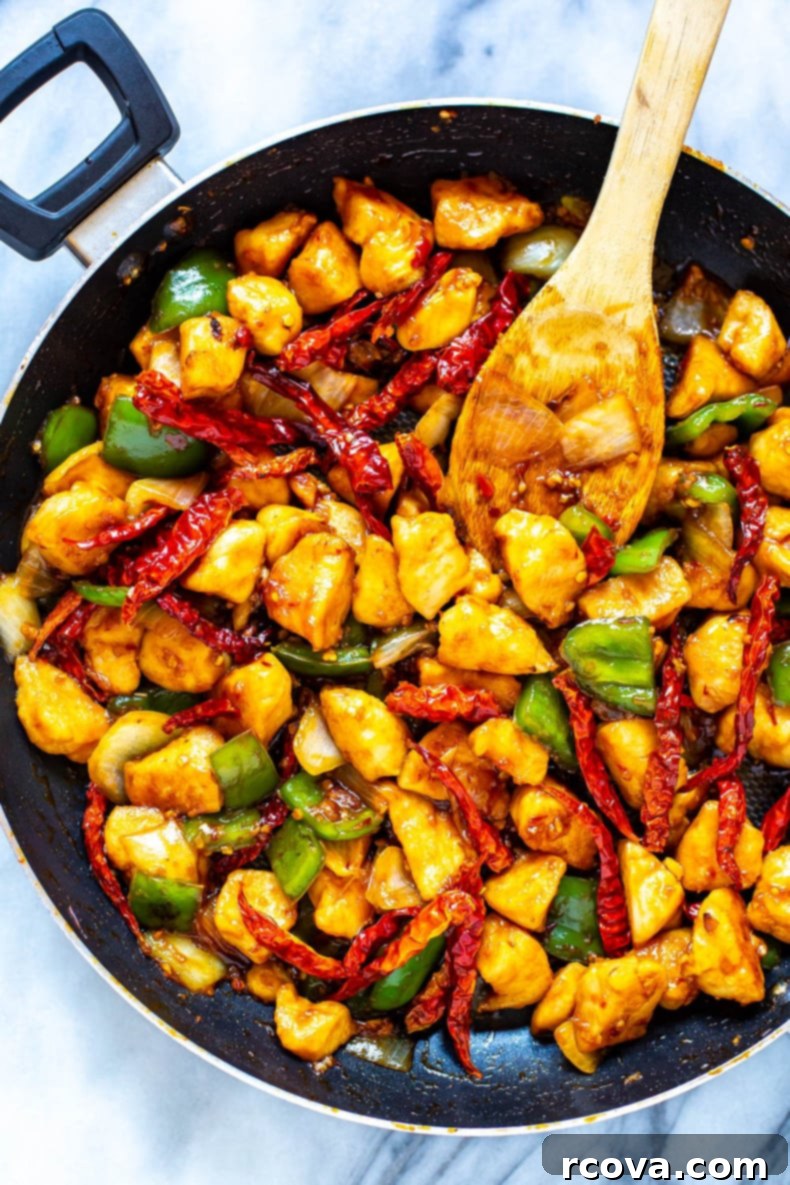
Authentic Homemade Chilli Chicken: Sweet, Spicy & Perfectly Crisp (Better Than Takeout!)
Craving the vibrant, irresistible flavors of your favorite Chinese takeout? Look no further! This easy homemade Chilli Chicken recipe offers a delightful and lighter twist on a classic, delivering the perfect symphony of sweet and spicy notes right to your dinner table. Forget greasy deep-fried options and complex preparations; this recipe simplifies the process, making it accessible for any home cook while still achieving that restaurant-quality taste and tantalizing crispy texture. It’s an ideal choice for a quick weeknight meal, yet impressive enough to serve guests.
FREE Budget-Friendly Meal Plan!
Save thousands of dollars on food every year with my free budget-friendly meal plan ebook.
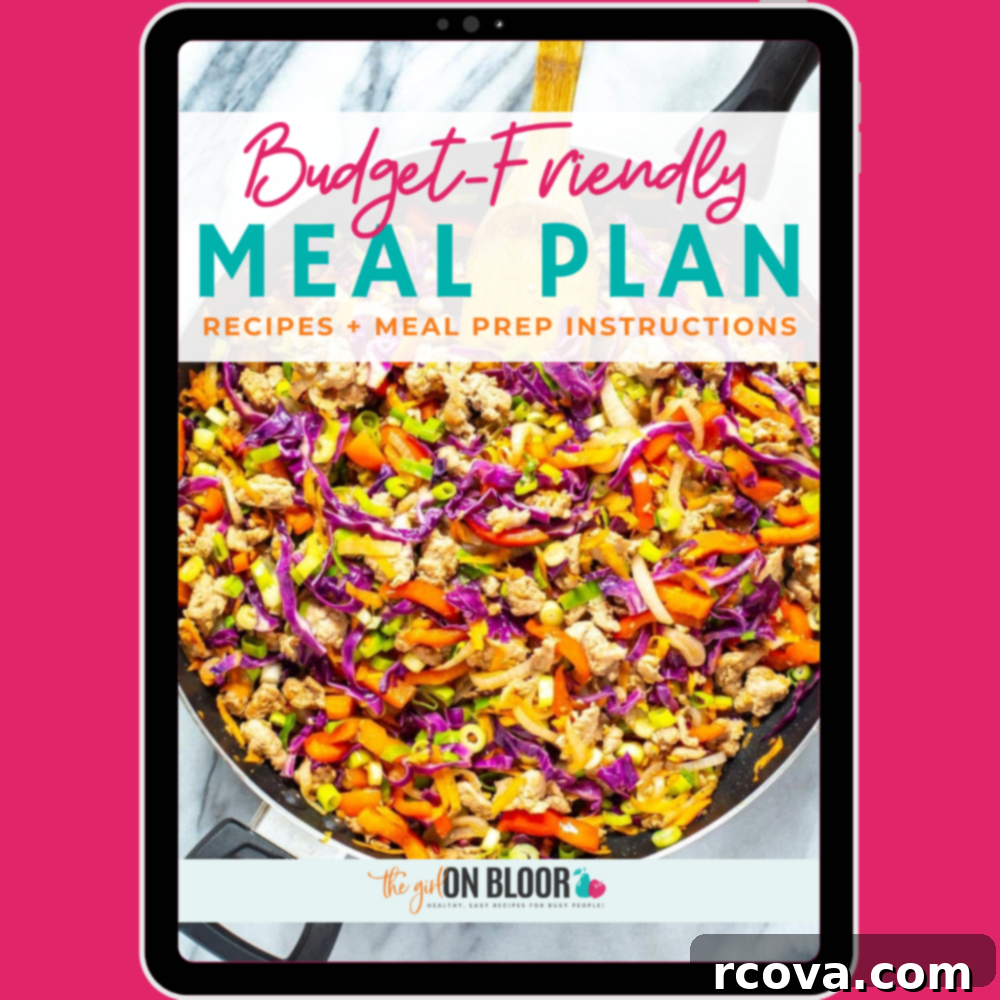
Essential Ingredients & Smart Substitutions for Your Chilli Chicken Stir Fry
Crafting the perfect Chilli Chicken at home means using fresh ingredients, but also knowing how to adapt. Here’s a detailed look at what you’ll need and the best ways to make substitutions without sacrificing flavor or texture:
- Boneless Chicken Breasts: For a leaner, lighter version of this Chinese-inspired dish, boneless chicken breasts are an excellent choice. They cook quickly and absorb flavors beautifully. However, if you prefer a richer, more succulent bite, boneless chicken thighs are a fantastic alternative due to their higher fat content, which keeps them incredibly moist during high-heat cooking. You could also experiment with other proteins like sliced turkey, pork, or even beef for a different twist.
- Cornstarch: This is a crucial ingredient for achieving that desirable crispy coating on your chicken, especially when combined with baking soda (more on that below!). It helps create a tender yet slightly crisp exterior, sealing in the chicken’s juices. If you don’t have cornstarch, arrowroot powder or potato starch can be used as direct substitutes, offering similar thickening and coating properties.
- Baking Soda: Don’t skip this secret ingredient! Baking soda acts as a powerful tenderizer for the chicken, a technique often used in Asian cooking known as “velveting.” It raises the pH level of the chicken, which helps it retain moisture and become incredibly tender. Additionally, it aids in creating a beautiful golden-brown and crispy crust when seared in the pan, without the need for flour.
- Salt: Essential for seasoning the chicken and enhancing all the other flavors in the dish. Adjust to your personal preference.
- Canola Oil: A neutral-flavored oil with a high smoke point is ideal for stir-frying. Canola oil fits the bill perfectly. Other excellent neutral oil options include grapeseed oil, avocado oil, or even a light olive oil, all of which can withstand the high temperatures needed for a good stir-fry.
- Yellow Onion: Adds a sweet and pungent aromatic base to the stir-fry. Yellow onions will soften and caramelize slightly, contributing depth of flavor. White or red onions can be used interchangeably if you have those on hand.
- Green Pepper: Bell peppers contribute freshness, color, and a subtle sweetness. While green pepper is classic for chilli chicken, feel free to use red, yellow, or orange bell peppers for a sweeter profile and a pop of color. Mixing colors can also make the dish more visually appealing.
- Green Onions: Used both in the stir-fry and as a garnish, green onions (scallions) provide a fresh, mild onion flavor. Chives or finely diced shallots can be used as a substitute, or you can omit them if you’re not a fan.
- Dried Chillis: These are key for that authentic spicy kick and a beautiful aroma. You can use whole dried red chillies, green chillies, or even Chinese dried red chilies. Adjust the quantity based on your spice tolerance; for a milder dish, you can significantly reduce or omit them entirely.
Flavorful Stir Fry Sauce Components
The sauce is truly the heart of this Chilli Chicken recipe, balancing the sweet, spicy, and savory elements. Making it from scratch ensures a fresher, more vibrant taste:
- Soy Sauce: The foundation of umami flavor in many Asian dishes. For a gluten-free version, tamari or coconut aminos are excellent alternatives, maintaining a similar savory profile. Consider low-sodium soy sauce if you’re watching your sodium intake.
- Sweet Chilli Sauce: This provides the crucial sweet element that balances the heat from the other chili components, creating that signature sweet and spicy profile. If you find yourself without it, a quick homemade substitute can be made by combining hot sauce (like Sriracha) with a touch of honey or brown sugar.
- Sambal Oelek (Chili Sauce): This chili paste brings the primary heat and a robust, fresh chili flavor. Sambal Oelek is typically a pure chili paste without much added sugar, offering a direct and vibrant spice. Sriracha can be used as a substitute, offering a similar level of heat, though it has a slightly different flavor profile due to its garlic and vinegar notes. Adjust the amount according to your desired spice level.
- Garlic: Freshly minced garlic is highly recommended here, as it delivers the most potent and aromatic flavor to the sauce, elevating the entire dish. While jarred minced garlic can be used for convenience, you might find fresh garlic provides a more superior taste.
Perfectly Cooked Jasmine Rice
Serving your Chilli Chicken over a bed of fluffy, fragrant rice is customary and incredibly satisfying:
- Jasmine Rice: Known for its delicate fragrance and soft texture, jasmine rice is the traditional choice for Chinese-inspired dishes. However, you can use any rice you prefer, such as basmati, brown rice for a healthier whole-grain option, or even short-grain white rice. For a low-carb alternative, consider quinoa or rice noodles.
- Butter: Adding a small amount of butter (or a drizzle of olive oil or margarine) to your rice as it cooks or after it’s done makes it incredibly moist and adds a lovely sheen, preventing it from drying out.
- Salt: A pinch of salt enhances the natural flavor of the rice, making it a more complementary base for the richly flavored chilli chicken.
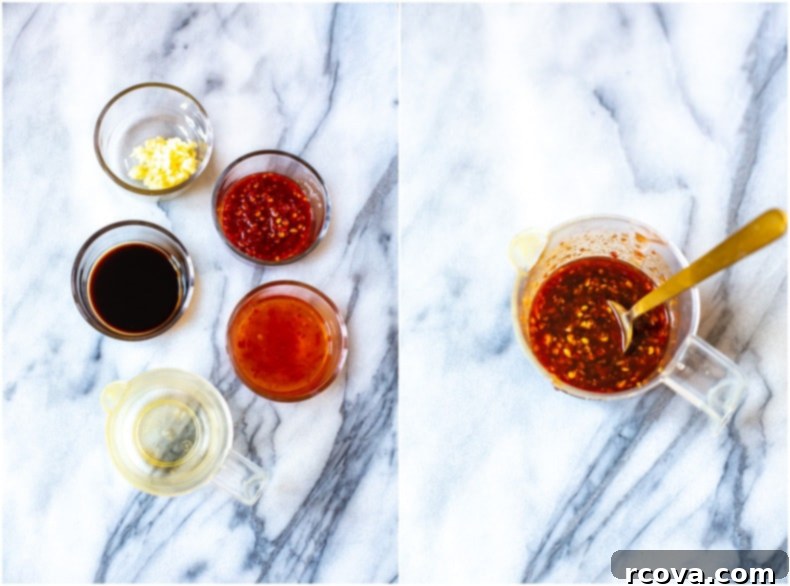
How to Prepare Delicious Chilli Chicken: A Step-by-Step Guide
Follow these simple steps to create a mouthwatering Chilli Chicken that rivals your favorite takeout, with minimal fuss and maximum flavor.
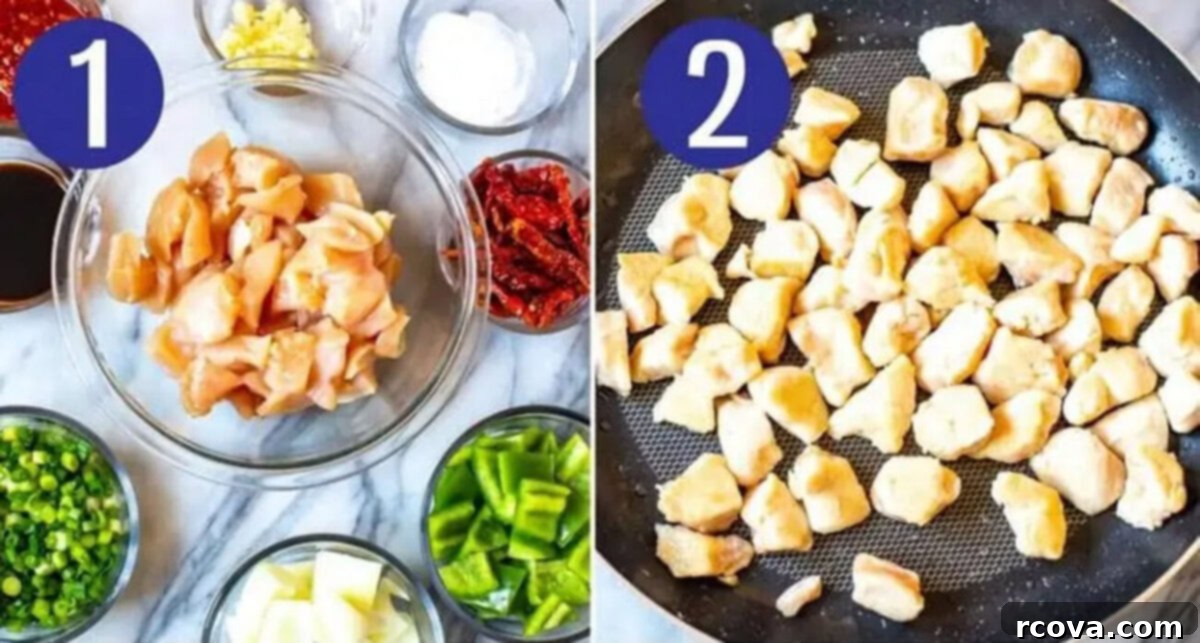
Step 1: Prepare and Season the Chicken for Optimal Tenderness.
Begin by cutting your boneless chicken breasts (or thighs) into bite-sized pieces. In a medium bowl, toss the diced chicken generously with cornstarch, baking soda, and salt. The cornstarch helps create a light, crispy crust, while the baking soda acts as a tenderizer, ensuring the chicken remains incredibly juicy. Let this mixture rest for about 5-10 minutes while you prepare the rest of your ingredients. During this time, whisk together all the stir-fry sauce ingredients in a separate bowl. Also, get your jasmine rice cooking in a rice cooker or a pot on the stovetop according to package directions, aiming for it to be ready around the same time as your chicken.
Step 2: Achieve a Perfect Golden-Brown Sear on Your Chicken.
Heat the canola oil in a large frying pan or wok over medium-high heat. The key here is to get the oil sufficiently hot to ensure a good sear without overcrowding the pan. Add the seasoned chicken pieces in a single layer, working in batches if necessary, to avoid steaming the chicken. Sauté the chicken for approximately 5 minutes, turning occasionally, until each piece is beautifully browned and develops a slightly crispy exterior. This browning contributes significantly to the overall flavor of the dish.
Step 3: Incorporate Fresh Vegetables for Flavor and Texture.
Once the chicken is browned, add the chopped yellow onion and green pepper to the same pan. Continue to cook for another 3-4 minutes, stirring frequently, until the vegetables begin to soften but still retain a slight crunch. You want them tender-crisp, not mushy, to add textural contrast to the dish. This quick stir-fry method helps lock in their fresh flavors and vibrant colors.
Step 4: Combine the Stir Fry Sauce to Create the Signature Flavor.
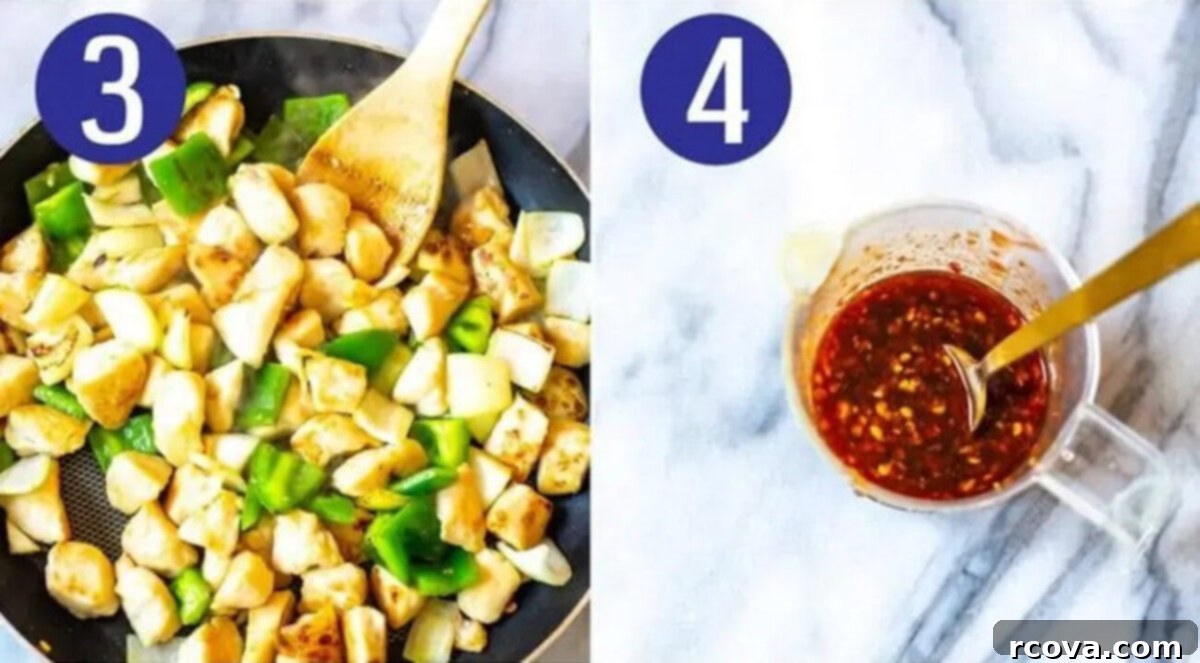
You’ve already prepared your delectable stir-fry sauce in Step 1. This sweet, spicy, and savory mixture of soy sauce, sweet chilli sauce, sambal oelek, and minced garlic is now ready to be added to the pan. Ensure all ingredients are well combined before pouring it over the chicken and vegetables.
Step 5: Toss Everything Together Until the Sauce Thickens to Perfection.
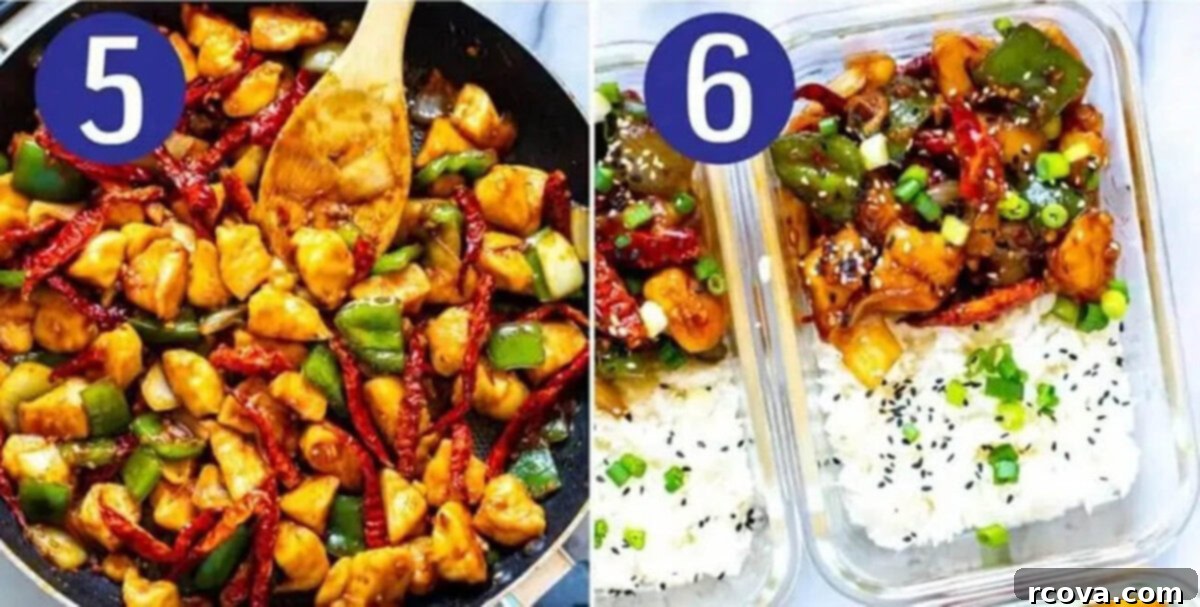
Pour the prepared stir-fry sauce over the cooked chicken and vegetables in the pan. Add the dried chilies at this stage for their aromatic heat. Toss everything together vigorously, ensuring all the chicken and vegetables are thoroughly coated in the rich, glossy sauce. Continue to cook for another 2 minutes or so, stirring constantly, until the sauce visibly thickens and clings beautifully to the ingredients. The cornstarch from the chicken marinade will also contribute to this thickening, creating a cohesive and luscious coating.
Step 6: Serve Hot and Savor Your Homemade Chilli Chicken!
Once the sauce has thickened to your liking, remove the pan from the heat immediately. Serve generous portions of the hot, fragrant Chilli Chicken over your freshly cooked jasmine rice. Garnish with plenty of fresh, sliced green onions for a burst of color and a final hint of fresh, mild oniony flavor. Now, all that’s left to do is gather your loved ones and enjoy this incredibly satisfying homemade meal!
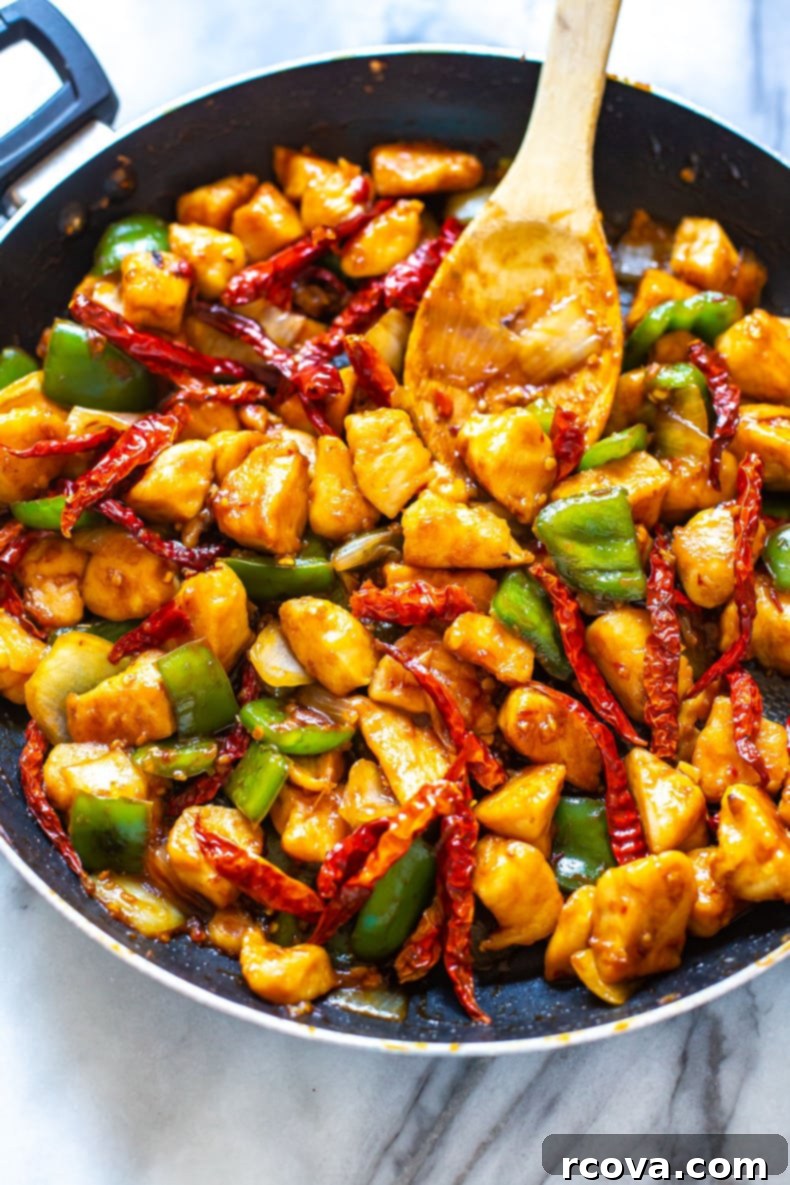
Pro Tips & Smart Tricks for Your Best Chilli Chicken Yet
Elevate your homemade spicy chilli chicken from good to absolutely amazing with these expert tips and tricks:
- Master Your Own Sauce: While store-bought sauces offer convenience, they often come laden with preservatives, artificial flavors, and excessive sugar or sodium. Making your own stir-fry sauce, as this recipe guides you, is incredibly simple and allows you full control over the ingredients and flavor profile. You’ll likely find that all the pantry staples needed are already in your kitchen, ensuring a fresher, more authentic, and healthier result.
- Embrace the Tenderizing Technique: The combination of cornstarch and baking soda isn’t just for crisping; it’s a fundamental Asian cooking technique known as “velveting.” Allowing the chicken to sit in this mixture for just 5-10 minutes before cooking works wonders. The baking soda raises the pH of the meat, preventing it from seizing up and becoming tough during high-heat cooking. The cornstarch creates a protective barrier, locking in moisture and ensuring the chicken pieces are exceptionally tender and succulent on the inside, while still achieving a delightful golden-brown crust on the outside.
- Prevent Overcooking the Chicken: Chicken breast, especially when diced, cooks very quickly. The goal is to cook it just until it’s browned on the exterior and cooked through internally, keeping it moist. Overcooking will lead to dry, rubbery chicken, which nobody wants in their delicious stir-fry. Cook until browned, then promptly add your vegetables, and finish with the sauce, allowing the chicken to cook minimally further.
- Customize Your Spice Level: One of the best parts about homemade cooking is tailoring dishes to your preference. If you have a low spice tolerance or are cooking for children, feel free to skip the dried chillis entirely. For a milder kick, use just a small amount of sambal oelek or omit it and rely solely on the sweet chilli sauce for a gentle warmth. If you love heat, feel free to add more dried chillies or extra sambal oelek to fire things up!
- Boost with More Veggies: This chilli chicken recipe is incredibly versatile and pairs well with a wide array of vegetables. Don’t hesitate to toss in some extra nutrients and textures! Consider adding vibrant broccoli florets, sweet corn kernels, crunchy water chestnuts, tender bok choy, snap peas, sliced carrots, or mushrooms. Add harder vegetables earlier in the cooking process and softer ones later to ensure they are all cooked to your desired tenderness.
Frequently Asked Questions About Homemade Chilli Chicken
This flavorful chilli chicken recipe is incredibly versatile and pairs wonderfully with a variety of side dishes. My personal favorite is serving it over a bed of fluffy jasmine rice, which perfectly soaks up the delicious sauce. However, you can certainly use whatever type of rice you have on hand, such as hearty brown rice for added fiber, or a lighter option like cauliflower fried rice for a low-carb meal. Beyond rice, consider other delightful alternatives like slippery rice noodles, savory hakka noodles, protein-rich quinoa, or even plain cauliflower rice. The dish itself is quite substantial and filling, so you might not need much else. But if you desire an extra touch of freshness and nutrients, a simple side of steamed broccoli or a light green salad would complement it beautifully.
Marinating the chicken in baking soda is a clever culinary technique known as “velveting,” commonly employed in Chinese cooking to achieve remarkably tender and moist meat. The process works by raising the pH level of the chicken, which helps break down some of its muscle fibers. This alkalinity prevents the protein from seizing up and becoming tough during high-heat cooking, ensuring the chicken stays incredibly succulent. Furthermore, when combined with cornstarch, the baking soda significantly enhances the browning process, leading to a crisper, more appetizing exterior without needing a heavy flour coating. So, a quick baking soda soak ensures you get chicken pieces that are not only tender on the inside but also boast a beautiful, crisp coating, making for a truly superior texture.
This homemade chilli chicken recipe is designed to have a noticeable kick, delivering a delightful warmth that complements the sweet and savory notes. However, its spiciness is entirely customizable to your preference! If you’re not particularly fond of intensely spicy food, you can easily moderate the heat. The simplest way to reduce the spice is to skip the dried chillies altogether, as they contribute a significant portion of the heat and aroma. Additionally, you can reduce the amount of Sambal Oelek (chili sauce) you add to the stir-fry sauce. Start with just a teaspoon, or even half a teaspoon, and taste as you go. For those who crave more heat, feel free to increase the quantity of both dried chillies and Sambal Oelek to your heart’s content!
For an authentic touch to your chilli chicken, you can use various types of dried chillies, which primarily add a warm, smoky heat and a wonderful aroma. Common dried red chillies found in most grocery stores’ international or spice aisles will work well. For a more specific flavor profile, consider seeking out Chinese dried red chilies (often called “facing heaven” chilies) from Asian markets or purchase them online. If you can’t find them, or prefer a less intense heat, simply use a pinch of red pepper flakes instead. And remember, if you’re not a fan of spice, you can always choose to leave them out altogether – the dish will still be incredibly flavorful!
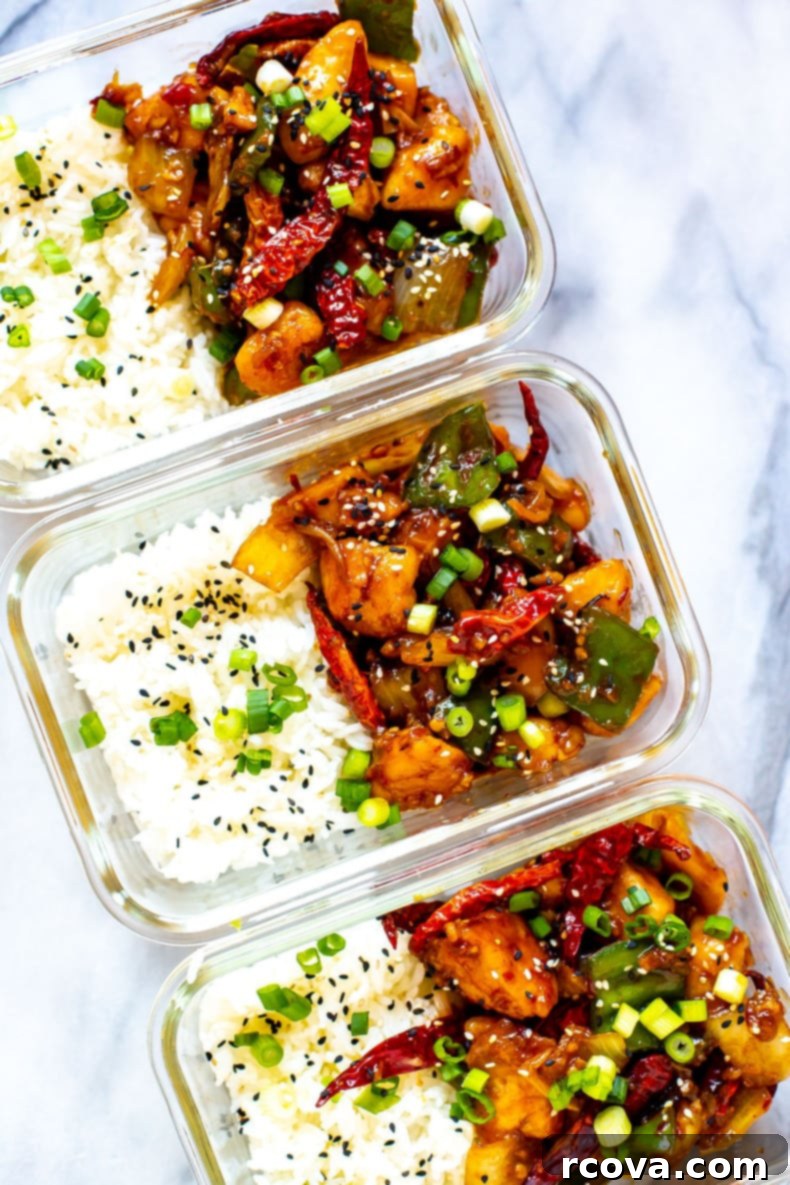
Storing & Reheating Your Delicious Chilli Chicken Leftovers
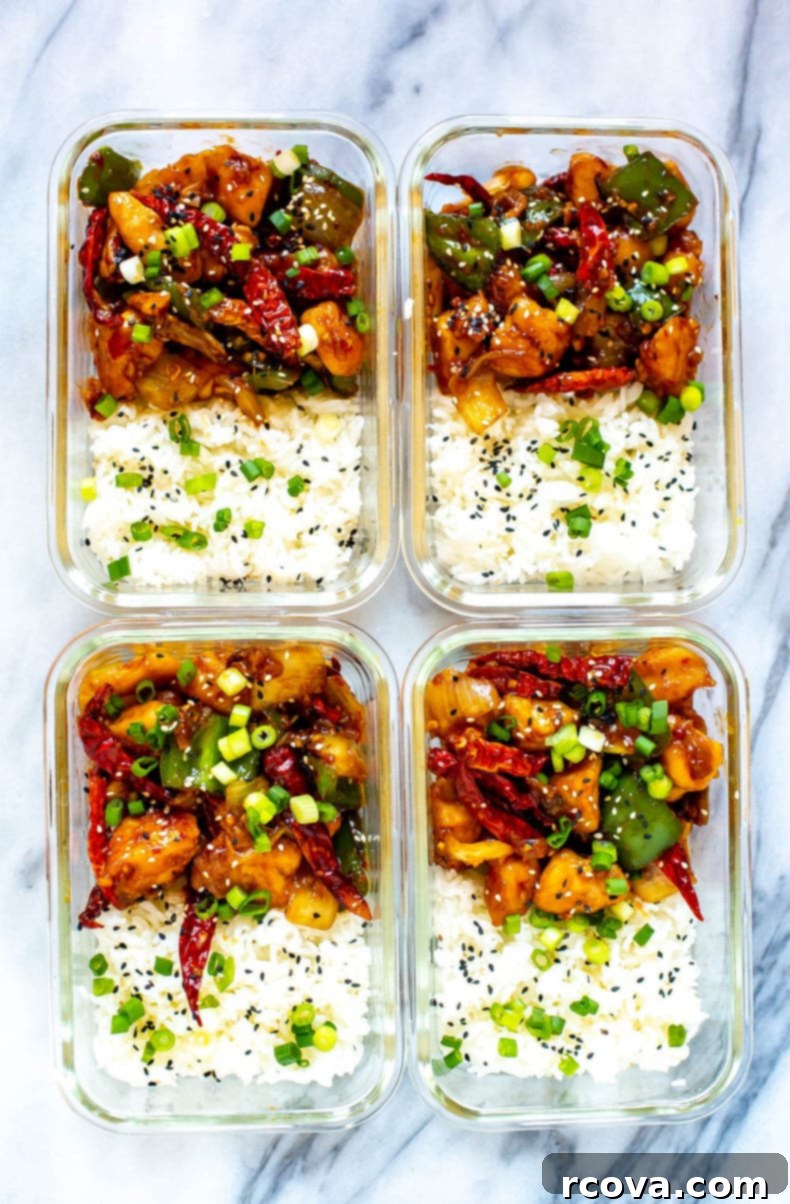
This chilli chicken recipe is not only fantastic for fresh enjoyment but also proves to be an excellent candidate for meal prep! Its flavors deepen beautifully upon sitting, making leftovers just as delightful as the freshly cooked meal. You can store any remaining portions in an airtight container in the refrigerator for up to 5 days, ensuring you have delicious, ready-to-eat meals throughout your week.
When it comes to reheating, you have a couple of options. While the microwave is certainly convenient for a quick warm-up (a couple of minutes on high usually does the trick), be aware that the chicken might lose some of its crispy edges achieved during the initial pan-frying. For the best possible reheating experience that preserves most of the original texture and flavor, I highly recommend warming the chilli chicken in a pan on the stovetop with a tiny bit of oil over medium heat. This method helps to re-crisp the chicken and vegetables slightly, bringing back that fresh-cooked feel. Stir occasionally until thoroughly heated through.
If you’ve fallen in love with the homemade stir fry sauce (and we’re sure you will!), consider making a larger batch next time. This extra sauce can be stored separately in a sealed mason jar in the refrigerator for up to two weeks. It’s a fantastic secret weapon to have on hand, ready to quickly spice up any leftover meat, sautéed vegetables, or even simple scrambled eggs for a burst of flavor!
Freezing This Chilli Chicken Recipe for Future Meals
Yes, this homemade chilli chicken recipe is remarkably freezer-friendly, making it a perfect candidate for convenient future meals! Proper freezing techniques will ensure you can enjoy this delicious dish even on your busiest days.
If you intend for this to be a dedicated freezer meal, a crucial tip is to slightly undercook the vegetables during the initial stir-fry. This is because vegetables tend to soften further when thawed and reheated, and undercooking them initially helps them retain a pleasant texture rather than becoming mushy. For best results, it’s advisable to freeze the chicken and rice separately. Once cooled completely, transfer the chicken and veggies to an airtight freezer-safe container or heavy-duty freezer bag. The cooked chicken (with vegetables) will maintain its quality in the freezer for up to 3 months. When you’re ready to enjoy, simply thaw it in the refrigerator overnight before reheating using your preferred method (stovetop for best texture, or microwave for speed).
Alternatively, you can also freeze just the stir-fry sauce. This is a fantastic way to prepare components ahead of time! Pour the cooled sauce into an airtight container or a freezer-safe bag, and it can be frozen for up to 3 months. To use, let the sauce thaw completely in the refrigerator, then simply warm it through and toss it with freshly cooked or reheated chicken and vegetables for an instant meal.
More Irresistible Stir Fry Recipes to Try
If you loved this chilli chicken, you’ll surely enjoy exploring more delicious and easy stir-fry recipes to add to your weeknight rotation!
-
Easy Chicken Ramen Noodle Stir Fry {Ready in 30 Minutes!}
-
Easy Chicken Chow Mein Recipe
-
Easy Mandarin Chicken Recipe
Essential Meal Prep Tools for Efficiency
- Grab some glass meal prep bowls if you plan on transforming this delicious recipe into convenient weekly lunches. They are excellent for storing and reheating.
- I source all my high-quality, free-range chicken from Butcher Box. Their convenient delivery service ensures I always have premium meats on hand, delivered frozen right to my door.
- For freezing this recipe, particularly if you’re preparing larger batches, utilize durable glass microwave-safe bowls, which are perfect for safe storage and easy reheating directly from the freezer for up to 3 months.
- **Discover my complete curated list of essential meal prep tools and kitchen gadgets here!**
Restaurant-Style Chilli Chicken
Print
Pin
Rate
SEND ME MY PLAN
Ingredients
- 1 lb chicken breasts diced
- 1 tbsp cornstarch
- 1 tsp baking soda
- 1/2 tsp salt
- 1 tbsp canola oil
- 1 yellow onion chopped into chunks
- 1 green pepper chopped into chunks
- 4 green onions, sliced
- 1/2 cup dried chillis (optional)
Stir fry sauce
- 2 tbsp soy sauce or tamari if gluten-free
- 2 tbsp sweet chili sauce
- 1-2 tbsp sambal oelek (chili sauce) depends how spicy you like it
- 4 cloves garlic, minced
Jasmine rice
- 1 1/4 cups water
- 1 cup jasmine rice
- 1 tsp butter
- 1 pinch salt
Instructions
-
Toss chicken with cornstarch, baking soda and salt, setting aside for 5-10 minutes.
-
Meanwhile, combine sauce ingredients in a bowl, and cook rice in a rice cooker or on the stovetop.
-
Add canola oil to a large frying pan or wok over med-high heat. Saute chicken for 5 minutes or so until browned, then add onion and green pepper, cooking another 3-4 minutes until softened.
-
Toss chicken mixture with stir fry sauce and dried chilies, cooking for another 2 minutes or so until sauce thickens. Remove from heat.
-
Serve chicken overtop of cooked rice and garnish with green onions. Enjoy!
Video
Notes
If you’re not a fan of spice, leave out the dried chillis.
Serve with cauliflower rice for a low-carb option.
Store any leftovers in the fridge for up to 5 days. Reheat in the microwave or in a pan on the stovetop.
If you plan on freezing this stir fry, undercook the veggies so they don’t get mushy.
Freeze the chicken and veggies for up to 3 months. Defrost in the fridge overnight then reheat as normal.
