Spooktacular Funfetti Halloween Cookies: Easy & Festive Treats for a Ghoulishly Good Time
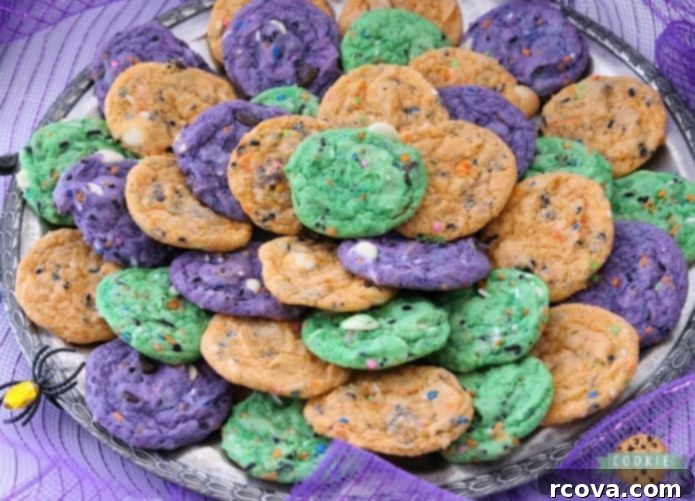
Prepare for a hauntingly delightful baking adventure with these **Funfetti Halloween Cookies**! These incredibly soft, vibrant, and utterly delicious treats are guaranteed to be the star of any spooky celebration. Each cookie is generously packed with festive Halloween sprinkles and gets an irresistible boost of moist texture and enhanced flavor from a special ingredient: instant pudding mix. They’re more than just a cookie; they’re a playful culinary creation that’s as visually striking as it is wonderfully tasty.
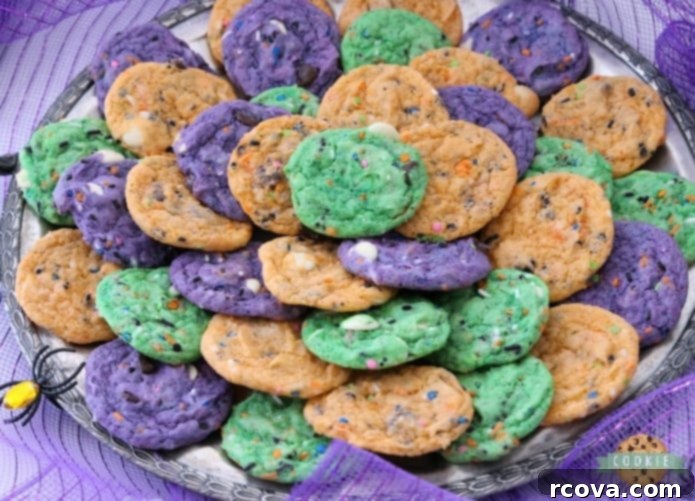
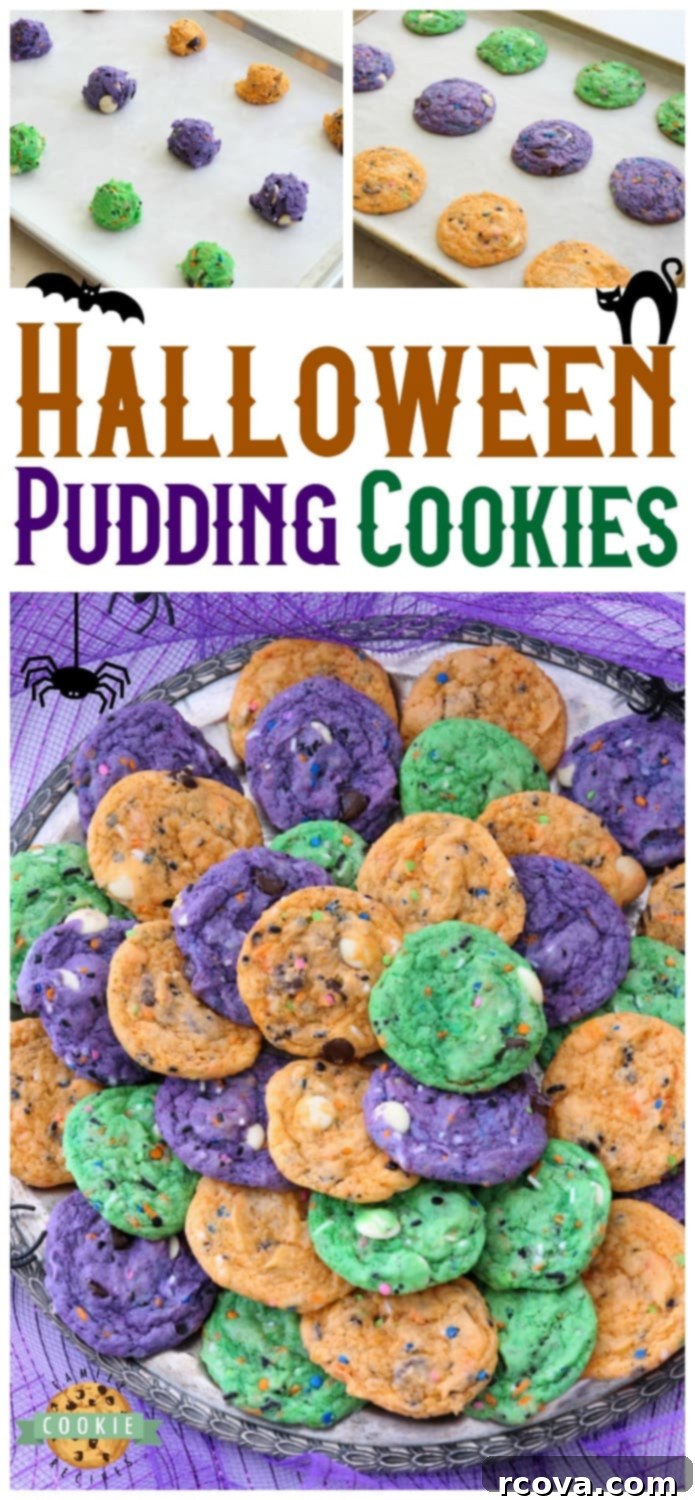
These Funfetti Halloween Cookies are the epitome of soft, chewy, and perfectly festive for the spooky season! The magic of the pudding mix not only blesses them with an incredible tender texture but also amplifies their delightful flavor, making every bite a dreamy experience. Meanwhile, a shower of colorful sprinkles adds a playful pop and crunch that’s undeniably Halloween. You have the creative freedom to keep things elegantly simple with a single dough color, or you can unleash your inner artist by dividing the dough into three sections for a bold, multicolored, and utterly mesmerizing look using classic Halloween hues like orange, green, and purple. Whichever route you choose, these funfetti cookies are destined to be an absolute smash hit at all your Halloween parties, school events, and family get-togethers!
Baking these cookies is a breeze, making them a fantastic activity for families with kids looking for a fun holiday project. Imagine the joy of seeing those vibrant colors emerge from the oven, ready to be devoured. Get ready to impress your guests and satisfy those sweet cravings with a batch of these unforgettable Funfetti Halloween Cookies!
Key Ingredients for Unforgettable Funfetti Halloween Cookies
Crafting the perfect Funfetti Halloween cookie relies on a thoughtful blend of ingredients, each playing a crucial role in achieving that sought-after soft, chewy texture and vibrant, festive appeal. Here’s a detailed look at what you’ll need to create these spooktacular treats:
- Butter: You’ll need ½ cup of softened unsalted butter. Softened butter is essential for creaming properly with the sugar, creating a light, airy base for your cookie dough. It contributes significantly to the rich flavor and tender crumb of the finished cookies. Make sure it’s at room temperature for the best results – not melted, but easily yielding to a gentle press.
- Granulated Sugar: 1 cup of granulated sugar is used to sweeten the cookies and create that delightful crisp edge while keeping the center wonderfully soft. Sugar also plays a role in moisture retention, preventing the cookies from drying out too quickly.
- Egg: A single large egg acts as a vital binding agent, holding all the ingredients together and adding richness and moisture to the dough. It helps create a cohesive structure and contributes to the cookies’ chewiness.
- Vanilla Yogurt: ½ cup of vanilla yogurt is a secret weapon for moisture and tenderness. The yogurt’s slight acidity also interacts with the baking soda, aiding in leavening, and its vanilla flavor complements the pudding mix beautifully, enhancing the overall taste profile of these Halloween funfetti cookies.
- Instant Pudding Mix: This is where the magic happens! One 3.4-oz box of instant vanilla or white chocolate pudding mix is crucial for achieving that incredibly soft, tender, and melt-in-your-mouth texture. It also intensifies the flavor, making the cookies taste richer and more decadent. Don’t use cooked pudding mix; instant is key for this recipe.
- Milk: Just 2 tablespoons of milk are added to adjust the dough consistency, ensuring it’s perfectly pliable and easy to work with. This small amount helps achieve the ideal texture without making the dough too sticky or too dry.
- All-Purpose Flour: 2 cups of all-purpose flour provide the primary structure for these cookies. It’s important to measure flour correctly – spoon and level it into your measuring cup rather than scooping directly from the bag, which can lead to too much flour and a dry, crumbly cookie.
- Baking Soda: ½ teaspoon of baking soda is the leavening agent responsible for helping the cookies puff up beautifully as they bake, resulting in a light and airy texture. It reacts with the acidic components (like yogurt) in the dough to create carbon dioxide, which gives the cookies their rise.
- Salt: A mere ½ teaspoon of salt is vital for balancing the sweetness and enhancing all the other flavors in the dough. It brings out the best in the chocolate and vanilla notes, preventing the cookies from tasting overly sweet.
- Festive Flair: This is what makes them truly “Halloween Funfetti”!
- Chocolate Chips: 2 cups of combined semi-sweet and white chocolate chips add delightful bursts of rich, creamy flavor and a varied texture to each bite. You can also experiment with milk chocolate or even spooky candy melts.
- Halloween Sprinkles: ½ cup of Halloween-themed sprinkles provides that iconic funfetti visual appeal, adding vibrant color contrast and a subtle crunch. Look for mixes with bats, ghosts, pumpkins, or classic orange, black, and purple jimmies.
- Food Coloring: Orange, green, and purple food coloring allow you to customize the dough’s appearance, reflecting the classic and iconic colors of Halloween. Gel food coloring is recommended as it provides vibrant hues without significantly altering the dough’s consistency.
Creative Ways to Serve Funfetti Halloween Cookies at Your Spooky Soiree
These vibrant Funfetti Halloween Cookies are a treat for the eyes as much as they are for the taste buds, making their presentation just as important as their flavor. Here are some of the best ways to serve them at your next Halloween bash, ensuring they’re a memorable part of the celebration:
- Eye-Catching Presentation: Showcase the cookies’ colorful and festive look by arranging them artfully on a decorative platter or a multi-tiered dessert stand. A black or orange serving tray can make the vibrant sprinkles pop even more! For an extra spooky touch, place them among some faux spiderwebs or miniature plastic spiders.
- Themed Dessert Spread: Create an impressive Halloween dessert table by arranging these funfetti cookies alongside other complementary spooky treats. Think classic Halloween favorites like pumpkin-shaped rice krispie treats, delightful homemade candy corn, ghost-shaped brownies, or even candy apples. The variety will entice guests and create a visually rich spread.
- Spooky Tableware: Enhance the overall spooky vibe of your party by using small plates, napkins, and cups adorned with Halloween designs such as ghosts, bats, pumpkins, or witches. These small details can make a big difference in setting the festive mood.
- Perfect Pairings: For a truly satisfying combo, serve these delicious cookies with classic beverages. A tall glass of cold milk is always a hit, especially with younger guests. For adults and cooler evenings, pair them with steaming hot cocoa, a specialty Halloween-themed coffee, or even a spiced apple cider.
- Individual Party Favors: If you’re hosting a party for children, or even adults, consider packaging the cookies individually. Place one or two cooled cookies in clear cellophane bags, then tie them with festive Halloween-themed ribbons or attach small “trick or treat” tags. This not only keeps them fresh but also transforms them into delightful party favors that guests can take home to enjoy later.
- Cookie “Graveyard” Display: Get creative by using crushed Oreo cookies as “dirt” on a platter. Gently push some cookies halfway into the “dirt” and add small plastic gravestone picks or gummy worms for a fun, edible graveyard display.
- Serving Warm: While delicious at room temperature, a slightly warmed cookie can be extra comforting. If you have a way to keep them gently warm, or if guests can pop them into a microwave for a few seconds, it can elevate the experience.
Storage Tips: Keeping Your Funfetti Halloween Cookies Fresh and Delicious
To ensure your Funfetti Halloween Cookies remain wonderfully soft, chewy, and flavorful long after they’re baked, proper storage is key. Whether you plan to enjoy them over a few days or save them for a future spooky craving, these tips will help:
- Room Temperature Storage (5-7 Days): Once your cookies have completely cooled, transfer them to an airtight container. Store this container at room temperature, away from direct sunlight or heat. This method will keep your cookies soft and chewy for up to 5-7 days. To actively combat dryness and help maintain their moisture, a time-honored trick is to place a fresh slice of plain bread (like white bread) inside the container with the cookies. The cookies will absorb moisture from the bread, keeping them perfectly tender. Just replace the bread slice every day or two as it dries out.
- Freezing Baked Cookies (Up to 3 Months): If you’ve baked a large batch or want to enjoy these festive treats much later, freezing is an excellent option.
- First, ensure the cookies are entirely cooled. Any residual warmth can lead to condensation and ice crystals, affecting texture.
- Arrange the cooled cookies in a single layer on a baking sheet. Place the baking sheet in the freezer for about 1-2 hours, or until the cookies are firm. This “flash freezing” prevents them from sticking together when stored in a bag.
- Once firm, transfer the frozen cookies to a heavy-duty, sealable freezer bag or an airtight freezer-safe container. Press out as much air as possible before sealing to prevent freezer burn.
- Label the bag with the date. Frozen Funfetti Halloween Cookies can be stored for up to 3 months.
- To serve, simply remove the desired number of cookies from the freezer and let them thaw at room temperature for about 30-60 minutes. For a “freshly baked” experience, you can gently warm them in a microwave for 10-15 seconds or in a preheated oven (around 275°F/135°C) for 5-7 minutes.
- Freezing Unbaked Dough (Up to 3 Months): As mentioned in our FAQs, you can also prepare the dough in advance and freeze it.
- Scoop rounded portions of the unbaked dough onto a parchment-lined baking sheet.
- Flash freeze until firm (about 1-2 hours).
- Transfer the frozen dough balls to a freezer-safe bag or container.
- When ready to bake, place frozen dough balls on a baking sheet and bake as directed, adding a few extra minutes to the baking time if necessary.
Ultimate Funfetti Halloween Cookie Recipe
Print
Pin
Rate
Ingredients
- ½ cup butter softened
- 1 cup granulated sugar
- 1 egg
- ½ cup vanilla yogurt
- 3.4 oz box vanilla or white chocolate instant pudding mix
- 2 TBSP milk
- 2 cups flour
- ½ tsp baking soda
- ½ tsp salt
- 2 cups semi sweet & white chocolate chips combined
- ½ cup Halloween themed sprinkles
- orange, green, and purple food coloring
Instructions
-
Preheat your oven to 375 degrees F (190°C). Prepare your baking sheets by lining them with parchment paper. This prevents sticking and ensures even baking.
-
In a small bowl, whisk together the dry ingredients: flour, baking soda, and salt. Set this mixture aside for later.
-
Using an electric mixer, in a separate large bowl, cream together the softened butter and granulated sugar until the mixture is light and fluffy. Then, add the egg, vanilla yogurt, and the dry instant pudding mix. Continue to mix until the combined batter is smooth and well-incorporated.
-
Gradually pour the reserved dry ingredients into the butter mixture bowl. Mix slowly on low speed until everything is just incorporated, being careful not to overmix the dough.
-
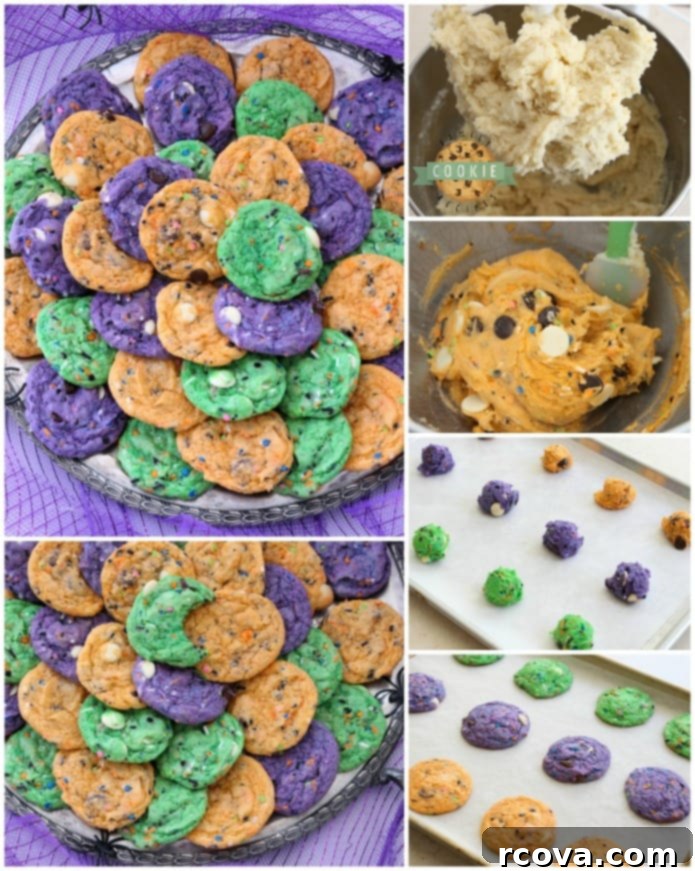
Now for the fun part: Divide the dough into three equal sections and place each section into a separate bowl. To each bowl, add a few drops of your chosen food coloring (orange, green, or purple), along with a few tablespoons of Halloween sprinkles and about ⅔ cups of the chocolate chips. Gently fold and stir each section until the color is even and the sprinkles and chocolate chips are well distributed throughout the dough. For a single-color dough, add all coloring, sprinkles, and chips to the main bowl.
-
Scoop rounded tablespoonfuls of the colorful cookie dough onto the parchment-lined baking sheets, leaving about 2 inches between each cookie. Bake in the preheated oven for approximately 10 minutes, or until the edges are lightly golden and the centers are still soft. Let the Funfetti Halloween Cookies cool for several minutes on the cookie sheet before carefully transferring them to a wire cooling rack to cool completely. Serve and enjoy your festive, homemade treats!
Video Tutorial
Recipe Notes & Tips
For longer storage, flash freeze the baked cookies on a baking sheet, then transfer them to an airtight container or freezer bag and freeze for up to 3 months. Thaw at room temperature before serving. Unbaked dough can also be frozen for up to 3 months.
Nutrition Information
Frequently Asked Questions About Funfetti Halloween Cookies
What substitutes can be used for instant pudding mix in Funfetti cookies?
The instant pudding mix is a key ingredient for the unique soft and tender texture of these Funfetti Halloween cookies. If you need a substitute, you have a few options:
- Custard Powder: This can often be used as a direct substitute for instant pudding mix, offering a similar thickening and tenderizing effect. Ensure it’s an instant variety.
- Cornstarch and Vanilla Extract: For a homemade alternative, you can try combining 2 tablespoons of cornstarch with an extra ½ teaspoon of vanilla extract (in addition to any vanilla already in the recipe). The cornstarch will help tenderize, while the extra vanilla will boost flavor. This may slightly alter the texture compared to pudding mix.
- Greek Yogurt (additional): While the recipe already includes vanilla yogurt, adding a touch more (perhaps an extra ¼ cup) might increase moisture and tenderness. However, be mindful that adding too much wet ingredient can change the dough’s consistency, and it won’t replicate the specific tenderizing quality of pudding mix. It might also introduce a slight tang. Always adjust flour slightly if the dough becomes too sticky.
Can I prepare Funfetti Halloween Cookie dough ahead of time?
Absolutely! Preparing the dough in advance is a fantastic way to streamline your Halloween baking.
- Refrigeration: You can prepare the cookie dough up to 3 days in advance. Once mixed, wrap the dough tightly in plastic wrap or place it in an airtight container. Store it in the refrigerator. Chilling the dough also helps prevent spreading during baking, resulting in thicker, chewier cookies.
- Freezing: For longer storage, the cookie dough can be frozen for up to 3 months. Form the dough into balls or log shapes, wrap them tightly, and place them in a freezer-safe bag or container. When you’re ready to bake, thaw the dough overnight in the refrigerator. You might need to let it sit at room temperature for a few minutes before scooping or slicing if it’s too firm.
What’s the best way to incorporate food coloring into the cookie dough for vibrant results?
Achieving those bold, vibrant Halloween colors in your Funfetti cookies is easy with a few simple techniques:
- Divide the Dough: As the recipe suggests, separate your cookie dough into distinct portions (e.g., three for orange, green, and purple) *before* adding the food coloring. This allows for individual coloring of each portion.
- Use Gel Food Coloring: For the most intense and vibrant hues without significantly altering the dough’s consistency, opt for gel food coloring over liquid food coloring. Gel colors are highly concentrated, meaning you’ll need only a few drops to achieve bright, rich colors.
- Mix Gently but Thoroughly: Add a few drops of your chosen gel food coloring to each dough portion. Mix gently with a spoon or your hands (wearing gloves can prevent staining) until the color is evenly distributed. Avoid overmixing, as this can develop the gluten in the flour too much, leading to tougher cookies.
- Start Small, Add More: Begin with a small amount of food coloring and gradually add more until you reach your desired shade. It’s easier to deepen a color than to lighten it.
How can I achieve an even distribution of sprinkles throughout the Funfetti cookies without them melting or bleeding color?
Evenly distributed and vibrant sprinkles are key to the “funfetti” appeal. Here’s how to ensure your Halloween sprinkles look their best:
- Add Sprinkles Last: Always add the sprinkles (and chocolate chips) as the final additions to your colored dough portions. This minimizes the amount of time they are exposed to the moisture of the dough, reducing the risk of bleeding.
- Fold Gently: After adding the sprinkles, fold them into the dough gently and quickly with a spatula. Avoid vigorous stirring or overmixing, which can cause the colors to bleed and the sprinkles to break apart. Just enough to distribute them.
- Chill the Dough: Refrigerating the dough for at least 30 minutes (or even longer, as mentioned for make-ahead dough) before baking is highly recommended. Chilled dough is firmer, which helps the sprinkles stay in place and prevents them from melting and bleeding into the dough as quickly in the hot oven. It also helps the cookies maintain their shape better.
- Use Quality Sprinkles: Some sprinkles are more prone to bleeding than others. High-quality sprinkles designed for baking tend to hold their color better. Jimmie-style sprinkles or nonpareils are usually good choices for funfetti cookies.
What are some common issues and troubleshooting tips for baking Funfetti Halloween Cookies?
Even experienced bakers sometimes encounter hiccups. Here are some common issues and how to troubleshoot them:
- Cookies Spreading Too Much:
- Ensure your butter wasn’t too soft or melted.
- Chill the dough for at least 30 minutes (or longer) before baking. This helps solidify the fat and prevents excessive spreading.
- Double-check your flour measurement; too little flour can lead to flat cookies.
- Make sure your oven temperature is accurate. A too-low oven can cause cookies to spread before setting.
- Cookies are Dry/Crumbly:
- You might have used too much flour. Always spoon and level your flour measurements.
- Overmixing the dough can develop too much gluten, resulting in a tougher, drier cookie. Mix until just combined.
- Overbaking is a common culprit. Cookies will continue to cook slightly on the hot baking sheet even after coming out of the oven. Remove them when the edges are lightly golden, and the centers still look a bit soft.
- Sprinkles Bleeding Color:
- As mentioned above, use gel food coloring and add sprinkles last.
- Chill the dough well before baking.
- Ensure you’re using high-quality, bake-stable sprinkles.
- Cookies Not Colorful Enough:
- Use gel food coloring for concentrated, vibrant colors.
- Don’t be afraid to add a few more drops of coloring until you achieve the desired intensity, especially when dividing the dough.
Explore More Spooky & Sweet Halloween Treats!
If you’re looking to expand your repertoire of Halloween goodies beyond these delightful Funfetti cookies, we’ve got you covered! Discover more festive and easy-to-make recipes that are perfect for parties, trick-or-treaters, or simply enjoying the spooky season with your loved ones. Each of these treats promises a unique flavor and a fun Halloween twist:
- These fun and festive No-Bake Chewy Caramel Cookies are loaded with cornflakes, rice krispies, coconut, and gooey caramels. Quick to make and full of rich caramel flavor, they’re the perfect sweet treat for Halloween!
- Halloween Cookie Cake is a soft, chewy chocolate chip M&M cookie cake, topped with festive candies and candy eyeballs. Fun, colorful, and full of flavor, it’s the perfect treat for Halloween celebrations!
- Make this Easy Halloween Snack Mix for a sweet & salty treat perfect for parties! You’ll need pretzels, chocolate & Chex cereal for this easy festive snack mix recipe!
- Halloween Brownie Cookies combine all the fudgy, chocolatey goodness of brownies into a soft, chewy cookie. Topped with decadent chocolate icing, they’re a festive treat every chocolate lover will adore!
- For a quick, easy, and festive treat look no further than these Halloween Cake Mix Sprinkle Cookies. Made with cake mix, vanilla frosting, and colorful sprinkles, they’re the perfect simple treat for Halloween!
- Halloween Peanut Butter Cookie Pizza starts with a chewy peanut butter cookie crust, then gets loaded with marshmallows and Reese’s Pieces. Finished with drizzles of chocolate, caramel, and orange icing, it’s a fun and festive treat for spooky celebrations!
In conclusion, these **Funfetti Halloween Cookies** are truly a celebration in every bite! Their irresistible combination of soft, chewy texture, vibrant colors from festive sprinkles, and enhanced flavor courtesy of instant pudding mix makes them a standout treat. They are not only incredibly playful and tasty but also remarkably easy to make, embodying the very spirit of Halloween fun. Whether you’re whipping up a batch for a lively party, a cozy family gathering, or just to enjoy the magic of the season, these cookies are guaranteed to bring smiles and satisfy every sweet tooth. Get ready to enchant your taste buds and brighten your Halloween with these spooktacularly delicious cookies!
