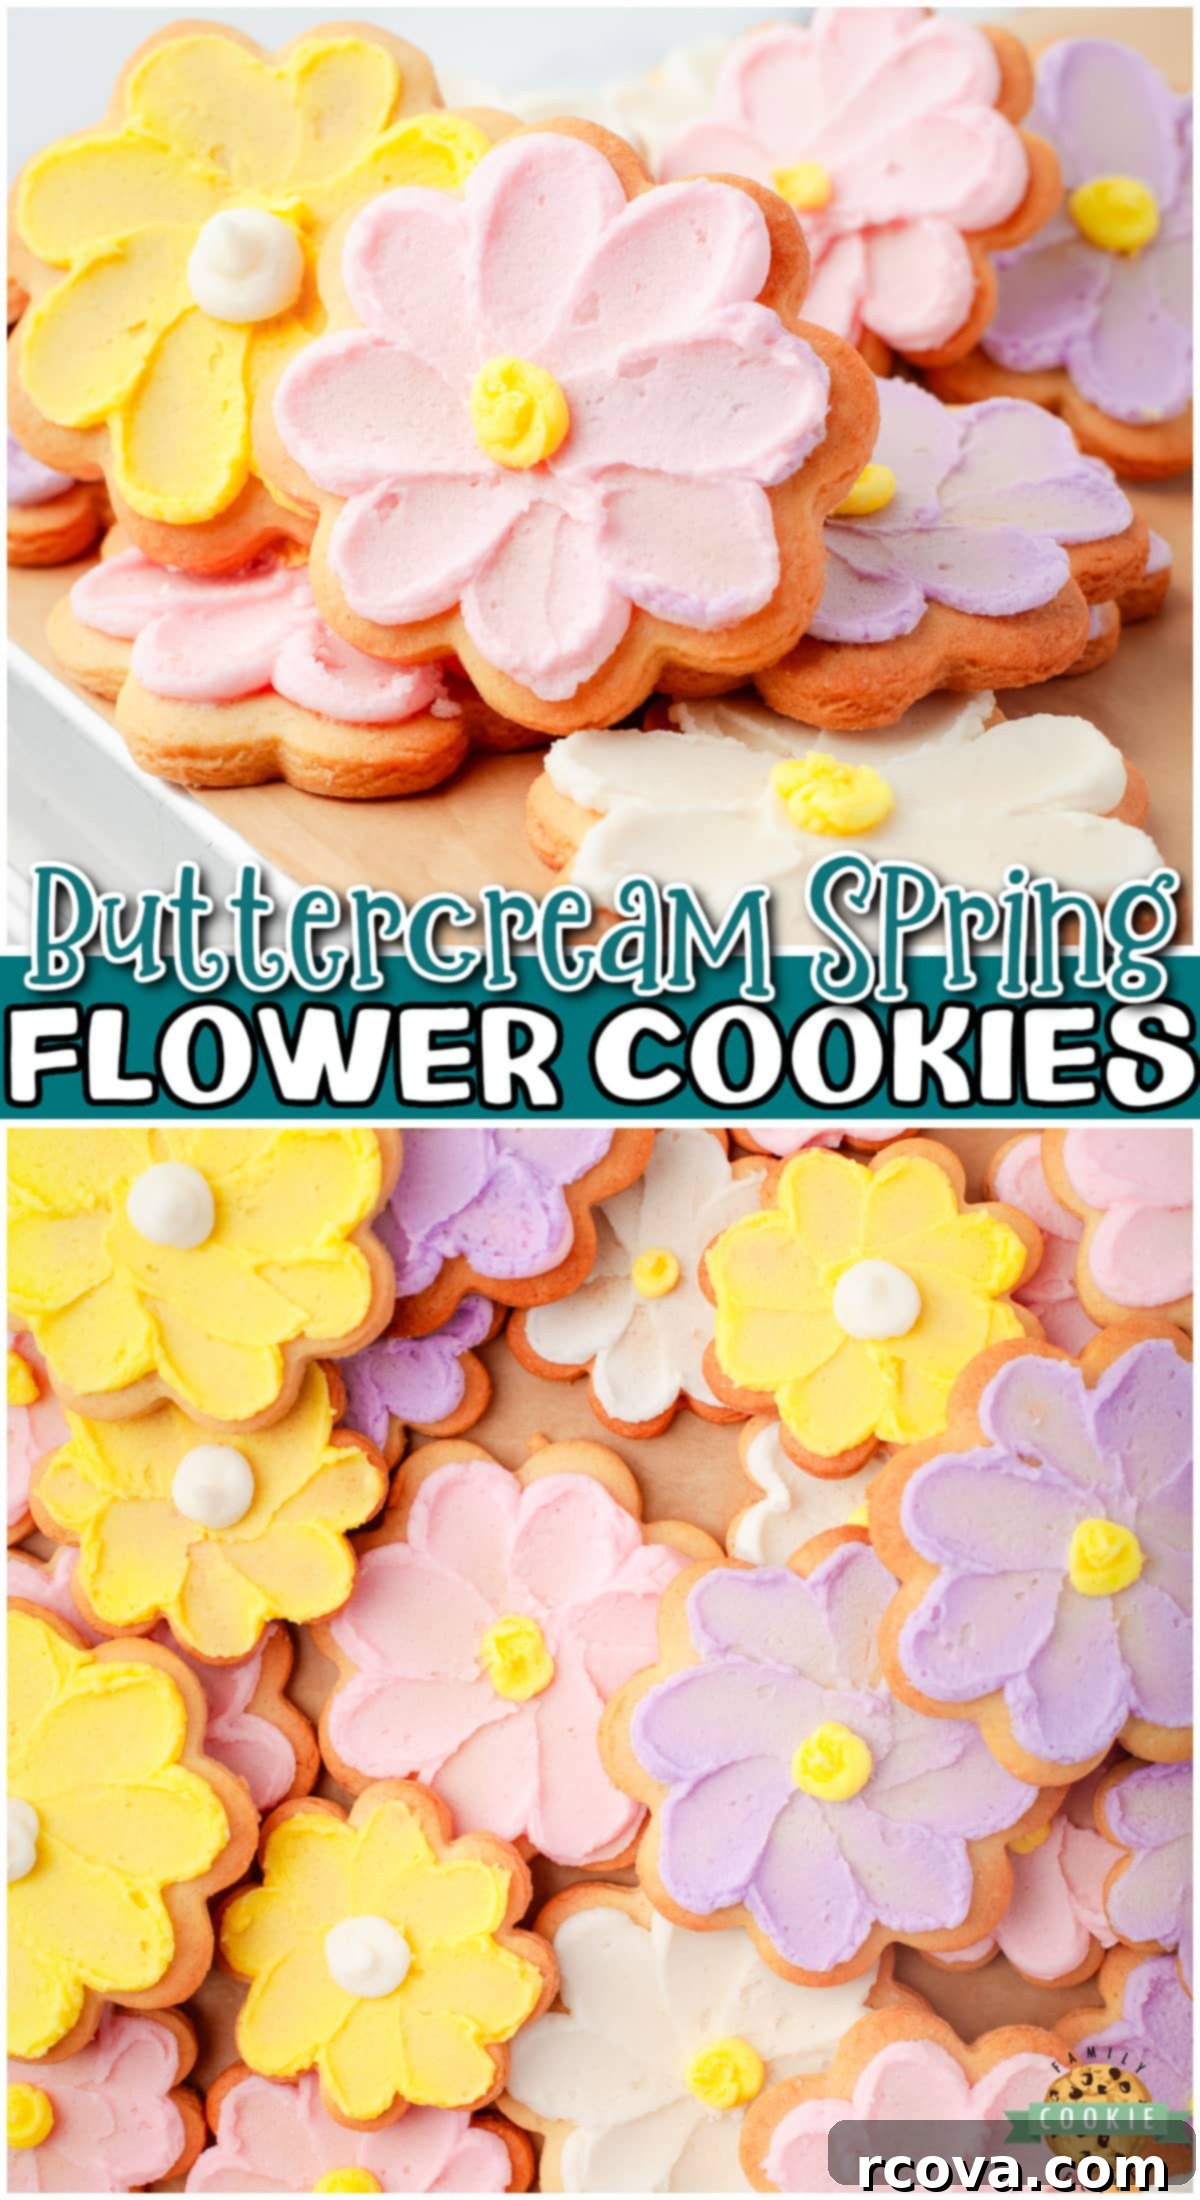
Buttercream Flower Cookies: Your Ultimate Guide to Baking & Decorating Beautiful Frosted Treats
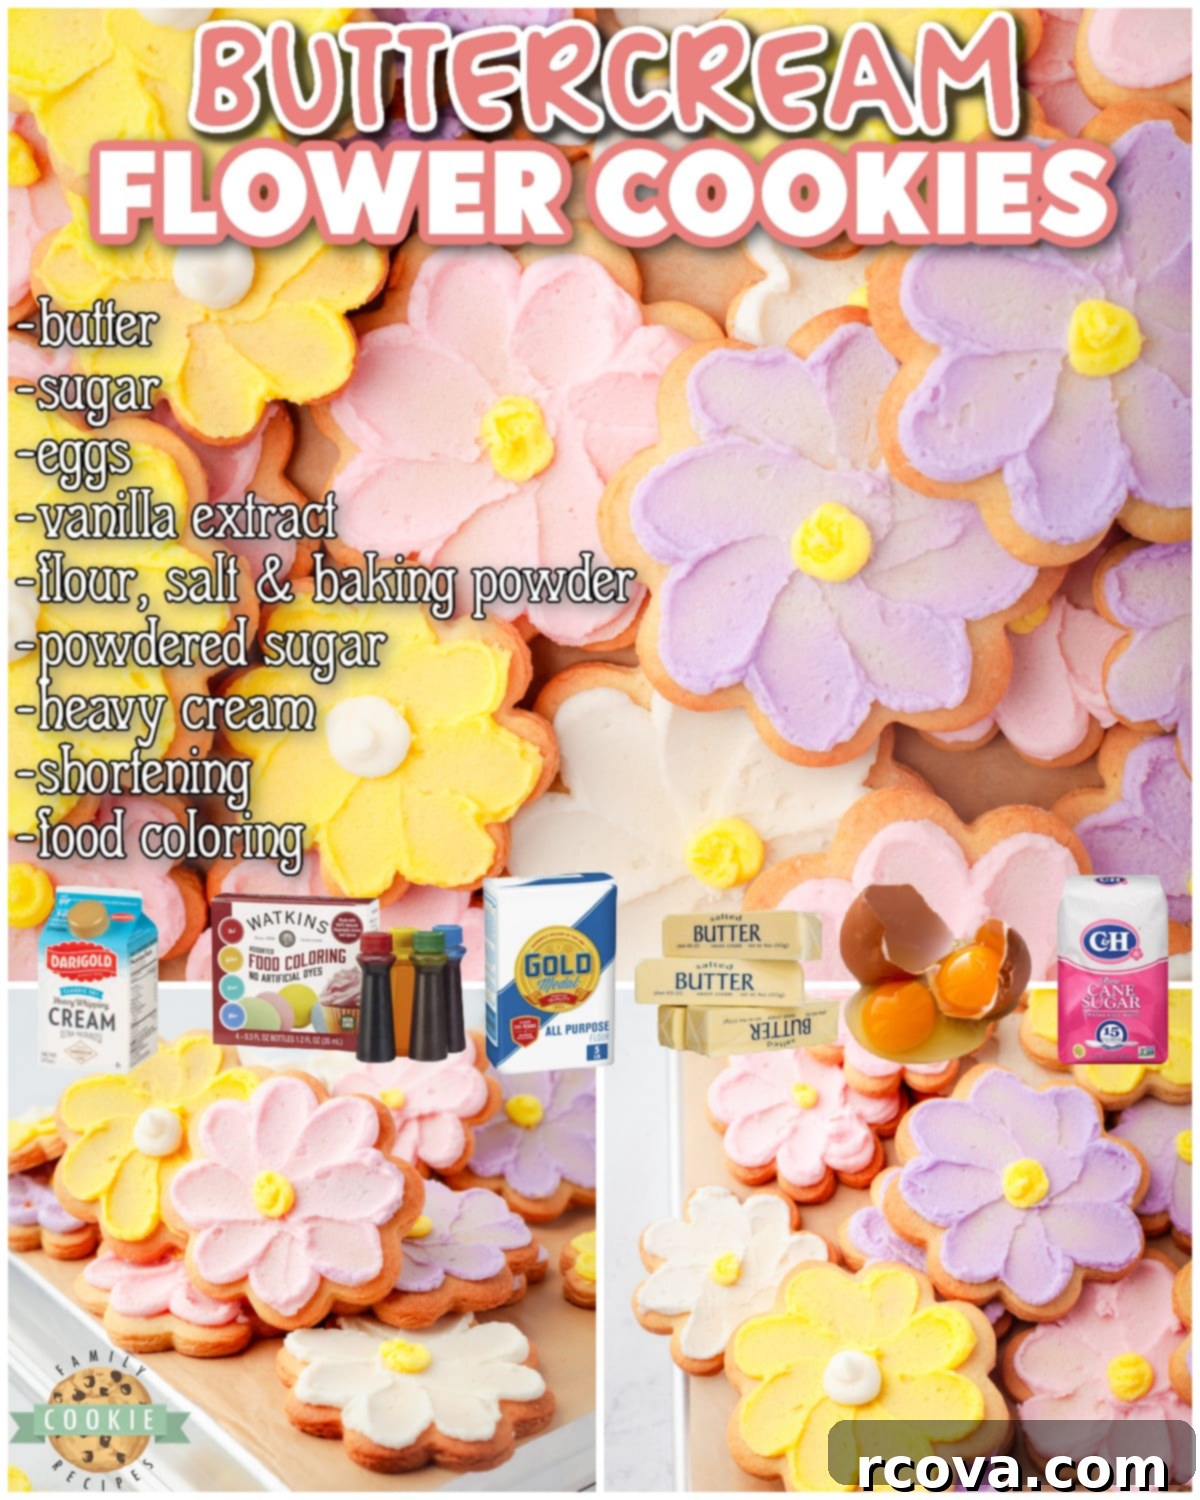
Buttercream Flower Cookies are a delightful fusion of taste and artistry, combining a soft, tender cookie base with an exquisite, visually stunning buttercream frosting. These charming treats are not only perfect for spring celebrations and festive gatherings but also ideal for adding a touch of elegance and joy to any occasion. With a straightforward recipe and simple ingredients, these spring cookies are surprisingly easy to create, transforming each bite into a delightful experience of both beauty and flavor.
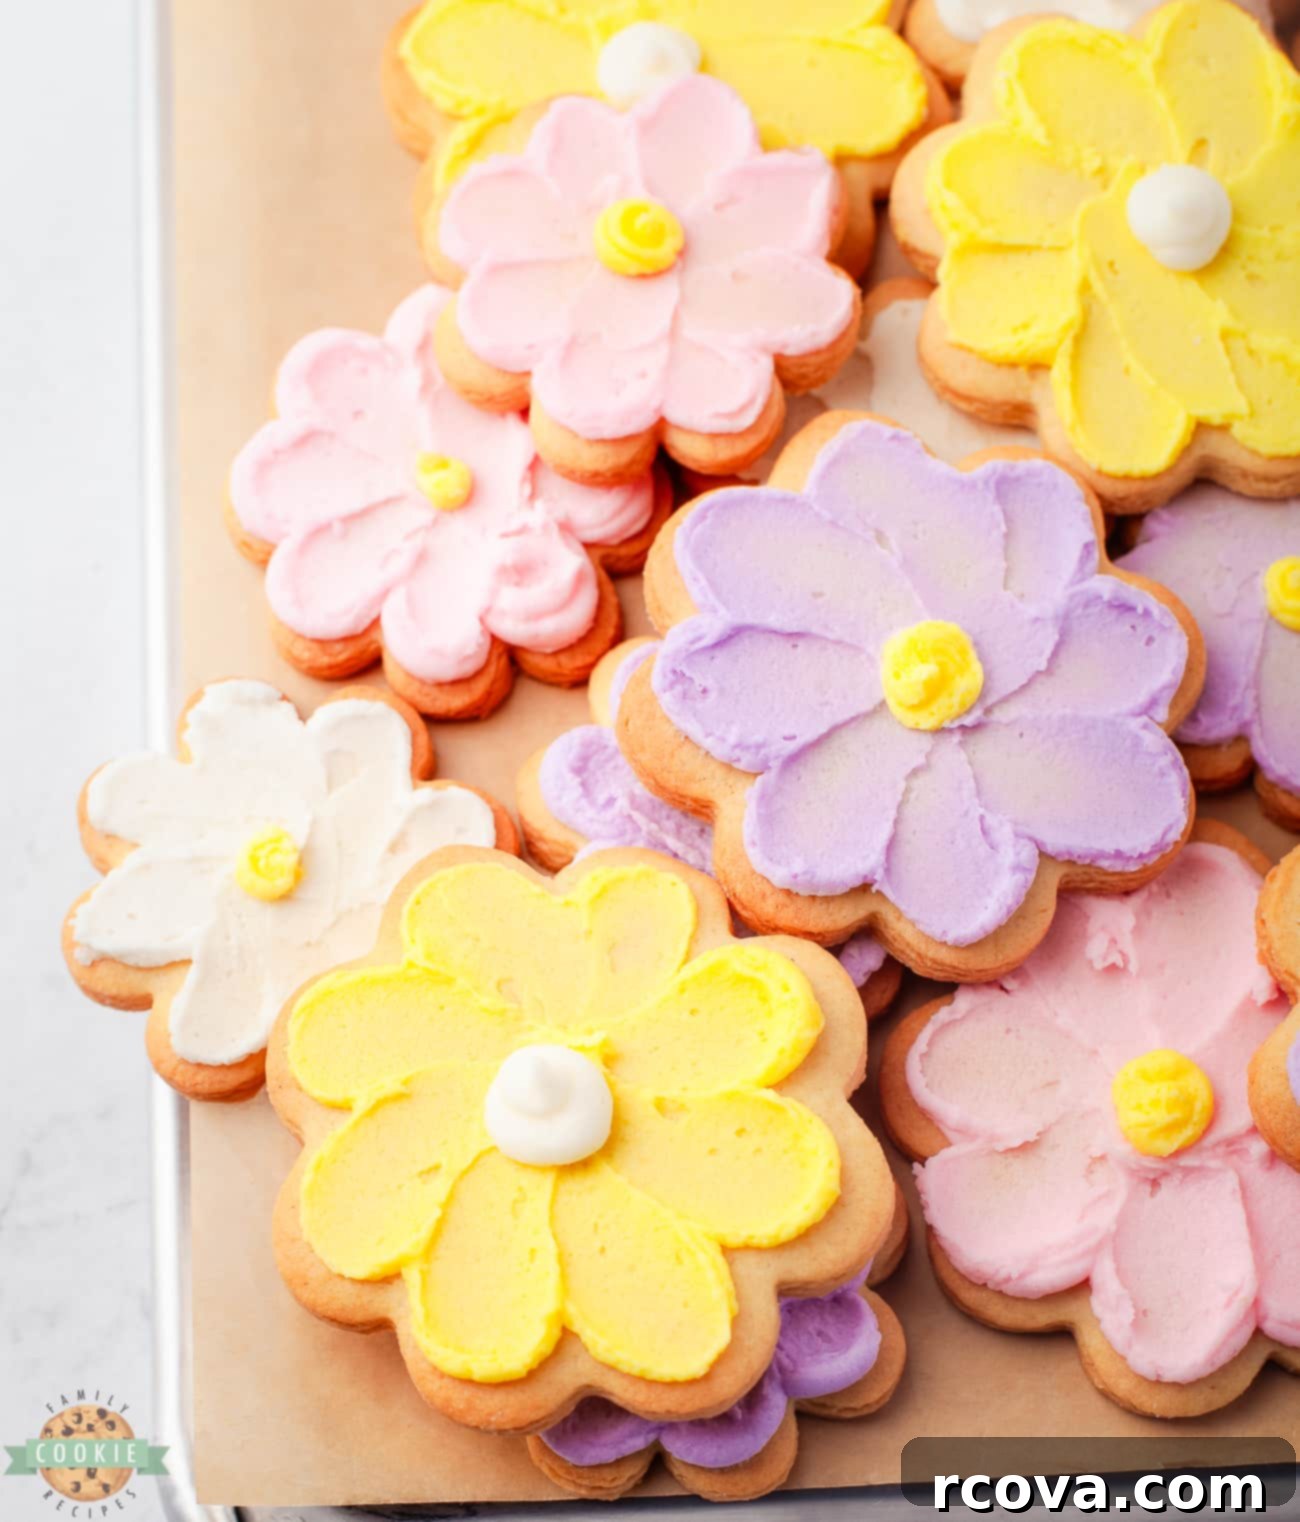
Crafting these delectable cut out flower cookies begins with a simple yet incredibly flavorful dough. Made with creamy butter, granulated sugar, a hint of salt to balance the sweetness, and a touch of vanilla for warmth, this dough bakes up perfectly tender. Once cooled, these pristine canvases are ready to be adorned with rich, silky buttercream frosting. This frosting, colored with vibrant gel food dyes, allows you to pipe intricate and edible floral designs, turning each cookie into a miniature work of art. The process is not just baking; it’s an invitation to unleash your creativity, resulting in cookies that are as enjoyable to behold as they are to devour.
Beautiful & Delicious Flower Cookies Everyone Will Love
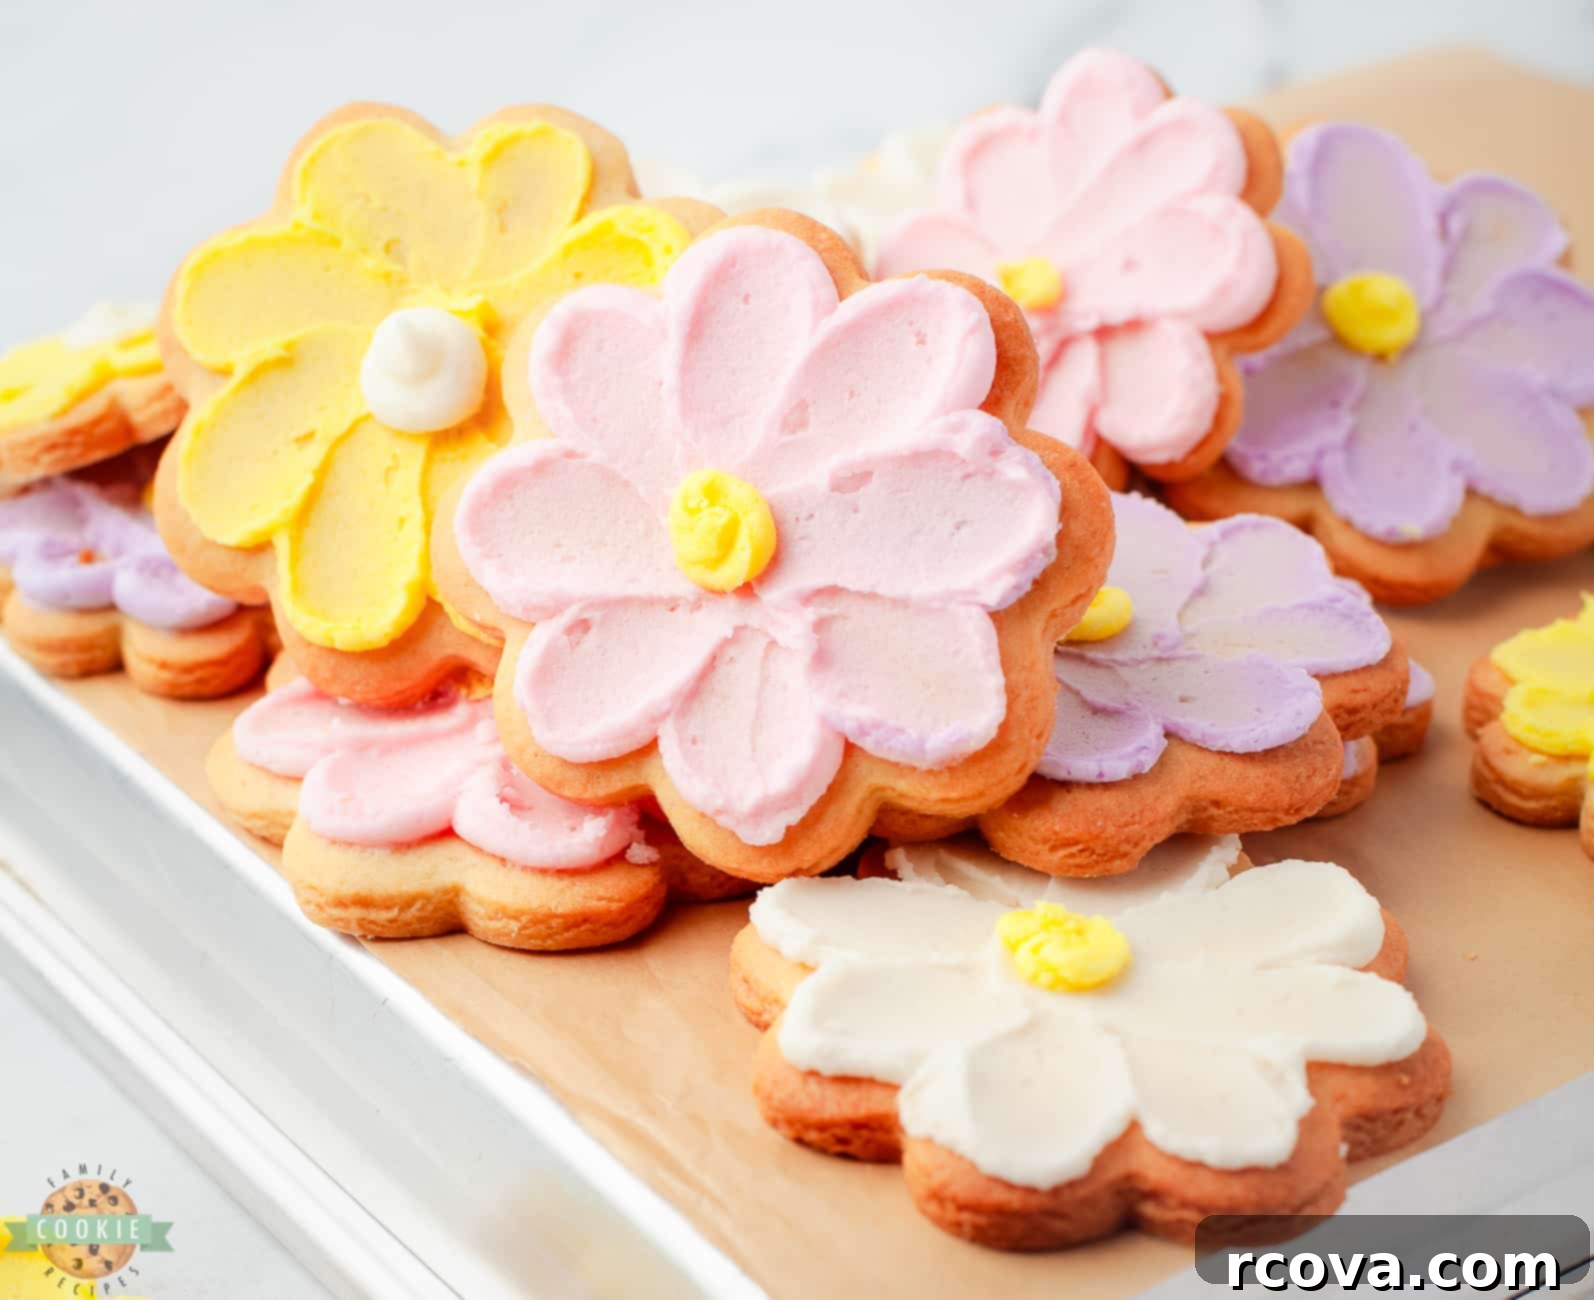
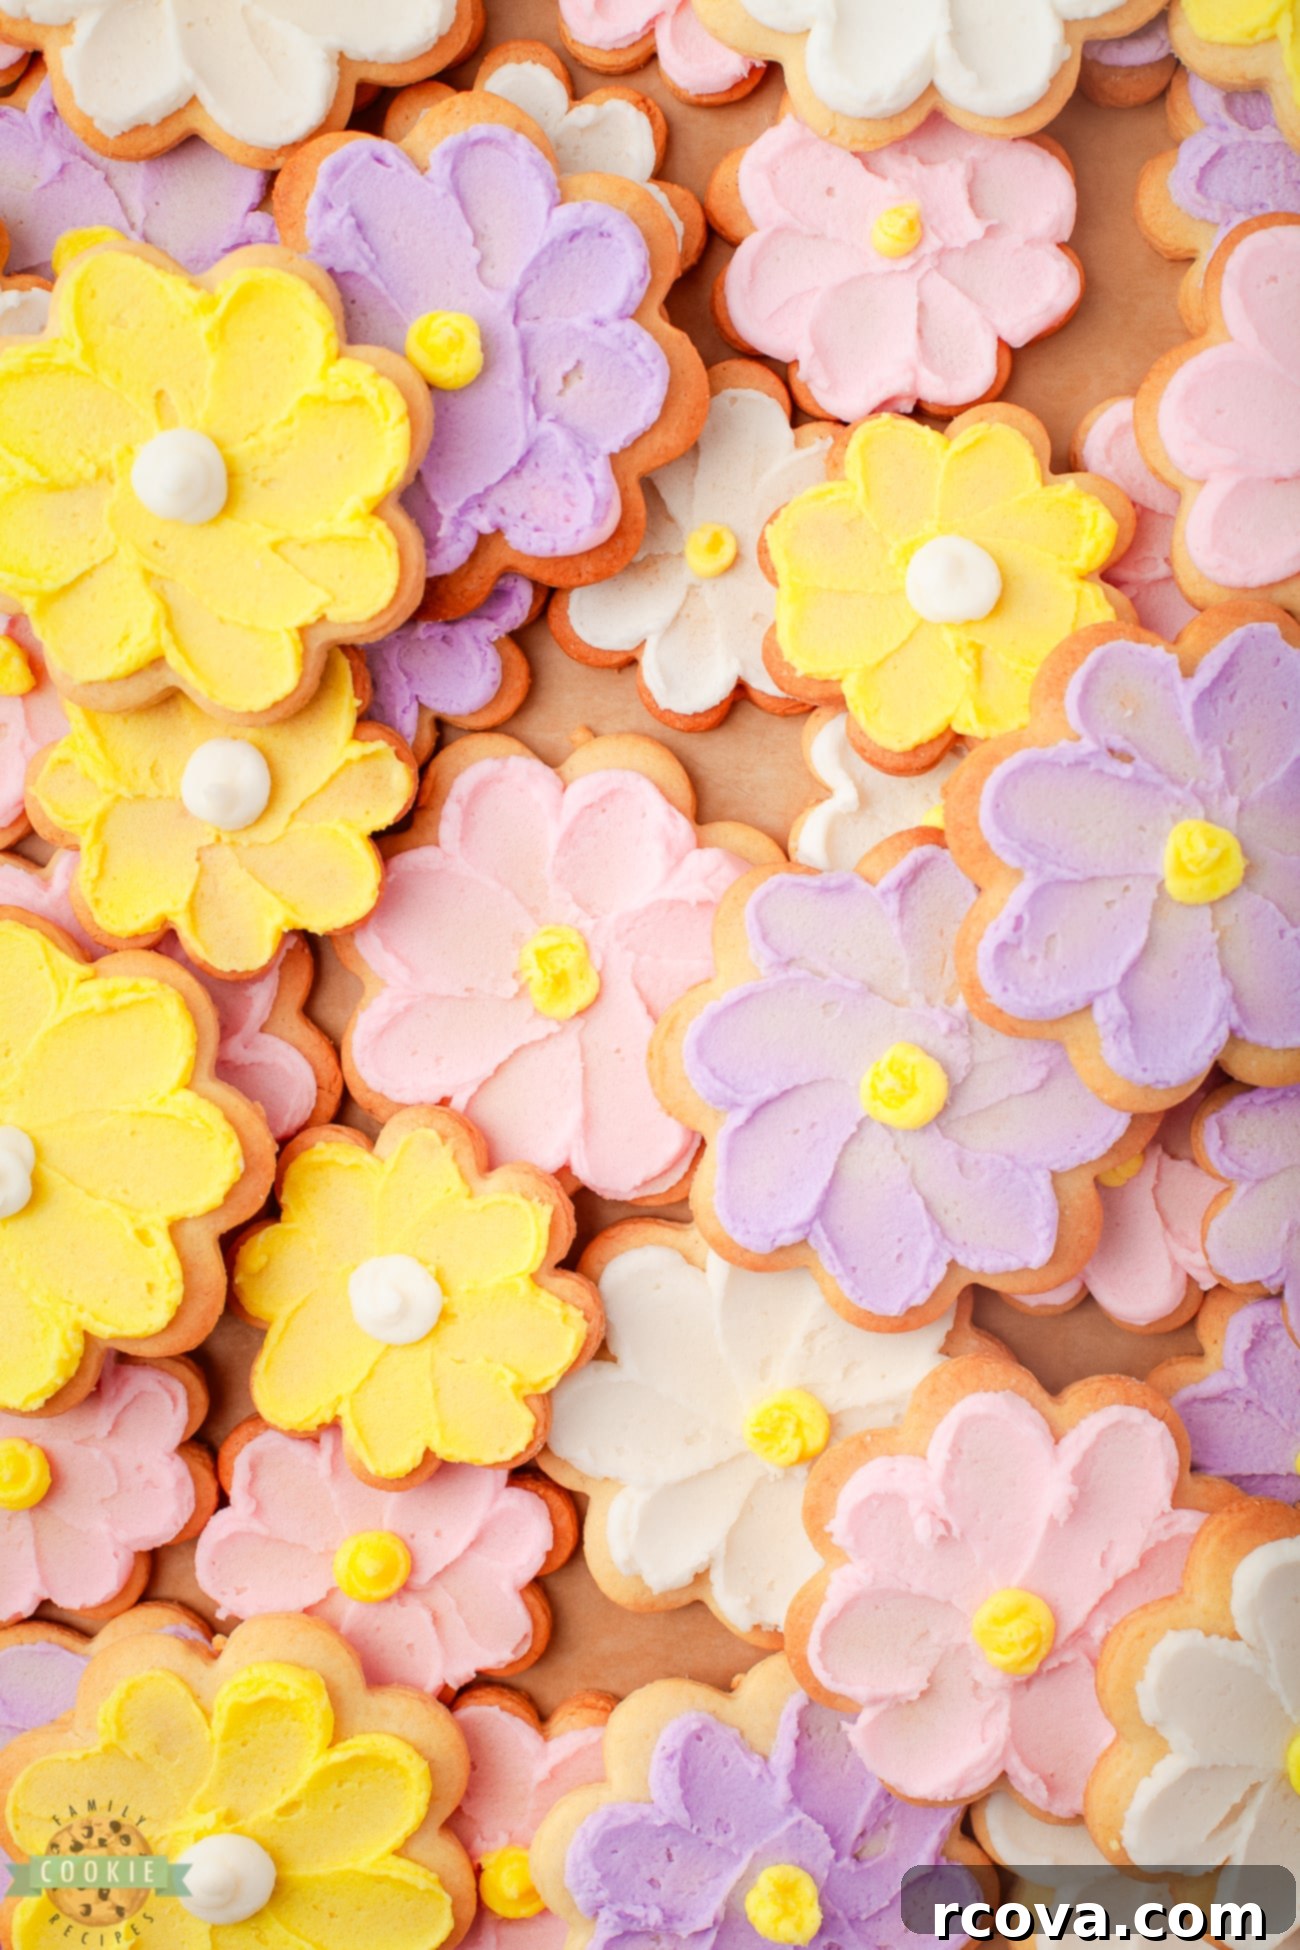
Imagine a treat that effortlessly captures hearts with its stunning appearance and tantalizes taste buds with its incredible flavor. That’s exactly what Buttercream Flower Cookies offer. These aren’t just any sugar cookies; they are edible masterpieces that bring a vibrant burst of color and a touch of seasonal charm to any event. From lively birthday parties and elegant baby showers to festive holiday gatherings and serene garden teas, these eye-catching confections are guaranteed to be a showstopper on any dessert spread.
The foundation of these exquisite treats is a perfectly baked sugar cookie, providing a stable yet tender canvas for your artistic endeavors. The delicate vanilla scent of the cookie base beautifully complements the rich, buttery sweetness of the frosting. Each bite delivers a harmonious blend of textures: the soft, creamy peaks of the buttercream giving way to the crisp, yet yielding, cookie beneath. The vibrant colors of the piped flowers truly make these frosted cookies stand out on any dessert table, inviting guests to admire their beauty before indulging in their deliciousness. Why wait? Dive into this recipe today and experience the joy of creating and sharing these amazing floral delights!
Why You’ll Love This Frosted Cookie Recipe
There are countless reasons why these Buttercream Flower Cookies will quickly become a favorite in your baking repertoire. They combine simplicity with spectacular results, making them accessible and rewarding for every home baker, regardless of their experience level.
- Amazing Taste & Appearance: These buttercream flower cookies excel in both flavor and visual appeal. The soft, buttery cookie base provides a delightful foundation, while the creamy, flavorful buttercream allows for endless possibilities in creating beautiful floral designs. Each cookie is a small package of joy, designed to impress and satisfy. The harmonious balance of a slightly crisp edge with a tender center, topped with smooth, melt-in-your-mouth frosting, creates an unforgettable sensory experience that will leave everyone craving more.
- Incredibly Versatile for Any Occasion: This recipe offers remarkable versatility, empowering bakers to express their creativity with an array of flower shapes, sizes, and vibrant colors. Whether you’re celebrating spring, a birthday, a bridal shower, a holiday, or simply want to brighten someone’s day, these cookies can be customized to suit any theme or season. Experiment with different cookie cutters – not just daisies – to create unique floral assortments like roses, tulips, or even whimsical designs. It’s an excellent and impressive way to personalize your treats and delight guests at any special event.
- Easy and Rewarding Recipe for All Skill Levels: Don’t let the intricate appearance fool you; this recipe is designed to be straightforward and enjoyable for bakers of all experience levels. The clear, step-by-step instructions for both the cookie dough and the buttercream frosting ensure a smooth and stress-free baking process. Beginners will find it an encouraging introduction to cookie decorating, while experienced bakers can appreciate the reliable base for advanced techniques and creative experimentation. It’s a fun, engaging project that consistently yields stunning results.
- Perfect for Gifting: Beyond being a treat for your own home, these beautifully decorated cookies make exquisite homemade gifts. Package them in charming boxes, cellophane bags, or decorative tins, and they become thoughtful and personalized presents for friends, family, teachers, neighbors, or hosts. Their undeniable visual appeal and delicious taste ensure they are always well-received, making them a fantastic option for holiday baskets, thank-you gifts, party favors, or just a sweet gesture to show you care.
- Freshness and Make-Ahead Friendly: Both the cookies and the buttercream can be prepared in stages, making this recipe incredibly convenient for busy schedules. The cookie dough can be made ahead and chilled for up to a few days, or even frozen. The buttercream frosting can also be prepared in advance and stored. This flexibility allows you to bake the cookies one day and decorate them another, spreading out the work and ensuring you always have a fresh batch of these beautiful cookies ready to go for your next event without feeling rushed.
Buttercream Cut Out Flower Cookie Ingredients
Creating the perfect base for your floral masterpieces requires a few common kitchen staples. Quality ingredients are key to achieving that delightful buttery taste and tender texture in your cut out cookies.
For the Soft & Buttery Cookie Dough:
- Butter: You’ll need 1 cup of unsalted butter, softened to true room temperature. Softened butter creams beautifully with sugar, incorporating essential air for a tender cookie texture. If using salted butter, remember to slightly reduce the amount of salt added to the dough.
- Salt: A crucial ¾ tsp of fine salt helps balance the sweetness of the sugar and significantly enhances the overall flavor profile of the cookies, bringing out their buttery notes. Don’t skip this important flavor enhancer!
- Granulated Sugar: 1 cup of granulated sugar contributes to the cookies’ delightful sweetness and helps create that slightly crisp yet wonderfully chewy texture that everyone loves in a classic sugar cookie.
- Eggs: Two large eggs act as a vital binder, holding all the ingredients together seamlessly and adding richness and essential moisture to the dough, resulting in a more tender and palatable crumb.
- Vanilla Extract: 1 ½ tsp of pure vanilla extract is absolutely essential for imparting that classic, comforting, and universally loved sugar cookie flavor. Always opt for good quality vanilla for the best and most aromatic taste.
- All-Purpose Flour: The structural base of this recipe is 3 cups of all-purpose flour. It is critically important to measure flour correctly by using the “spoon and level” method (spoon flour into the measuring cup and then level it off) to avoid inadvertently adding too much, which can lead to dense, dry, and unappealing cookies.
- Baking Powder: 1 ½ tsp of baking powder is included to help these cookies rise ever so slightly during baking. This leavening agent gives them a soft lift and prevents them from being too flat, hard, or overly dense.
Silky Buttercream Frosting Ingredients
The star of these cookies is undoubtedly the vibrant, smooth, and pipeable buttercream frosting. Here’s what you’ll need to create a stable and perfect frosting for intricate floral designs:
- Salted Butter: ½ cup of salted butter provides a rich, creamy, and flavorful base for your frosting and helps stabilize its overall structure. Using salted butter adds a touch of desirable flavor complexity that complements the sweetness.
- Vegetable Shortening: ½ cup of vegetable shortening is included for a very specific reason: it significantly helps the buttercream hold its intricate piped shape beautifully and prevents it from melting as quickly, especially in warmer conditions. It contributes to a frosting that develops a better “crust” when set, making your decorations more durable.
- Vanilla Extract: 1 tsp of pure vanilla extract infuses the frosting with a subtle, sweet, and inviting aroma and flavor that perfectly complements both the cookie base and the other ingredients.
- Confectioners’ Powdered Sugar: You’ll need 4 ½ cups of confectioners’ powdered sugar (also widely known as icing sugar or white powdered sugar). This finely milled sugar is absolutely essential for achieving a smooth, lump-free buttercream. Sifting it before use is highly recommended to ensure maximum smoothness and easy piping.
- Milk or Heavy Cream: 3-5 tablespoons of milk or heavy cream are used to gradually adjust the frosting to the desired smooth, pipeable consistency. Always start with 3 tablespoons and add more gradually, one tablespoon at a time, until your frosting is perfect – it should be stiff enough to hold a peak but soft enough to pipe smoothly. Heavy cream will typically yield a richer and slightly thicker frosting.
- Gel Food Coloring: A few drops of pink, purple, and yellow gel food coloring are recommended for decorating vibrant and lifelike flowers. Gel food colorings are highly preferred over liquid ones as they provide intense, concentrated color without significantly altering or thinning the frosting’s delicate consistency. Feel free to use any color palette you like to match your occasion!
How to Make Buttercream Flower Cookies: Step-by-Step Guide
Follow these detailed steps to create your own batch of stunning and delicious buttercream flower cookies. Precision and patience are your best friends in the kitchen, ensuring beautiful results every time!
Preparing the Cookie Dough
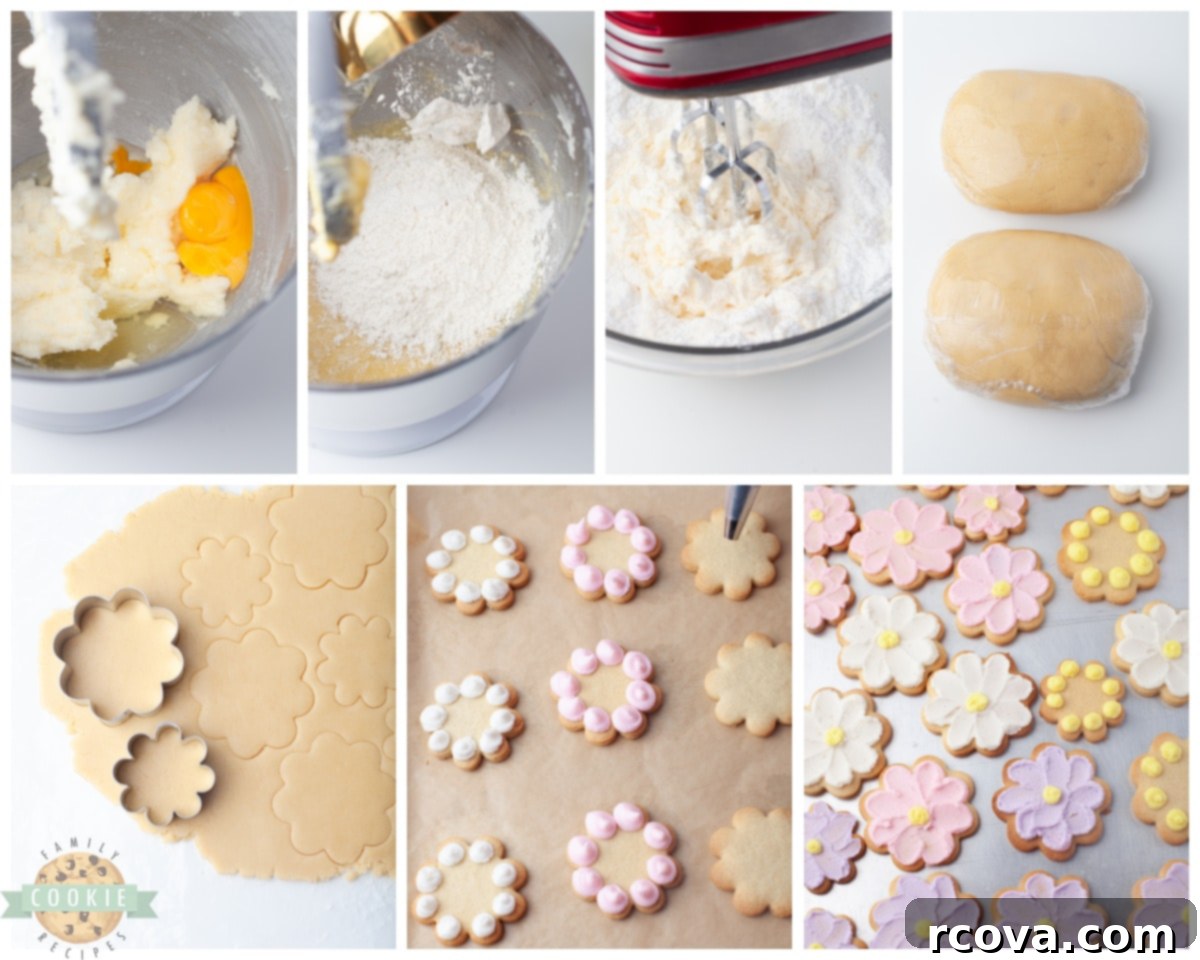
- Cream Wet Ingredients: In the bowl of a stand mixer fitted with the paddle attachment (or using a large bowl with a powerful handheld electric mixer), combine the softened butter, granulated sugar, and salt. Cream these ingredients together on medium speed for about 2 minutes. The mixture should transform into a light, fluffy, and noticeably pale consistency. This initial creaming step is absolutely crucial for incorporating air, which contributes to the tender crumb of your baked cookies.
- Add Eggs and Vanilla: Introduce the two large eggs one at a time, mixing just until each egg is fully incorporated into the mixture. It’s important to be careful not to overmix at this stage. Stop the mixer and use a rubber spatula to thoroughly scrape down the sides and bottom of the bowl, ensuring all ingredients are evenly combined. Finally, add the vanilla extract and mix again briefly, just until combined, typically about 30 seconds.
- Combine Dry Ingredients: In a separate, medium-sized bowl, use a whisk to thoroughly combine the measured all-purpose flour and baking powder. Whisking these dry ingredients together ensures they are well blended and evenly distributed throughout the mixture, preventing any pockets of unmixed baking powder in your final cookies.
- Combine Wet and Dry: With the mixer on low speed, gradually add the dry flour mixture to your wet ingredients in the stand mixer bowl. Mix until the dough just comes together and begins to pull cleanly away from the sides of the bowl. It is paramount to stop mixing as soon as the flour is incorporated to avoid overdeveloping the gluten, which can unfortunately lead to tough, chewy cookies instead of tender ones.
Chilling the Dough for Perfect Cut-Outs
- Shape and Wrap: Once your cookie dough is ready, remove it from the mixer bowl. On a lightly floured clean work surface, gently gather and shape the dough into a cohesive ball, then flatten it into a thick disc. Shaping it into a disc makes it much easier to roll out evenly later on.
- Chill Thoroughly: Wrap the dough disc tightly in plastic wrap, ensuring no air can get in, and place it in the fridge for a minimum of 30 minutes. Chilling is a vital step that plays a significant role in preventing the cookies from spreading too much in the oven, thus ensuring they maintain their intricate cut-out shapes and sharp edges. If you find yourself with a particularly large batch of dough, consider dividing it into two smaller discs before chilling; this makes it much easier to work with in batches.
Shaping & Baking Your Flower Cookies
- Preheat Oven and Prepare Sheets: While your cookie dough is chilling in the refrigerator, preheat your oven to 375°F (190°C). Prepare two large cookie sheets by lining them with parchment paper. This simple step is invaluable as it prevents the cookies from sticking to the pan and makes cleanup an absolute breeze.
- Roll and Cut: Retrieve the thoroughly chilled dough from the fridge. Lightly flour a clean work surface (your countertop or a pastry mat) and your rolling pin. Roll the dough out to an even ¼ inch thick. Maintaining a consistent thickness is ideal for achieving cookies that are tender yet sturdy enough to hold intricate frosting designs and ensures even baking. Using your daisy flower cookie cutters (or any other preferred shapes), carefully cut out your flower cookies. Gather any dough scraps, gently re-roll them, and cut out more shapes until all the dough is used.
- Bake to Perfection: Carefully place each cut-out flower cookie on the prepared baking sheets, ensuring you leave a little space between them to allow for even baking. Bake in the preheated oven for approximately 6-7 minutes, or until the edges of the cookies are just lightly golden. The centers should still appear soft. Remember that baking times can vary slightly depending on your oven, so keep a close eye on them to prevent overbaking.
- Cool Completely: Once baked, remove the cookie sheets from the oven and let the cookies sit on the hot sheet for a couple of minutes. This brief resting period allows them to firm up slightly, making them less prone to breaking. Then, gently transfer them to a wire cooling rack to cool down completely. It’s absolutely essential that the cookies are fully cooled to room temperature before you attempt to apply any buttercream, otherwise, the frosting will melt and slide right off.
Crafting the Silky Buttercream Frosting
- Cream Butter and Shortening: In the clean bowl of your stand mixer (or using a powerful handheld electric mixer), cream the softened butter for about a minute until it is smooth and light. Then, very slowly add the vegetable shortening, making sure to stop and scrape down the sides of the bowl frequently between additions. Continue creaming until the butter and shortening are thoroughly combined, light, and wonderfully fluffy. This strategic blend is crucial for giving the buttercream excellent stability and a smooth texture.
- Add Vanilla: Stir in the vanilla extract and mix for another minute, ensuring it is well distributed throughout the creamy base. The vanilla adds a delightful aromatic depth to the frosting.
- Gradually Add Powdered Sugar: Begin adding the confectioners’ powdered sugar to the mixture. It’s best to add it one cup at a time, beating slowly at first to prevent a large cloud of sugar from erupting into your kitchen. Once a cup is mixed in, you can increase the speed slightly before adding the next. Continue this process until all the powdered sugar is incorporated. Remember to scrape down the bowl as needed to ensure everything is evenly mixed.
- Achieve Perfect Consistency: With the mixer on low speed, slowly add 3 tablespoons of milk or heavy cream to start. Continue mixing, and gradually add more milk/cream, one tablespoon at a time, until the buttercream reaches a thick, butter-like, and perfectly pipeable consistency. It should be smooth and creamy, holding its shape without being too stiff to pipe or too runny to hold a design. Mix on medium to high speed for a couple of minutes to ensure it is airy, smooth, and lump-free. If you’re using shortening in your recipe, be mindful not to overmix, as this can sometimes cause the buttercream to become grainy.
- Color Your Frosting: Once your buttercream is ready and perfectly smooth, divide it into separate bowls, one for each color you plan to use for your flowers. Add a few drops of your chosen gel food coloring into each bowl and mix thoroughly until the color is evenly combined and vibrant. Gel food colorings are preferred as they provide intense color without thinning the frosting.
- Prepare Piping Bags: Transfer each batch of colored buttercream into individual piping bags. For creating delicate flower petals, fit your piping bags with a #104 petal piping tip. This tip is specifically designed to create beautiful, realistic flower petals with ease.
Decorating Your Beautiful Flower Cookies
- Pipe the Petals: Hold your prepared piping bag with the #104 tip at an angle. Place a generous dot of colored buttercream onto each petal section of your daisy flower cookie, essentially creating a base for each petal. Ensure each petal area gets a distinct, well-placed dot of frosting.
- Shape the Petals: Immediately after piping the dots, grab a small offset spatula or the back of a small spoon. Gently spread the frosting from the outside edge of each dot inwards towards the very center of the flower. This delicate technique helps to create a natural, soft, and slightly ruffled petal effect. Continue this process carefully until all the petals on all your cookies are beautifully shaped with the buttercream.
- Add the Flower Center: To perfectly complete your charming flowers, add a small dot of yellow or orange buttercream (or even some complementary sprinkles!) in the very middle of each flower. This central detail is key to bringing your floral designs to life and adding that final touch of realism.
- Set and Serve: After all your cookies are decorated, allow them to set at room temperature for a few hours. This crucial step helps the buttercream to “crust” over slightly, making them much easier to handle, stack, and transport without smudging your beautiful designs. Once the frosting has slightly crusted and is firm to the touch, your gorgeous buttercream flower cookies are ready to be served and thoroughly enjoyed by all!
Buttercream Flower Cookies
Print
Pin
Rate
Ingredients
- 1 cup butter softened
- ¾ tsp salt
- 1 cup granulated sugar
- 2 eggs
- 1 ½ tsp vanilla extract
- 3 cups flour spoon and level measured
- 1 ½ tsp baking powder
Buttercream Frosting
- ½ cup salted butter
- ½ cup vegetable shortening shortening holds a better crust
- 1 tsp vanilla extract
- 4 ½ cups confectioners’ powdered sugar white powdered sugar
- 3-5 TBSP Milk or heavy cream
Instructions
-
Dough: Cream the butter, sugar, and salt, in a stand mixer on medium speed for about 2 minutes.
-
Add in the eggs, mix until just incorporated, scrape down the sides of the bowl. Add vanilla extract and mix again until combined.
-
Whisk the flour and baking powder in a separate bowl. Add the dry ingredients to the wet ones. Mix until the it becomes a dough and it pulls away from the sides of the bowl.
-
Chill: Remove the dough from the bowl and shape it into a ball and flatten, wrap it in plastic wrap, and place in the fridge for at least 30 minutes. If you prefer, divide the dough into two discs, and work in two batches. It is quite a bit of dough to work with all at once.
-
Shape & bake: Preheat the oven to 375°F while your dough chills.
-
Pull the dough from the fridge, flour a clean surface, and roll the dough out to ¼ inch thick. Cut your cookies out into daisy flower shapes.
-
Place each flower cookie on a parchment lined baking sheet and bake for 6-7 minutes, or until the edges of the cookies are golden. Once baked, let them sit for a couple of minutes on the cookie sheet to firm up. Transfer to a cooling rack so they can cool completely before adding the buttercream.
-
Frosting: Cream your butter in a stand mixer for a minute and very slowly add the shortening, scraping down sides in between creaming until well incorporated. Add the vanilla extract, mix again for a minute. Add in the powdered sugar, beat slowly so the powdered sugar doesn’t go all over the place.
-
Add in 3 TBSP of heavy cream and continue to add more until it reaches a thick butter-like consistency. Mix until smooth, on medium to high speed for a couple of minutes until it is creamy. If you use shortening then be careful to not overmix because it can turn grainy.
-
Once ready, divide the buttercream into separate bowls of the amount of colors you will be using. Add the gel food coloring into each bowl and mix well until evenly combined. Transfer each of the colors into a piping bag using a #104 tip.
-
Decorate: Place a large dot of buttercream onto each petal of each daisy flower cookie. Once each petal has the dot, grab a spatula and spread the frosting from the outside of the petal towards the center of the flower. Continue to do this until all of the petals have buttercream. Add a dot of yellow or orange buttercream for the middle of the flower. Continue for all the cookies. Let cool and enjoy!
Notes
For longer storage, freeze unfrosted cookies for up to 3 months. Thaw at room temperature, add the frosting, then enjoy!
Nutrition
Tips for Perfect Buttercream Flower Cookies
Achieving bakery-quality buttercream flower cookies is easier than you think with a few key tips and tricks. These suggestions will help ensure your cookies are delicious, beautifully decorated, and hold their shape perfectly.
- Don’t Skip Chilling the Dough: This is perhaps the most crucial step for successful cut-out cookies. Chilling the dough prevents it from spreading excessively in the oven, ensuring your intricate flower shapes remain sharp, defined, and picture-perfect. If the dough becomes too warm or sticky while you’re rolling and cutting, simply place it back in the fridge for 10-15 minutes to firm up again.
- Measure Flour Correctly: For truly tender cookies, always spoon your flour into the measuring cup and then level it off with a straight edge (like the back of a knife). Scooping directly from the flour bag can compact the flour, leading you to add too much, which results in dry, dense, and tough cookies.
- Ensure Even Dough Thickness: When rolling out your cookie dough, it’s vital to aim for a consistent ¼ inch thickness across the entire surface. This uniformity ensures that all your cookies bake evenly, preventing some from being undercooked and soft while others become overbaked and too crisp.
- Room Temperature Ingredients for Buttercream: For the smoothest, creamiest, and most easily pipeable buttercream, make absolutely sure that your butter and shortening are at true room temperature. This allows them to cream together effortlessly, incorporating sufficient air and creating that desirable light and fluffy texture.
- Sift Powdered Sugar: To prevent any unsightly lumps and ensure a super silky smooth frosting, it is highly recommended to sift your confectioners’ powdered sugar before adding it to the buttercream mixture. A smooth frosting is essential for delicate and precise piping work.
- Practice Piping: If you’re new to piping or want to refine your skills, don’t hesitate to practice! Pipe a few practice flowers on a piece of parchment paper or wax paper first. The beauty is you can easily scrape the frosting back into your piping bag and reuse it. This helps you get a feel for the necessary pressure and movement before decorating your actual cookies.
- Gel Food Coloring is Best: For achieving vibrant, rich colors without significantly altering or thinning the consistency of your buttercream, always opt for high-quality gel food colorings over liquid ones. A little bit of gel coloring goes a long way, so start with a small amount and add more as needed.
- Allow Frosting to Set: After you’ve finished decorating your beautiful cookies, let them sit undisturbed at room temperature for a few hours, or even overnight if time permits. This exposure to air allows the buttercream to “crust” over, forming a delicate shell that makes them much easier to handle, stack, and transport without smudging your gorgeous designs.
How Long are Frosted Cookies Good For?
Proper storage is absolutely key to maintaining the freshness, delicious taste, and beautiful appearance of your frosted cookies. When stored correctly, these delightful treats can be enjoyed for several days, making them perfect for parties or as a make-ahead dessert.
Frosted cookies typically stay wonderfully fresh for 3-5 days when stored at room temperature. To achieve this, always place them in an airtight container to protect them from air exposure, which can dry them out. If you need them to last longer, refrigerating them can extend their freshness for up to 2 weeks. For extended preservation, such as preparing well in advance for a future event, consider freezing unfrosted cookies for up to 3 months. When you’re ready to enjoy them, simply thaw the unfrosted cookies at room temperature, then apply your freshly prepared buttercream frosting for the best taste and texture.
Is There a Festive Twist I Can Add to Buttercream Flower Cookies for the Holiday Season?
Absolutely! The inherent versatility of buttercream flower cookies makes them incredibly adaptable for any holiday, season, or special occasion. Incorporating seasonal flavors and designs is a wonderful way to elevate these treats and make them perfectly suited for the holiday season or any festive theme you desire.
For a warm, cozy, and distinctly holiday-inspired taste, consider adding delightful spices like cinnamon, nutmeg, ginger, cloves, or even a hint of cardamom directly to your cookie dough. You could also infuse your buttercream with a touch of peppermint extract for a festive minty flavor, orange zest for a bright citrusy note, or a rich almond extract for a nutty twist. Beyond flavor, using holiday-themed cookie cutters (think festive stars, delicate snowflakes, jolly gingerbread men, charming Christmas trees, or even elegant poinsettias) instantly enhances their festive appeal. Decorate them with traditional holiday colors like vibrant reds, deep greens, shimmering silvers, and luxurious golds. You can also add edible glitter, festive sprinkles, or delicate sugar pearls to make them truly sparkle and shine on your holiday dessert platter. For other seasons, imagine heart-shaped cutters with pink and red frosting for Valentine’s Day, or autumn leaf cutters with warm orange, deep red, and golden yellow frosting for a beautiful fall display. The possibilities for creative customization are truly endless!
Best Storage Method for Frosted Cookies
To keep your beautifully decorated buttercream flower cookies fresh, delicious, and appealing for as long as possible, proper storage is absolutely crucial. Here’s a comprehensive guide on how to store them effectively:
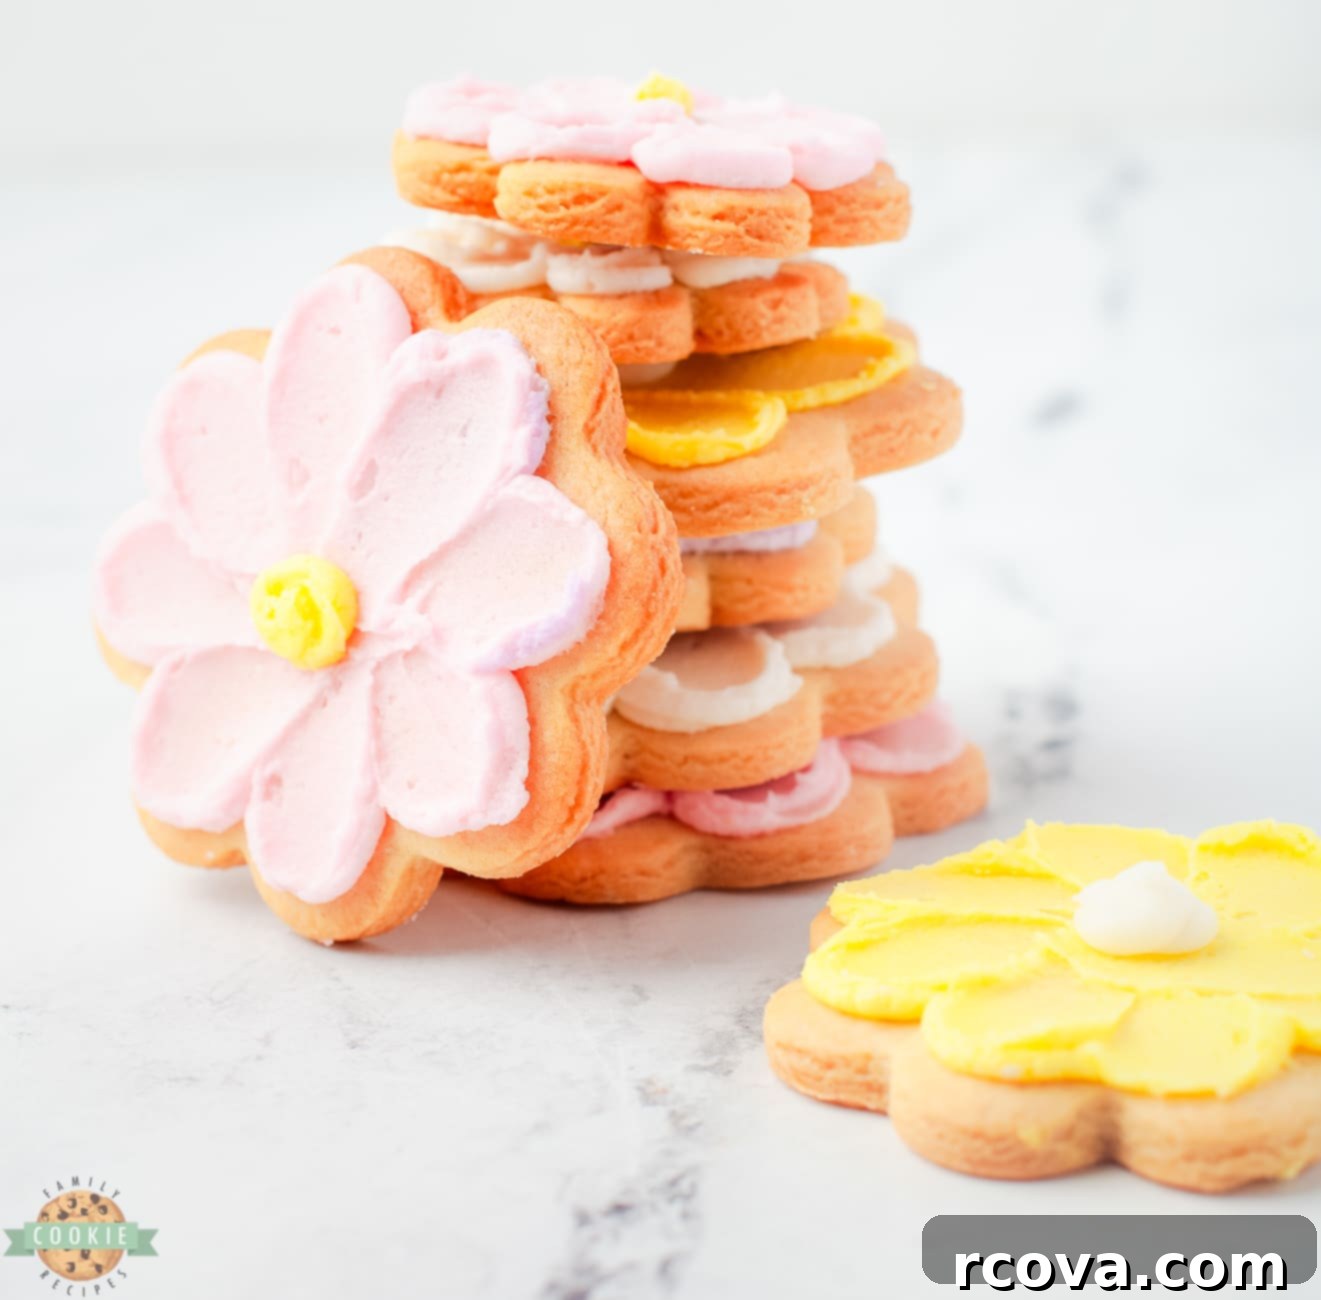
- At Room Temperature: For immediate enjoyment or consumption within a few days, store your frosted cookies in an airtight container at room temperature. To prevent the delicate frosting from sticking, smudging, or getting damaged, it’s highly recommended to place a piece of parchment paper or wax paper between layers of cookies. This also helps maintain their individual beauty and integrity. Always keep the container in a cool, dry place, away from direct sunlight and any heat sources (like ovens or warm appliances) that could cause the buttercream to soften, melt, or sweat.
- In the Refrigerator: If you need to store your cookies for a slightly longer period (up to 2 weeks), or if your kitchen is particularly warm and humid, storing them in a sealed container in the refrigerator is your best bet. Again, always use parchment paper or wax paper between layers to protect the frosting. Before serving, it’s advisable to bring the cookies to room temperature for about 15-30 minutes. This crucial step allows the cookie base to soften slightly and the buttercream to regain its ideal creamy, melt-in-your-mouth texture. It also prevents any condensation from forming on the frosting when they come out of the cold, which could negatively affect its appearance and texture.
- Freezing Unfrosted Cookies: For extended storage, the best method is to freeze the cookies *before* frosting them. Place unfrosted, cooled cookies in a single layer on a baking sheet and freeze until solid (about 1-2 hours). Once frozen, transfer them to an airtight freezer-safe container or a heavy-duty freezer bag. They can be stored this way for up to 3 months. When you’re ready to decorate and serve, simply thaw them at room temperature, then proceed with the buttercream frosting as usual.
- Freezing Buttercream: This buttercream frosting recipe yields a generous amount (approximately 4 cups), so you might find yourself with leftovers. Any unused buttercream can be stored in an airtight container in the fridge for up to a week. For much longer storage, it can be safely frozen for up to three months. To use frozen buttercream, thaw it completely in the refrigerator overnight. Once thawed, transfer it to a stand mixer or a bowl with an electric mixer and re-whip it on medium-high speed for a few minutes until it’s light, fluffy, and smooth again. You might need to add a tiny splash (1-2 teaspoons) of milk or heavy cream if it appears too stiff after re-whipping to achieve the perfect piping consistency.
How Do You Ensure Buttercream Frosting Hardens Enough for Stacking Cookies?
Achieving a buttercream frosting that is firm enough for stacking cookies without damage or smudging is a common and important goal for decorators. Here’s how you can ensure your buttercream sets perfectly to allow for easy handling and transport:
- The Power of Shortening for Stability: As highlighted in the ingredient list, incorporating a mix of salted butter and vegetable shortening is a key strategy. Vegetable shortening boasts a higher melting point than butter, which significantly contributes to creating a more stable and resilient frosting structure that is less prone to softening or melting, especially in warmer environments. This strategic blend results in a buttercream that can hold intricate piped designs beautifully and reliably develops a slight “crust” when exposed to air.
- Allow Adequate Air Exposure for Crusting: After you’ve meticulously finished decorating your cookies with the buttercream, it is absolutely essential to allow them to set at room temperature for a sufficient period. This exposure to air helps the outer layer of the buttercream to dry and form a delicate yet firm crust. The exact time required can vary depending on your kitchen’s humidity and temperature, but typically 2-4 hours is sufficient for a good crust to form. For optimal results, arrange your decorated cookies in a single layer on a cooling rack in an undisturbed area, away from direct sunlight or drafts.
- Avoid Over-Hydrating the Frosting: When adding milk or heavy cream to adjust the frosting consistency, it’s crucial to be conservative and add it gradually, a teaspoon at a time. A buttercream frosting that is too wet or thin will take considerably longer to set, and in some cases, may never truly harden enough for stacking without damage. Aim for a consistency that is perfectly pipeable, yet still holds a stiff peak when lifted with a spatula.
- Refrigeration for Speed (with caution): If you find yourself pressed for time and need to speed up the setting process, you can gently place the decorated cookies in the refrigerator for approximately 15-30 minutes after decorating. This will indeed accelerate the frosting’s firming. However, it’s very important to allow the cookies to come back to room temperature before stacking, packaging, or serving. Doing so prevents condensation from forming on the frosting, which can make it sticky, wet, and potentially ruin your beautiful work.
Try More of Our Amazing Spring Time Recipes Here:
If you’ve enjoyed making these lovely buttercream flower cookies, you’ll be absolutely delighted by our other fresh, vibrant, and equally delicious spring-inspired recipes. They are perfect for adding more sweetness and culinary creativity to your seasonal celebrations, family meals, or simply as delightful treats for yourself!
- Looking for a refreshing, sweet treat to serve at your next gathering or picnic? Try these mini fruit tarts; they are simply delicious, visually appealing, and burst with the fresh, natural flavors of seasonal fruits!
- You can’t go wrong with these frosted strawberry cookies. With their bright, luscious strawberry flavor and soft, chewy texture, they are always a delightful hit and a crowd-pleaser for any occasion.
- This easy mango fruit salad makes a wonderful, vibrant side dish that pairs beautifully with almost any main course. Its tropical sweetness and colorful appearance make it a fantastic addition to any meal, especially as the weather gets warmer.
- Whip up a batch of these soft, citrus-flavored lemon crinkle cookies. Their beautiful crinkled appearance and zesty, refreshing lemon flavor make them look absolutely amazing on any Spring event dessert table or as a light treat.
- Here is a great main course to enjoy as the weather gets warmer and you crave lighter, fresher meals: chicken caprese. It tastes fantastic, combines classic Italian flavors, and completes a meal perfectly with its fresh, wholesome ingredients.
Conclusion: The Joy of Buttercream Flower Cookies
Buttercream Flower Cookies are more than just a dessert; they are an experience – a delightful journey from simple ingredients to edible works of art. Combining the rich, comforting taste of a buttery cookie with the creamy, indulgent texture of a beautifully piped buttercream frosting, these treats are truly special. Their vibrant floral designs make them a visual delight, perfectly capturing the essence of spring, celebrating a special occasion, or simply adding a touch of homemade charm to your day.
Whether you’re an experienced baker looking for a new creative outlet or just starting your cookie decorating journey, this recipe offers a rewarding and enjoyable process. With clear instructions and helpful tips, you’ll be creating stunning and delicious flower cookies that are sure to bring smiles and delight to everyone who sees and tastes them. So, gather your ingredients, unleash your inner artist, and bake a batch today to share the joy of these exquisite, edible masterpieces!
