Spooktacular Halloween Skeleton Cookies: Easy Chocolate Sugar Cookie Recipe
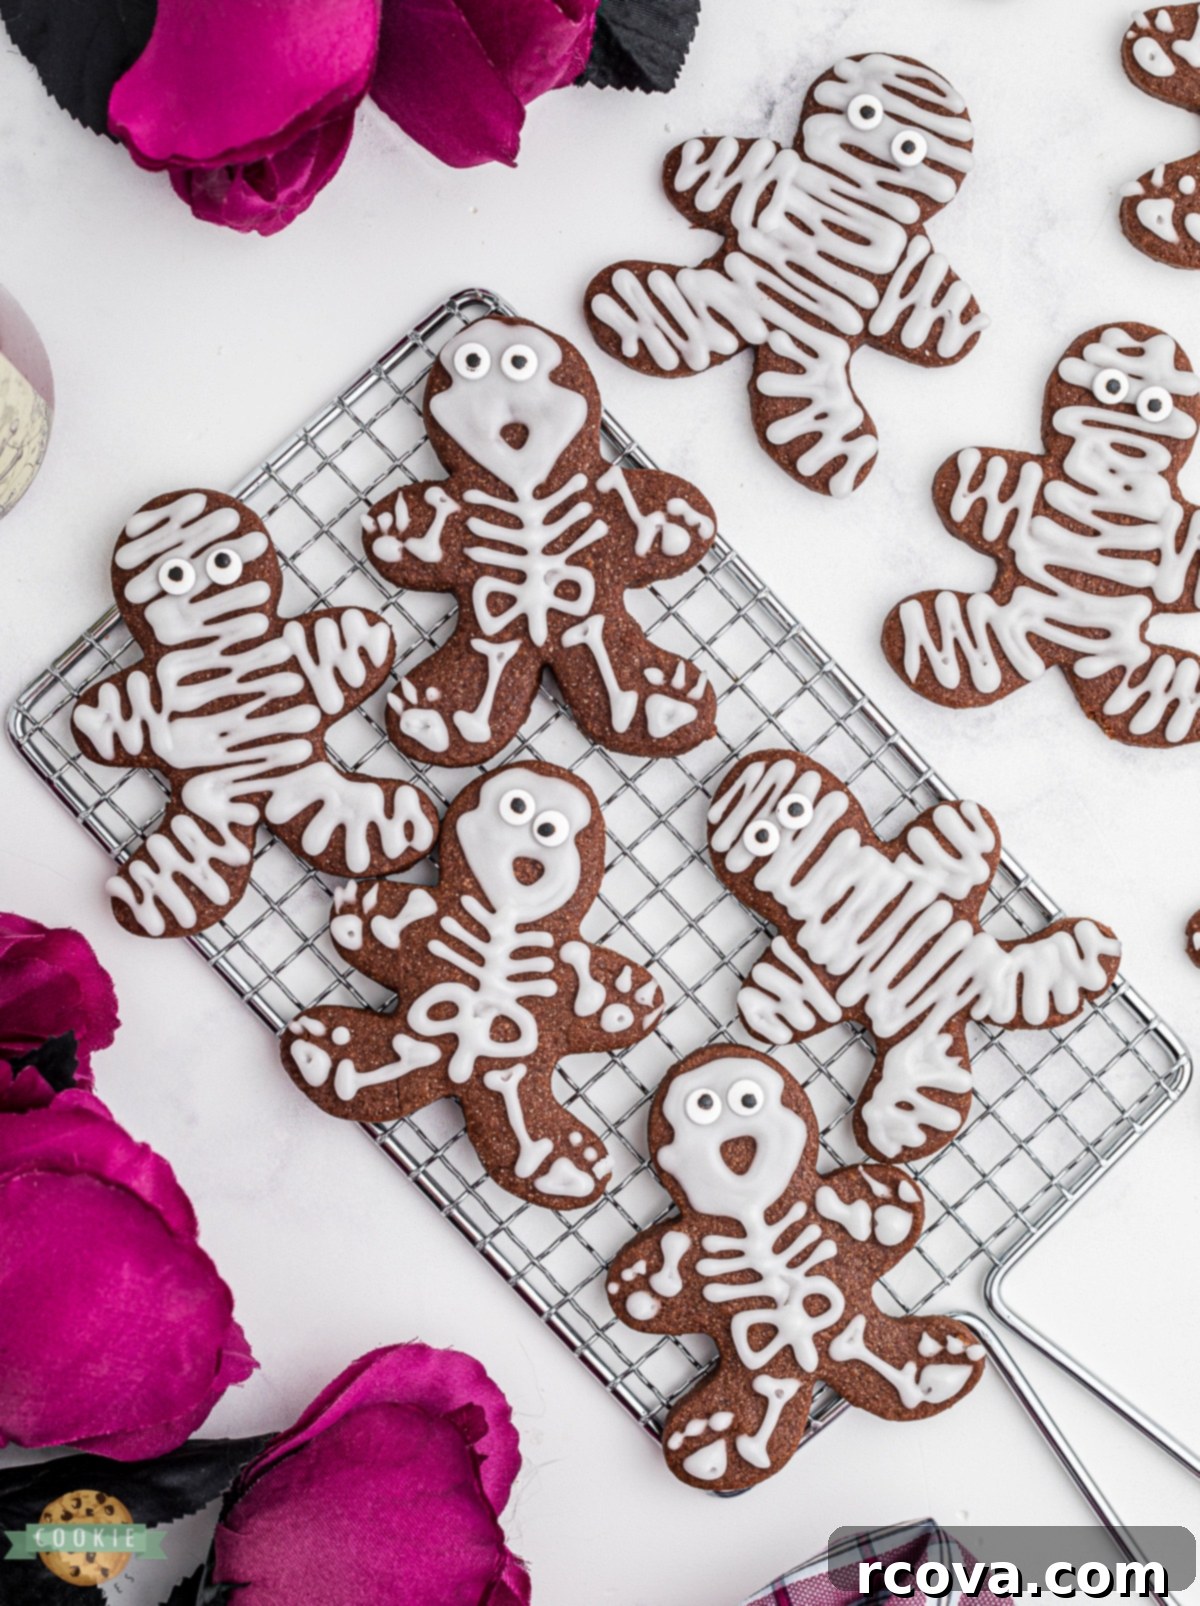
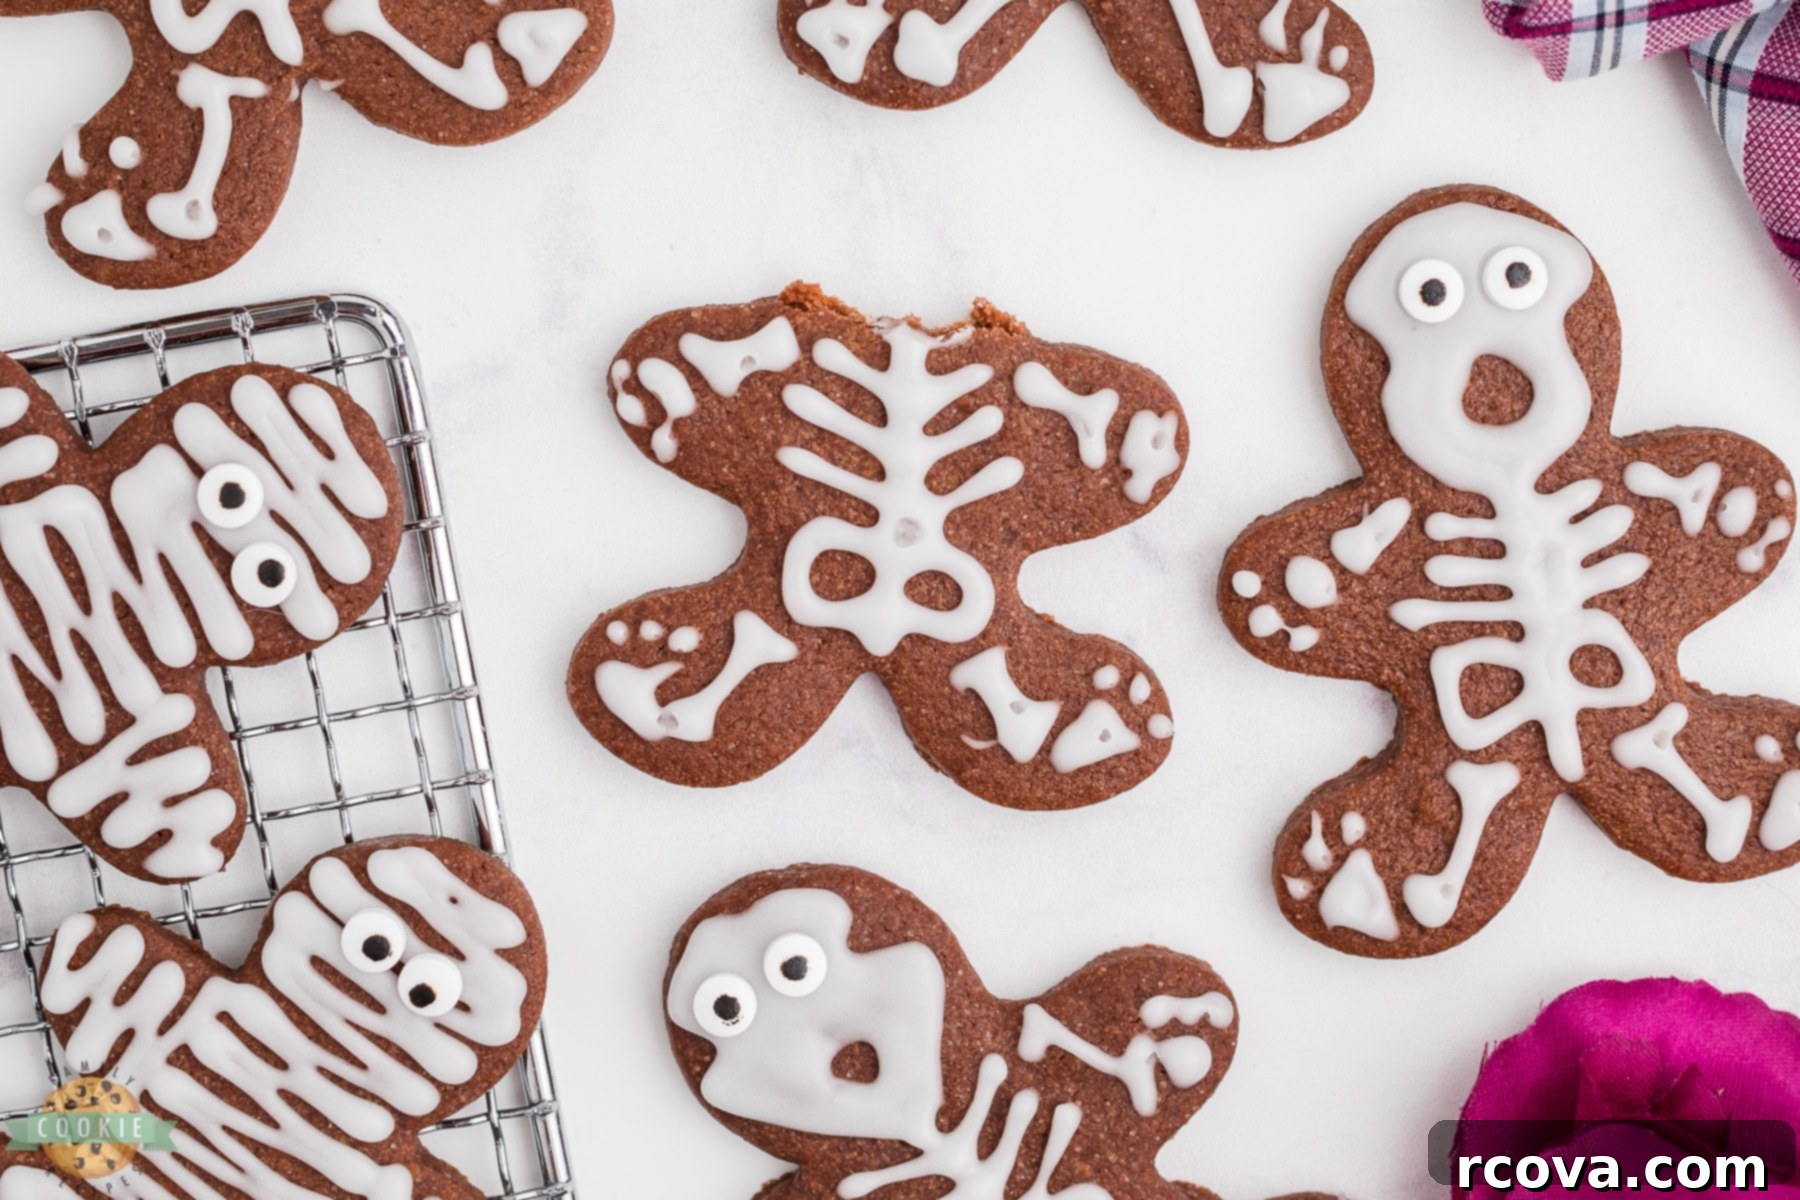
Get ready to unleash your inner ghoul and delight your taste buds with these incredibly fun and festive Halloween Skeleton Cookies! These aren’t just any ordinary treats; they’re rich, delicious chocolate sugar cookies transformed into delightfully creepy cut-out skeletons, perfect for celebrating the spookiest time of the year. Whether you’re planning a thrilling Halloween party, looking for a unique baking project with the kids, or simply craving a sweet, chocolatey indulgence, this recipe promises both enjoyment in the making and utter deliciousness in every bite. With their simple gingerbread man shape serving as a canvas for ghoulish decoration, these cookies are a creative and tasty way to make your Halloween celebrations truly memorable.
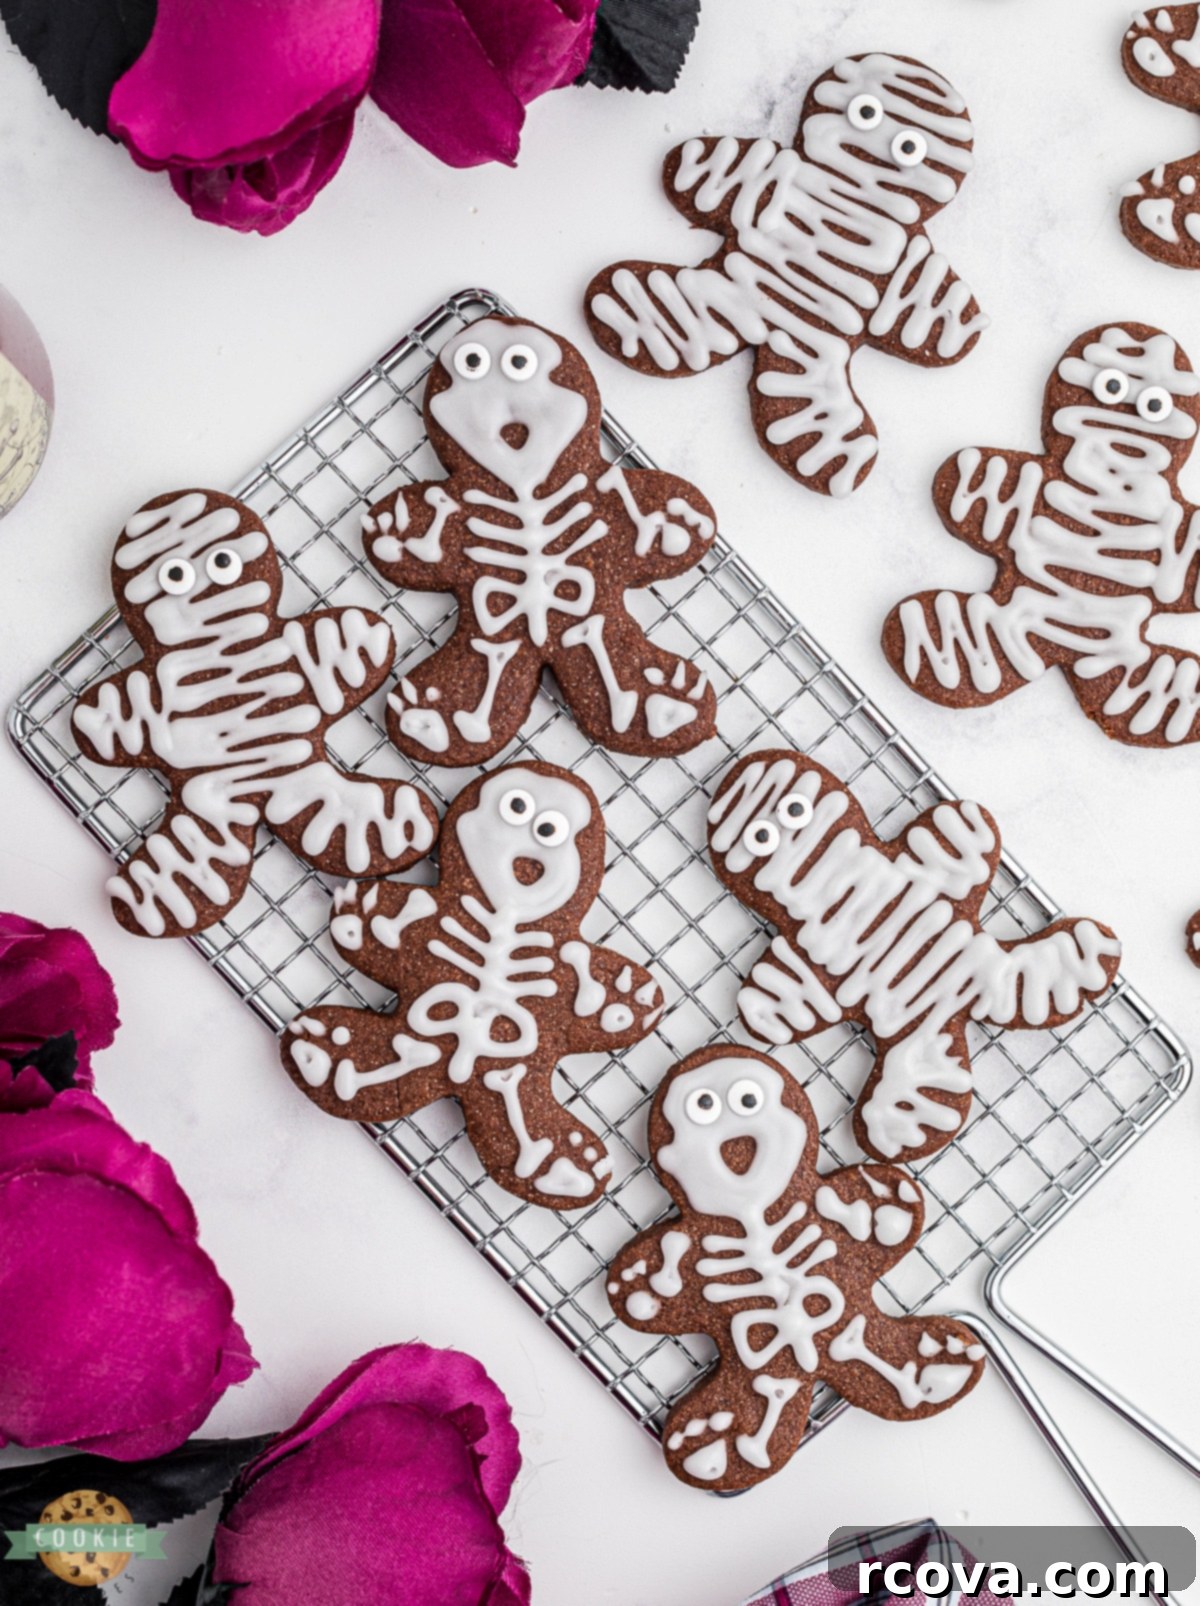
These cut-out sugar cookies offer an experience that’s as entertaining to decorate as it is satisfying to eat. Gather your family, especially the little monsters, and let them join in the creative decorating fun. This Halloween sugar cookie recipe isn’t just a dessert; it’s an edible art project rolled into one. Watch everyone’s faces light up with excitement and anticipation as they reach for their very own sweet and chocolatey skeletal masterpiece. From eerie skulls to playful bones, the possibilities for customization are endless, making each cookie a unique and personal creation.
Crafting Your Delicious Halloween Chocolate Sugar Cookies
Creating these chocolate sugar cookies from scratch is a surprisingly simple process, even though it involves several distinct steps. The beauty of this recipe lies in its flexibility; you can even spread the preparation out over a couple of days, making it perfect for busy schedules. And trust us, the effort is entirely worth it! These skeleton sugar cookies are a truly festive and spooktacular treat that will be the highlight of your next Halloween gathering. Each cookie is uniquely wonderful, baked with love and attention to detail, promising to become a cherished addition to your collection of favorite Halloween recipes. Encourage your children and their friends to get involved in the decorating process – it’s a fantastic way to turn baking into a fun party activity, fostering creativity and making lasting memories.
Why You’ll Adore This Halloween Cookie Recipe
There are countless reasons why these Halloween Skeleton Cookies will become a staple in your autumnal baking repertoire. From their straightforward preparation to their captivating charm, they offer a delightful experience for every baker and dessert lover.
- Effortlessly Simple Ingredients: You’ll be pleasantly surprised to discover that most, if not all, of the ingredients required for this recipe are likely already waiting in your pantry. We’re talking about everyday essentials like all-purpose flour, baking powder, salt, butter, sugar, and cocoa powder. This means fewer trips to the grocery store and more time enjoying the baking process, making these cookies an accessible project for anyone.
- Convenient Make-Ahead Dough: One of the best features of this recipe is the ability to prepare the cookie dough in advance. The dough requires a minimum of 2 hours of chilling before you can roll it out and cut your shapes. However, you can make the dough up to 2 days ahead of time, storing it in the refrigerator. This allows you to split the baking process, tackling the dough preparation on one day and then simply rolling, cutting, baking, and decorating when it fits best into your schedule. This flexibility is a lifesaver during the busy Halloween season!
- Clever Cookie Cutter Repurposing: Say goodbye to single-use kitchen gadgets! If you have gingerbread man-shaped cookie cutters tucked away from the Christmas holidays, now is their time to shine again. This recipe brilliantly repurposes them, using their iconic shape as the foundation for our spooky skeletons. It’s a creative and economical way to get more use out of your existing baking tools, and it makes creating the distinct skeleton shape incredibly simple.
- Fun for All Ages and Skill Levels: This recipe is designed to be enjoyable for everyone, from novice bakers to seasoned pros. The steps are clear, and the decorating aspect is forgiving, allowing for both intricate designs and whimsical, child-friendly artistry. It’s an ideal activity to share with family, creating cherished memories alongside delicious treats.
- Irresistible Chocolate Flavor: Unlike traditional sugar cookies, these boast a rich, deep chocolate flavor that makes them even more decadent and appealing. The cocoa powder infuses the dough with a delightful bitterness that perfectly complements the sweet glaze, creating a balanced and utterly addictive taste experience.
Essential Ingredients for Your Skeleton Halloween Cookies
Crafting the perfect batch of chocolate Halloween sugar cookies begins with high-quality ingredients. Here’s what you’ll need, along with a few tips on why each component is important:
- Butter: You’ll need 1 cup (two sticks) of unsalted butter, softened to room temperature. Room temperature butter creams beautifully with sugar, creating a light, airy base for your cookies and ensuring a tender texture.
- Granulated Sugar: 1 cup of granulated sugar not only sweetens the cookies but also contributes to their softness and helps create that classic sugar cookie crisp edge.
- Extracts: To enhance the flavor of the cookie dough, we use 1 teaspoon of clear vanilla extract (divided for both cookies and glaze) and ¼ teaspoon of almond extract. Clear vanilla is excellent for maintaining the rich dark color of the chocolate dough and the pure white of the icing, while almond extract adds a subtle, sophisticated depth of flavor that complements chocolate wonderfully.
- Large Egg: One large egg acts as a crucial binder, bringing all the ingredients together and adding richness and structure to the cookie dough.
- All-Purpose Flour: 2 cups of all-purpose flour (plus an additional 2 tablespoons for dusting your work surface) provide the essential structure for your cookies. Proper measurement is key here; spoon and level your flour to avoid a dense, dry cookie.
- Unsweetened Natural Cocoa Powder: ½ cup of unsweetened natural cocoa powder gives these cookies their distinctive deep chocolate flavor and dark color. Using natural cocoa powder (not Dutch-processed) interacts best with the baking powder in the recipe.
- Baking Powder: ¾ teaspoon of baking powder is your leavening agent, helping the cookies to puff up slightly and achieve a desirable texture as they bake, preventing them from being too flat or hard.
- Salt: ¾ teaspoon of salt is vital for balancing the sweetness and enhancing the rich chocolate flavor, making every bite more complex and delicious.
For the Perfect Icing Glaze
The glaze is where the magic happens for your Halloween cookie decorations. Achieving the right consistency is key for smooth piping and a professional finish.
- Powdered Sugar: 3 cups of sifted powdered sugar form the smooth, sweet base of your icing. Sifting is crucial to prevent lumps, ensuring a silky texture that pipes beautifully.
- Milk: Approximately ¼ cup of milk (you might need slightly more or less) helps achieve the ideal consistency for your glaze. Add it gradually until the icing flows smoothly but holds its shape for piping.
- Light Corn Syrup: 2 tablespoons of light corn syrup are added for two important reasons: it gives the glaze a beautiful, shiny finish and helps prevent the icing from crystallizing, keeping it smooth and pleasant to eat.
- Clear Vanilla Extract: ½ teaspoon of clear vanilla extract (part of the 1 tsp divided for the whole recipe) is added to the glaze for flavor without altering the pure white color.
- Candy Eyeballs: These are absolutely essential for bringing your skeleton and mummy cookies to life! You can easily find them in the cake decorating aisles of most craft stores, large supermarkets like Walmart, or conveniently here on Amazon.
- Edible Ink Pens: If you’re looking to add fine details or artistic touches, edible ink pens are a fantastic optional tool. They allow you to draw intricate designs, expressions, or patterns directly onto the hardened icing, adding another layer of creativity to your cookies.
Decorating Instructions for Your Spooky Halloween Cookies
Once your chocolate sugar cookies are baked and fully cooled, it’s time for the most exciting part: decorating! This is where your creativity can truly shine, transforming simple gingerbread shapes into impressive Halloween characters. Prepare your piping bag with the prepared white glaze, fitted with a small round tip (like Wilton #1 or #2) for precision.
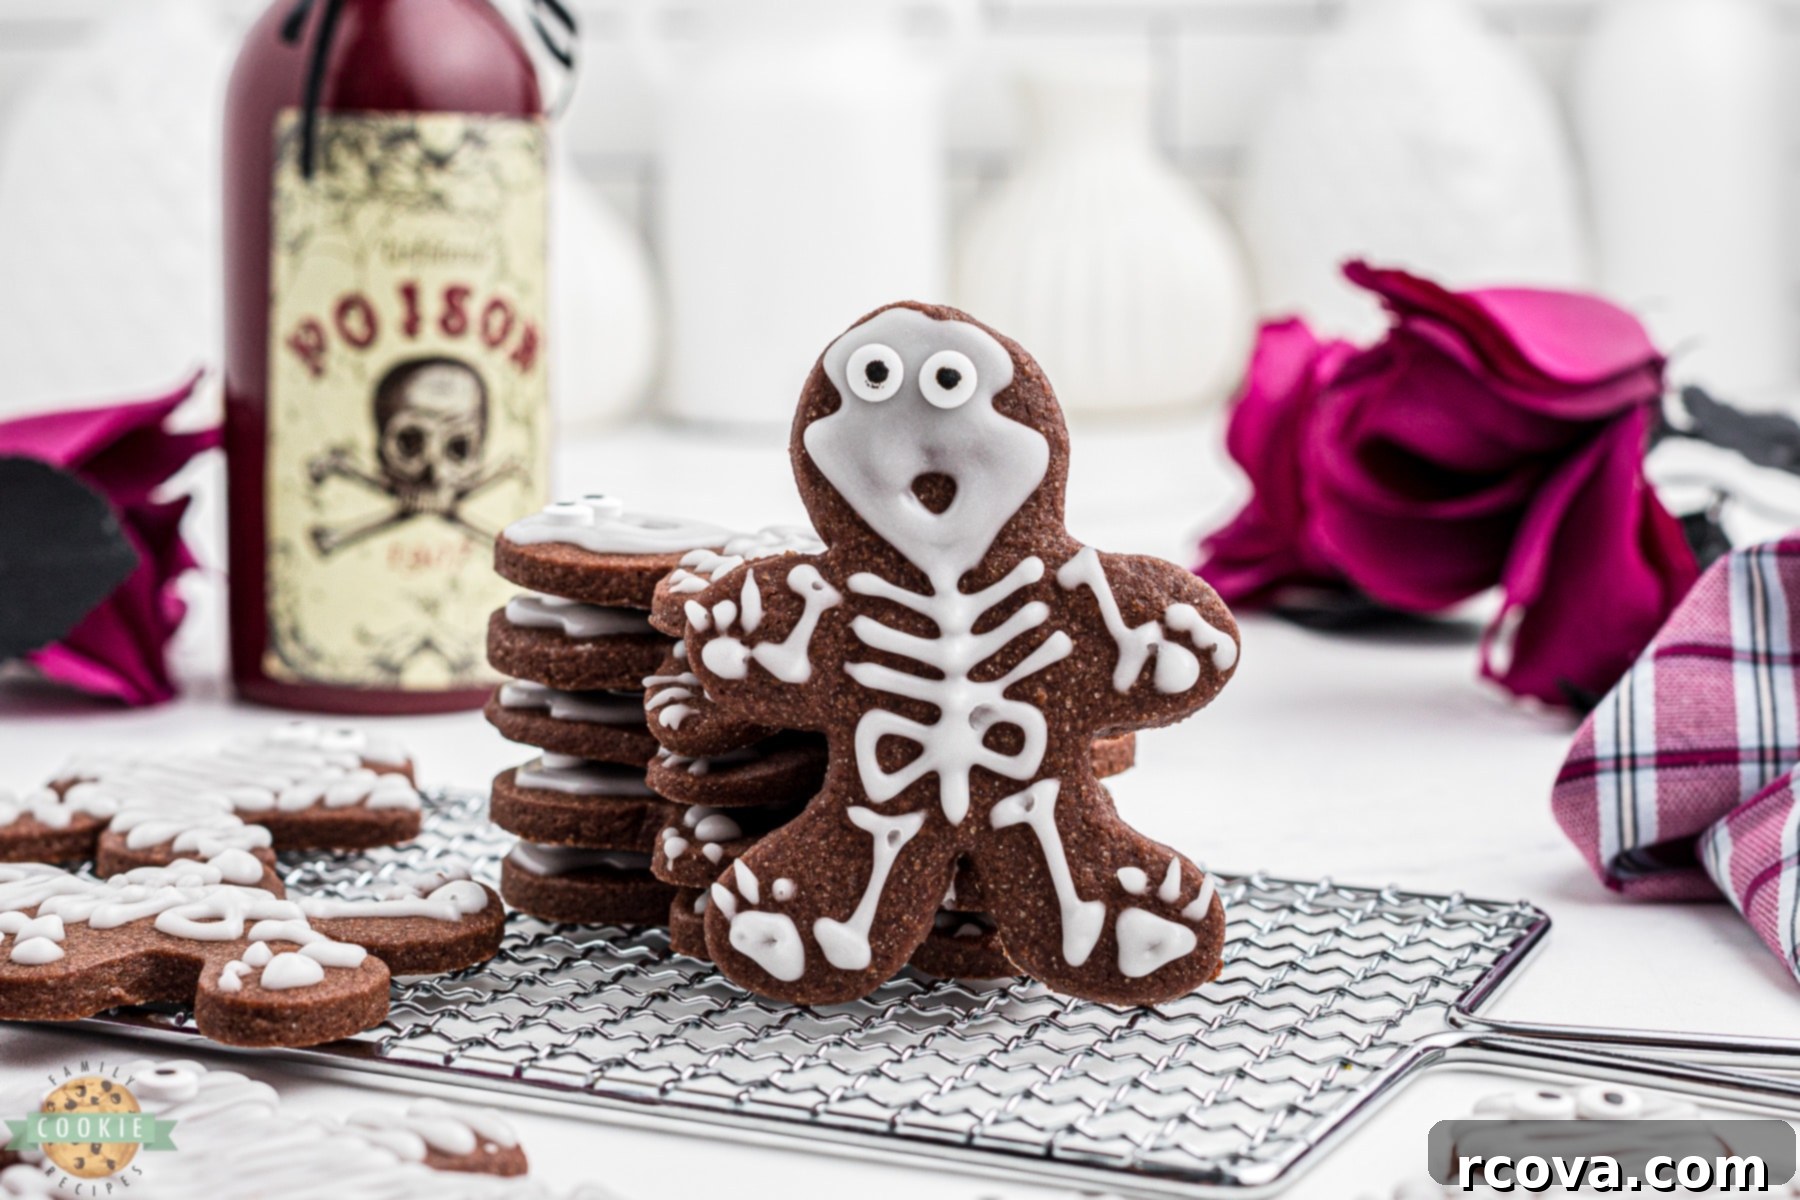
- For Crafting Creepy Skeletons: Begin by imagining the skull at the top of the gingerbread man shape. Pipe a small, roughly circular or oval shape to form the base of the skull. Inside this shape, draw a small horizontal line or a tiny oval to serve as the mouth opening. Then, carefully pipe around the initial skull outline, filling in the space to create a solid white skull. If there are any small gaps or uneven areas, use a clean toothpick to gently smooth and fill them. While the icing is still wet, attach two candy eyeballs to the skull to give your skeleton an instantly ghoulish gaze. Once the skull is complete, pipe lines down the body and limbs to represent bones, creating a simple yet effective skeleton outline.
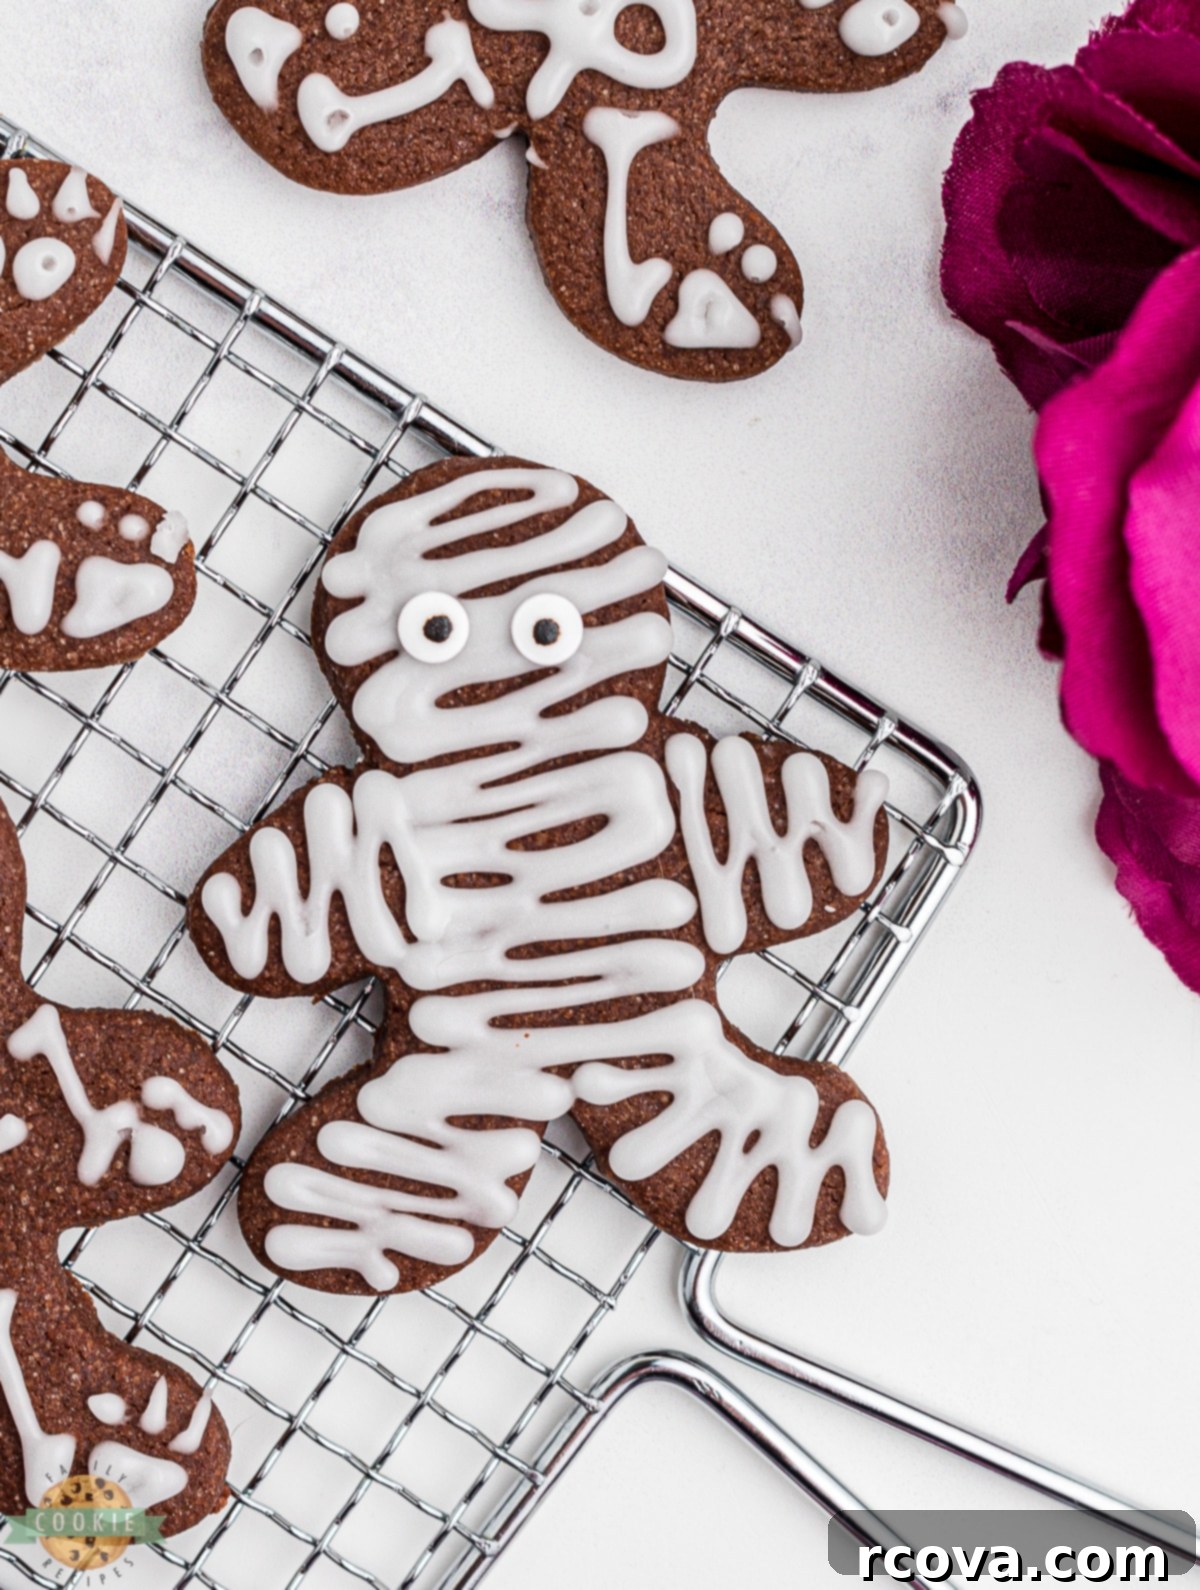
- For Making Mummified Masterpieces: These are incredibly fun and surprisingly easy! Start by adding two candy eyeballs to the head area of your gingerbread cookie. Then, using your piping bag, pipe irregular outlines or “bandages” across the entire cookie, overlapping them slightly to create a wrapped effect. Don’t worry about perfection; uneven lines add to the charm of a mummy. Ensure you don’t pipe too close to the eyeballs, leaving them exposed for a peek-a-boo effect. Allow these cookies to dry for several hours (preferably overnight) until the icing is completely hardened. Once dry, you can use edible markers to add details like stitching on the bandages, or even outline the eyes for a more intense stare.
Remember, the key to successful piping is a steady hand and consistent pressure. Practice on a piece of parchment paper first if you’re new to piping. Don’t be afraid to experiment and have fun with different designs!
How Long Do Skeleton Decorated Cookies Stay Fresh?
The good news is that these spooky treats can be enjoyed for several days after baking! Once the royal icing on your skeleton cookies has completely hardened (this usually takes several hours at room temperature, or overnight for best results), you can store them. Place the cookies in an airtight container at room temperature. They will maintain their delicious flavor and festive appearance for up to 5-7 days. To prevent them from sticking together or damaging the icing, you can place a piece of parchment paper or wax paper between layers if stacking.
HALLOWEEN SKELETON COOKIES RECIPE
Print
Pin
Rate
Ingredients
- 1 cup Butter unsalted, room temperature
- 1 cup Granulated Sugar
- ½ tsp Clear Vanilla Extract
- ¼ tsp Almond Extract
- 1 Large Egg
- 2 cups All-Purpose Flour + 2 Tbsp for rolling dough out on
- ½ cup Unsweetened Natural Cocoa
- ¾ tsp Baking Powder
- ¾ tsp Salt
Icing
- 3 cups Powdered Sugar sifted
- ¼ cup Milk
- 2 TBSP Light Corn Syrup
- ½ tsp Clear Vanilla Extract
- Candy Eyeballs
- Edible ink pens optional
Instructions
-
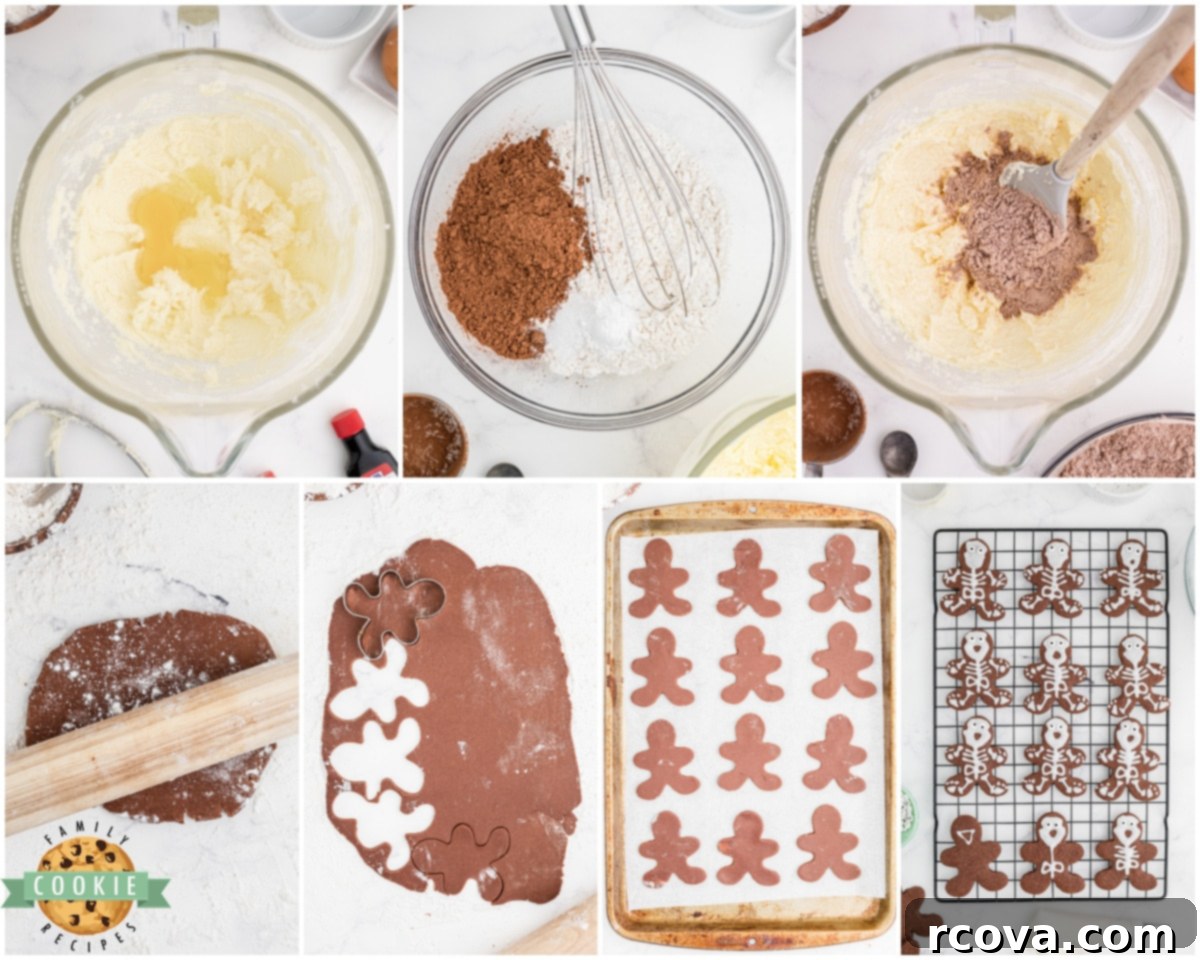
In a stand mixer bowl, cream the butter and sugar for about 5 minutes. Add in the egg, vanilla extract, and almond extract. Beat again for about 1 minute to mix.
-
In a separate bowl, combine the flour, cocoa powder, baking powder, and salt with a whisk. Add the dry ingredients, in batches, to the creamed butter mixture. Mix until just incorporated.
-
Divide the dough in half and spoon it onto plastic wrap. Cover and wrap the dough well before pressing it into a disc shape. Repeat with the remaining half of dough. Place the discs of dough into the fridge to chill for at least 2 hours.
-
Once chilled, get the oven preheating to 350 degrees F. Line a cookie sheet with parchment paper or silicon mat and set it aside.
-
Take one disc of cookie dough and unwrap it. Place onto a liberally floured surface. Roll the dough out with a rolling pin so that it is between ⅛ a- ¼ inch thick.
-
Use a gingerbread man shaped cookie cutter to cut out shapes. Reroll and cut the dough as many times as needed, placing your cut cookies onto the prepared baking sheet. Repeat this process with the remaining half of dough.
-
Bake the cookies in the preheated oven for 8-10 minutes. Remove the baking sheet from the oven and allow the cookies to cool on the sheets for 10 minutes before transferring to a wire rack to cool completely.
-
Make the glaze by sifting the powdered sugar into a large mixing bowl. Add the milk, corn syrup, and vanilla extract. Whisk until the icing is a good consistency. You will know that it is ready when you drizzle the icing back onto itself it should hold its shape a little before melting back into the icing. Spoon your icing into a piping bag that has been fitted with Wilton#1 piping tip and a coupler. Carefully pipe the icing onto the cooled cookies.
-
For making skeletons– Start by drawing a hole to become the mouth and then pipe around it to make the skull. Use a toothpick as needed to fill in small gaps. Attach two eyeballs to each skull.
For making mummies- Pipe outlines on the cookies (not too close to each other) and then add the eyeballs. Allow the cookies to dry for several hours, and then decorate with the edible markers as desired.
Notes
Place them in an airtight container or freezer bag and freeze for up to 3 months. Thaw at room temperature before serving.
Nutrition
Can You Freeze These Frosted Sugar Cookies?
Absolutely, you can freeze these delicious frosted sugar cookies, making them an ideal make-ahead treat for Halloween parties or unexpected cravings! The key to successful freezing is to do it properly, ensuring the delicate frosting remains intact and the cookies taste as fresh as the day they were baked. Here’s a step-by-step guide:
- Allow the Frosting to Fully Set: This is the most critical step. Before attempting to freeze, ensure your cookie frosting is completely dry and firm to the touch. This can take several hours, or even overnight, depending on the humidity in your environment. Rushing this step will result in smudged decorations.
- Flash Freeze for Protection: Arrange the fully frosted and dried cookies in a single layer on a baking sheet lined with parchment paper. Place the baking sheet in the freezer for 1 to 2 hours, or until the cookies are completely solid. This “flash freezing” prevents the cookies from sticking together when stacked and protects the delicate icing.
- Layer Carefully in an Airtight Container: Once flash-frozen, transfer the solid cookies to an airtight freezer-safe container. Place a sheet of parchment paper or wax paper between each layer of cookies to add an extra layer of protection and prevent sticking.
- Seal Well to Prevent Freezer Burn: Ensure the container is tightly sealed to keep out air and moisture, which are the main culprits of freezer burn. A good seal will preserve the flavor and texture of your cookies for longer.
- Thawing for Optimal Enjoyment: When you’re ready to enjoy your frozen treats, simply remove the container from the freezer and let it thaw at room temperature. It’s important to keep the lid on the container during thawing. This allows any condensation to form on the outside of the container rather than directly on the cookies, preserving their crispness and the integrity of the frosting.
Properly frozen, these cookies can be stored for up to 3 months, ensuring you have a stash of spooky delights whenever the mood strikes!
Creative Uses for Edible Ink Pens
Edible ink pens are a fantastic tool for adding intricate details and personalized touches to your Halloween Skeleton Cookies once the royal icing has dried and hardened. If you want to take your designs to the next level, here are a few ideas:
- Enhance Skull Details: Use a black edible marker to draw more defined eye sockets, jagged teeth, or even hairline cracks on the skull for a more weathered, ancient look.
- Add More Bones: Beyond the basic outline, you can sketch in more detailed bone segments or rib cages on the skeleton’s body.
- Spooky Spiderwebs: If you’ve opted for a flood-filled white cookie, you can draw delicate spiderwebs across the surface. Start with a dot in the center, then draw lines radiating outwards, and connect them with curved lines to create the web effect.
- Personalized Messages: Write “Happy Halloween!” or individual names on the cookies, making them perfect party favors.
- Mummy Bandage Textures: For your mummy cookies, after the initial white icing has dried, use a brown or gray edible pen to add subtle shading or texture to the bandages, giving them an aged, cloth-like appearance. You can also draw small stitches or frayed edges.
- Freestyle Halloween Designs: Don’t limit yourself to skeletons and mummies! Once you have a blank canvas of hardened white icing, you can draw anything from bats, ghosts, pumpkins, or witches’ hats, turning your cookies into a diverse collection of Halloween art.
These pens offer a level of detail that’s hard to achieve with piping bags alone, allowing for truly customized and impressive cookie art.
Can I Make Regular Sugar Cookies Instead of Chocolate Sugar Cookies?
Absolutely! If you prefer a classic sugar cookie base, it’s very easy to adapt this recipe. Simply omit the ½ cup of unsweetened natural cocoa powder. To maintain the correct dough consistency, you will then need to increase the amount of all-purpose flour from 2 cups to 2 ½ cups. This adjustment ensures your cookies will still be perfectly rollable and hold their shape beautifully during baking.
When switching to a regular sugar cookie base, your cookies will be a light golden color. This means your white royal icing will stand out even more vividly! However, you might also consider adding some food coloring to your royal icing for a pop of Halloween color. Imagine vibrant orange, eerie green, or deep purple icing to contrast with the light-colored cookies, making your skeleton and mummy designs even more eye-catching. You can also divide the icing into several bowls and tint them with different gel food colorings to create a variety of spooky shades for decorating.
Tips for Achieving Perfect Cut-Out Cookies Every Time
Making beautiful cut-out cookies is a rewarding process, and a few simple techniques can ensure your chocolate Halloween cookies turn out perfectly shaped and delicious.
- Proper Chilling is Non-Negotiable: The chilling time specified in the recipe (at least 2 hours) is crucial. Cold dough is less sticky and much easier to roll out without becoming unmanageable. It also helps prevent the cookies from spreading too much in the oven, ensuring they maintain their crisp, defined edges.
- Flour Your Surface Wisely: When rolling out the dough, a liberally floured surface is your friend. This prevents sticking, but be careful not to incorporate too much extra flour into the dough, as it can make the cookies tough. Lightly flour your rolling pin as well.
- Roll Evenly: Aim for a consistent thickness of ⅛ to ¼ inch across the entire dough sheet. Uneven thickness can lead to some cookies baking faster than others, resulting in a mix of over-baked and under-baked treats. Using a rolling pin with adjustable guides can be very helpful here.
- Optimize Your Cuts: Try to cut your shapes as close together as possible to minimize dough scraps. The less you re-roll the dough, the more tender your cookies will be. Each time dough is re-rolled, it develops more gluten, which can lead to tougher cookies.
- Handle with Care: Once cut, use a thin spatula or a dough scraper to carefully transfer the cut-out cookies to your prepared baking sheet. This helps prevent stretching or deforming their shapes.
- Cool Completely: Allow the cookies to cool on the baking sheet for a few minutes after baking before transferring them to a wire rack to cool completely. This helps them firm up and prevents breakage. Decorating warm cookies will melt your icing!
Host a Spooktacular Halloween Cookie Decorating Party
These Halloween Skeleton Cookies are not just a dessert; they’re an experience waiting to happen, especially when shared! Transform your kitchen into a creative hub by hosting a Halloween cookie decorating party. It’s a fantastic way to celebrate the holiday, engage kids (and adults!), and create edible works of art.
- Prepare Ahead: Bake all your chocolate sugar cookies in advance. Have them fully cooled and ready to go. You can even pre-bake them a day or two ahead and store them.
- Set Up a Decorating Station: Cover your table with a festive Halloween tablecloth (paper ones make for easy cleanup!). Provide each decorator with a few cookies.
- Offer a Variety of Icing Colors: While white is traditional for skeletons and mummies, offer small bowls of icing tinted with orange, green, purple, or even black food coloring. Provide small piping bags (or ziplock bags with a corner snipped off) for each color.
- Provide Plenty of Toppings: Lay out a selection of candy eyeballs, spooky sprinkles, edible glitter, and, of course, edible ink pens. Small bowls for each topping make it easy for everyone to access.
- Inspire Creativity: Have a few example cookies on display, or print out some decorating ideas. Encourage everyone to come up with their own unique spooky designs.
- Capture the Memories: Don’t forget to take photos of the process and, especially, of the finished creations!
A cookie decorating party is an interactive and delicious way to make Halloween even more special, leaving everyone with sweet treats and even sweeter memories.
Check Out These Other Frightfully Delicious Halloween Cookie Recipes
If you’re still craving more spooky sweets, be sure to explore these other fantastic Halloween cookie ideas to round out your festive spread:
- Halloween Sprinkle Cookies are soft, buttery brown sugar cookies tinted in spooky colors and coated in festive sprinkles. A fun and delicious treat that’s perfect for Halloween celebrations!
- Perfect M&M Halloween Cookies are soft, chewy treats made with pudding mix, butter, and sugar, then loaded with colorful M&M’s. A festive and crowd-pleasing cookie for any Halloween celebration!
- These Halloween Cobweb Cookies are topped with chocolate and vanilla icing, decorated with a quick spider web design. A spooky yet simple treat that’s as fun to make as it is to eat!
- Caramel Apple Snickerdoodles are cinnamon sugar cookies filled with fresh apples and gooey caramel. A cozy fall twist on the classic snickerdoodle!
- Make a batch of these incredible Pumpkin Pudding Cookies! Loaded with warm pumpkin spice flavor, sweet white chocolate chips, plus the pudding mix makes them extra moist and irresistible.
- Funfetti Halloween Cookies are soft, colorful treats packed with festive sprinkles and a boost of texture from pudding mix. A spooky-fun cookie that’s as tasty as it is playful!
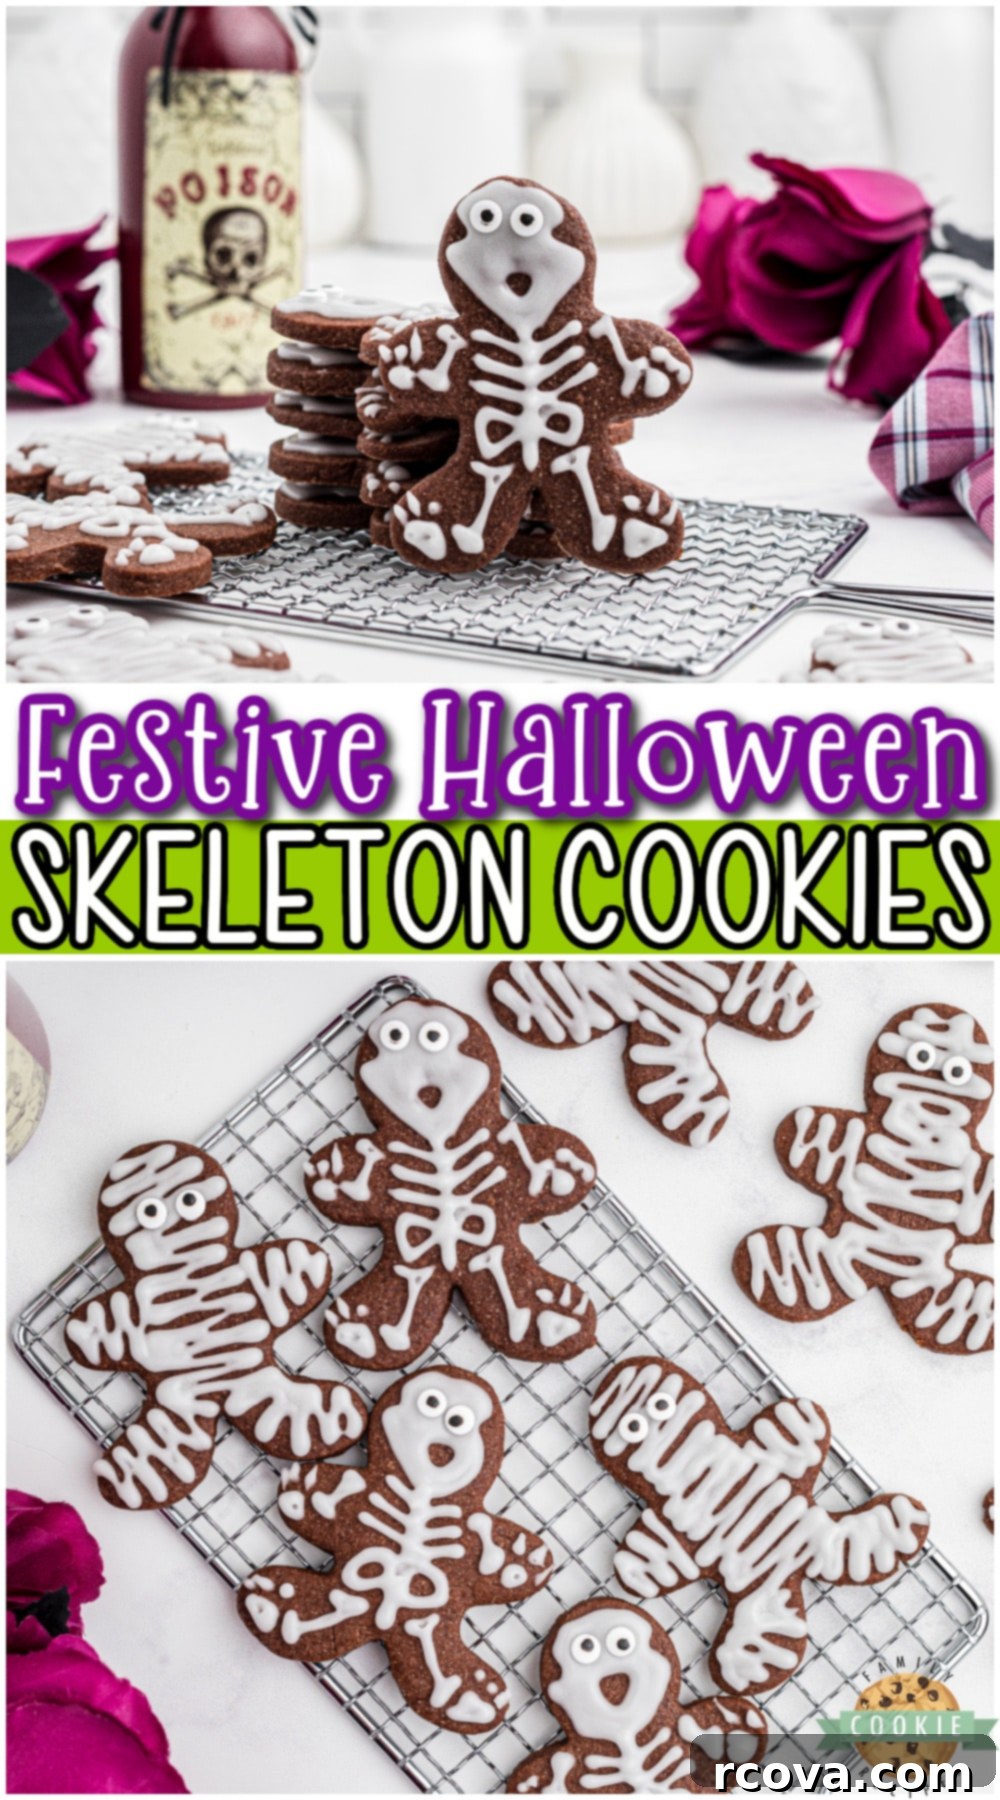
Ultimately, these Halloween Skeleton Cookies are more than just a dessert; they’re a blank canvas for your spooky creativity. With their rich chocolate flavor and customizable skeleton designs, they can be as cute or as eerie as you desire. This easy-to-follow recipe, using simple ingredients you likely already have, ensures a delightful baking experience and a truly memorable treat for any Halloween celebration. Get ready to bake, decorate, and enjoy the delicious spirit of the season!
