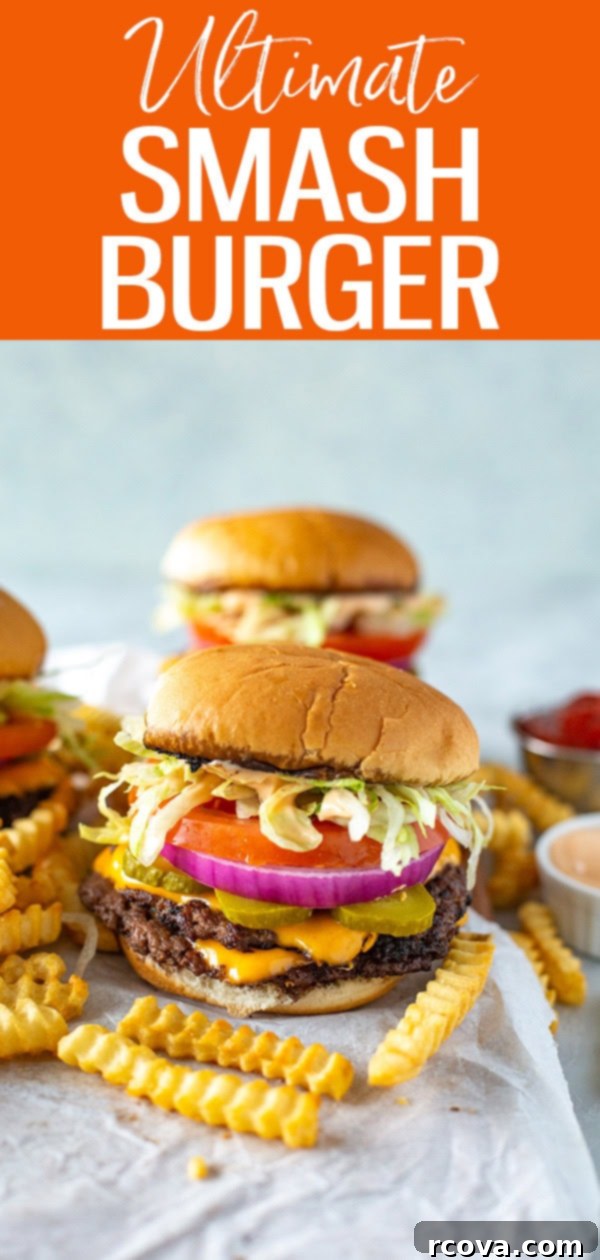
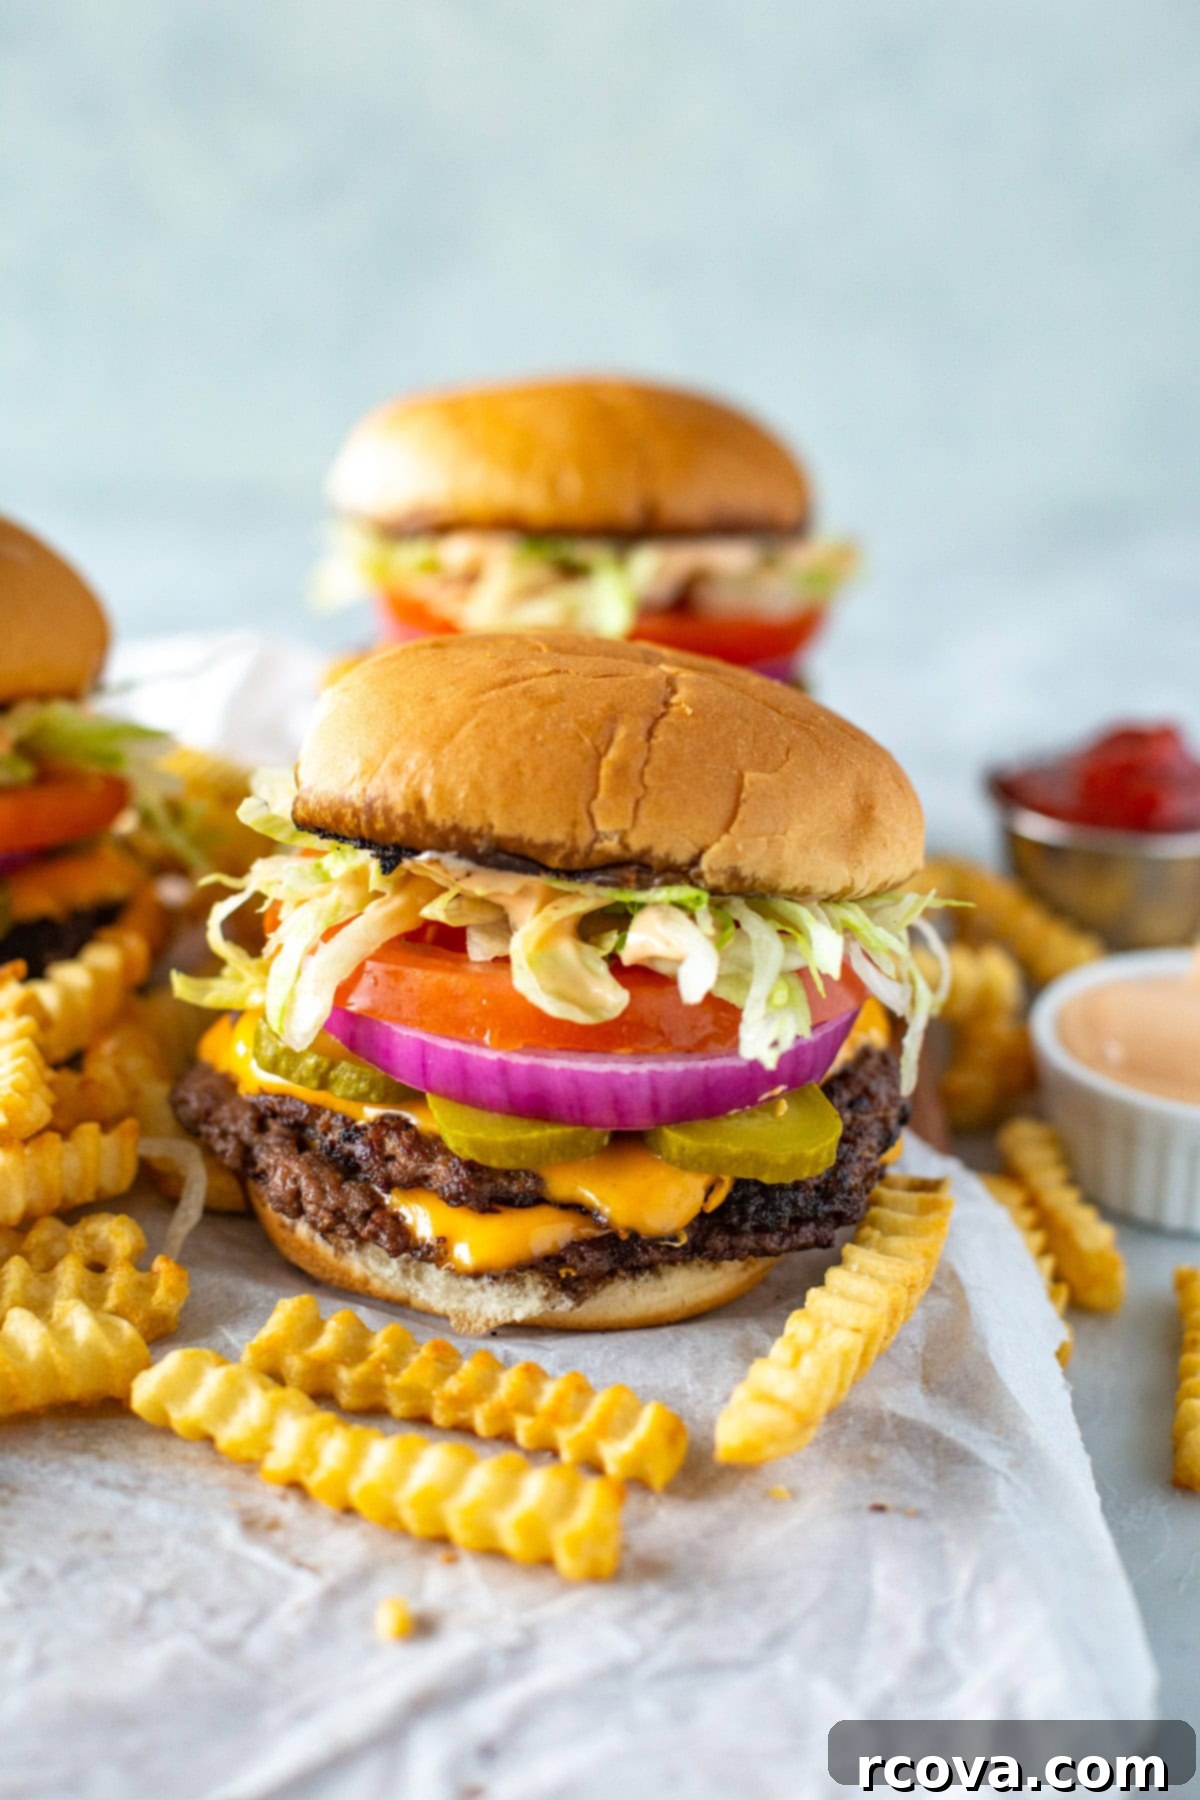
Ultimate Homemade Smash Burger Recipe: Achieve Restaurant-Quality Crispy & Juicy Burgers at Home
Prepare to revolutionize your burger nights with this incredible Ultimate Smash Burger Recipe! Forget dry, bland patties – we’re talking about perfectly seared, incredibly juicy, and intensely flavorful burgers with those coveted crispy edges you find at your favorite diner. This guide makes it delicious and surprisingly easy to recreate that restaurant-quality experience right in your own kitchen. We’ll walk you through every step, from selecting the right beef and crafting a mouth-watering special sauce to mastering the smash technique and assembling your perfect burger. Get ready to impress your taste buds and your guests; serve these culinary masterpieces with your favorite sides and toppings for an unforgettable meal!
FREE Budget-Friendly Meal Plan!
Save thousands of dollars on food every year with my free budget-friendly meal plan ebook.
Ingredients and Smart Substitutions for Your Perfect Smash Burger
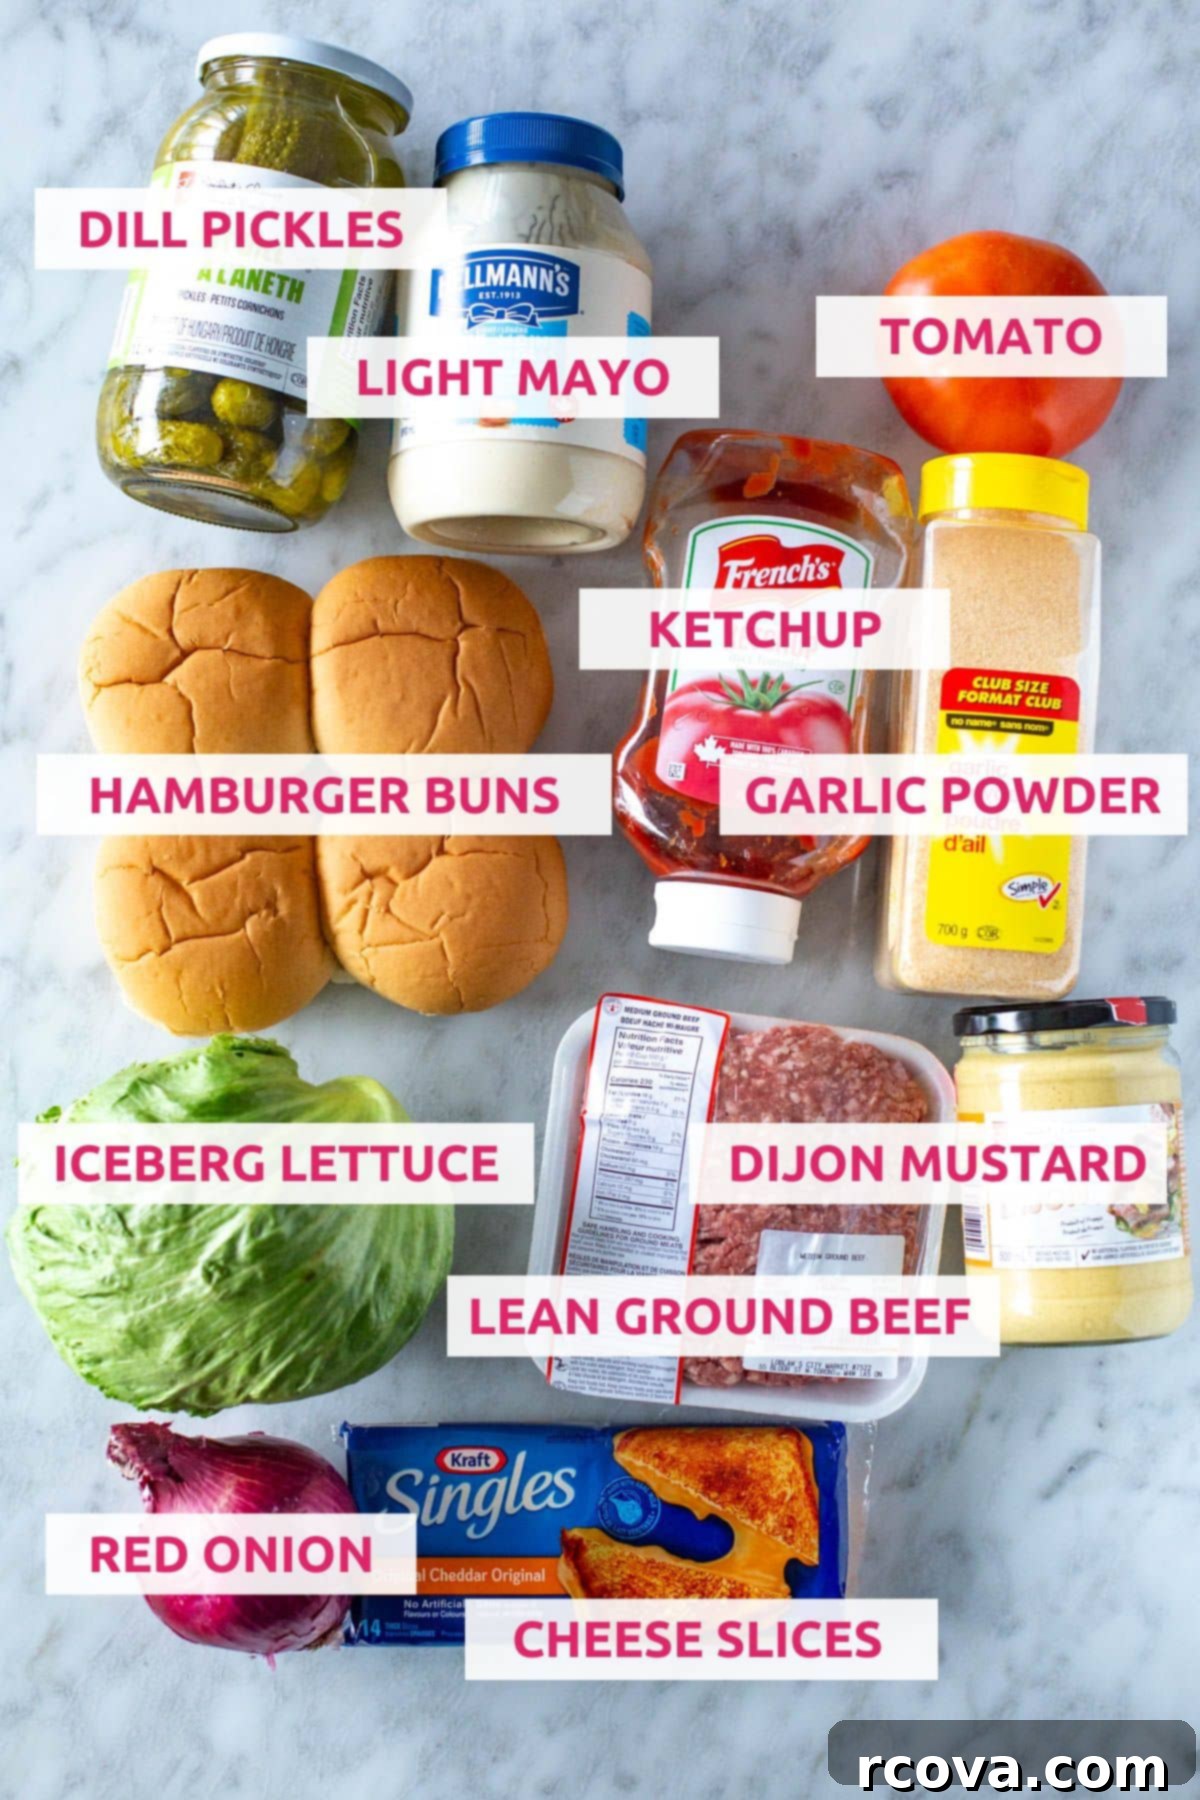
Crafting the perfect smash burger starts with quality ingredients, but don’t be afraid to get creative with substitutions to suit your taste or what you have on hand. Here’s a detailed look at what you’ll need:
- Lean Ground Beef: For that signature crispy crust and juicy interior, it’s crucial to use ground beef with a good fat content. Aim for a lean-to-fat ratio of 80/20 (80% lean, 20% fat) or 85/15. Regular ground beef works wonderfully. Avoid extra-lean ground beef (90/10 or higher), as it lacks the necessary fat to create that crispy, flavorful exterior and will likely result in a dry burger. The fat renders quickly on the hot griddle, contributing to the Maillard reaction that gives smash burgers their irresistible char and rich taste.
- Cheese Slices: The melted cheese is non-negotiable for a classic smash burger. American cheese is a traditional choice due to its superior melting properties, creating a gooey, uniform layer over the hot patty. However, feel free to experiment with other cheeses like sharp cheddar for a bolder flavor, creamy mozzarella for an extra stretch, or nutty Swiss for a different profile. Provolone or pepper jack could also add a fantastic kick.
- Hamburger Buns: A soft, slightly sweet, and sturdy bun is essential to hold up to the juicy patties and abundant toppings. Classic brioche buns, potato rolls, or even a good quality sesame seed bun are excellent choices. For a lower-carb option, consider serving your smash burger patties nestled in fresh, crisp lettuce wraps made from iceberg or Boston lettuce leaves. Toasting the buns is a simple yet vital step to prevent sogginess and add another layer of texture.
- Iceberg Lettuce: This crisp, refreshing lettuce provides a cool, crunchy contrast to the hot, savory burger. Its mild flavor won’t overpower the other components. Romaine lettuce is another great alternative if you prefer a slightly firmer leaf with a bit more bite. You could also use butter lettuce for a softer texture.
- Beefsteak Tomato: Fresh, ripe beefsteak tomato slices add a burst of acidity and sweetness, cutting through the richness of the beef and cheese. Choose firm, red tomatoes for the best flavor and texture. If tomatoes aren’t your preference, feel free to omit them entirely or swap them for roasted red peppers for a smoky, sweet twist.
- Red Onion: Thinly sliced red onion brings a sharp, pungent bite and a vibrant color to the burger. If raw onion is too intense, soaking the slices in ice water for 10-15 minutes can mellow their flavor. Alternatively, consider making caramelized onions for a sweet, savory, and incredibly rich topping, or even quick-pickled red onions for a tangy crunch. White or yellow onion slices also work well.
- Dill Pickle Slices: The tangy crunch of dill pickle slices is a quintessential burger topping that provides a refreshing counterpoint to the rich beef. Feel free to use your favorite pickle variety – bread and butter pickles for a sweeter note, or spicy pickles for a bit of heat. You can also chop them finely and mix them into your special sauce for an extra burst of flavor.
Crafting the Perfect Special Sauce
No smash burger is complete without a signature sauce to tie all the flavors together. This classic special sauce is incredibly versatile and delicious, but don’t hesitate to explore other options!
- Light Mayo: Forming the creamy base of our sauce, light mayonnaise keeps the calorie count in check without sacrificing flavor. If you’re not concerned about calories, regular full-fat mayo will provide an even richer texture. You could also try a plant-based mayo for a vegan option.
- Ketchup: This provides a touch of sweetness and acidity. For a tangier finish or if you prefer to make it from scratch, combine tomato paste with a dash of vinegar and a pinch of sugar. A smoky BBQ sauce can also be a delicious substitute for a different flavor profile.
- Dijon Mustard: Dijon adds a subtle pungent kick and a layer of sophisticated flavor. Stone-ground mustard or even a good quality yellow mustard could also work, though they will alter the flavor profile slightly.
- Garlic Powder: A hint of garlic powder infuses a savory depth into the sauce. If you don’t have garlic powder, a tiny bit of finely minced fresh garlic can be used (use sparingly to avoid an overpowering raw garlic taste), or substitute with onion powder for a complementary savory note.
- Pickle Juice: This secret ingredient adds a bright, briny tang that elevates the entire sauce. It’s a fantastic way to utilize leftover pickle juice! If you don’t have any, a teaspoon of pickle relish can offer a similar flavor and added texture, or you can omit it if preferred.
For an extra special touch, you can also try my renowned Big Mac Sauce or my latest Special Burger Sauce, both designed to take your burgers to the next level!
How to Master the Art of Making a Smash Burger
The beauty of a smash burger lies in its simplicity and the incredible flavor developed through a specific cooking technique. Follow these steps to achieve that perfect crispy, juicy, and intensely flavorful burger every time.
Step 1: Prepare Your Toppings and Craft the Special Sauce
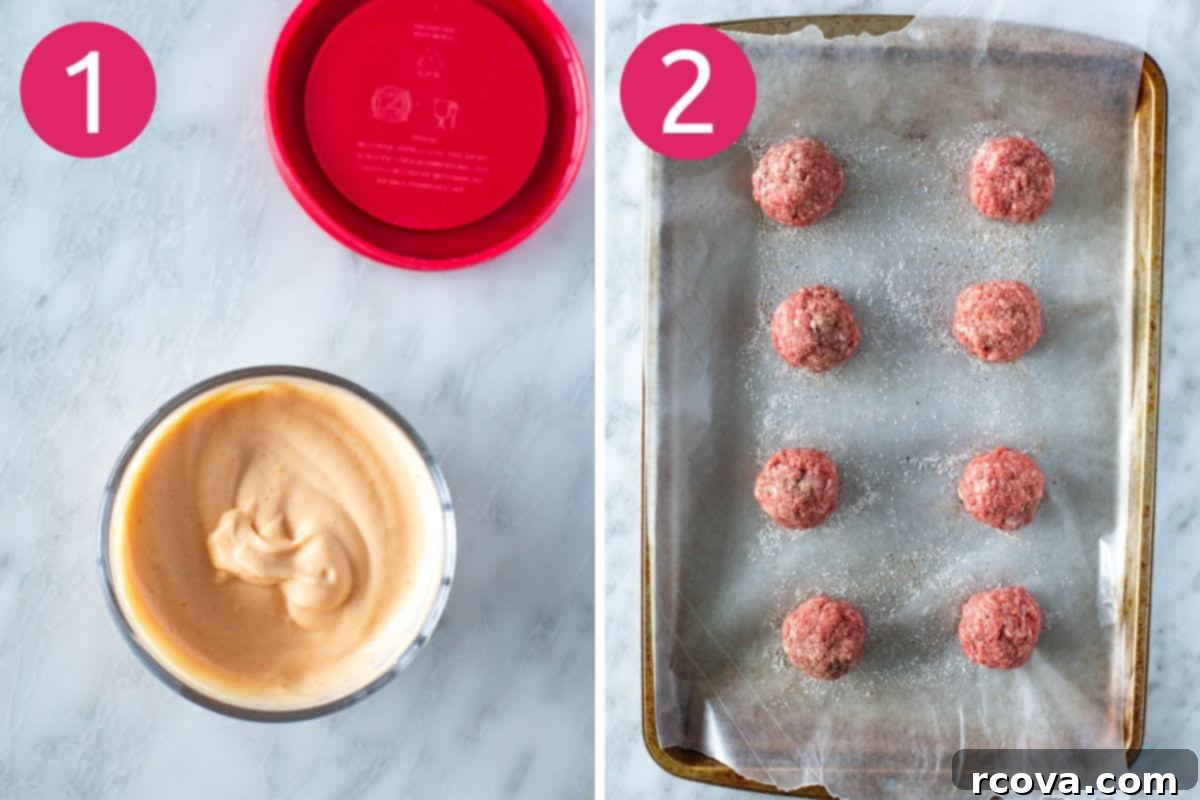
Before you even think about touching the beef, ensure all your toppings are prepped and readily available. This includes slicing your tomatoes, onions, and pickles, shredding your lettuce, and having your cheese slices and buns within arm’s reach. Next, prepare your special sauce by whisking together the light mayo, ketchup, Dijon mustard, garlic powder, and pickle juice until smooth and well combined. This allows the flavors to meld beautifully. You can also use this time to get any side dishes, like frozen fries, cooking in the oven or air fryer, ensuring everything is hot and ready at the same time.
Step 2: Form the Beef Balls
Divide your lean ground beef into equal portions, typically around 2-3 ounces each, and gently roll them into loose, uniform balls. The key here is not to overwork the meat, as this can lead to tough burgers. Avoid forming them into patties at this stage; the “smash” happens directly on the hot cooking surface. Place these beef balls on a parchment-lined baking sheet to keep them separate and easy to transfer, then season them generously with salt and freshly ground black pepper on all sides. This initial seasoning is crucial for building flavor.
Step 3: Smash the Patties to Perfection
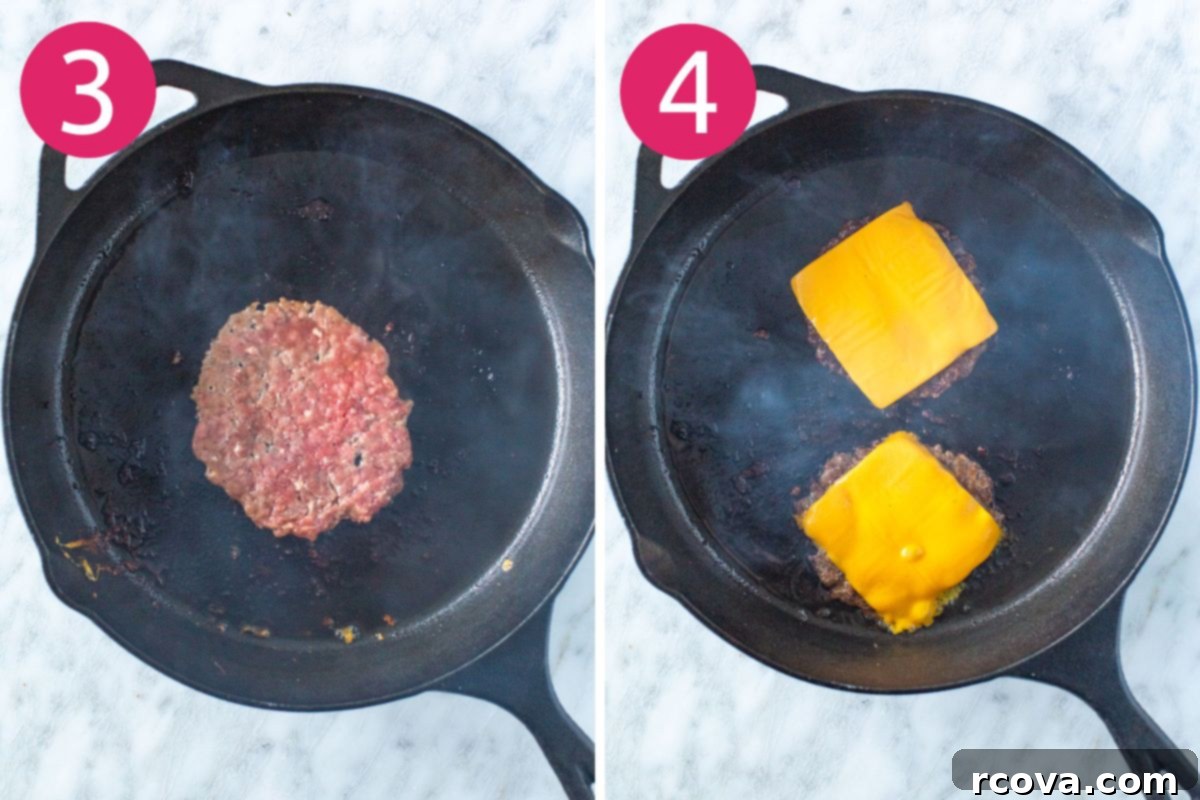
Heat a heavy-bottomed skillet, ideally a cast iron skillet or a flat-top griddle, over medium-high heat until it’s smoking hot. This high temperature is essential for achieving that characteristic crispy crust. Add a small drizzle of a high smoke point oil like avocado or grapeseed oil. Once the pan is shimmering and lightly smoking, place a beef ball onto the hot surface. Immediately, using a sturdy, flat spatula or a dedicated burger press (sprayed with cooking spray or lightly greased to prevent sticking), press down firmly and evenly on the beef ball, flattening it into a thin patty, about ¼-inch thick. Apply consistent pressure for about 10 seconds to ensure maximum contact with the hot surface and to create those irresistible lacy, crispy edges. Work in batches to avoid overcrowding the pan, which can lower the temperature and steam the burgers instead of searing them.
Step 4: Cook and Add the Cheese
Once smashed, let the burger cook undisturbed for approximately 1 to 1.5 minutes. You’ll know it’s time to flip when a beautiful, deep brown crust has formed on the bottom, and the edges appear crispy. Carefully scrape under the patty with your spatula, ensuring you get all those delicious crispy bits (the “fond”), and flip it over. Immediately place a slice of your chosen cheese on top of the cooked side. Allow the second side to cook for another 30-60 seconds, or until the cheese is perfectly melted and gooey. Since smash burgers are thin, they cook very quickly, so keep a close eye on them to prevent overcooking and drying out.
Step 5: Toast the Buns for Enhanced Texture
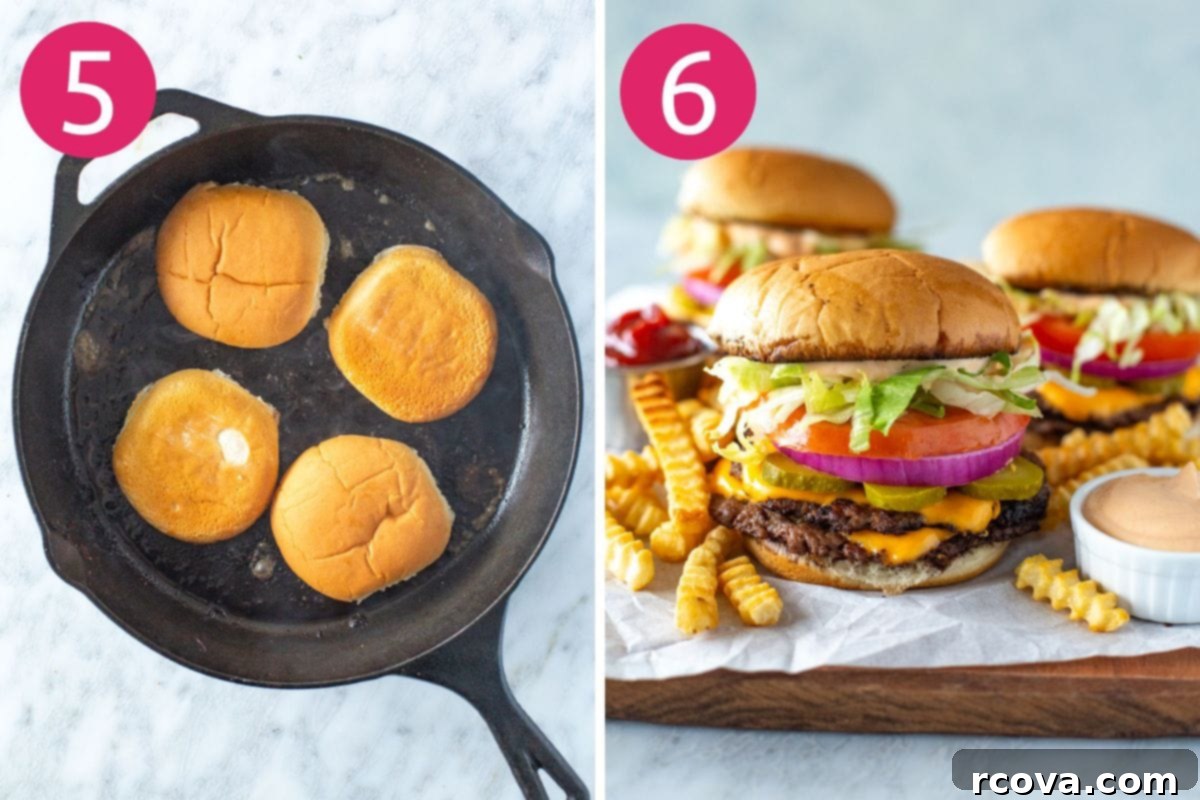
While your final burger patties are cooking, quickly add a small dab of butter or a brush of residual cooking oil to the hot pan. Place your hamburger buns, cut-side down, onto the griddle. Toast them for about 30-60 seconds, or until they are lightly golden brown and slightly crispy. Toasting the buns not only adds a wonderful textural element but also creates a barrier that prevents the buns from becoming soggy when they absorb the juices from the patty and sauce. This simple step makes a significant difference to the overall burger experience.
Step 6: Assemble Your Burgers and Serve!
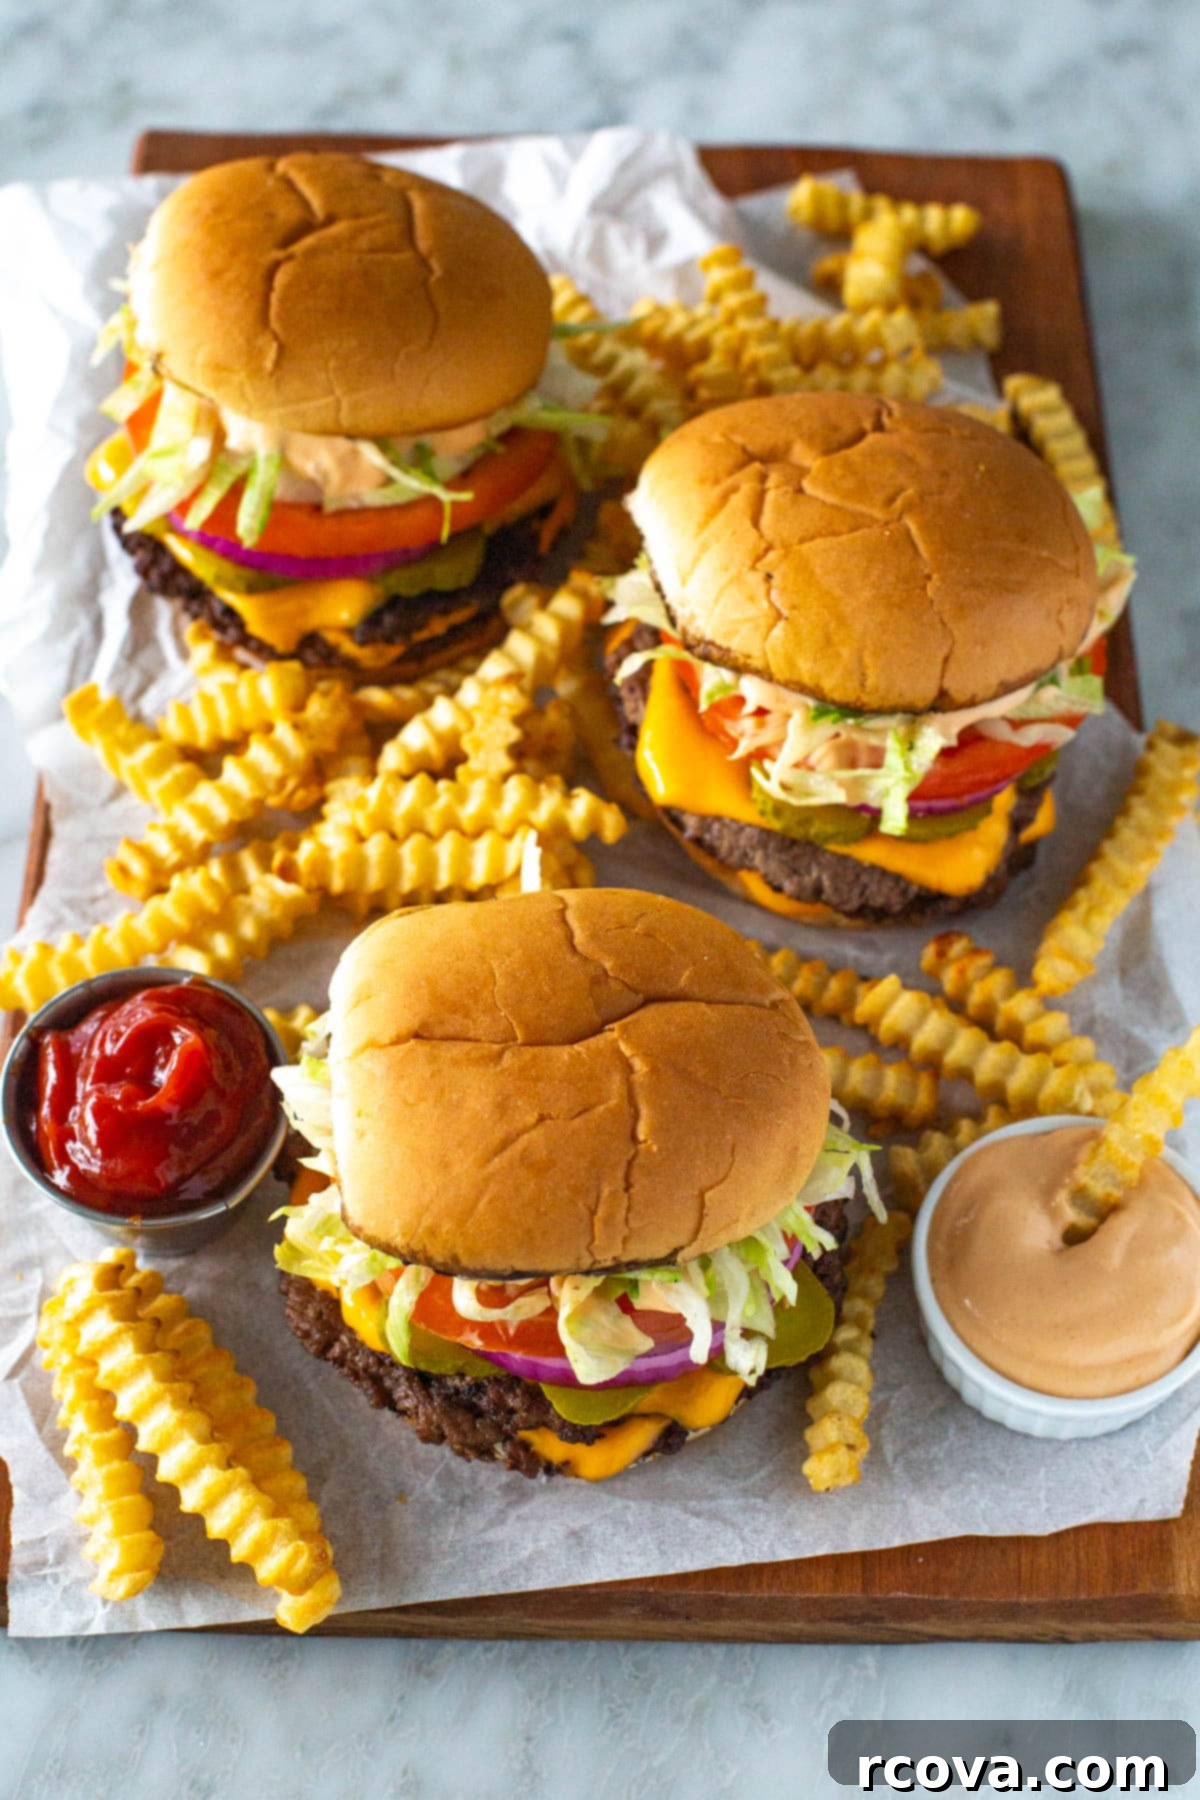
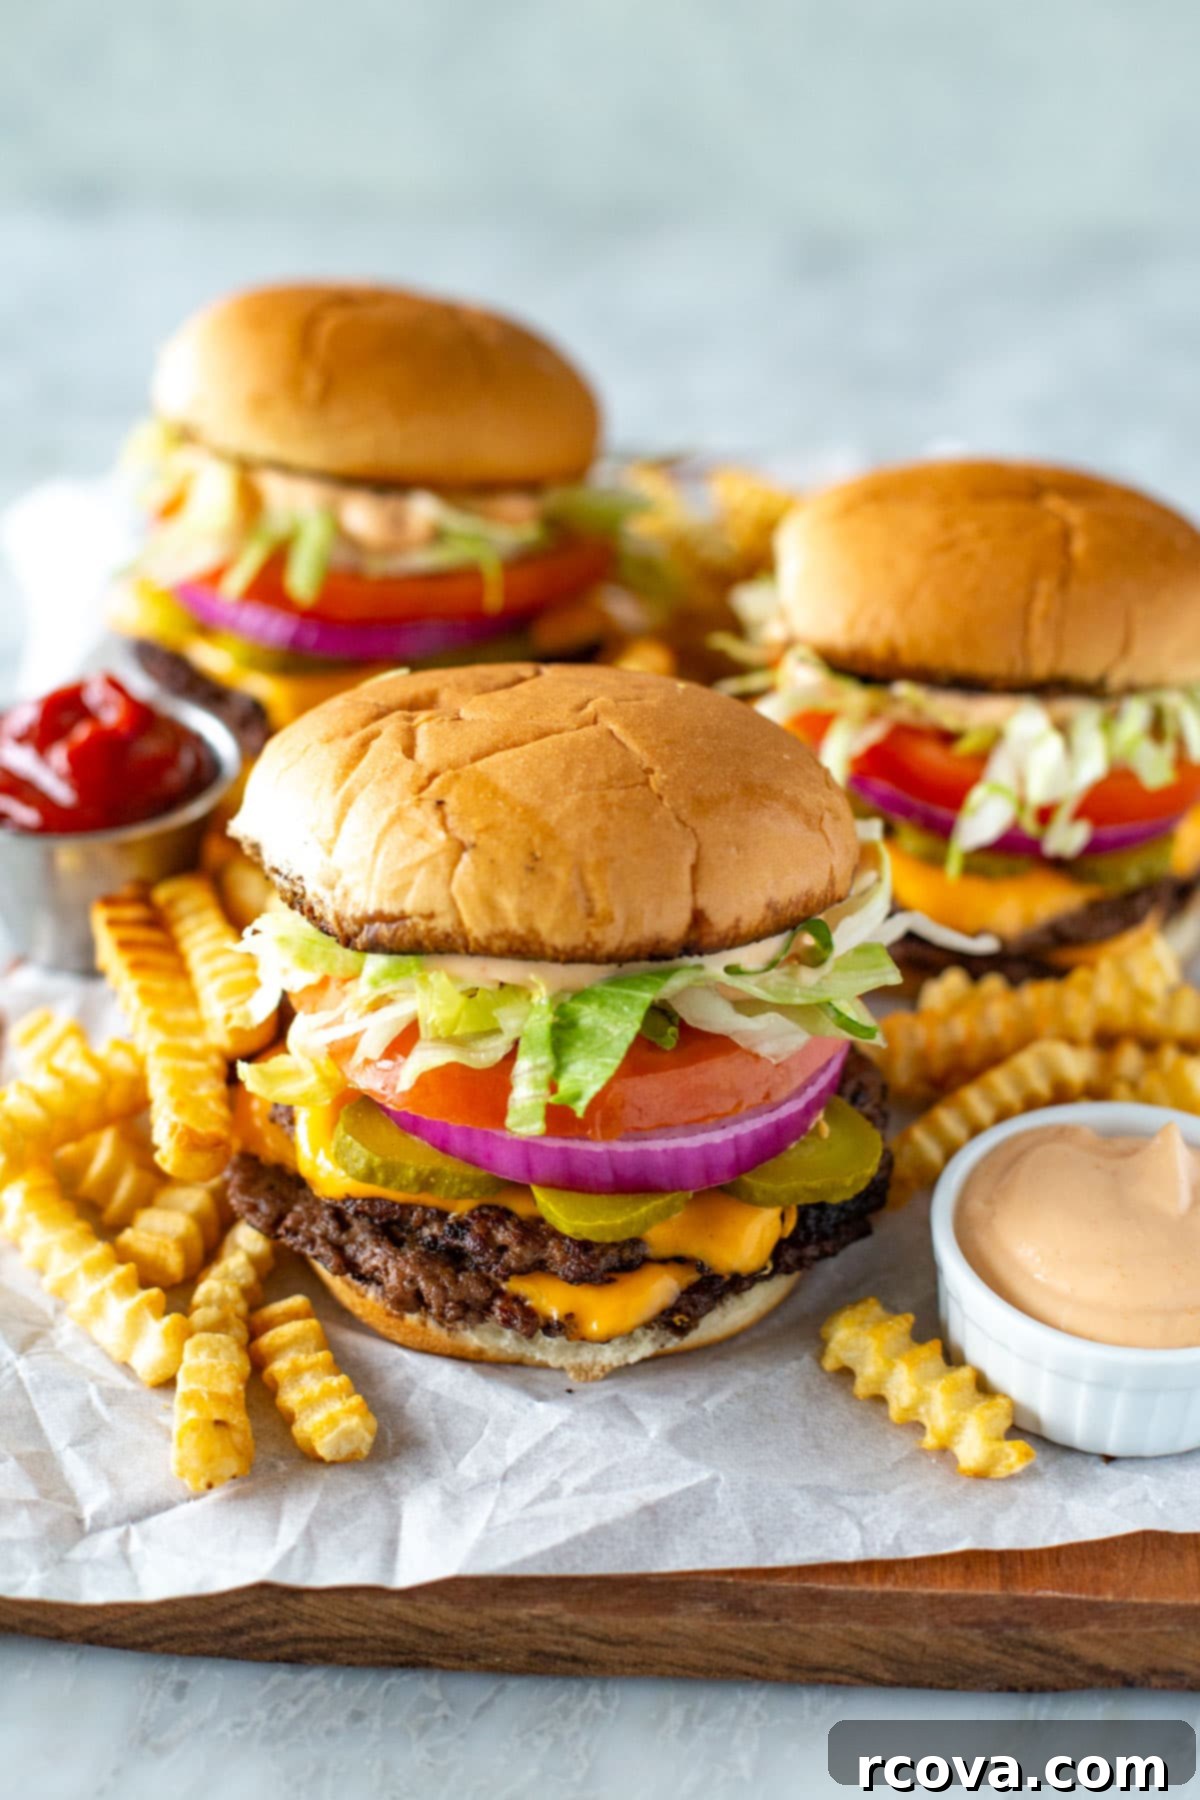
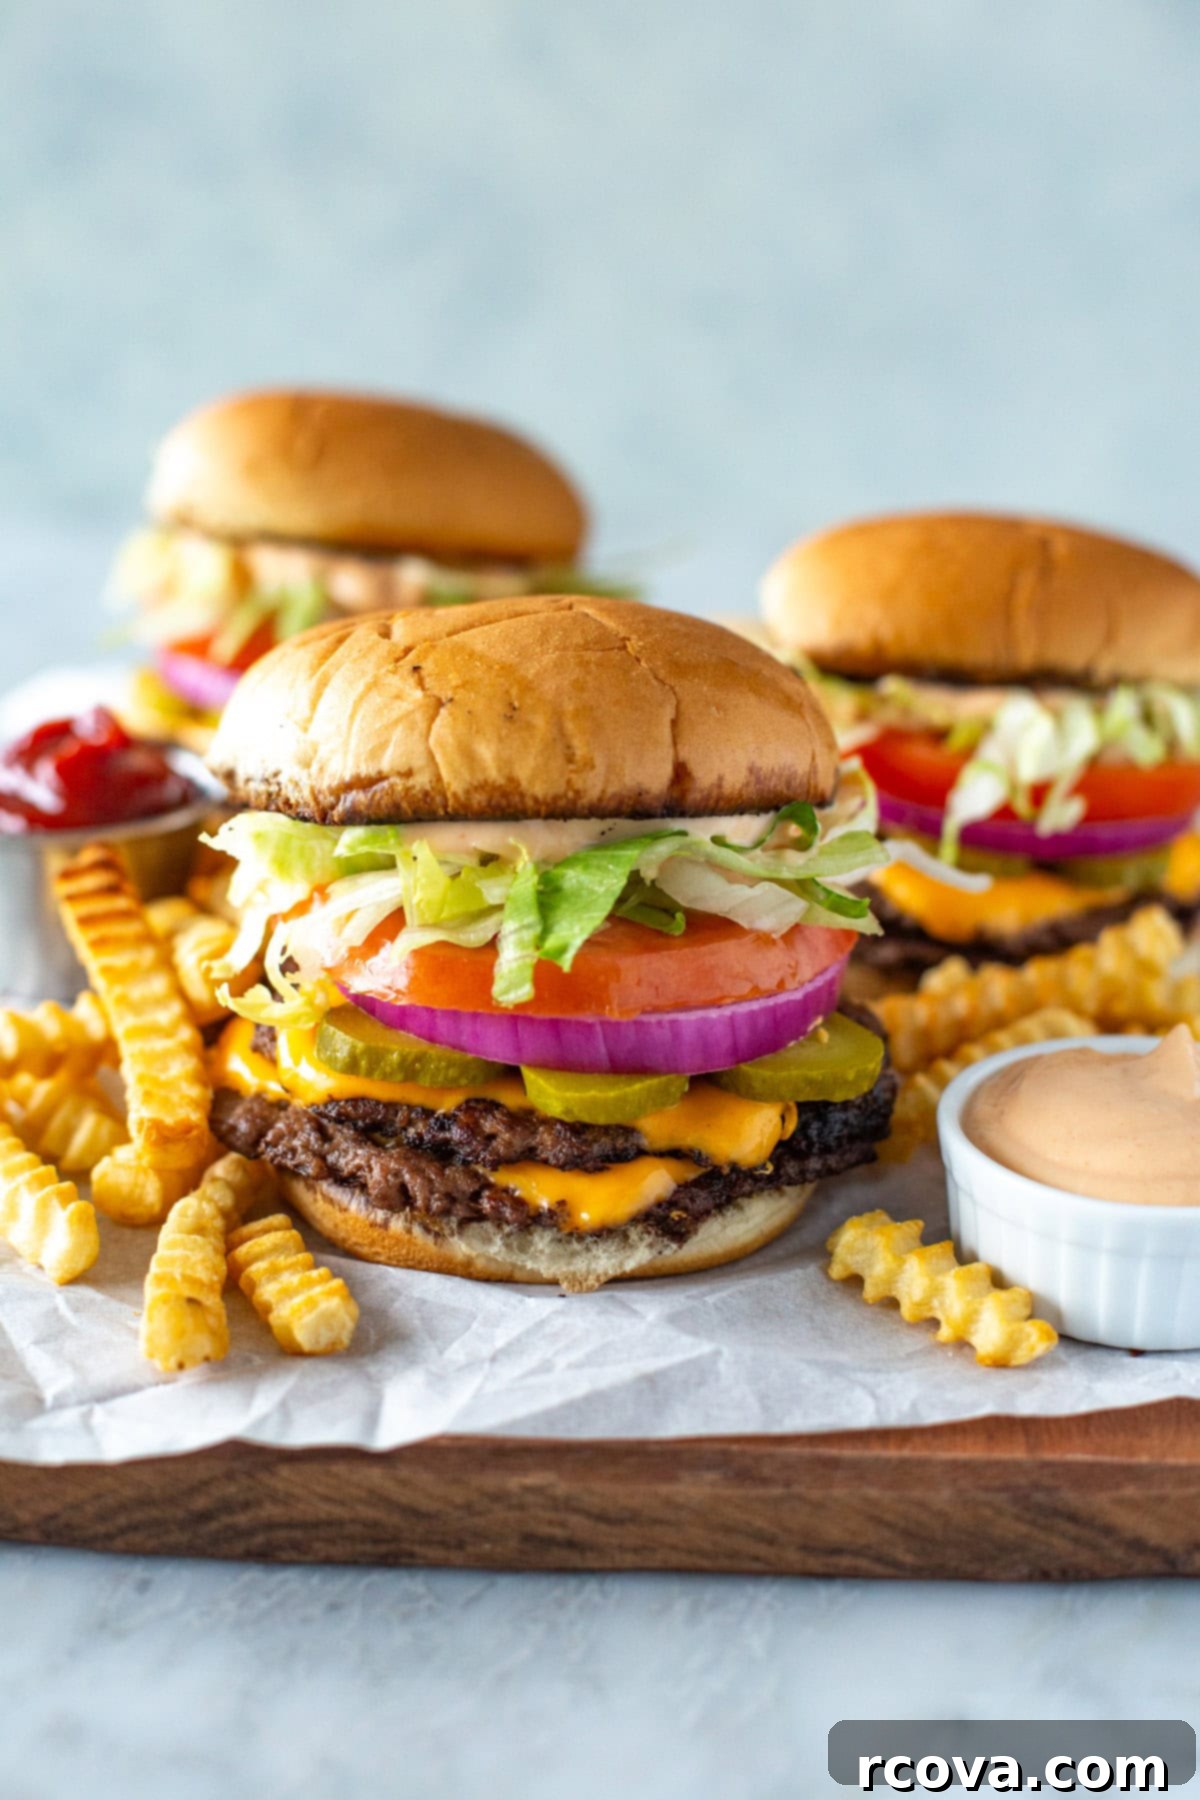
Now for the grand finale – assembly! Take a toasted bun bottom and layer your crispy, cheesy smash patty on top. For a true diner-style experience, consider stacking two thin patties per burger. Then, add your fresh toppings in your preferred order: typically the crisp lettuce, juicy tomato slices, tangy pickle slices, and sharp red onion. Generously spread your homemade special sauce onto the top bun. Place the sauced top bun onto your burger, gently pressing down. Serve your ultimate smash burgers immediately with your chosen side dishes, such as golden fries, a refreshing coleslaw, or a vibrant side salad. Get ready to enjoy a truly satisfying and flavorful homemade burger!
Smash Burger Tips and Creative Variations
Elevate your smash burger game with these expert tips and exciting variations, ensuring every bite is a flavor explosion:
- Use the Right Beef for Optimal Flavor: The foundation of an epic smash burger is the meat. Always opt for ground beef with at least 15-20% fat content (like 80/20 or 85/15 ground chuck). This fat is crucial for creating that sought-after crispy, caramelized crust (the Maillard reaction) and ensuring the patty remains incredibly juicy despite being thin. Extra-lean beef will dry out quickly and won’t develop the same depth of flavor or texture.
- Don’t Form Patties, Roll into Balls: Resist the urge to pre-shape your beef into patties. The entire philosophy behind a smash burger is to form loose, golf-ball-sized portions of ground beef and then “smash” them directly onto a ripping hot cooking surface. This technique maximizes contact with the griddle, promoting rapid searing and the development of those irresistible crispy edges.
- Smash Immediately on a Hot Surface: Timing is everything! As soon as you place a beef ball onto your preheated, smoking-hot skillet or griddle, smash it down firmly and quickly with a sturdy spatula or burger press. Do not let the beef cook for even a few seconds before smashing, as this will prevent proper crust formation. The goal is a thin, wide patty with maximum surface area for searing.
- Season Generously and Promptly: Once smashed, immediately season the top side of your patty with salt and pepper. When you flip it, season the other side as well. This liberal seasoning on both sides is key to enhancing the beef’s natural flavor and contributing to that savory crust.
- Don’t Overcrowd the Pan: Cooking too many burgers at once will drastically lower the temperature of your cooking surface, leading to steamed instead of seared patties. Cook in batches, allowing ample space between each burger for proper heat circulation and maximum crispness.
- Scrape, Don’t Flip Gently: When it’s time to flip, use a wide, sturdy spatula to aggressively scrape under the patty, making sure to lift all those flavorful browned bits (the “fond”) from the griddle. These bits are packed with flavor and contribute to the overall texture.
- Experiment with Different Toppings & Sauces: While classic toppings are fantastic, don’t shy away from creative variations. Try rich caramelized onions, sautéed mushrooms, crispy bacon, a dollop of bacon jam, or even an authentic In-N-Out Secret Sauce (Animal Style Sauce). For cheese lovers, a blend of different cheeses like cheddar and Monterey Jack can be a delightful twist.
- Make Them Low-Carb: For a healthier or low-carb option, simply swap out the traditional hamburger buns for crisp iceberg, romaine, or Boston lettuce leaves. These make for surprisingly sturdy and refreshing wraps that let the burger’s flavor truly shine.
- Consider a Double Stack: For a heartier burger without making a single thick patty, stack two thin smash patties on top of each other. This doubles the crispy surface area and layers of cheese for an even more satisfying bite.
Frequently Asked Questions About Smash Burgers
A smash burger is distinct from a regular burger primarily by its preparation method. Instead of forming patties by hand or with a press before cooking, ground beef is rolled into loose balls. These balls are then placed onto a screaming hot skillet or griddle and immediately “smashed” down into a very thin patty. This technique maximizes surface contact with the hot metal, leading to a rapid and intense sear that creates a wonderfully crispy, caramelized crust while locking in the juices, resulting in a thin yet incredibly flavorful and juicy burger. Regular burgers, by contrast, are typically thicker, pre-formed, and cooked on a grill or pan without the aggressive smash.
Since smash burgers are intentionally thin, they cook much faster than traditional burgers. You’ll know they’re done when a deep brown, crispy crust has formed on the bottom side – this is the Maillard reaction in action, giving them their signature flavor and texture. The edges will also appear slightly lacy and cooked through. Once flipped, the second side only needs about 30-60 seconds, especially when adding cheese to melt. There’s no need for a meat thermometer due to their thinness; visual cues are your best guide. Avoid overcooking, as their thin nature makes them prone to drying out if left on the heat too long.
Smash burgers pair wonderfully with classic American diner-style sides. You can’t go wrong with crispy frozen fries cooked to golden perfection, a creamy coleslaw for a refreshing contrast, or a simple, vibrant side salad. To elevate your meal, consider homemade animal fries with their special sauce, healthy air fryer sweet potato fries, a hearty potato salad, or even nostalgic tater tots. Onion rings, macaroni salad, or corn on the cob are also fantastic accompaniments.
The optimal choice for a smash burger is lean ground beef, specifically a blend with about 15-20% fat content (e.g., 80/20 or 85/15 ground chuck). This fat is crucial because it renders quickly on the hot cooking surface, contributing to the intense browning and crispness of the patty while keeping the interior juicy. Using extra-lean ground beef (90/10 or higher) is not recommended, as it lacks sufficient fat to achieve the desired crispy crust and will likely result in a dry, less flavorful burger.
The real secret to an unparalleled smash burger lies in two critical factors: an intensely hot cooking surface and the immediate “smash.” Ensure your skillet or griddle is pre-heated to a smoking hot temperature before placing the beef. Then, as soon as the loose beef ball hits the hot surface, smash it down firmly and quickly into a thin, even patty. This rapid, forceful smash creates maximum contact with the heat, initiating the Maillard reaction immediately for an incredibly crispy, flavorful crust. I also highly recommend investing in a good quality, heavy-duty burger press – it’s a foolproof tool for achieving that perfect smash every single time.
For truly authentic and crispy smash burgers, a heavy-bottomed cast iron skillet or a flat-top griddle is ideal. These surfaces retain heat exceptionally well and distribute it evenly, which is critical for achieving that intense sear and characteristic crispy crust. A stainless steel skillet can also work if it’s thick enough, but avoid non-stick pans as they typically don’t get hot enough to achieve the desired crust without risking damage to the non-stick coating.
While you can roll the ground beef into balls a few hours in advance and keep them refrigerated, it’s best to smash them directly onto the hot pan just before cooking. Pre-smashing can lead to overworking the meat and prevent the desired crispy edges. The beauty of smash burgers is how quickly they cook, so prepping your toppings and sauce is the best way to get ahead without compromising the patty quality. If you absolutely must, you can lightly form them into very loose, thick patties, but the immediate smash is always preferred for optimal results.
Storing and Reheating Your Smash Burgers
While smash burgers are undeniably best enjoyed fresh off the griddle, any leftovers can still be savored. To properly store your cooked burgers, separate the patties from the buns and toppings. Place the cooled burger patties in an airtight container in the refrigerator for 3-4 days. Store fresh toppings like lettuce, tomato, and onion separately to maintain their crispness. Your special sauce can also be made ahead and stored in an airtight container in the fridge for up to a week, tasting even better as the flavors meld.
When you’re ready to reheat, for the best results, warm your burger patties in a skillet on the stovetop over medium heat for 1-2 minutes per side, until heated through and the crust regains some crispness. Alternatively, you can microwave them for 1-2 minutes, flipping halfway through, though this method won’t yield the same crispy texture. Once reheated, quickly toast a fresh bun, reassemble your burger with your favorite fresh toppings and a generous dollop of special sauce, and dig into a delicious second-day meal!
Freezing This Recipe for Future Enjoyment
Smash burger patties are surprisingly freezer-friendly, allowing you to enjoy a quick, homemade meal whenever the craving strikes. After cooking your burger patties, let them cool completely to room temperature. To prevent freezer burn and maintain quality, wrap each individual patty tightly in aluminum foil or plastic wrap. Then, place the wrapped patties into an airtight freezer-safe container or a heavy-duty Ziploc bag, removing as much air as possible. Cooked smash burger patties can be frozen for up to 3 months.
When you’re ready to enjoy them, transfer the frozen patties to the refrigerator and let them defrost overnight. Once defrosted, reheat them using the stovetop method described above for optimal crispness. Serve them on freshly toasted buns with your favorite fresh toppings and a dollop of your special sauce for a convenient and delicious meal that tastes almost as good as fresh.
More Easy Burger Recipes You’ll Love
If you’re a fan of a great burger, explore these other fantastic recipes that are simple to make and bursting with flavor. From classic fast-food inspired creations to lighter alternatives, there’s something for every burger enthusiast!
-
The Best Homemade Big Mac Recipe
-
Mediterranean Portobello Beef Burgers
-
The Best & Juiciest Turkey Burger Recipe
Essential Meal Prep Tools for Your Smash Burgers
Having the right tools can make all the difference in preparing, storing, and enjoying your smash burgers:
- Grab some glass meal prep bowls if you plan on packing away leftover burgers. These are excellent for keeping ingredients fresh and are microwave-safe for easy reheating.
- I get all my high-quality, grass-fed ground beef from Butcher Box. It’s conveniently delivered to me frozen, ensuring I always have premium meat on hand for my smash burgers.
- For freezing and refrigerating leftover burger patties and ensuring they remain fresh, round glass microwave-safe bowls with lids are indispensable. They help maintain flavor and prevent sogginess.
- A sturdy burger press is an invaluable tool for consistently creating perfectly thin and crispy smash burgers. It ensures even pressure and maximizes the surface area for that delicious sear.
- **Get my full list of meal prep tools here** to optimize your kitchen for efficiency and deliciousness!
Ultimate Smash Burger Recipe
Print
Pin
Rate
SEND ME MY PLAN
Equipment
-
1 extra-wide stainless steel spatula or burger press
-
1 cast iron skillet or griddle
Ingredients
- 1 lb lean ground beef (80/20 or 85/15 for best crispness and juiciness)
- 4 cheese slices (American, cheddar, mozzarella, or Swiss work great)
- 4 hamburger buns (brioche or potato buns are excellent)
- 1 cup iceberg lettuce shredded (romaine or Boston lettuce also suitable)
- 1 beefsteak tomato sliced (or your favorite tomato)
- 1 small red onion thinly sliced (or white onion, caramelized for sweetness)
- dill pickle slices (or your preferred pickle variety)
Special sauce
- 1/2 cup light mayo (or regular mayo for richer flavor)
- 1 tbsp ketchup (or tomato paste, vinegar & sugar combo)
- 1 tsp Dijon mustard (stone-ground mustard is also a good option)
- 1 tsp garlic powder (or onion powder)
- 1 tsp pickle juice (or a bit of relish, or omit)
Optional side dish ideas
- Salad
- Coleslaw
- Frozen fries cooked in the oven or air fryer while you’re prepping and making burgers
Instructions
-
First, embark on a thorough preparation of all your burger elements. This includes meticulously slicing all your fresh toppings like lettuce, tomato, and red onion. Next, whisk together the ingredients for your special sauce until smooth and set aside. Ensure your hamburger buns and cheese slices are conveniently at the ready. If you plan on serving sides like frozen fries, now is the ideal time to get them baking in the oven or air fryer so they finish cooking simultaneously with your burgers.
-
Divide your pound of lean ground beef into 8 equal portions. Gently roll each portion into a loose ball – remember, don’t overwork the meat. Place these beef balls onto a parchment-lined baking sheet to prevent sticking and make them easy to transfer to the pan. Season each ball generously with salt and freshly ground black pepper, ensuring all surfaces are covered.
-
Place a large, heavy-bottomed cast iron skillet or griddle over medium-high heat. Allow it to heat thoroughly until it’s smoking slightly and a drop of water sizzles and evaporates immediately. Add a small drizzle of high smoke point oil like avocado or grapeseed oil. Lightly spray your extra-wide stainless steel spatula or burger press with cooking spray, or grease it with a thin layer of olive oil, to prevent the beef from sticking during the smash. Now, your cooking station is primed and ready!
-
Carefully place a beef ball onto the intensely hot cooking surface. Immediately, using your greased spatula or burger press, smash the ball down firmly and evenly into a thin, approximately ¼-inch thick patty. Apply consistent pressure for about 10 seconds to maximize contact and create those signature crispy edges. Remove the press. Let the burger cook undisturbed for 1 to 1.5 minutes, or until a deep brown, crispy crust forms on the bottom. Carefully scrape under the patty to loosen all the caramelized bits, then flip it over. Immediately season the newly exposed side with a bit more salt and add a slice of cheese if desired. Cook for another 30-60 seconds, allowing the cheese to melt beautifully. Once done, remove the patty from the heat and transfer it to a plate. Repeat this process with the remaining beef balls, forming 4 double-stack burgers (meaning 2 patties per burger). For classic double cheeseburgers, you will add 2 more cheese slices to two of the plain patties you’ve cooked, creating four complete cheesy patties.
-
Once all your burger patties are cooked, briefly add a small amount of butter to the hot pan (or use residual oil). Place your hamburger buns, cut-side down, onto the pan. Cook for 30-60 seconds until they are lightly golden brown and perfectly toasted. This step adds a crucial textural element and helps prevent the buns from becoming soggy.
-
Now, it’s time to build your ultimate smash burgers! Start with the toasted bottom bun. Layer one cheesy patty, followed by a plain patty (or two cheesy patties for a double cheeseburger). Arrange your fresh toppings: crisp pickle slices, a juicy tomato slice, thinly sliced red onion, and shredded iceberg lettuce. Finally, spread a generous amount of your homemade special sauce onto the top burger bun, then place it on top of your assembled burger. Serve immediately with your desired side dishes, and prepare to be amazed by the incredible flavors and textures. Enjoy every single bite of your homemade, restaurant-quality smash burger!
Notes
For the best results, smash the beef ball as soon as you place it in the hot pan. This rapid smash is key to developing that signature crispy crust.
For a delicious low-carb option, skip the buns and serve your smash burgers as lettuce wraps using crisp iceberg or Boston lettuce leaves.
Always use lean ground beef or regular ground beef with at least 15-20% fat content (e.g., 80/20) for this recipe. Extra-lean ground beef will lack the fat needed for crispness and juiciness, resulting in a dry burger.
Enhance your meal by serving these smash burgers with classic sides like crispy frozen fries, gourmet animal fries, wholesome sweet potato fries, a creamy potato salad, or fun tater tots.
Nutrition
