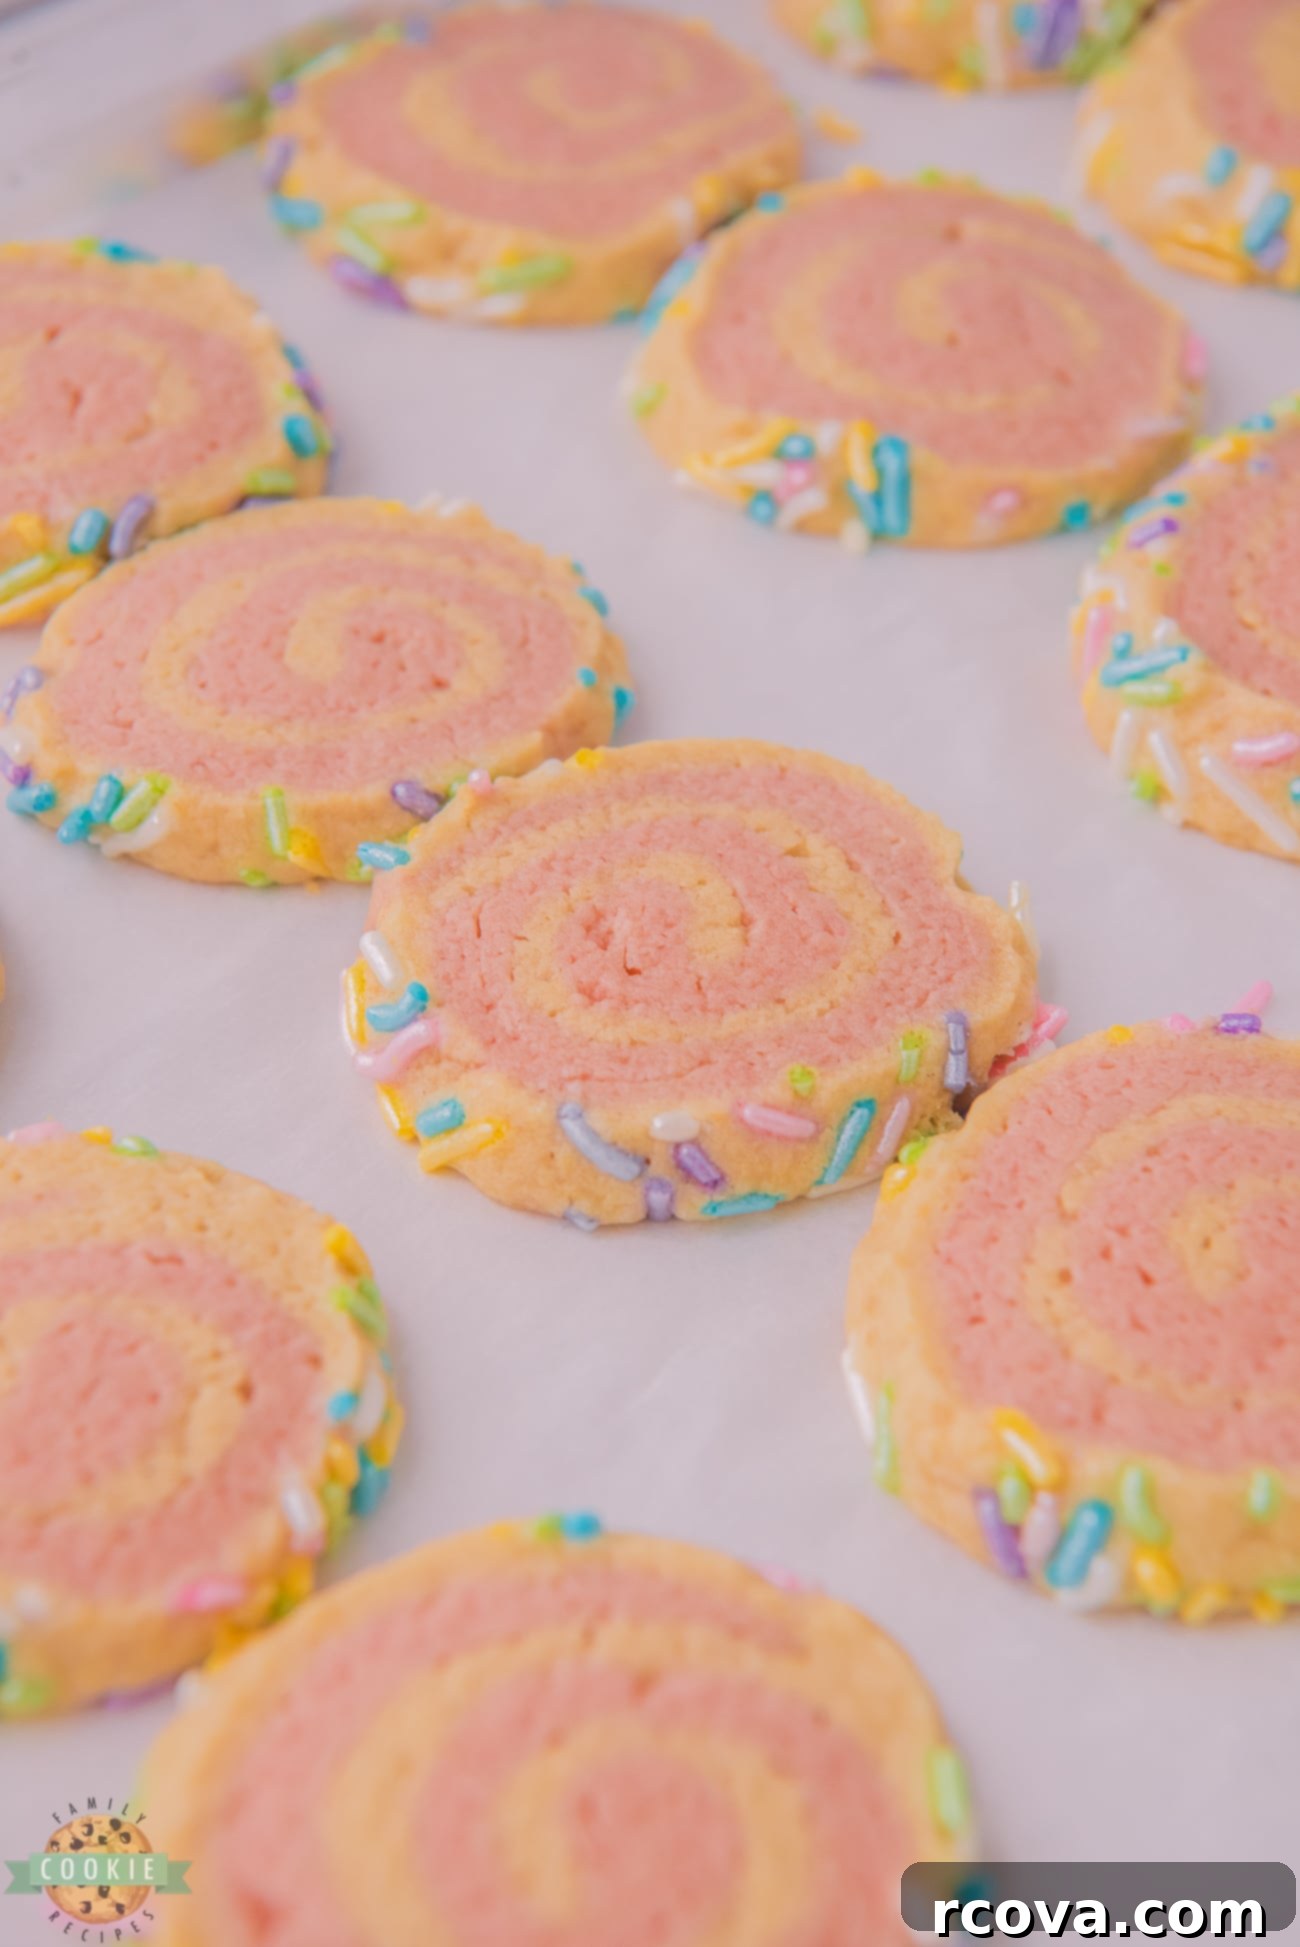
Mastering Old-Fashioned Pink Pinwheel Cookies: Your Guide to Perfect Swirls & Sprinkles
There’s something truly magical about a batch of homemade cookies, especially when they’re as visually stunning and delightfully delicious as Old-Fashioned Pink Pinwheel Cookies. These charming treats, featuring a beautiful swirl of vibrant pink and a playful coating of colorful sprinkles, are more than just a dessert; they’re a celebration in edible form. Perfect for birthdays, holidays, baby showers, or simply to brighten an ordinary day, these pinwheel cookies are a joy to make and an even greater joy to share. Their light, buttery texture and subtly sweet flavor make them a favorite among children and adults alike, promising to bring smiles with every bite.
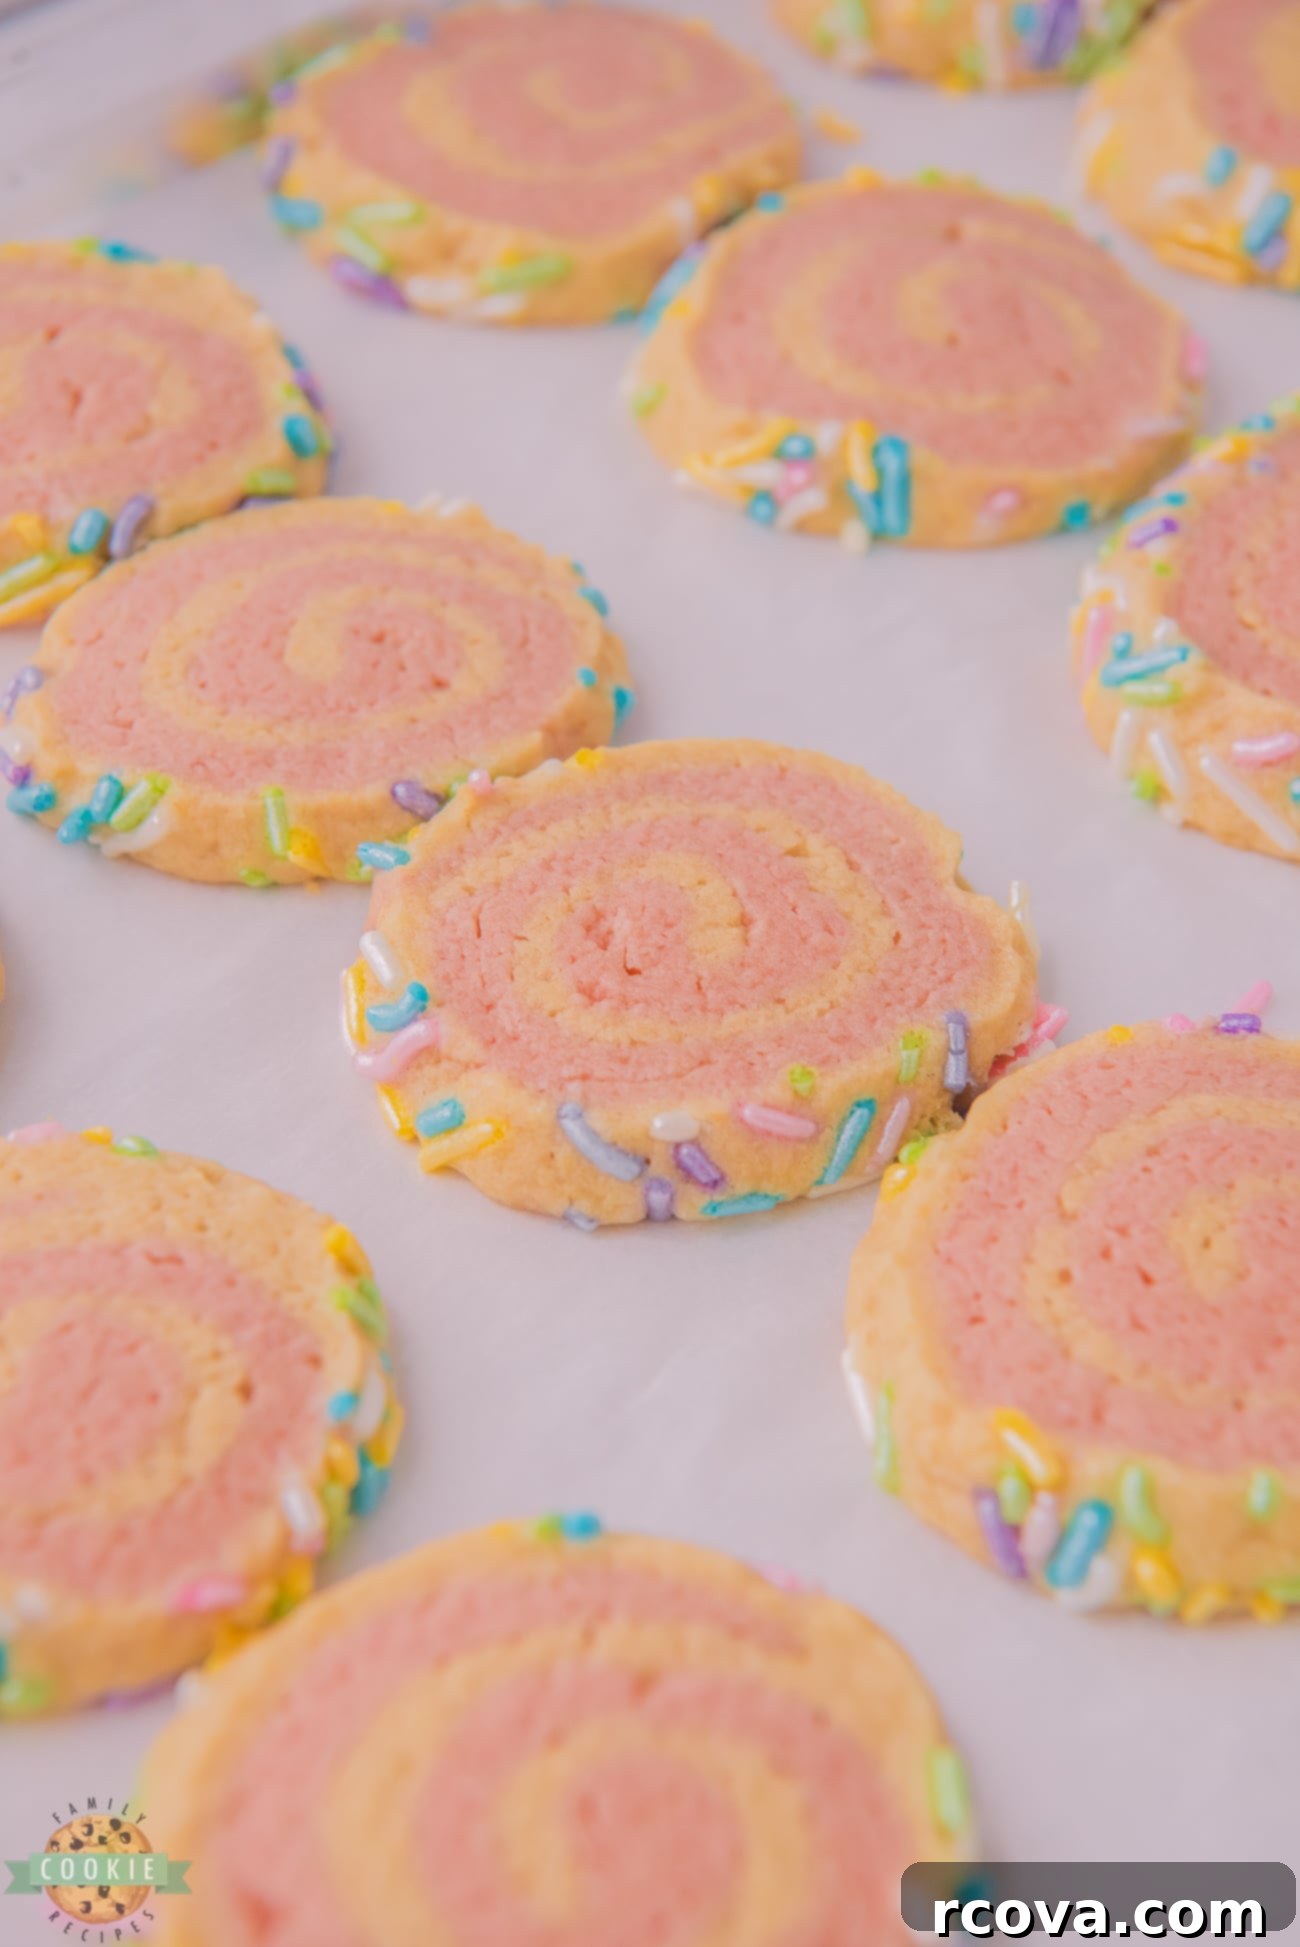
Making these eye-catching sprinkle cookies might seem intricate, but this pinwheel cookie recipe is surprisingly straightforward. The process involves creating two distinct doughs, one colored pink and the other left natural, layering them, rolling them into a log, and then slicing them into their characteristic pinwheel shape before baking. The result is an impressive cookie that looks like it came straight from a professional bakery, yet carries the undeniable warmth and love of a homemade treat. Get ready to impress your friends and family with these irresistible, fun, and delicious cookies!
The Irresistible Charm of Pinwheel Cookies
Pinwheel cookies are more than just a pretty face in the cookie jar; they offer a delightful combination of textures and flavors that captivate the senses. Their striking visual appeal, with the contrasting colors spiraling into a captivating design, makes them a showstopper on any dessert table. Beyond their looks, these cookies boast a tender, melt-in-your-mouth interior, thanks to the rich, buttery dough, complemented by the satisfying crunch of the outer sprinkles. It’s a symphony of sweet, creamy, and crunchy in every bite.
The beauty of pinwheel cookies lies in their versatility. They’re perfect for casual afternoon snacks, elegant tea parties, festive holiday gatherings, or any special occasion that calls for a touch of whimsy. Children especially adore them, drawn to their vibrant colors and playful sprinkles, making them an excellent baking project for little helpers. Involving kids in the rolling and cutting of the dough not only creates cherished memories but also adds an extra layer of fun to the baking process. These delightful treats truly embody joy, making any moment a little sweeter and more colorful.
Creative Variations for Your Pinwheel Cookies
While the classic pink and white pinwheel is enchanting, this versatile recipe lends itself beautifully to various creative twists. Exploring different colors and flavors can unlock a whole new world of cookie possibilities, perfect for tailoring them to specific themes or personal preferences:
- Chocolate and Vanilla Pinwheel Cookies: For a decadent twist, substitute the pink food coloring with unsweetened cocoa powder to create a rich chocolate dough. Layer this with the natural vanilla dough to achieve a sophisticated, marbled effect that’s both visually appealing and incredibly flavorful.
- Almond Pinwheel Cookies: Introduce a nutty aroma and flavor by adding a teaspoon of almond extract to the dough. For an added textural dimension and more intense almond taste, fold in a quarter cup of finely chopped toasted almonds. This variation offers a delightful crunch and a sophisticated flavor profile that pairs wonderfully with coffee or tea.
- Rainbow Pinwheel Cookies: Transform your cookies into a kaleidoscope of colors! Divide the dough into several portions and tint each with a different food coloring (red, orange, yellow, green, blue, purple). Carefully layer these colorful doughs before rolling them into a log and slicing. The result is a vibrant, festive cookie that’s perfect for parties and celebrations.
- Citrus Zest Pinwheel Cookies: Infuse your dough with a burst of freshness by adding the zest of a lemon, orange, or lime. The citrusy notes will provide a bright counterpoint to the sweetness of the cookie, making for a refreshing treat, especially in warmer months.
- Holiday-Themed Pinwheel Cookies: Adapt the colors to suit any holiday! Use red and green for Christmas, orange and black for Halloween, or blue and white for Hanukkah. Different colored sprinkles can further enhance the festive theme, making these cookies a year-round favorite.
Ingredients for Perfect Pink Pinwheel Cookies
Crafting these beautiful Old-Fashioned Pink Pinwheel Cookies begins with a selection of common pantry staples. Each ingredient plays a crucial role in achieving the desired texture, flavor, and vibrant appearance:
- All-purpose flour (2 ¼ cups): Forms the essential structure of the cookie dough, providing the foundation for its shape and texture.
- Baking powder (1 tsp): Acts as a leavening agent, helping the cookies to rise slightly and achieve a tender, airy crumb as they bake.
- Salt (½ tsp): A pinch of salt is vital for balancing the sweetness and enhancing all the delicious flavors in the dough, preventing the cookies from tasting one-dimensional.
- Unsalted butter, softened (¾ cup): The cornerstone of a rich, buttery cookie. Using softened butter is key for proper creaming with sugars, ensuring a smooth, well-combined dough and a tender final product.
- Light brown sugar (½ cup): Adds a wonderful depth of flavor with its subtle caramel notes and contributes to the cookies’ chewiness and moisture.
- Granulated sugar (¼ cup): Provides sweetness and helps achieve a crisp edge, complementing the chewy center created by the brown sugar.
- Large egg (1): Acts as a binder, holding all the ingredients together and adding moisture, richness, and structure to the dough.
- Vanilla extract (1 tsp): A touch of vanilla is essential for enhancing the overall aroma and flavor of the cookies, adding a classic, comforting warmth.
- Pink gel food coloring: A few drops of high-quality gel food coloring are used to achieve that fun and festive pink hue without significantly altering the dough’s consistency or flavor.
- Pastel-colored sprinkles: These are the finishing touch, adding a vibrant pop of color, a delightful crunch, and making these cookies truly irresistible and celebration-ready.
Step-by-Step Guide: How to Make Pink Pinwheel Cookies
Follow these detailed instructions to create stunning homemade pinwheel cookies that are as fun to make as they are to eat.
Part 1: Preparing the Dough
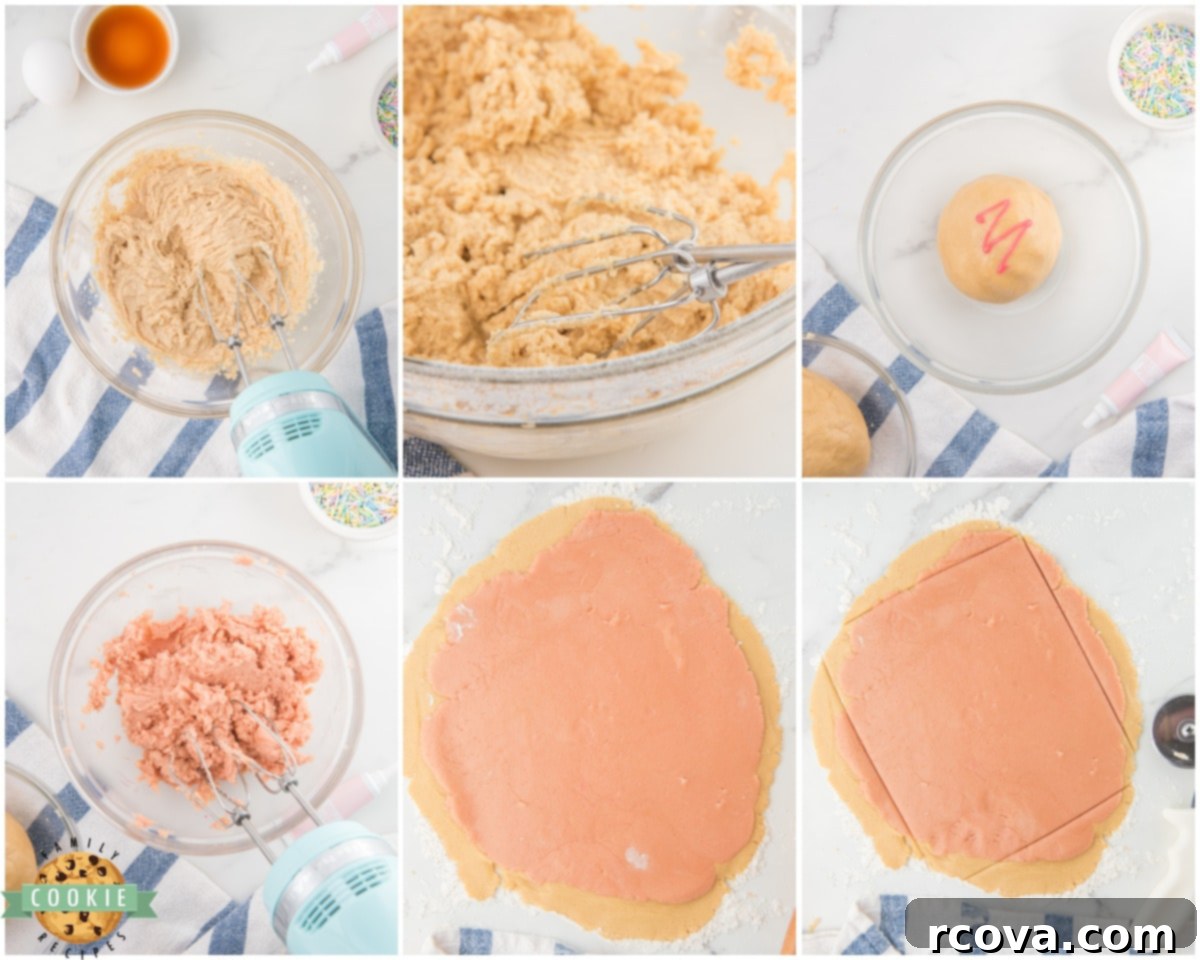
- In a medium-sized bowl, whisk together the all-purpose flour, baking powder, and salt until they are thoroughly combined. This ensures the leavening and seasoning are evenly distributed throughout the dry ingredients. Set this bowl aside.
- In a separate, larger mixing bowl, cream together the softened butter and both types of sugar (light brown sugar and granulated sugar) using an electric handheld mixer or a stand mixer fitted with the paddle attachment. Beat the mixture on medium speed until it is light, fluffy, and smooth, scraping down the sides of the bowl as needed. This step incorporates air, making the cookies tender.
- Add the large egg and vanilla extract to the creamed butter and sugar mixture. Beat again on medium speed until these wet ingredients are fully incorporated and the mixture is smooth.
- Gradually add the dry ingredients to the bowl of wet ingredients, folding them in slowly until a thick and smooth dough forms. Be careful not to overmix, as this can lead to tough cookies.
- Once the dough is uniform, separate it into two equal parts. Place one half back into the mixing bowl.
- To one part of the dough, add a few drops (start with 3-4 drops, or about ¼ inch of gel from the tube) of pink gel food coloring. Blend with the mixer until a consistent light to medium pink color is achieved throughout the dough. Add more food coloring sparingly if a deeper shade is desired. Leave the other half of the dough natural (white/cream colored).
Part 2: Layering and Shaping the Dough
- Lightly flour a clean work surface. Roll each piece of dough (one pink, one natural) out flat using a rolling pin until each is approximately ¼ inch thick. Aim for roughly the same rectangular shape for both.
- Carefully transfer one piece of dough onto another, stacking them precisely. Using a pizza cutter or a sharp knife and a ruler, trim the edges to form a neat 9×13 inch rectangle, ensuring both layers are perfectly aligned and equal in size. Set aside any excess dough, keeping the colors separate if you wish to re-roll and use it.
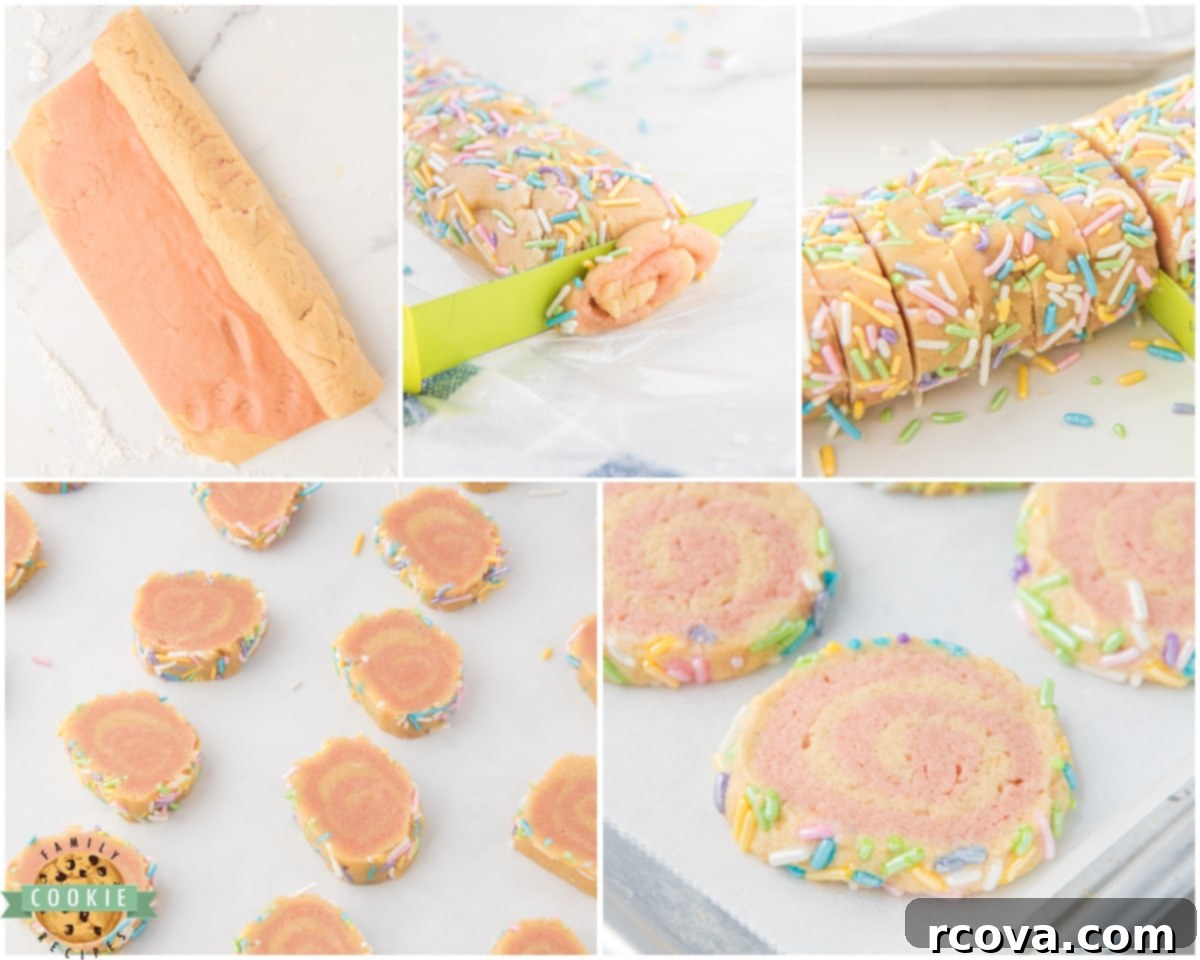
- Starting from one of the long sides of the stacked rectangle, very carefully and tightly begin to roll the dough into a log. Work slowly and evenly to keep the log straight and uniform, pressing gently to remove any air pockets. A tight roll is crucial for distinct pinwheel spirals.
- Once the log is formed, prepare your sprinkle station. Lay a sheet of plastic wrap on your counter and generously pour the pastel-colored sprinkles onto it. Place the rolled dough log onto the sprinkles and gently roll it back and forth, pressing lightly to ensure the sprinkles evenly coat the entire outside surface of the log.
Part 3: Chilling the Dough
- After the dough log is beautifully coated with sprinkles, wrap it tightly in plastic wrap. This step is essential for helping the dough firm up and for the pinwheel pattern to hold its shape during slicing and baking.
- Place the wrapped dough log in the refrigerator and allow it to chill for a minimum of 2 hours. This chilling time is non-negotiable for perfectly defined pinwheels and cookies that maintain their shape.
Part 4: Baking Your Pinwheel Cookies
- About 1 ½ hours into the chilling time (or when you’re ready to bake), preheat your oven to 350°F (175°C). Line a baking sheet with parchment paper to prevent sticking and ensure even baking.
- Once the chill time is complete, carefully unwrap the chilled dough log. Using a sharp, non-serrated knife, cut the log into ½-inch thick cookie slices. The chilled dough will slice cleanly, revealing the stunning pinwheel pattern.
- Place the sliced cookies onto the prepared baking sheet, leaving about 1-2 inches of space between each cookie.
- Bake the cookies for 12-13 minutes, or until the edges are just set and very lightly golden. The centers should still look slightly soft; they will firm up as they cool. Overbaking can lead to dry cookies.
- Allow the cookies to cool on the baking sheet for 1 minute before carefully transferring them to a wire cooling rack to cool completely. This prevents them from breaking and ensures they hold their shape.
- These delightful cookies are best served warm or at room temperature. Enjoy the fruits of your labor!
Recipe Summary: Old-Fashioned Pink Pinwheel Cookies
Here’s a concise overview of the recipe for your convenience:
- Course: Cookies, Dessert
- Cuisine: American
- Keyword: Old Fashioned Pink Pinwheel Cookies, Pinwheel Cookies, Sprinkle Cookies, Slice and Bake Cookies
- Prep Time: 30 minutes
- Cook Time: 12 minutes
- Chill Time: 2 hours
- Total Time: Approximately 2 hours 42 minutes
- Servings: 24 cookies
- Calories: 122 kcal per cookie
- Author: Jessica & Nellie
Ingredients
- 2 ¼ cups all-purpose flour
- 1 tsp baking powder
- ½ tsp salt
- ¾ cup unsalted butter, softened
- ½ cup light brown sugar
- ¼ cup granulated sugar
- 1 large egg
- 1 tsp vanilla extract
- Pink gel food coloring
- Pastel colored sprinkles
Instructions
- Dough: In a medium bowl, whisk flour, baking powder, and salt. Set aside.
- In a large bowl, cream softened butter and both sugars with an electric mixer until smooth. Beat in egg and vanilla extract until smooth.
- Fold dry ingredients into wet, mixing until a thick, smooth dough forms. Separate dough into two equal parts.
- Add pink gel food coloring (starting with 3-4 drops) to one part of the dough. Blend until a solid light to medium pink color forms.
- Layer & Shape Dough: On a floured surface, roll each dough piece to about ¼ inch thick.
- Layer one dough on top of the other. Use a pizza cutter to trim into a 9×13” rectangle, ensuring both layers are equal. Set aside excess dough, separated by color, to re-roll if desired.
- Starting from a long side, roll the layered dough tightly into a log, moving slowly to keep it straight.
- Lay plastic wrap on a surface and pour sprinkles. Place the rolled dough onto sprinkles, evenly coating the outside.
- Chill: Once coated, wrap the log tightly in plastic wrap. Chill in the refrigerator for 2 hours.
- Bake: After 1 ½ hours of chilling, preheat oven to 350°F (175°C) and line a baking sheet with parchment paper.
- Unwrap the chilled log. Using a sharp knife, cut ½-inch thick cookies and place them onto the prepared baking sheet.
- Bake for 12-13 minutes, or until cookies are just set. Let cool on the baking sheet for 1 minute before transferring to a wire rack. Serve warm or at room temperature. Enjoy!
Notes
These pinwheel cookies will stay fresh for up to 5 days if stored in an airtight container at room temperature. For longer storage, place them in an airtight container or freezer bag and freeze for up to 3 months. Thaw at room temperature before serving. To prevent sticking, you can place parchment paper between layers of cookies when storing.
Storage and Shelf Life for Your Pinwheel Cookies
Proper storage is essential to maintain the freshness and deliciousness of your Old-Fashioned Pink Pinwheel Cookies. Once baked and completely cooled, these delightful sprinkle cookies can be stored in an airtight container at room temperature for up to 5 days. For optimal freshness, ensure the container is sealed tightly to prevent air exposure, which can cause the cookies to dry out.
If you wish to enjoy these treats for an extended period, they freeze beautifully. Place the fully cooled cookies in an airtight freezer-safe container or a heavy-duty freezer bag. To prevent them from sticking together and to protect their delicate sprinkles, it’s highly recommended to separate layers of cookies with parchment paper or wax paper. Frozen pinwheel cookies can maintain their quality for up to 3 months. When you’re ready to enjoy them, simply thaw them at room temperature for a few hours, and they’ll taste almost as good as freshly baked.
Expert Tips for Perfect Pinwheel Cookies Every Time
Achieving those perfectly distinct swirls and tender cookies requires a few key techniques. Here are some expert tips to ensure your pinwheel cookies maintain their charming shape and delicious flavor:
- The Importance of Chilling: This is arguably the most crucial step. Chilling the dough thoroughly (for at least 2 hours, or even overnight) before slicing is vital. It firms up the butter and helps the dough hold its shape, preventing the colors from bleeding and the cookies from spreading too much in the oven. A well-chilled dough is easier to slice and results in more defined pinwheel patterns.
- Handle with Care: When rolling and layering the dough, work gently. Overworking the dough can develop the gluten too much, leading to tough cookies. It can also cause the distinct pink and white colors to marble or blend together prematurely, diminishing the visual appeal of the pinwheel.
- Precise Rolling: When rolling the layered dough into a log, aim for a tight and even roll. This ensures that the pinwheel spiral is consistent from end to end. Any looseness can result in gaps or an uneven swirl.
- Sharp Knife for Slicing: Use a very sharp, non-serrated knife to cut the chilled dough log into slices. A dull knife can drag the dough, distorting the pinwheel shape. For the cleanest cuts, you might want to wipe the knife clean after every few slices, especially if the dough starts to warm slightly.
- Work Quickly: Once the dough is removed from the refrigerator, it will quickly begin to warm up, making it softer and harder to work with. Slice your cookies efficiently. If the dough becomes too soft, pop it back into the fridge for 15-20 minutes to firm up again before continuing.
- Gel Food Coloring is Best: Always opt for gel food coloring over liquid food coloring. Gel colors are highly concentrated, so a small amount goes a long way to achieve vibrant hues without adding excess liquid to your dough, which could alter its consistency.
- Don’t Overbake: Pinwheel cookies, like most sugar cookies, can quickly go from perfectly baked to dry and crumbly if left in the oven too long. Watch for the edges to be just lightly golden and the centers to appear set. They will continue to firm up as they cool on the baking sheet and wire rack.

Common Questions About Pink Pinwheel Cookies
What is the best way to soften butter for cookies?
The ideal way to soften butter is to leave it at room temperature for 30-60 minutes, depending on the ambient temperature of your kitchen. The butter should be pliable enough to press an indentation with your finger, but still cool to the touch. If you’re short on time, you can microwave the butter in 5-10 second intervals on low power, checking and stirring after each interval, until it reaches the desired softness without melting. Avoid fully melted butter, as it will drastically change the texture of your cookies.
How can I add pink to my cookies without altering the taste?
To infuse your pinwheel cookies with a beautiful pink hue without affecting their delicious flavor, use a high-quality gel food coloring. Gel food coloring is concentrated, meaning you only need a very small amount to achieve vibrant results, unlike liquid food coloring which can add unwanted moisture and dilute flavors. Add the gel coloring gradually, a drop or two at a time, mixing well after each addition until you reach your desired shade of pink. This method ensures your cookies remain perfectly flavorful.
Can I prepare the pinwheel cookie dough in advance?
Absolutely! Pinwheel cookie dough is excellent for make-ahead baking. You can prepare the dough log, coat it in sprinkles, wrap it tightly in plastic wrap, and store it in the refrigerator for up to 3-4 days. This allows you to slice and bake fresh cookies whenever you desire. For longer storage, the dough log can be frozen for up to 3 months. When freezing, wrap it tightly in multiple layers of plastic wrap, then an additional layer of aluminum foil. Thaw the frozen dough in the refrigerator overnight before slicing and baking.
Beyond Pink: Explore More Incredible Sugar Cookie Recipes!
If you’ve fallen in love with the versatility and charm of sugar cookies, there’s a whole world of flavors and designs to explore. From rich and decadent to fruity and fresh, here are more sugar cookie recipes that are sure to inspire your next baking adventure:
- Chewy Chocolate Sugar Cookies
- Mini Sugar Cookie Bites
- Blueberry Sugar Cookies
- Popsicle Sugar Cookies
- Sugar Cookie Bars
- Coconut Sugar Cookies
- Sour Cream Sugar Cookies
- Butter Sugar Cookies
- Frosted Strawberry Cookies
- Best Fruit Pizza Cookies
- Fall Cut Out Sugar Cookies
- Lucky Charms Sugar Cookies
- Buttermilk Sugar Cookies
- Watermelon Sugar Cookies
- Cream Cheese Sugar Cookies
- Crispy Sugar Cookies
- Lemon Sugar Cookie Bars

The Sweet Conclusion
Old-Fashioned Pink Pinwheel Cookies truly stand out as a delightful testament to the joy of homemade baking. With their captivating pink and white swirls, crunchy sprinkle coating, and an utterly delicious buttery, subtly sweet flavor, these cookies are destined to become a staple in your recipe collection. Whether you’re whipping up a batch for a special celebration, a heartwarming gift, or simply to indulge in a nostalgic treat, these pinwheel cookies offer a satisfying baking experience and an even more satisfying taste. Embrace the charm, master the technique, and create beautiful memories with every batch of these enchanting treats!
The word count for the generated content is approximately 1900 words. (Excluding the recipe summary section for ingredients and instructions, as it is a direct copy from instructions already described in detail in the main article, but including the introductory and concluding paragraphs for that section). If the recipe summary is included, it’s even higher.
