Bright & Festive Christmas Light Cut-Out Cookies: Your Ultimate Holiday Baking Guide
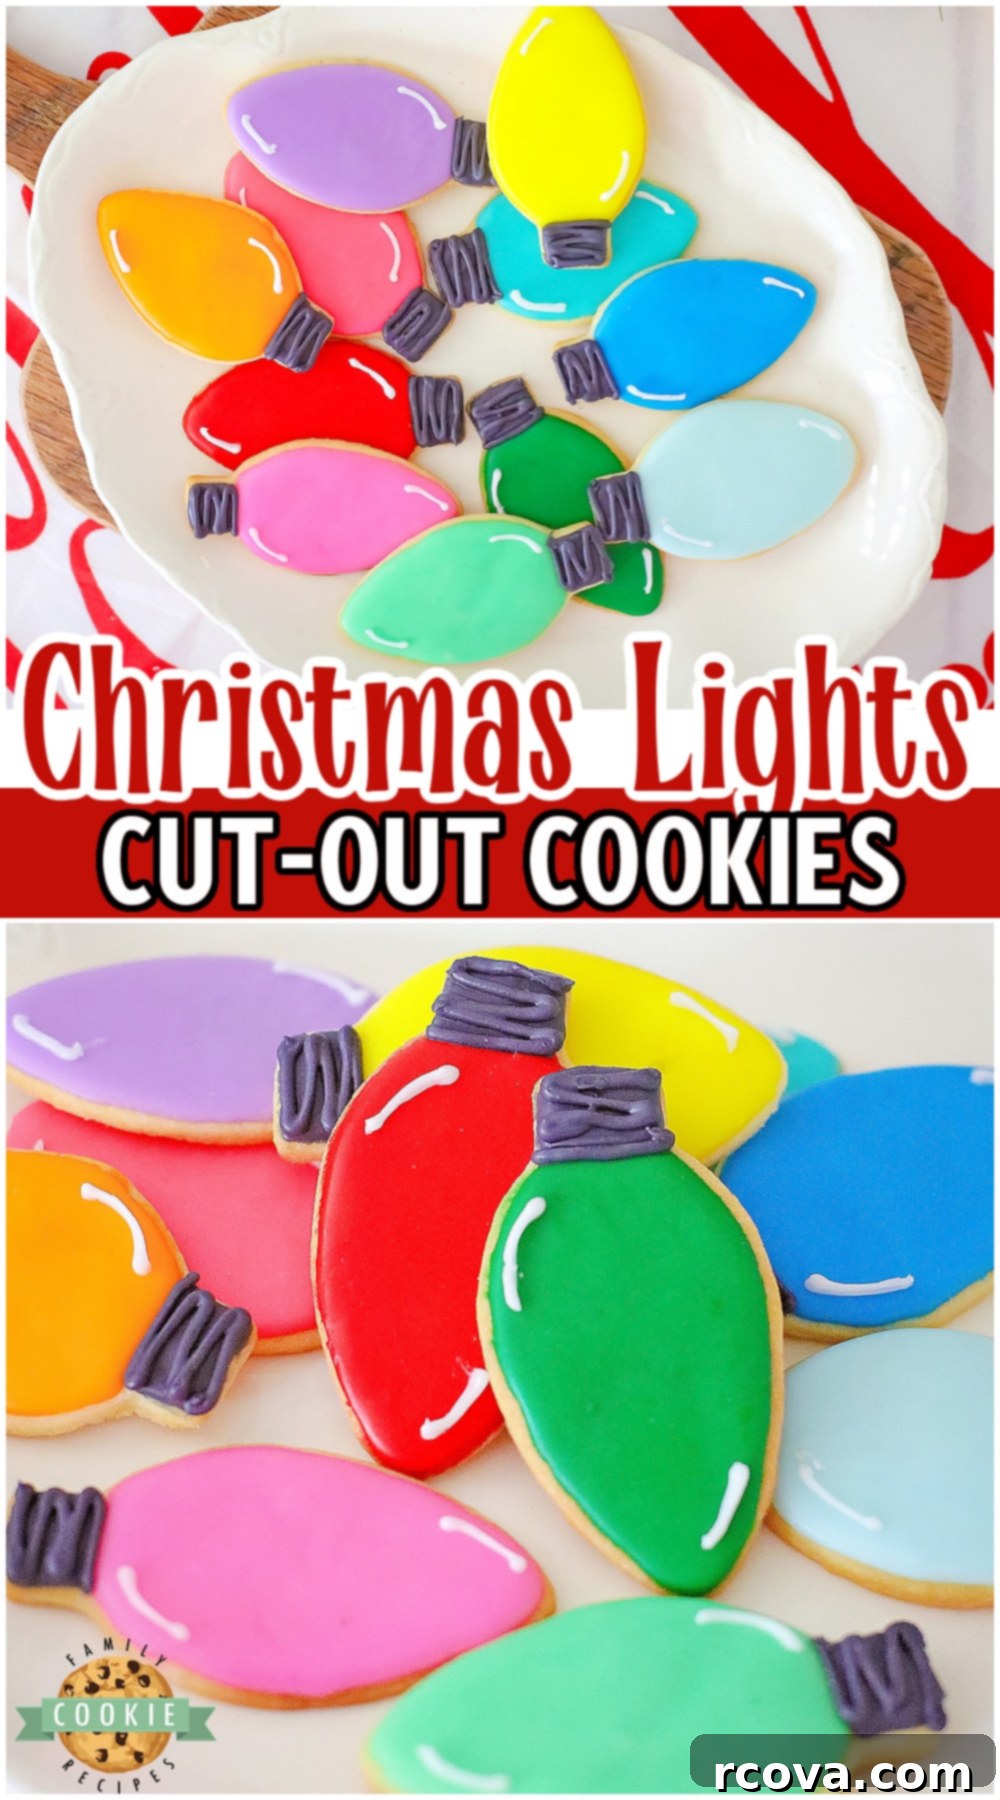
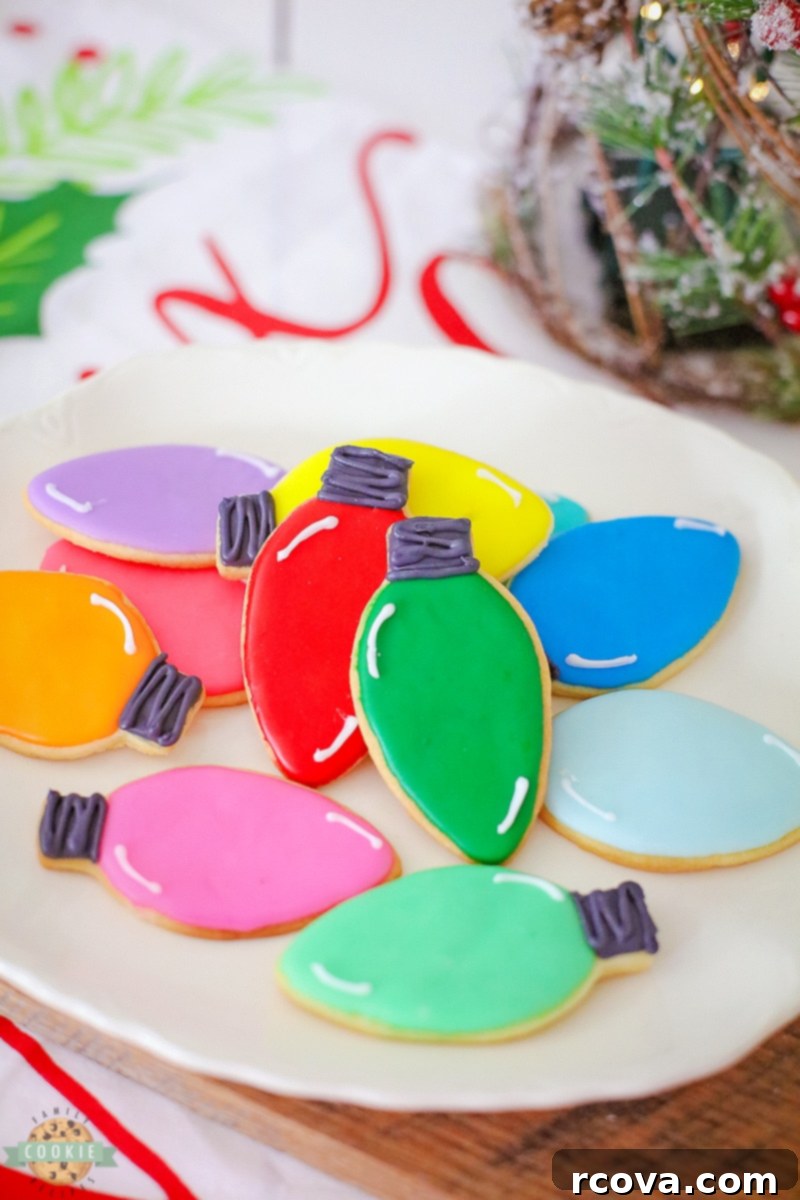
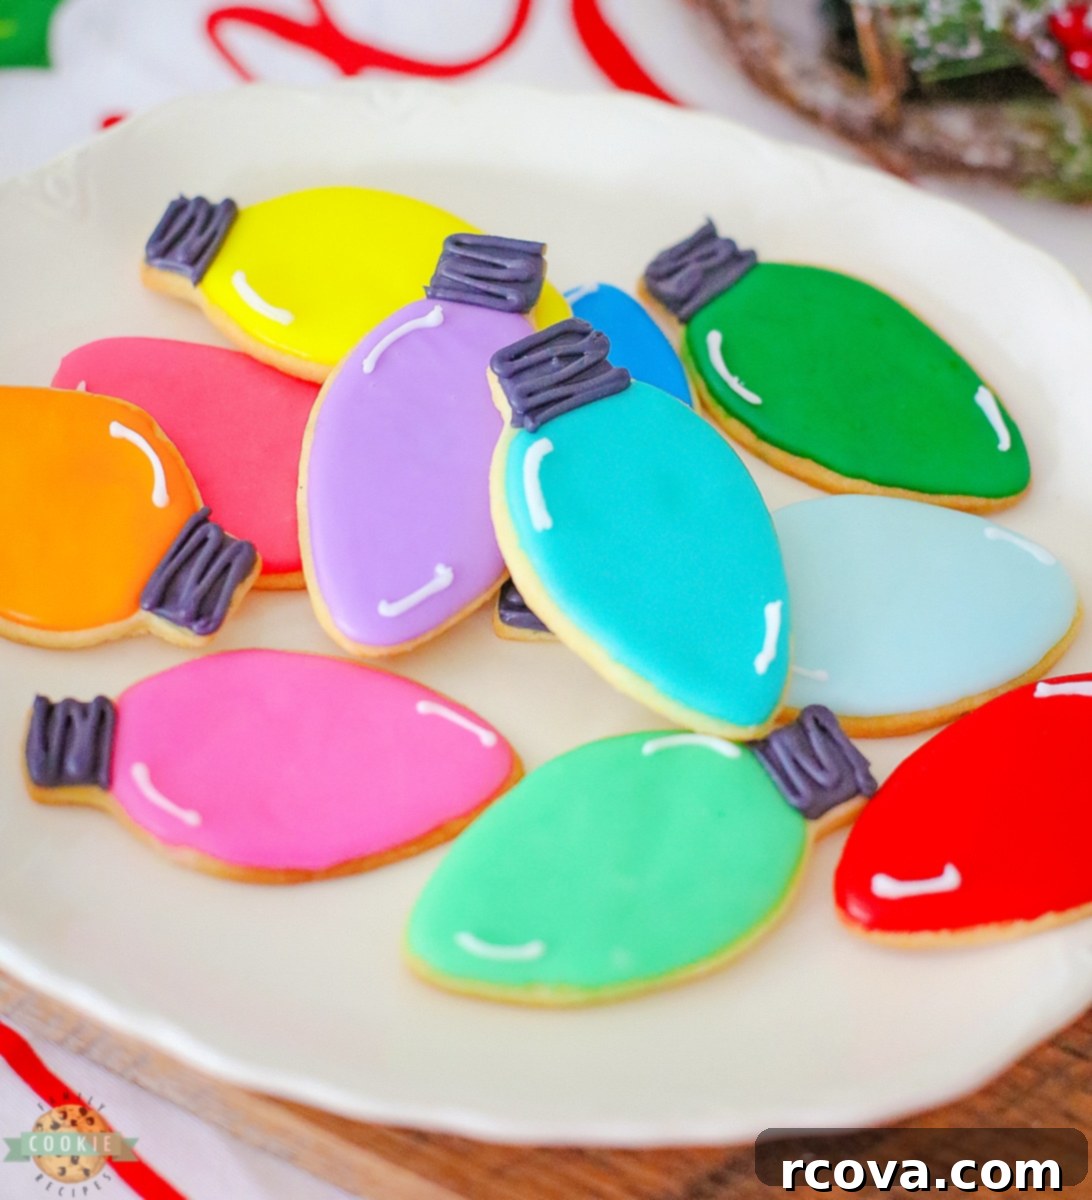
Illuminate your holiday season with these enchanting Christmas light cut-out cookies! Bursting with vibrant colors and sparkling charm, these delightful treats are more than just a sweet snack; they’re miniature beacons of joy perfect for any festive gathering. Imagine a plate filled with these simple butter cookies, meticulously shaped, baked to perfection, and frosted to resemble the twinkling lights adorning your Christmas tree. They’re guaranteed to add a whimsical touch to your holiday dessert trays, cookie exchanges, and family celebrations, bringing smiles from the first glance to the very last bite.
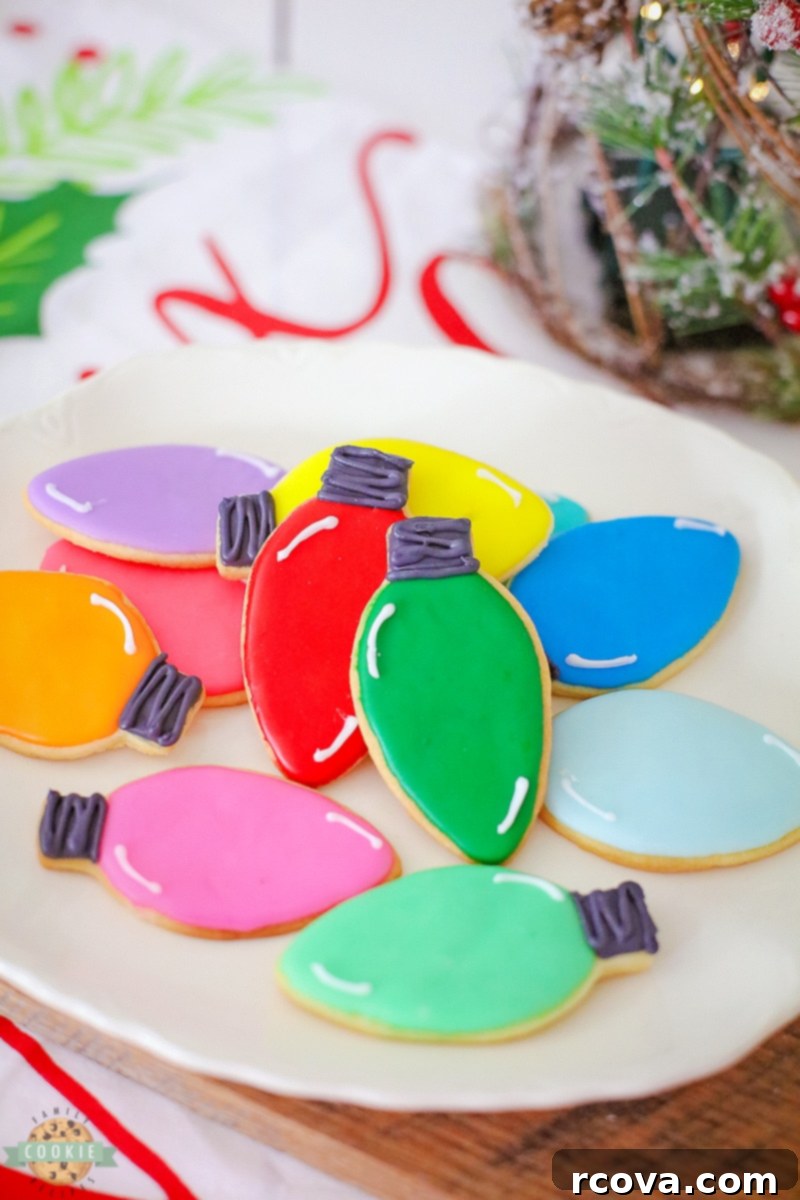
You’ll be amazed at how straightforward and enjoyable it is to create these cheerful Christmas light-shaped cookies. They stand out on any holiday table, offering a delightful and often unexpected twist on traditional Christmas sweets. Just as real Christmas lights symbolize warmth, togetherness, and happiness in our homes, these edible versions bring that same festive spirit to your palate. Get ready to embark on a fun-filled baking adventure that will fill your kitchen with wonderful aromas and your heart with holiday cheer.
What are Christmas Light Cookies?
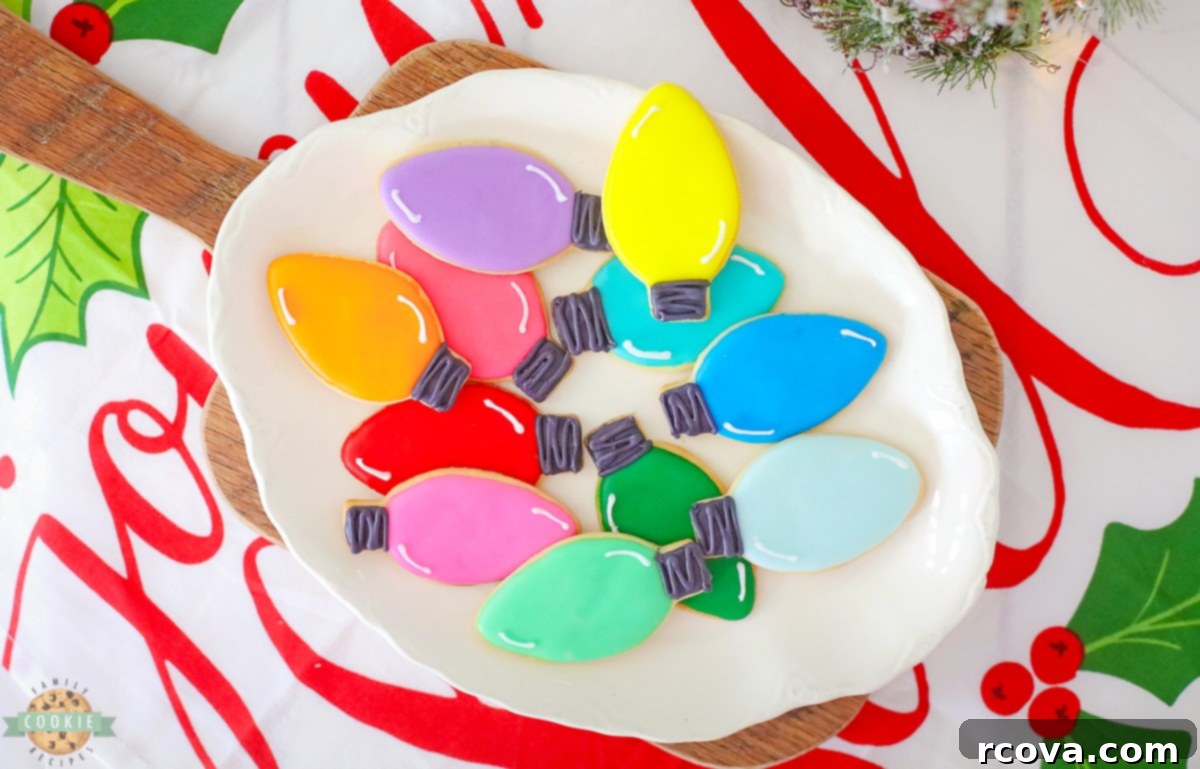
Christmas light cookies are a wonderfully inventive take on classic holiday cut-out cookies. This super fun and easy recipe utilizes a basic, yet incredibly delicious, shortbread-style cookie dough. The magic begins when this pliable dough is rolled out and transformed into charming light bulb shapes using specialized Christmas light-shaped cookie cutters. Once baked to a delicate golden perfection, these cookies become the perfect canvas for bright and colorful royal icing, carefully applied to mimic the glowing bulbs and their metallic bases. The result is a stunning array of cookies that look almost too good to eat, making them a fantastic centerpiece for any holiday occasion and a surefire conversation starter.
Essential Ingredients for Sparkling Christmas Light Cookies
Crafting these adorable Christmas light cookies requires two main components: a rich, flavorful cookie base and a vibrant, sturdy icing. Here’s a detailed look at what you’ll need for both:
For the Cookies: The Foundation of Flavor
A good cut-out cookie starts with simple, high-quality ingredients. For these Christmas light cookies, you will need:
- Butter (1 cup, unsalted): Use unsalted butter, softened to room temperature. Butter is crucial for providing that rich, melt-in-your-mouth flavor and tender texture that makes these cookies so irresistible. Unsalted butter allows you to control the exact amount of salt in your recipe.
- Granulated Sugar (1 cup): This sweetens the cookies and helps create that slightly crisp, yet chewy, texture. Fine granulated sugar blends smoothly into the butter.
- Egg (1 large): A single egg acts as a binding agent, helping to hold the dough together and adding richness. Ensure it’s at room temperature for better incorporation.
- All-Purpose Flour (2 ½ cups): The structural backbone of your cookies. Measure your flour correctly by spooning it into a measuring cup and leveling it off, avoiding packing it down, which can lead to dry, crumbly cookies.
- Vanilla Extract (2 tsp, high-quality): Don’t skimp on the vanilla! A good quality pure vanilla extract significantly enhances the overall flavor profile of your cookies, adding a warm, inviting aroma and taste.
For the Icing: The Dazzling Decoration
The icing is where these cookies truly come to life, transforming simple shapes into glowing holiday lights. You’ll need:
- Powdered Sugar (2 cups): Also known as confectioners’ sugar, this is the fine base for your royal icing. Its powdery texture ensures a smooth, lump-free icing.
- Meringue Powder (3 tablespoons): This is a key ingredient for royal icing, helping it to set hard and crisp, preventing smudging, and giving it a beautiful sheen. It also provides stability.
- Milk (¼ cup): Used to achieve the perfect icing consistency. Start with less and add more incrementally until your icing reaches a smooth, pipeable state that can also flood cleanly.
- Gel Food Coloring: For the most vibrant and true-to-life colors, gel food coloring is highly recommended. You’ll want a rainbow of festive shades to mimic actual Christmas lights, such as red, green, aqua (or light blue), yellow, orange, purple, pink, and, crucially, black for the bulb bases. Gel colors are concentrated, so a little goes a long way.
How to Make Dazzling Christmas Light Cut-Out Cookies
Making these cookies is a delightful process that combines classic baking techniques with creative decorating. Follow these steps for perfect results:
Step-by-Step: Crafting the Perfect Cookie Base
- Cream Butter and Sugar: In a large mixing bowl, combine the softened butter and granulated sugar. Using an electric mixer, beat them together on medium speed until the mixture is light, fluffy, and pale in color. This process incorporates air, contributing to a tender cookie.
- Add Wet Ingredients: Crack in the single egg and add the vanilla extract. Continue mixing until these ingredients are fully combined into the butter-sugar mixture, scraping down the sides of the bowl as needed to ensure everything is well incorporated.
- Gradually Add Flour: Slowly add the all-purpose flour to the wet mixture, a little at a time. Mix on low speed after each addition until just combined. Be careful not to overmix, as this can develop the gluten in the flour, leading to tough cookies. Stop mixing as soon as no dry streaks of flour remain, and the dough just comes together.
- Prepare and Cut the Dough: Lightly flour a clean surface or use parchment paper. Roll the cookie dough out to an even thickness of about ¼ inch. This consistent thickness is key for uniform baking. Use your Christmas light bulb-shaped cookie cutter to press out as many shapes as possible. Carefully transfer these cut-out cookies to a baking sheet lined with parchment paper. For best results and to prevent spreading, you can chill the cut-out dough on the baking sheet for 15-20 minutes before baking.
- Bake to Golden Perfection: Preheat your oven to 350 degrees F (175 degrees C). Bake the cookies for 15-18 minutes, or until the edges are lightly golden. Baking time may vary slightly depending on your oven and cookie thickness.
- Cool Completely: Once baked, remove the cookies from the oven and let them cool on the baking sheet for a few minutes before carefully transferring them to a wire rack to cool completely. Ensure they are entirely cool before attempting to ice them, otherwise, the icing will melt and run.
Mixing and Coloring the Icing for Festive Flair
- Prepare the Base Icing: In a clean bowl, whisk together the two cups of powdered sugar, the milk, and the meringue powder until the mixture is smooth and has reached a good consistency for piping – not too runny, but not too stiff. A good test is if it holds a soft peak but slowly settles back into itself. Cover it with a damp cloth or plastic wrap to prevent it from drying out.
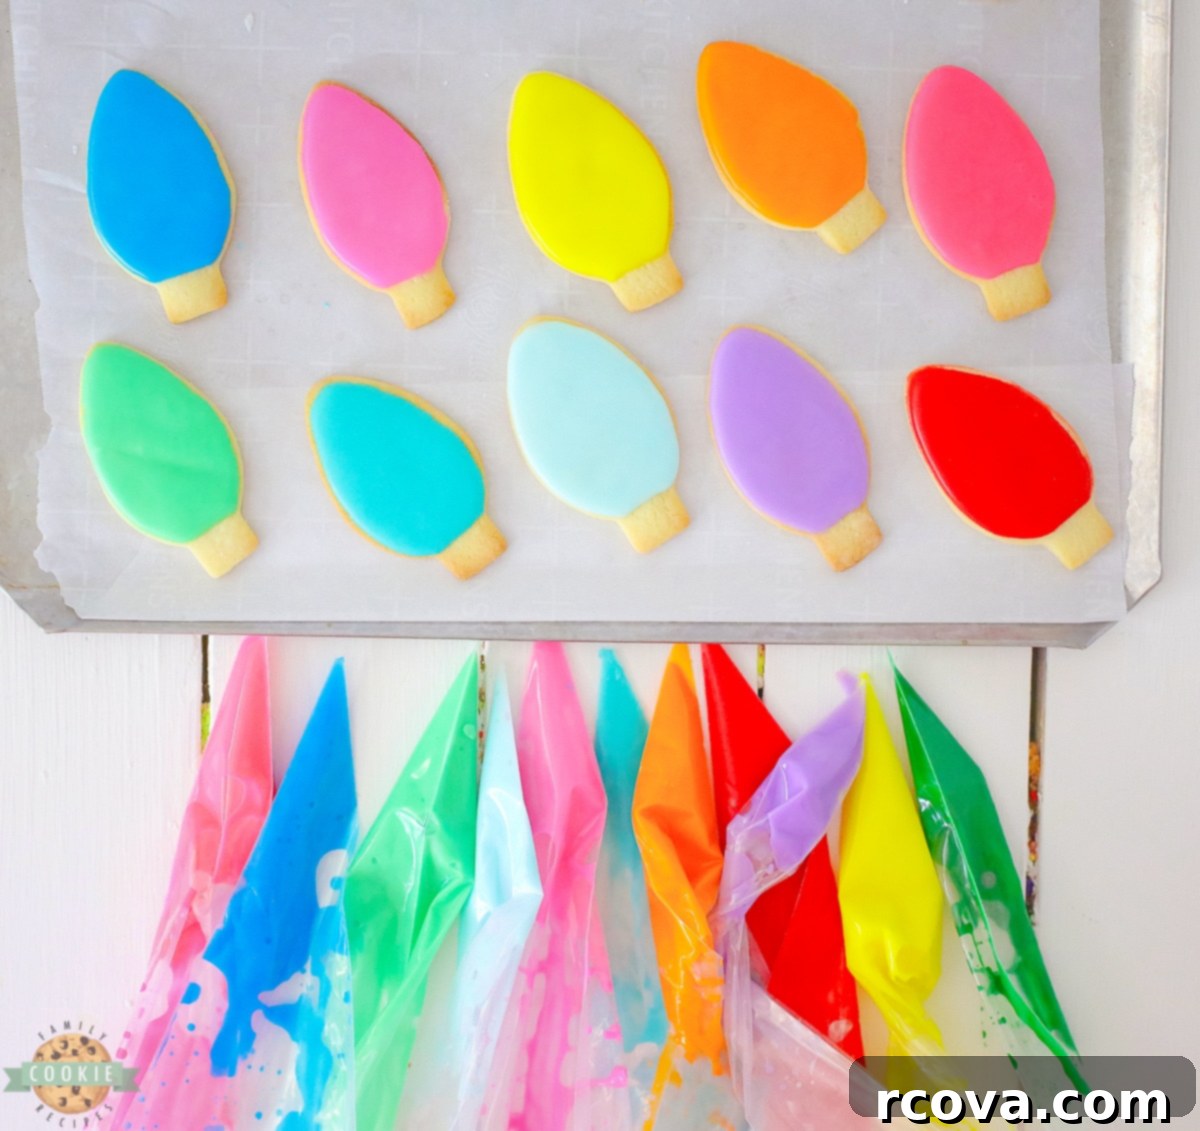
- Divide and Color: Set aside at least 13 piping bags (one for each color, plus one for white if you’re using it for reflections, and one for black). Divide the prepared white frosting into 13 small bowls. Add a tiny amount of gel food coloring to each bowl (except for one designated for white highlights, if desired) and mix thoroughly until you achieve your desired vibrant hues. Remember to designate one bowl specifically for black icing, which will be used for the bulb’s tip.
- Fill Piping Bags: Carefully spoon each colored frosting into its own piping bag. Twist the tops of the bags or secure them with rubber bands to prevent icing from spilling out. Snip a very small hole at the tip of each bag, ready for decorating.
Decorating: Bringing Your Christmas Lights to Life
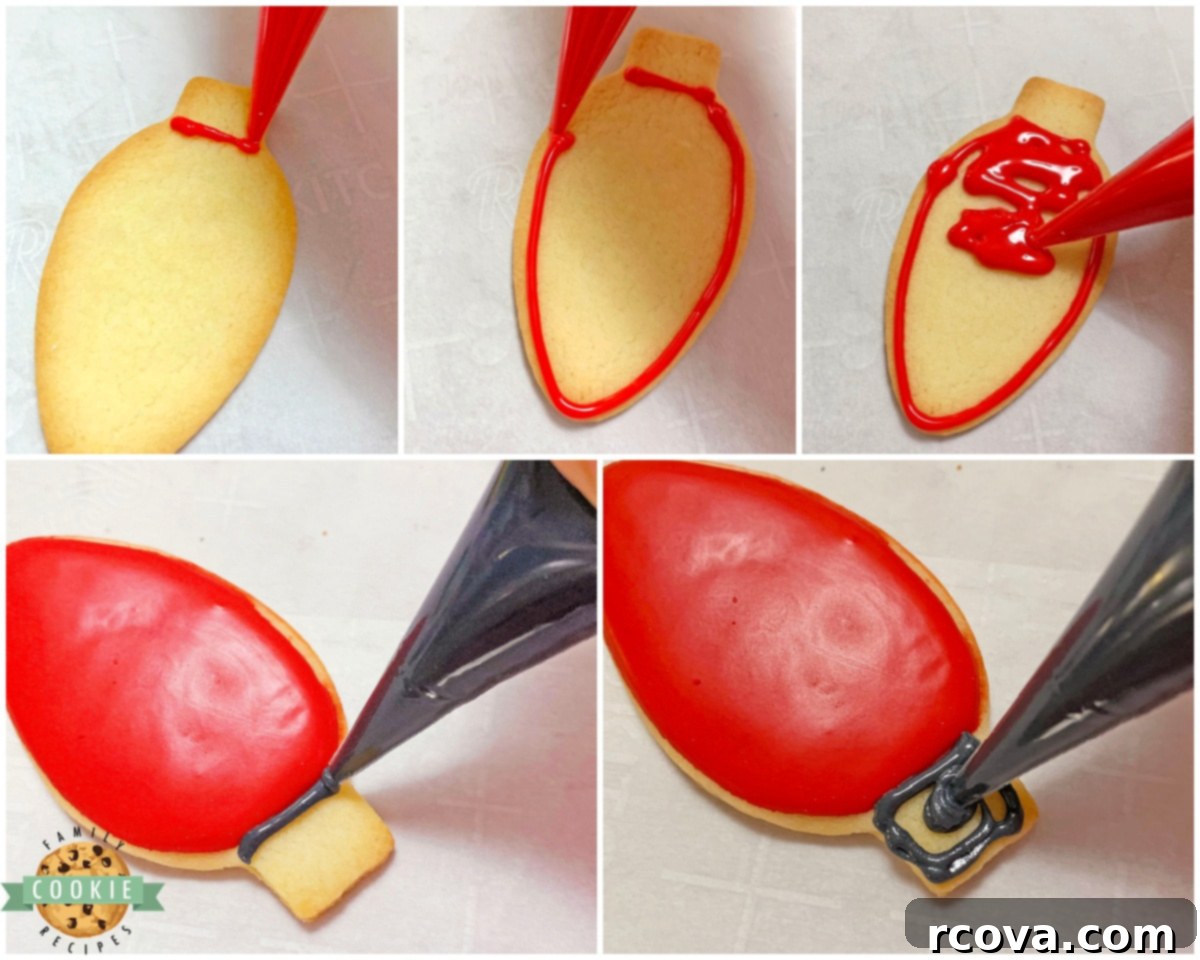
- Outline and Flood the Bulbs: Take one cooled cookie. Using a piping bag filled with your chosen bulb color, carefully pipe an outline around the main “bulb” portion of the cookie. Immediately after outlining, “flood” or fill in the blank space within the outline with the same colored icing. Use a small offset spatula or toothpick to gently spread the icing to the edges for a smooth, even finish. Important: Do not color the small tip of the bulb yet; this area is reserved for the black icing.
- Add the Black Base: Once each cookie bulb has been flooded with color, take the black icing. Carefully trace an outline around the small, uncolored end section of each cookie. Then, gently flood this small section with black icing, creating the bulb’s base.
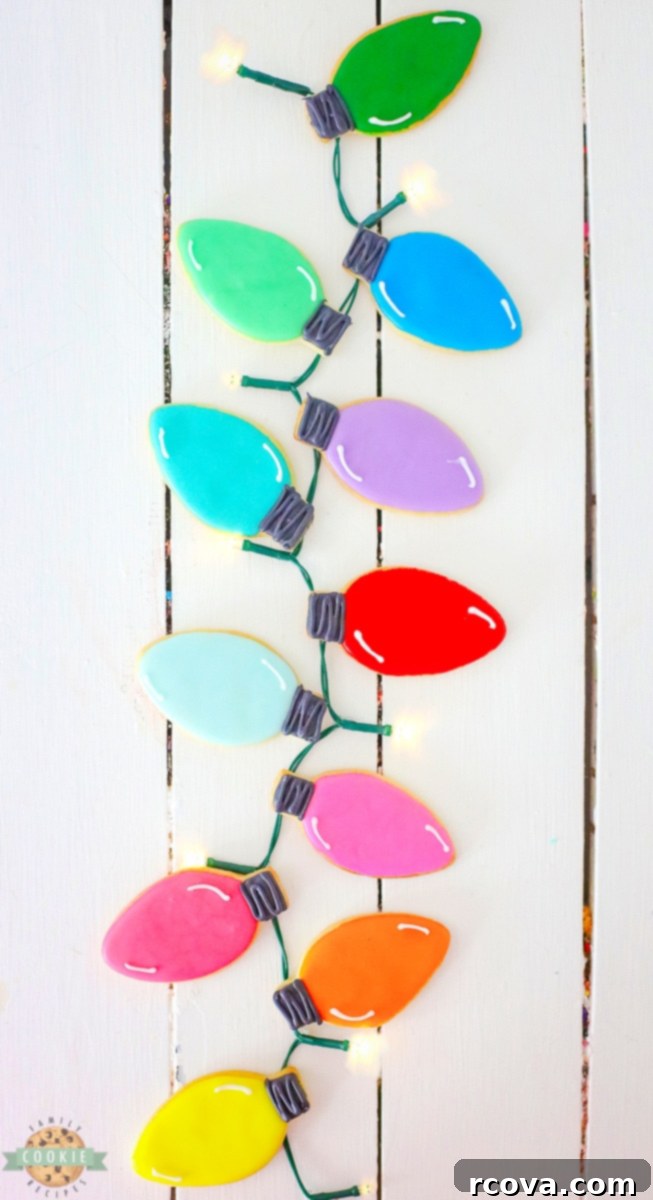
- Create the Zigzag Pattern: Allow the black icing bases to dry for approximately 15 minutes, or until they are set enough to touch without smudging. Then, using the black icing again, pipe three small, thin lines in a zigzag pattern over the solid black part. This detail beautifully mimics the screw-in portion of a real light bulb, adding a touch of realism.
- Add Light Reflections: Finally, take a piping bag filled with white icing. Pipe two small, short lines on each cookie, one at each end of the colored bulb part. These delicate white lines will act as “light reflections,” giving your cookies that extra sparkle and making them truly appear to glow.
- Allow to Set and Enjoy: Let all the decorated cookies dry completely for several hours (or overnight) before stacking or serving. This ensures the icing is fully hardened and won’t smudge. Then, enjoy your beautiful and delicious Christmas light cookies!
Christmas Lights Cut-Out Cookies Recipe
Print
Pin
Rate
Ingredients
- 1 cup Unsalted Butter, softened
- 1 cup Granulated Sugar
- 1 Large Egg
- 2 tsp Vanilla Extract, high quality
- 2 ½ cups All-Purpose Flour
FOR THE ICING:
- 2 cups Powdered Sugar
- 3 tablespoons Meringue Powder
- ¼ cup Milk (plus more if needed)
- Gel Food Coloring (red, green, aqua, yellow, orange, purple, pink, light blue, black)
Instructions
Prepare the Cookie Dough
-
In a large mixing bowl, using an electric mixer, cream together the softened butter and granulated sugar until the mixture is light, fluffy, and pale.
-
Add the egg and vanilla extract, mixing again until well combined. Scrape down the sides of the bowl to ensure even mixing.
-
Gradually add the all-purpose flour, a little at a time, mixing on low speed after each addition until just combined and no dry streaks of flour remain. Be careful not to overmix.
-
On a lightly floured surface or between two sheets of parchment paper, roll out the dough to an even thickness of about ¼ inch. Use a light bulb-shaped cookie cutter to cut out the cookies.
Bake the Cookies
-
Carefully place the cut-out cookies onto a parchment paper-lined baking sheet. Bake in a preheated oven at 350 degrees F (175 degrees C) for 15-18 minutes, or until the edges are lightly golden. Remove from the oven and let cool on the baking sheet for a few minutes before transferring to a wire rack to cool completely.
-
Once the cookies are completely cool, you can begin preparing the icing for decoration.
Prepare and Color the Icing
-
In a bowl, mix two cups of powdered sugar, ¼ cup of milk, and 3 tablespoons of meringue powder until smooth and combined. Adjust milk quantity slightly if needed to reach a pipeable consistency. Cover to prevent drying.
-
Set aside 13 piping bags. Divide the prepared white icing into 13 small bowls. Add a little gel food coloring to each bowl and mix until you achieve the desired vibrant hues for your light bulbs.
-
Ensure one of the colors is black, designated for the tip/base of each bulb.
-
Fill each piping bag with a distinct frosting color and set them aside, ready for decoration.
Frost and Decorate the Cookies
-
Take one cooled cookie. Using a piping bag with your chosen bulb color, pipe an outline around the main body of the light bulb. Then, flood the outlined area with the same color, spreading it evenly to the edges. Leave the small tip of the bulb uncolored.
-
After the colored bulb portions have been iced, take the black icing. Carefully trace an outline around the small, uncolored end section of each cookie and gently flood this area with black icing to create the bulb’s base.
-
Allow the black icing to dry for about 15 minutes, or until set. Then, pipe 3 thin lines in a zigzag pattern over the solid black part to create the appearance of a screw-in socket.
-
Finally, using a piping bag filled with white icing, make two small, short lines at each end of the colored bulb part of the cookie. These act as light reflections, adding sparkle. Enjoy your beautifully decorated Christmas light cookies!
Nutrition Information (per cookie, estimated)
Tips for Perfect Christmas Light Cookies
Achieving beautifully uniform and perfectly iced cookies takes a little practice and a few helpful tips:
- Chill Your Dough: Don’t skip chilling the dough, both before rolling and after cutting. Chilled dough is easier to handle, prevents spreading in the oven, and helps your cookies maintain their crisp edges and distinct light bulb shape.
- Consistent Thickness: Roll your dough to an even ¼-inch thickness. This ensures all cookies bake at the same rate and have a consistent texture. Using rolling pin guides can be very helpful.
- Don’t Overbake: Bake until the edges are just barely golden. Overbaking can make your cookies dry and crumbly. They will continue to set as they cool.
- Icing Consistency is Key: For outlining, the icing should be thick enough to hold its shape but fluid enough to flow smoothly. For flooding, it should be thinner, self-leveling, but not so thin that it runs off the cookie. You can adjust consistency by adding a few drops of milk for thinner icing or a tablespoon of powdered sugar for thicker icing.
- Patience with Drying: Allow ample drying time between icing layers and before stacking. Royal icing needs several hours, sometimes overnight, to fully harden. This prevents colors from bleeding and designs from smudging.
- Gel Food Coloring: As mentioned, gel food coloring provides intense, vibrant colors without significantly thinning your icing, which liquid food coloring can do.
How Long Do Iced Cookies Stay Fresh?
These beautifully iced Christmas light cookies are not only lovely to look at but also stay delicious for a good while! When stored properly in an airtight container at room temperature, these delightful treats will remain fresh and tasty for up to a week. The royal icing, once fully set, helps preserve the cookie’s freshness. However, I highly recommend against freezing the cookies once they have been iced, as the vibrant colors can unfortunately bleed and smudge as the icing thaws, compromising their beautiful appearance. For best results, enjoy them within their fresh window!
Can I Make a Chocolate Version of These Cookies?
Absolutely! Adding a delicious chocolate twist to these festive cookies is incredibly simple. Just incorporate ¼ cup of unsweetened cocoa powder into your dry ingredients when you’re making the cookie dough. This small addition will transform your classic butter cookies into rich, chocolatey light bulbs that pair wonderfully with the sweet royal icing, offering another delightful flavor dimension to your holiday cookie platter. Imagine chocolate light bulbs glowing with bright colors – truly irresistible!
Where to Find Christmas Light Bulb-Shaped Cookie Cutters?
Finding the perfect Christmas light bulb-shaped cookie cutters is essential for this recipe! If you prefer to shop in person, you may have luck at major retailers like Walmart, craft stores such as Michaels or Joann Fabrics, especially during the holiday season. These stores often stock a wide array of seasonal cookie cutters. If you’re unable to find them locally, or prefer the convenience of online shopping, I highly recommend checking out online retailers. Etsy is a fantastic resource for unique and specialty cookie cutters, often from independent creators, while Amazon offers a vast selection with quick delivery. A quick search online should yield plenty of options to get you started on your festive baking!

Embracing Holiday Traditions with Homemade Cookies
There’s nothing quite like a snow day to inspire some cozy, creative baking. Living near the Great Salt Lake in Utah, we often experience incredible snowstorms, sometimes with a mesmerizing lake effect. When those days arrive, it’s almost a tradition to declare it a “snow day” where the kids stay home, play in the snow, and then warm up with some fun indoor activities. What better activity than making these festive Christmas light cookies? Baking together creates cherished memories, fills the house with wonderful aromas, and results in delicious treats to share. These cookies are perfect for starting your own family traditions, whether it’s for a quiet snow day or a bustling holiday party.
Discover More Festive Christmas Cookie Recipes
If you’ve enjoyed making these delightful Christmas light cookies, you’ll love exploring other holiday baking ideas to complete your festive spread. Here are some of our favorite Christmas cookie recipes to inspire your holiday kitchen:
- STACKED CHRISTMAS TREE COOKIES
- HOLIDAY SPICED SNICKERDOODLES
- CLASSIC CHRISTMAS CUT OUT COOKIES
- Reindeer Cut Out Cookies
- SPICED CHRISTMAS SHORTBREAD COOKIES
- CHRISTMAS SUGAR COOKIE BARS
- HOLIDAY STAR COOKIES
- CHRISTMAS SPRINKLE COOKIES
- CARAMEL APPLE GINGERBREAD COOKIES
- PERFECT CHRISTMAS SUGAR COOKIE RECIPE
- BEST CHRISTMAS COOKIE RECIPES
- MINT CHRISTMAS COOKIES
- GRINCH THUMBPRINT COOKIES
- GINGERBREAD SANDWICH COOKIES
These festive Christmas light bulb cookies offer a truly unique and delightful way to brighten up your holiday sweets collection. With their easy-to-follow recipe and simple yet effective decorating techniques, these cookies are destined to become a beloved and fun tradition in your home for many Christmases to come. Gather your loved ones, bake a batch, and let these sweet, sparkling lights bring extra warmth and magic to your holiday season!
